Azure Configuration for Application Hosting
1. Select App Registrations tab in Azure AD
2. Select New Registration
3. Type application name, select Accounts in this organization (single tenant), and select register.
4. After registration is created, select the new registration. Select Certificates and Secrets. Select the Federated Credentials Tab and then select add credential.
5. Select GitHub Actions deploying Azure resources. Select Repository, Entity type, and add/review name of the credential.
6. Go to the subscription you are using. Select add. Add Role Assignment.
7. Select Assignment Type. Then select Privileged administrator roles. Select the role as contributor.
8. Under the members tab select Assign access to user,group, or service principle. Select Members. Type name of app registration and select from the list. Select the select button and continue to next screen. Select review and assign.
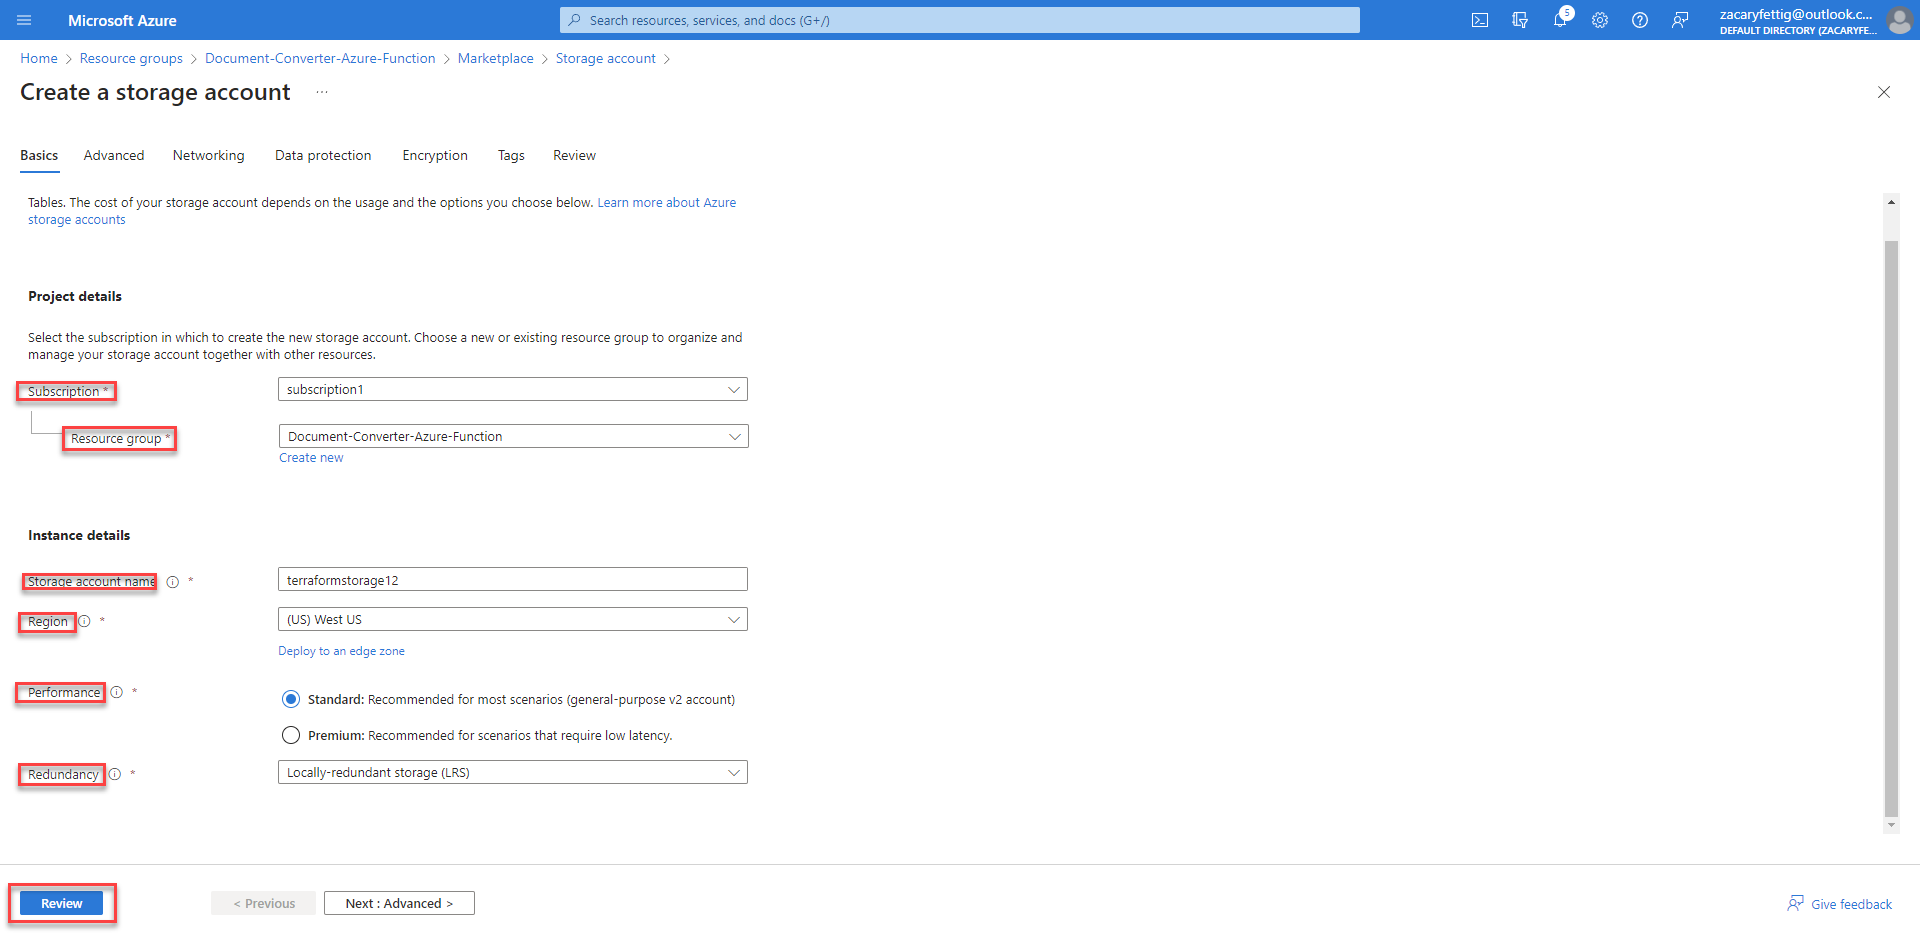
11. Create a resource group in Azure. Then create a storage account. Inside the storage account create a container inside the storage account used to store the Terriform State Files for deployment.


GitHub Deployment Configuration
1. In the Document Converter Azure Function Repository select Settings. Under the security section, select secrets and variables. Select Actions.
2. Select the Secrets tab and New repository secret.
3. Create the secrets that will be used to identify your Azure account to enable Azure deployment.
--AZURE_CLIENT_ID: Can be found on the overview page of the DocumentToPDFFunction App Registration
--AZURE_SUBSCRIPTION_ID: Found on the overview page of your subscription.
--AZURE_TENANT_ID: Found on the overview page of the main Azure AD page
--CONTAINER_NAME: Name of the container inside of the storage account.
--RESOURCE_GROUP_NAME: resource group used to hold the Terriform State Files.
--STORAGE_ACCOUNT: Storage account name of the account used to store the Terriform State Files
4. Setup for Deployment is finished.
Running Deployment through GitHub Actions
1. In the repo select Actions tab. Select Deploy Terraform & App from the left side menu. Select Run Workflow on the right side of the page.
4. View progress of the build by clicking on the workflow job and selecting the build-and-deploy job.

5. Green check mark after running the job means the build has completed successfully.
6. Deployed resources can be viewed in Azure
Accessing the Word to PDF program
1. Get url of application from the functionApp resource overview page. Add to the end of the url: /api/swagger/ui#/default
2. Select try it out.
3. Choose word file to upload and select Execute.
4. Selecting download file will download the converted document as a pdf.


