Create an EC2 Key Pair for SSH access of the firewall once created
1. Search for the EC2 Resource
2. Select Key Pairs under the Network & Security Menu. Select Create Key Pair on the upper right. 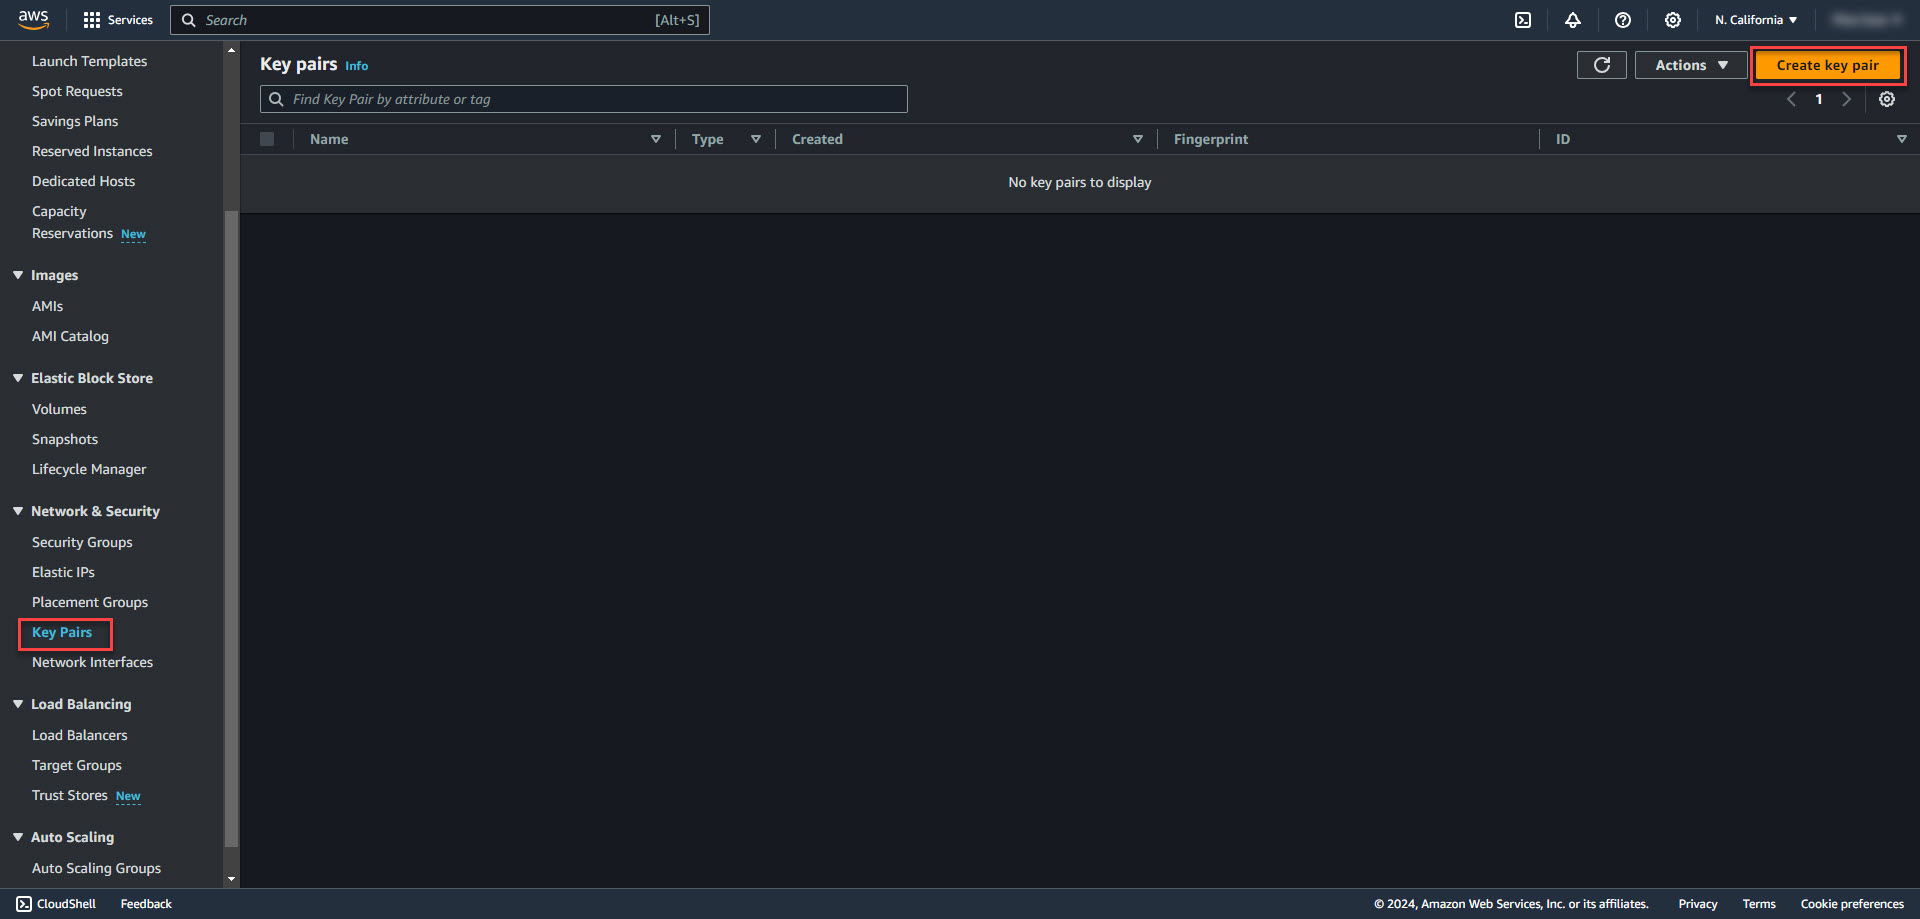
3. Enter name for Key Pair. Keep RSA and .ppk selected. Select Create Key Pair. When prompted, save key for future use.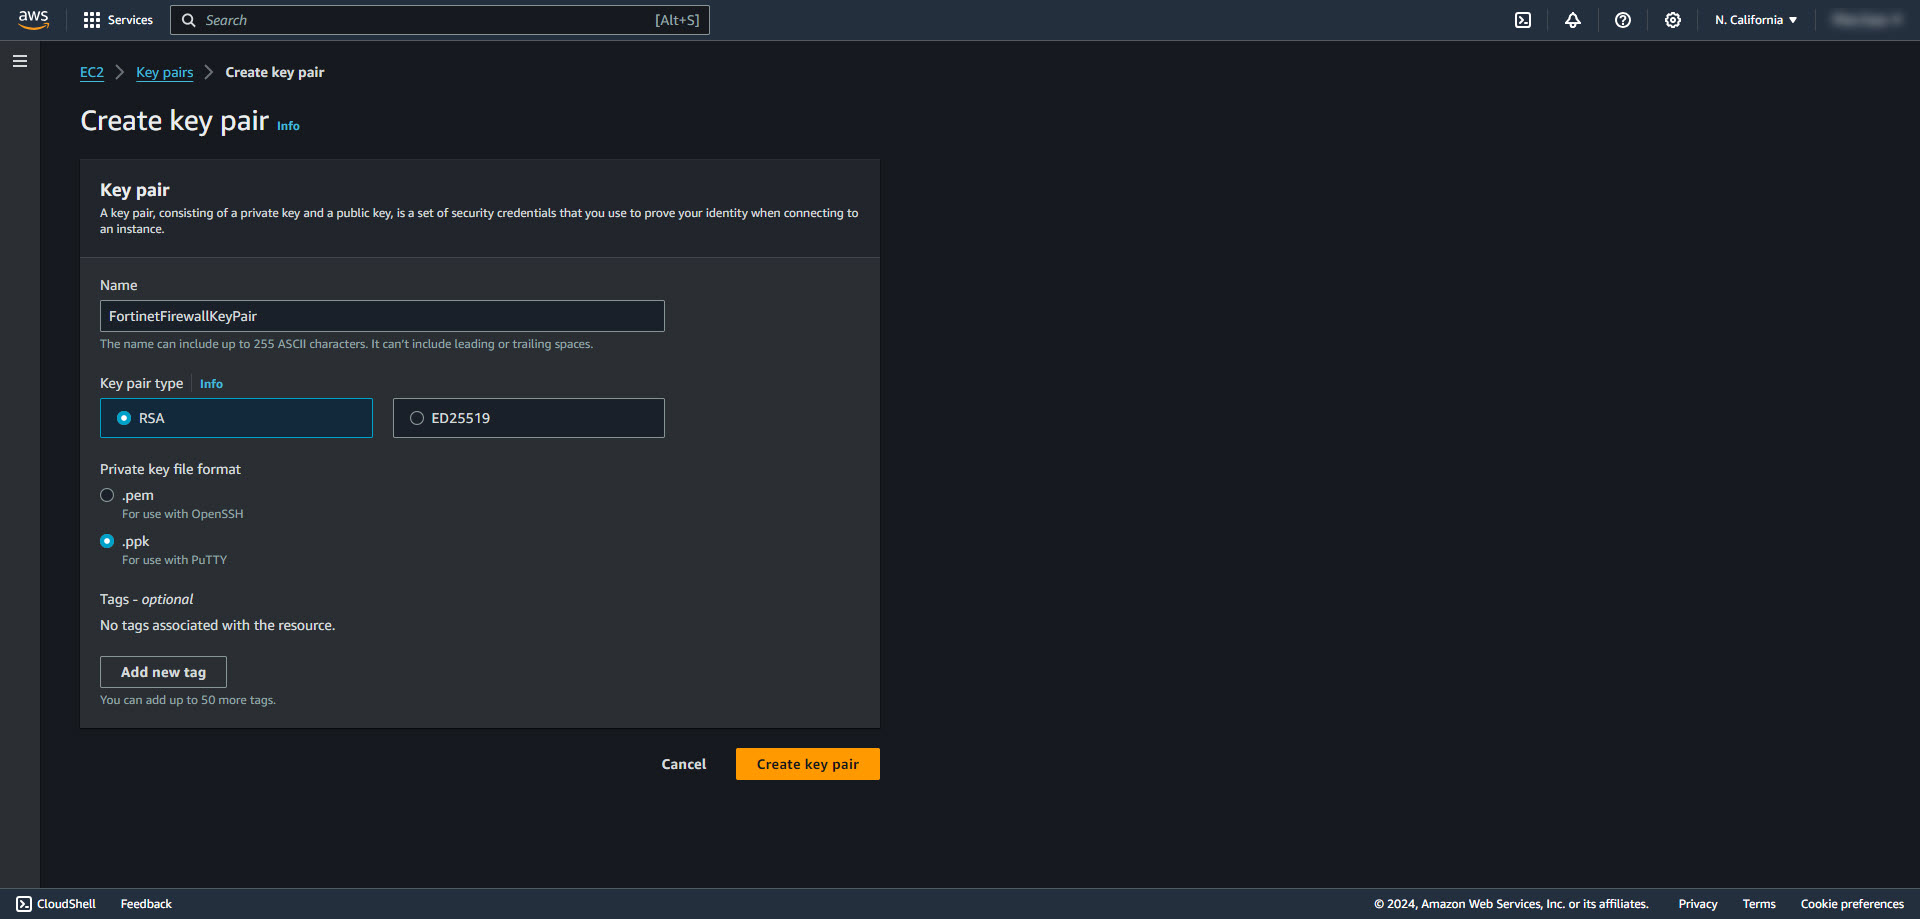
Download Fortigate Cloud Formation Templates from Fortinet's GitHub Page
1. Go to the link below to find the deployment template. The version numbers correspond to the Fortigate OS versions. The latest version in this example is 7.4
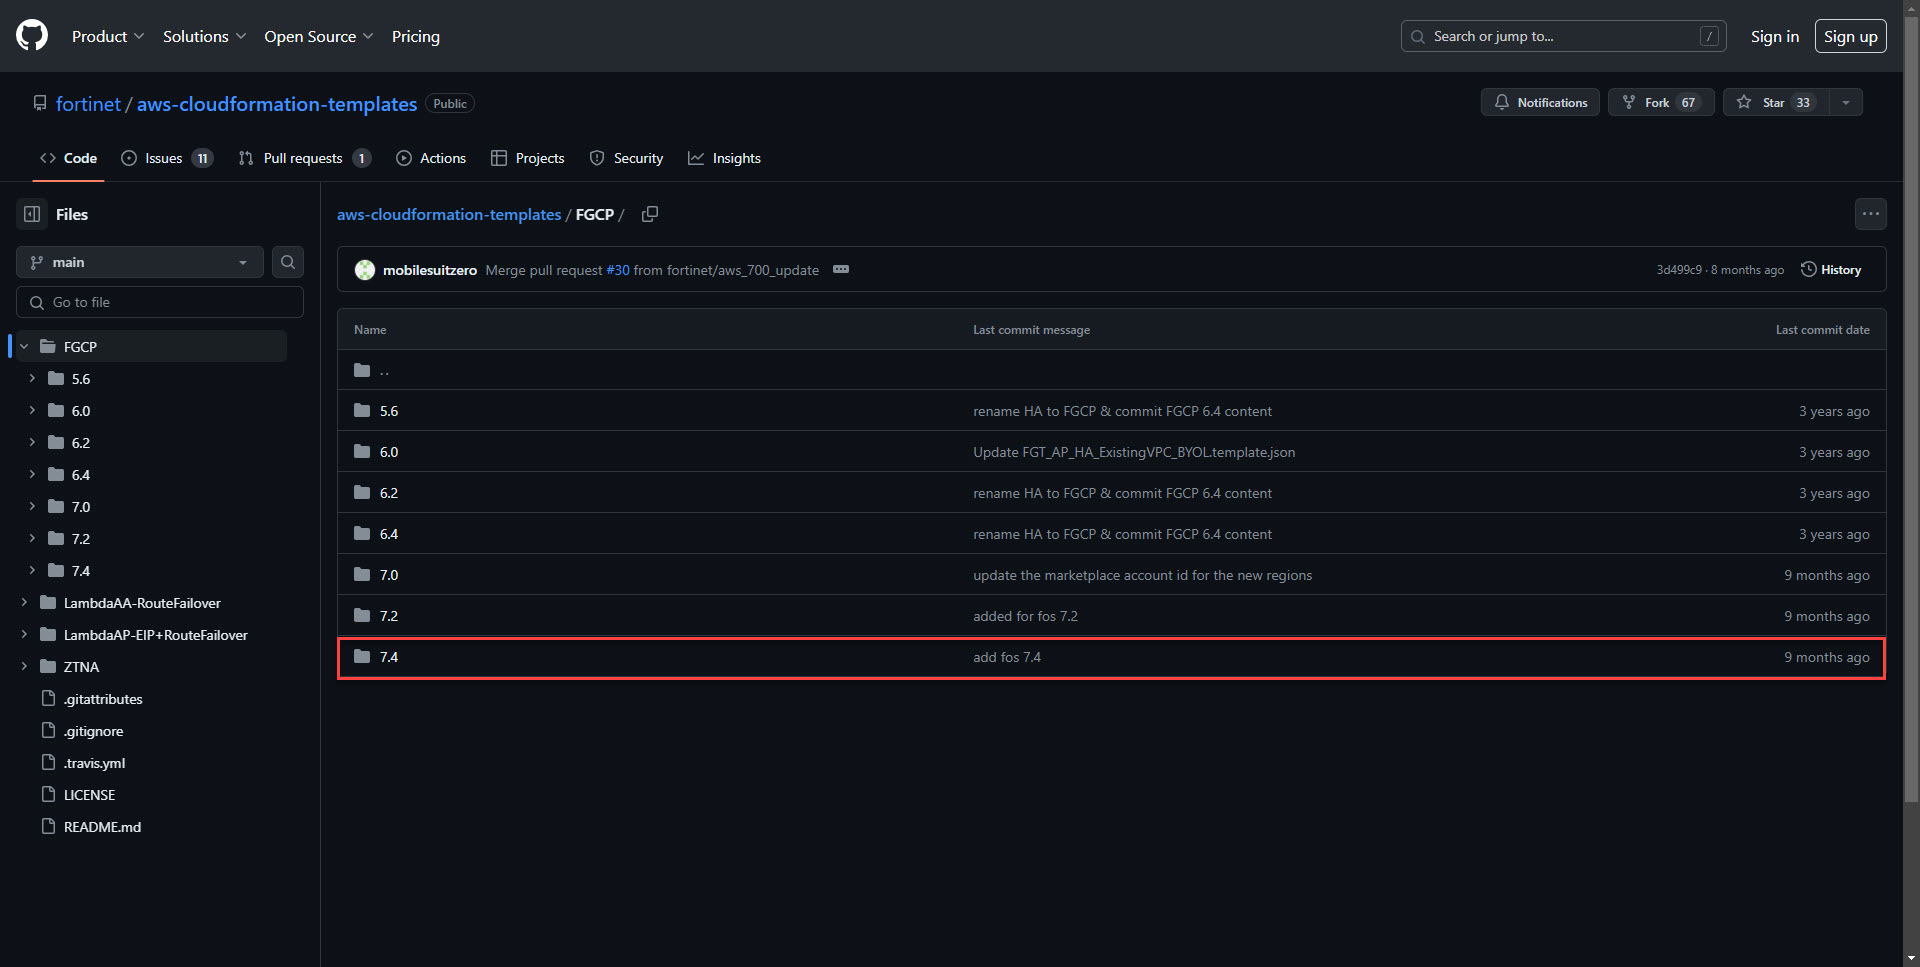
2. Selecting DualAZ will deploy the two firewalls in two different availability zones. Two AZ's will be selected in this example.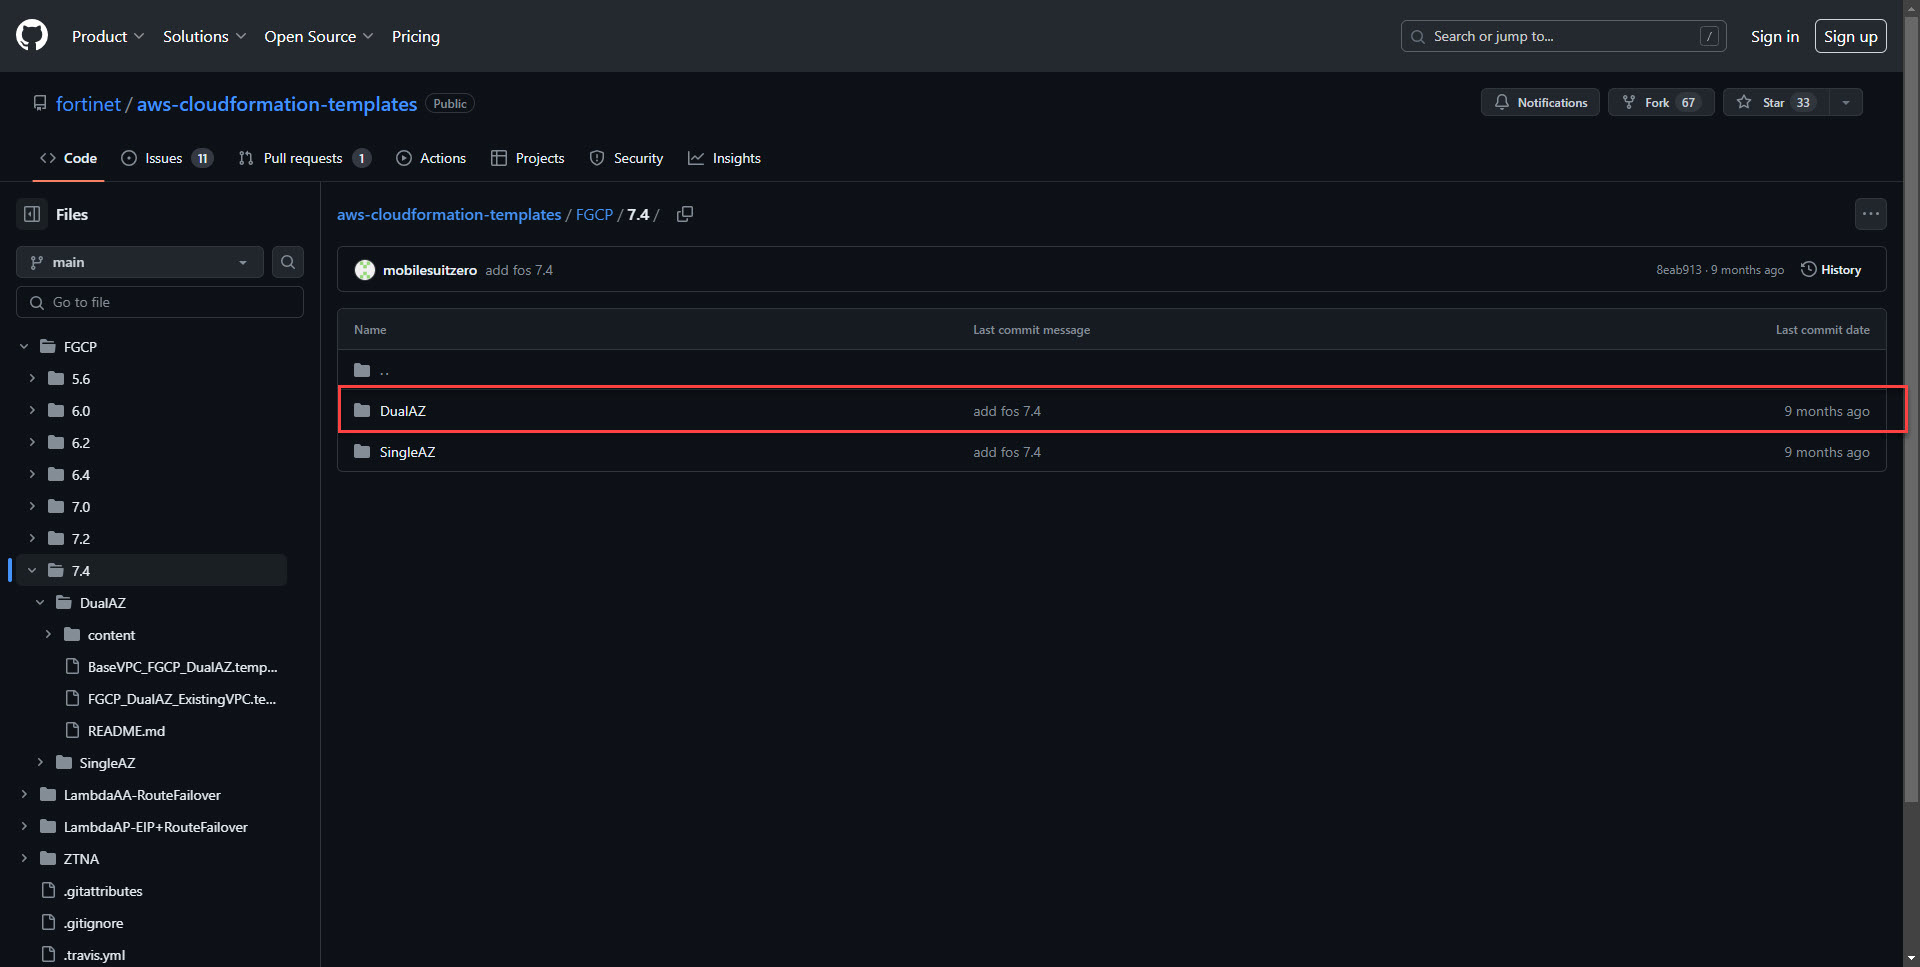
4. Download the BaseVPC_FGCP_DualAZ.template.json json template from GitHub. This will deploy the networking resources. 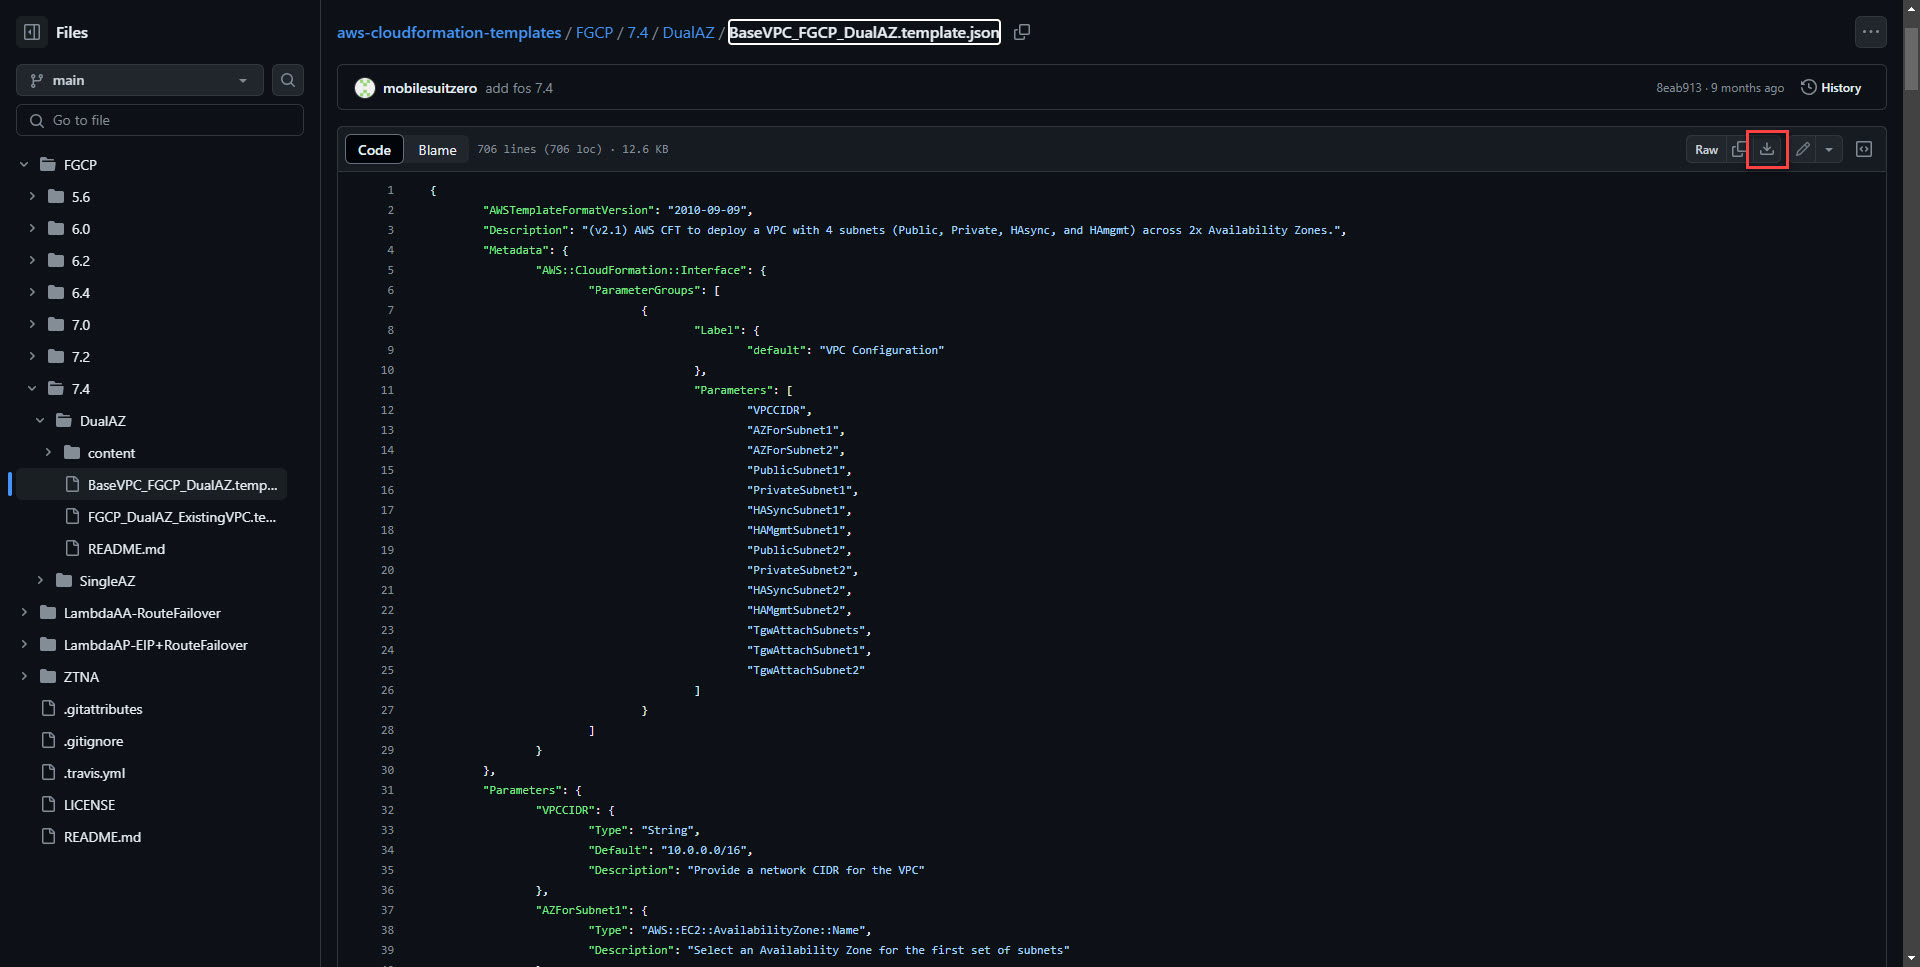
5. Next download the ExistingVPC Template. This template will deploy the firewall itself. 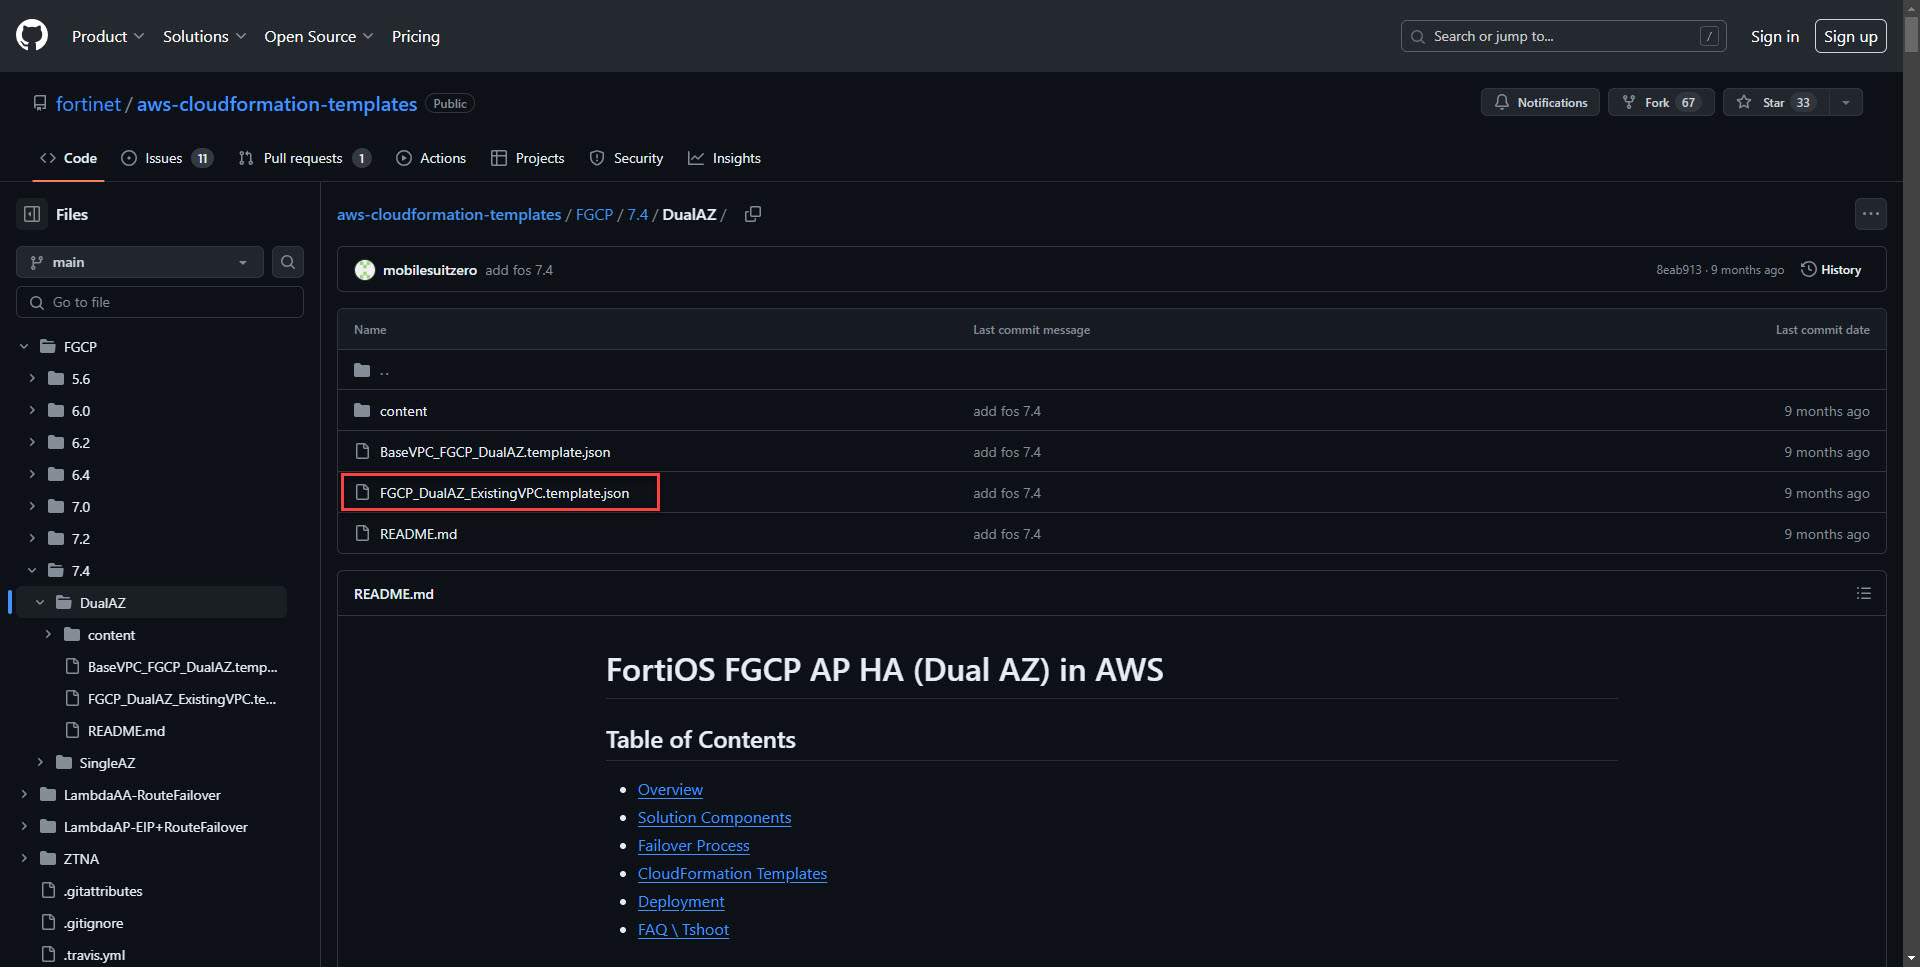
Create S3 Bucket for configuration files
1. Select S3 from the AWS Search 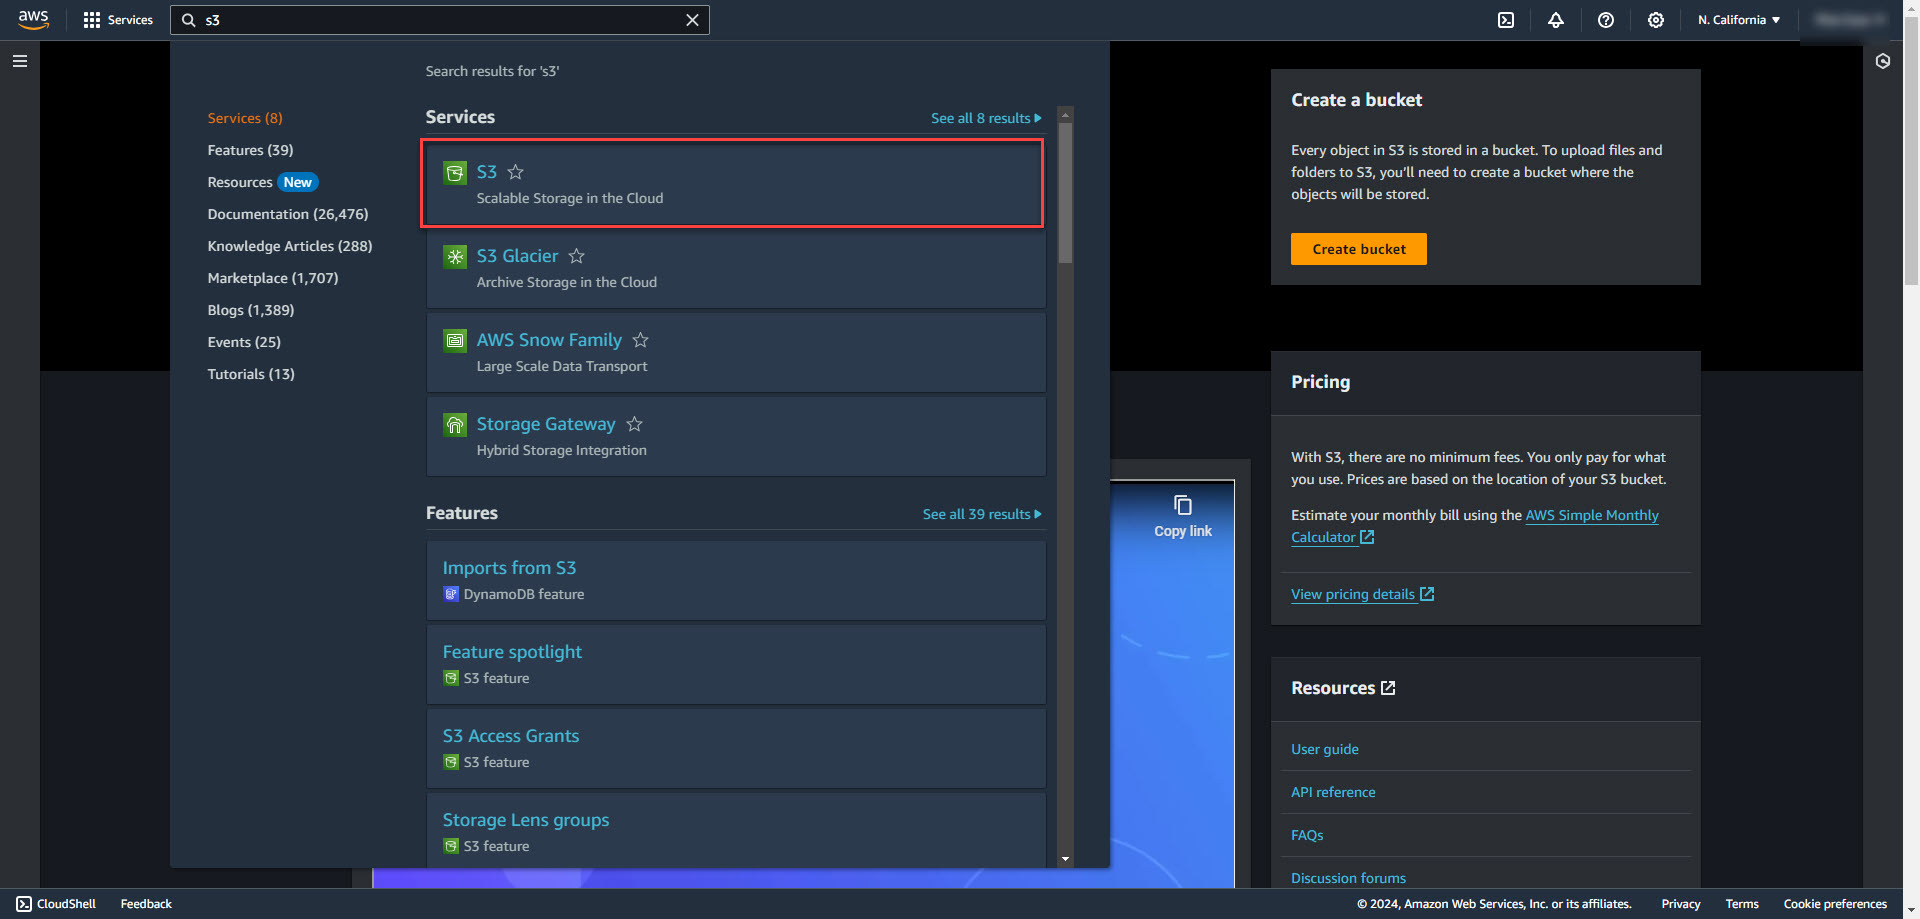
2. Select Create Bucket
3. Name the bucket and keep everything else as default. Select create Bucket at the end of the page.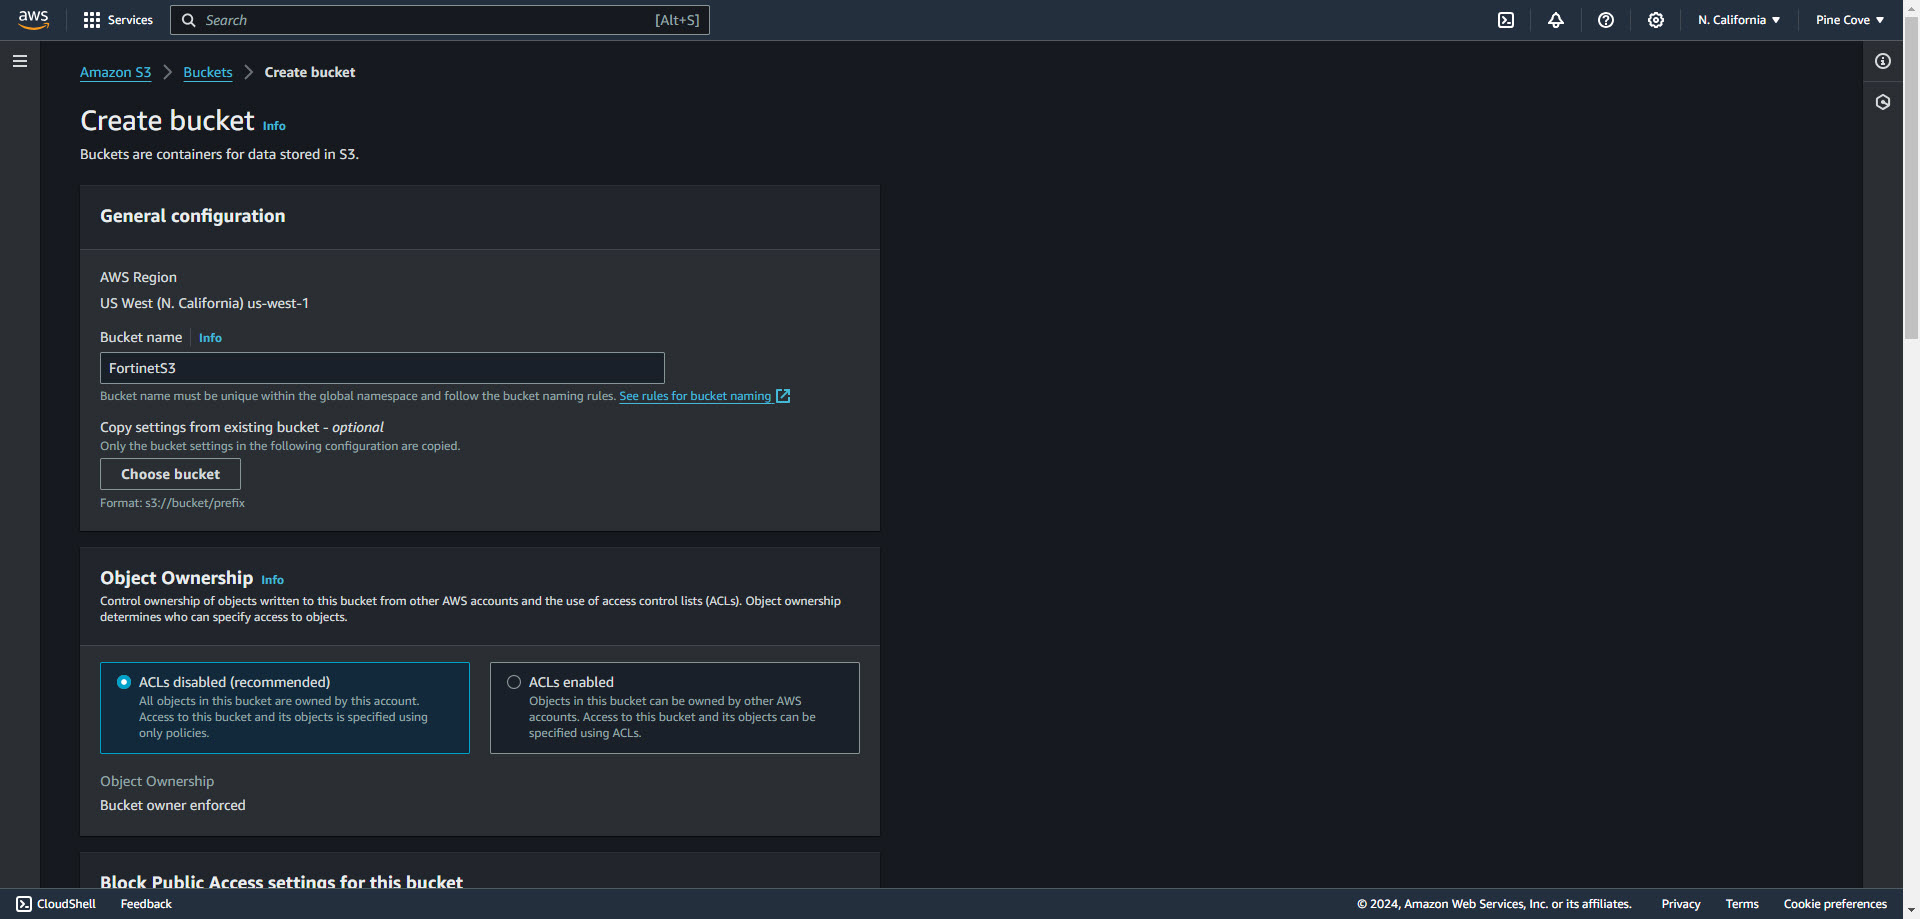
Configure template for deploying networking resources.
5. Edit the BaseVPC_FGCP_DualAZ.template.json in a code editor. Microsoft VS Code is the most popular for IaC.
6. In the Parameters section, select the network cidr to be used for the VPC. the default is 10.0.0.0/16. The PVC cidr must not overlap with your on prem environment if deploying in a hybrid configuration.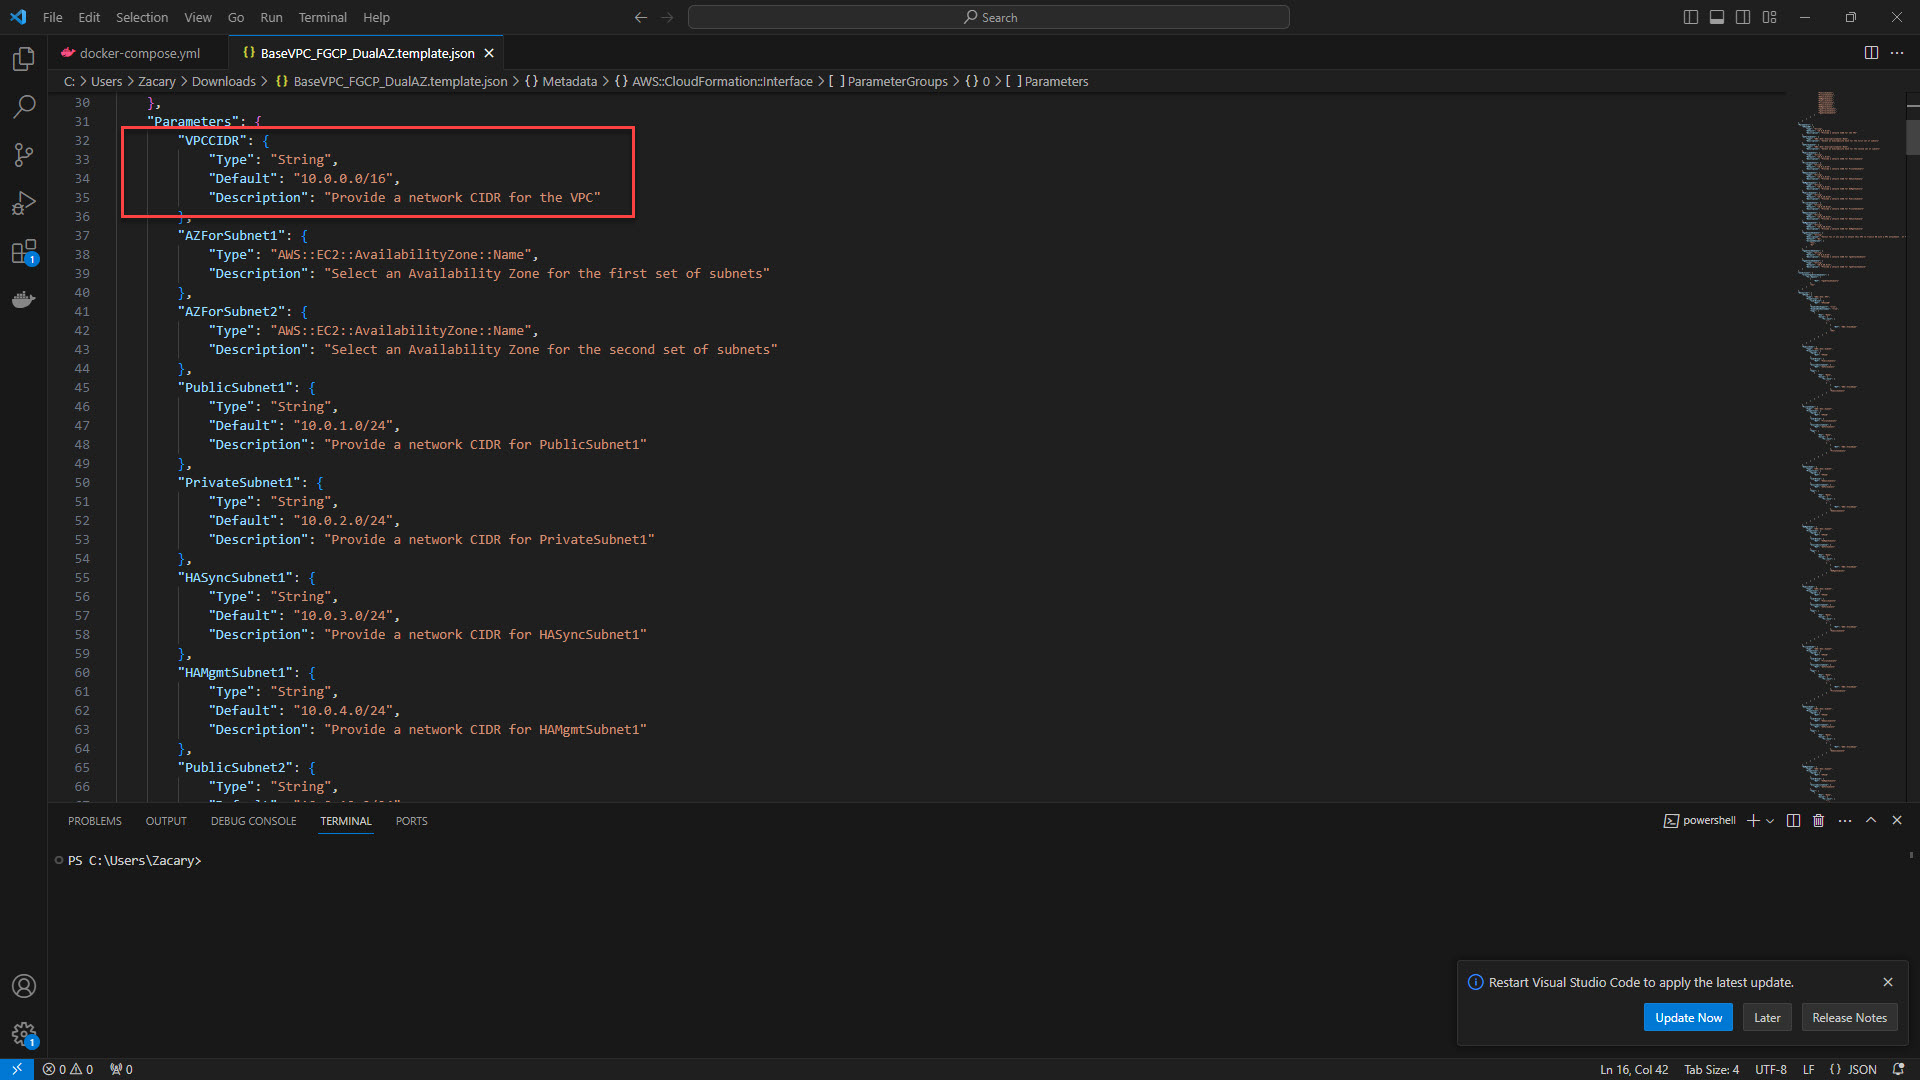
7. Replace "Name" with Availbility Zone location for Subnet 1 and Subnet 2. For example, us-west-2a or us-west-2c. Where a and c specify the availibility zones in region us-west-2 
8. Provide the Public Subnets for each firewall. The public subnets are attached to the WAN port that will connect to the internet.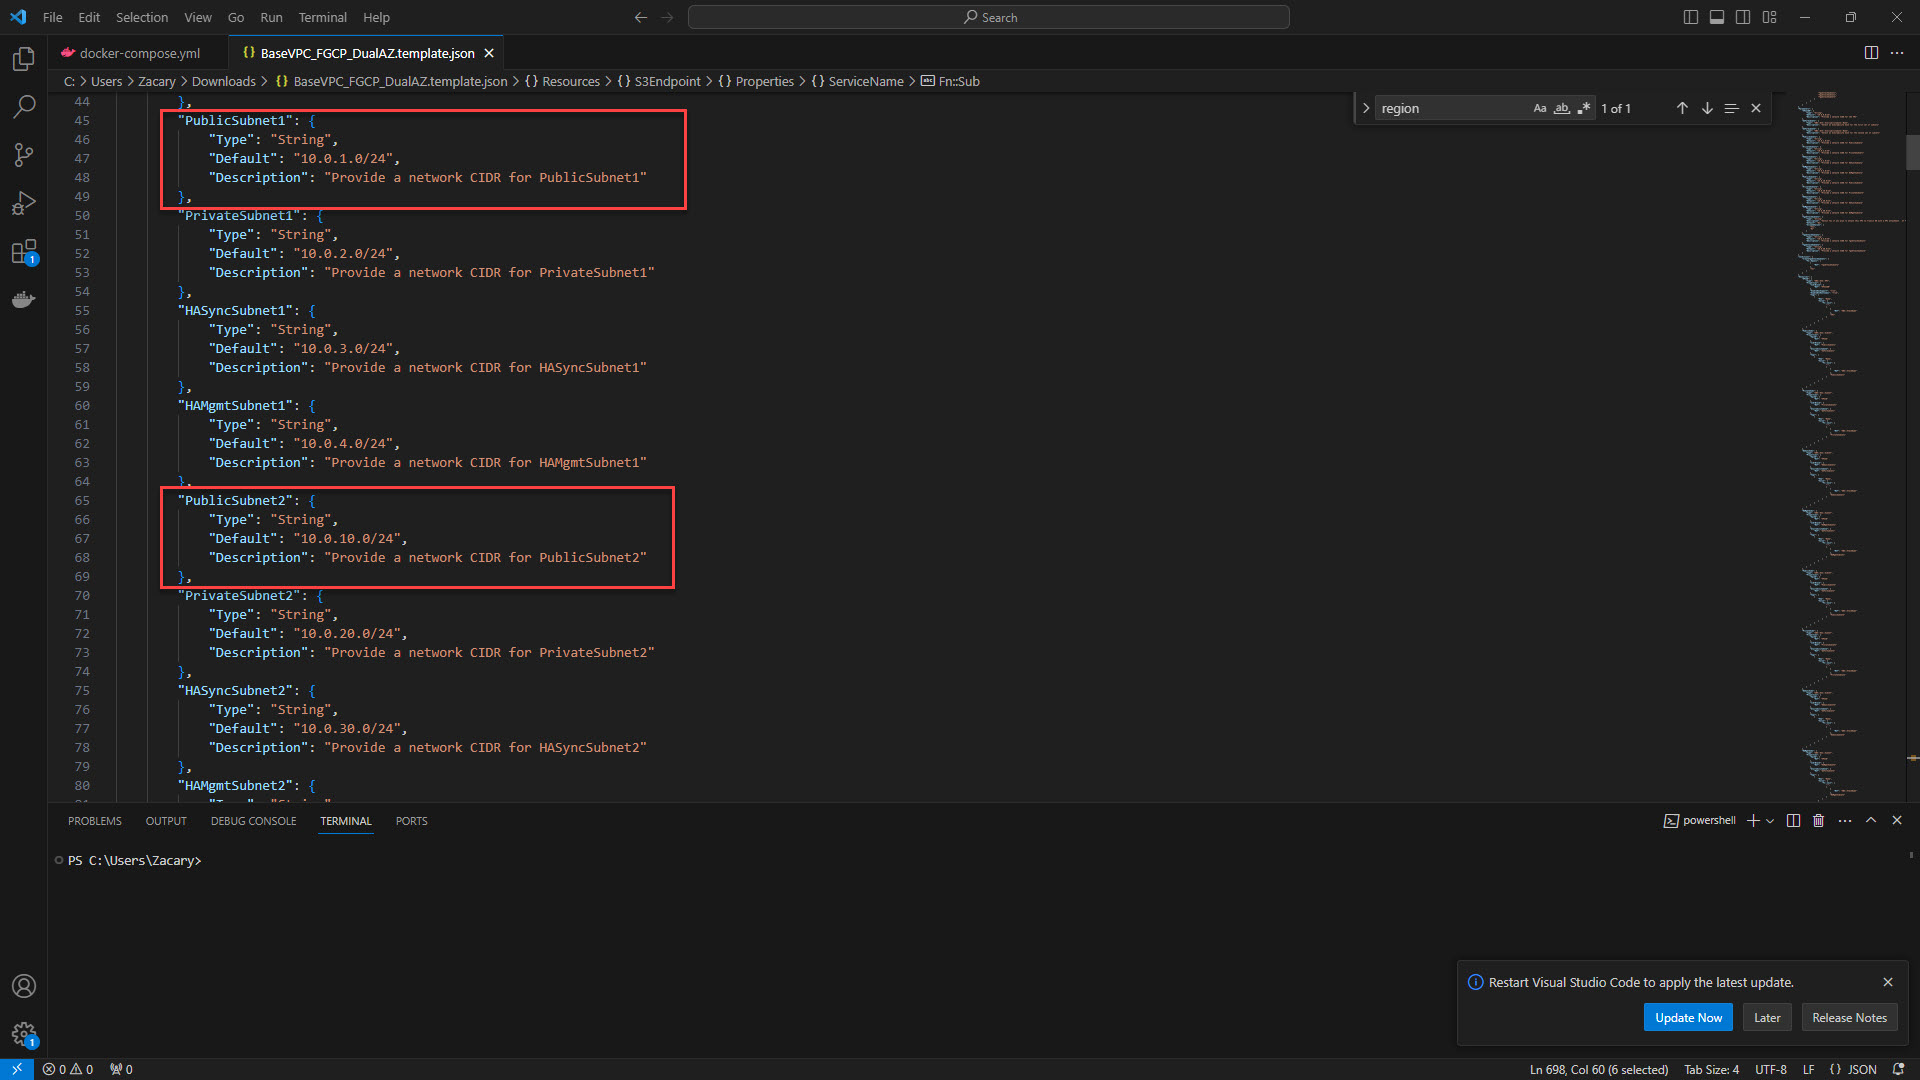
9. Provide the Private Subnets for each firewall that will be used to connect to the LAN.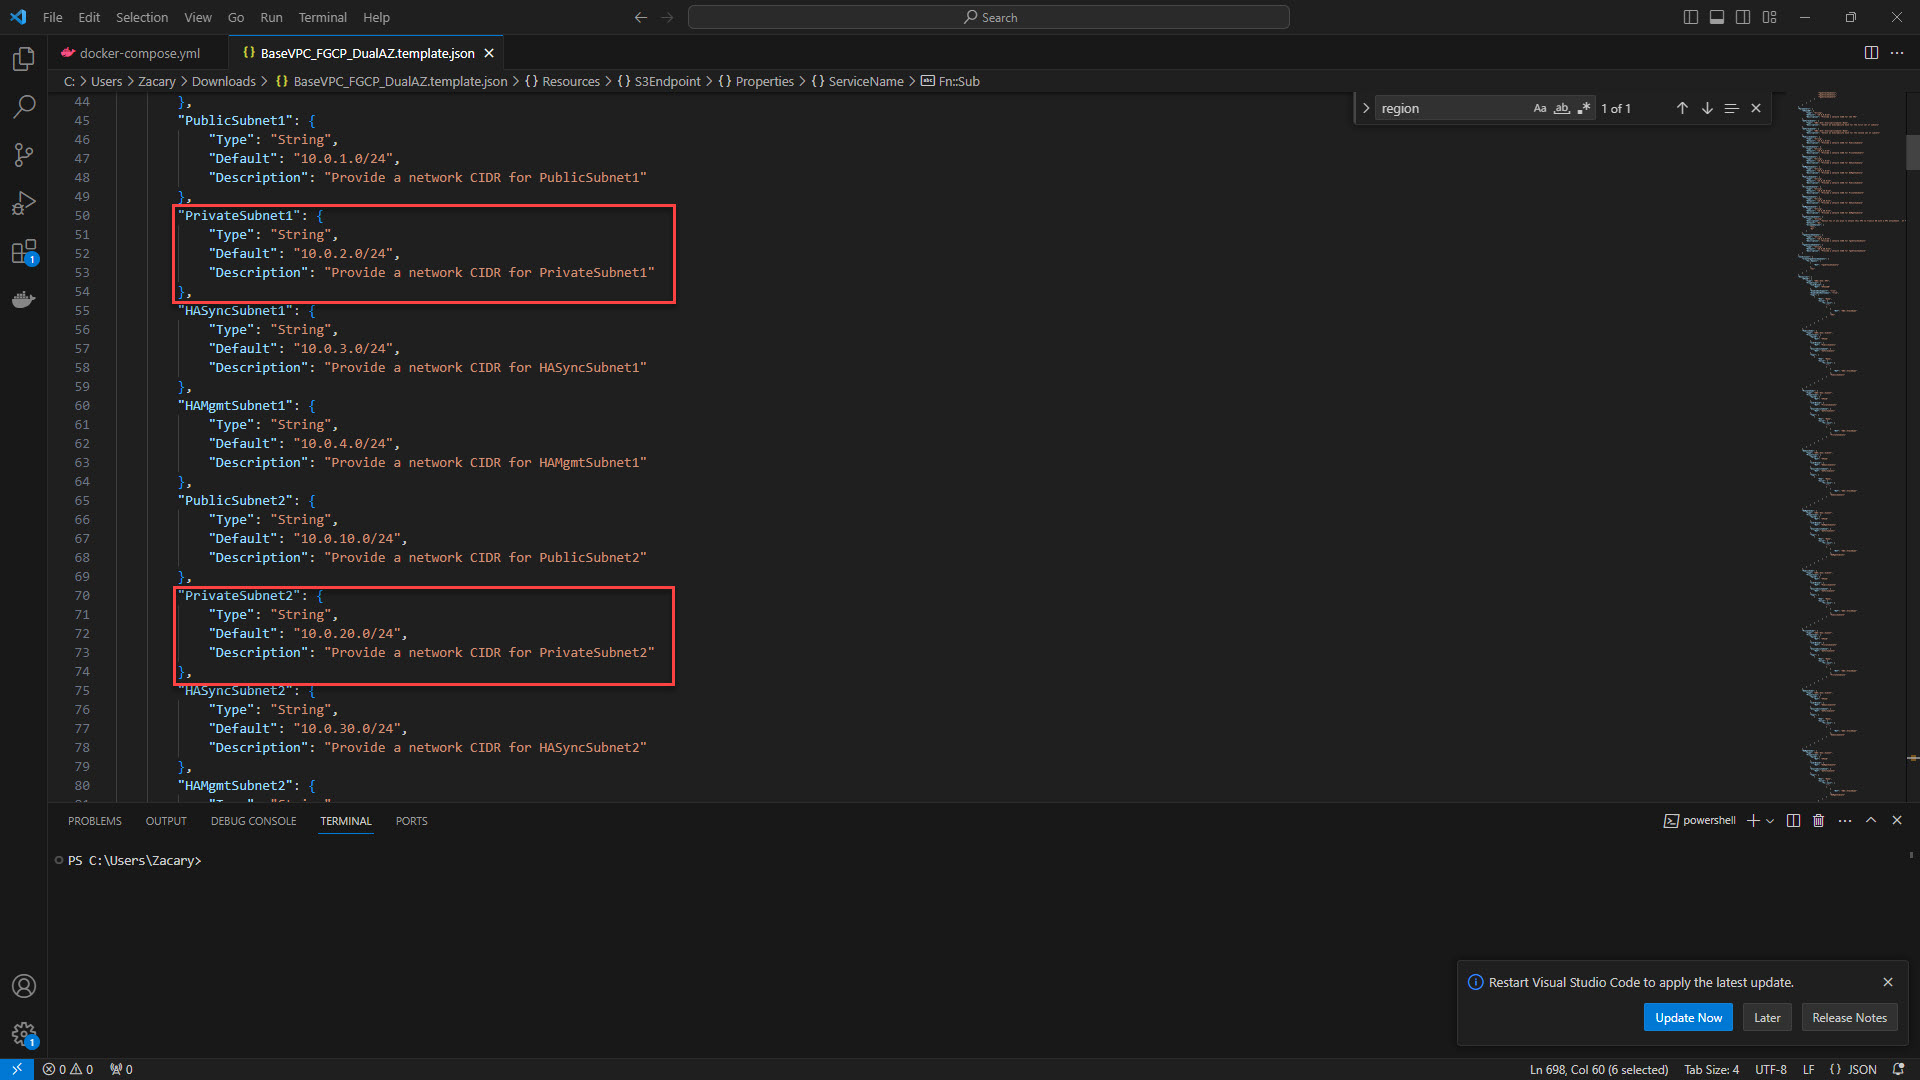
10. Provide the HA Sync Subnet for each firewall.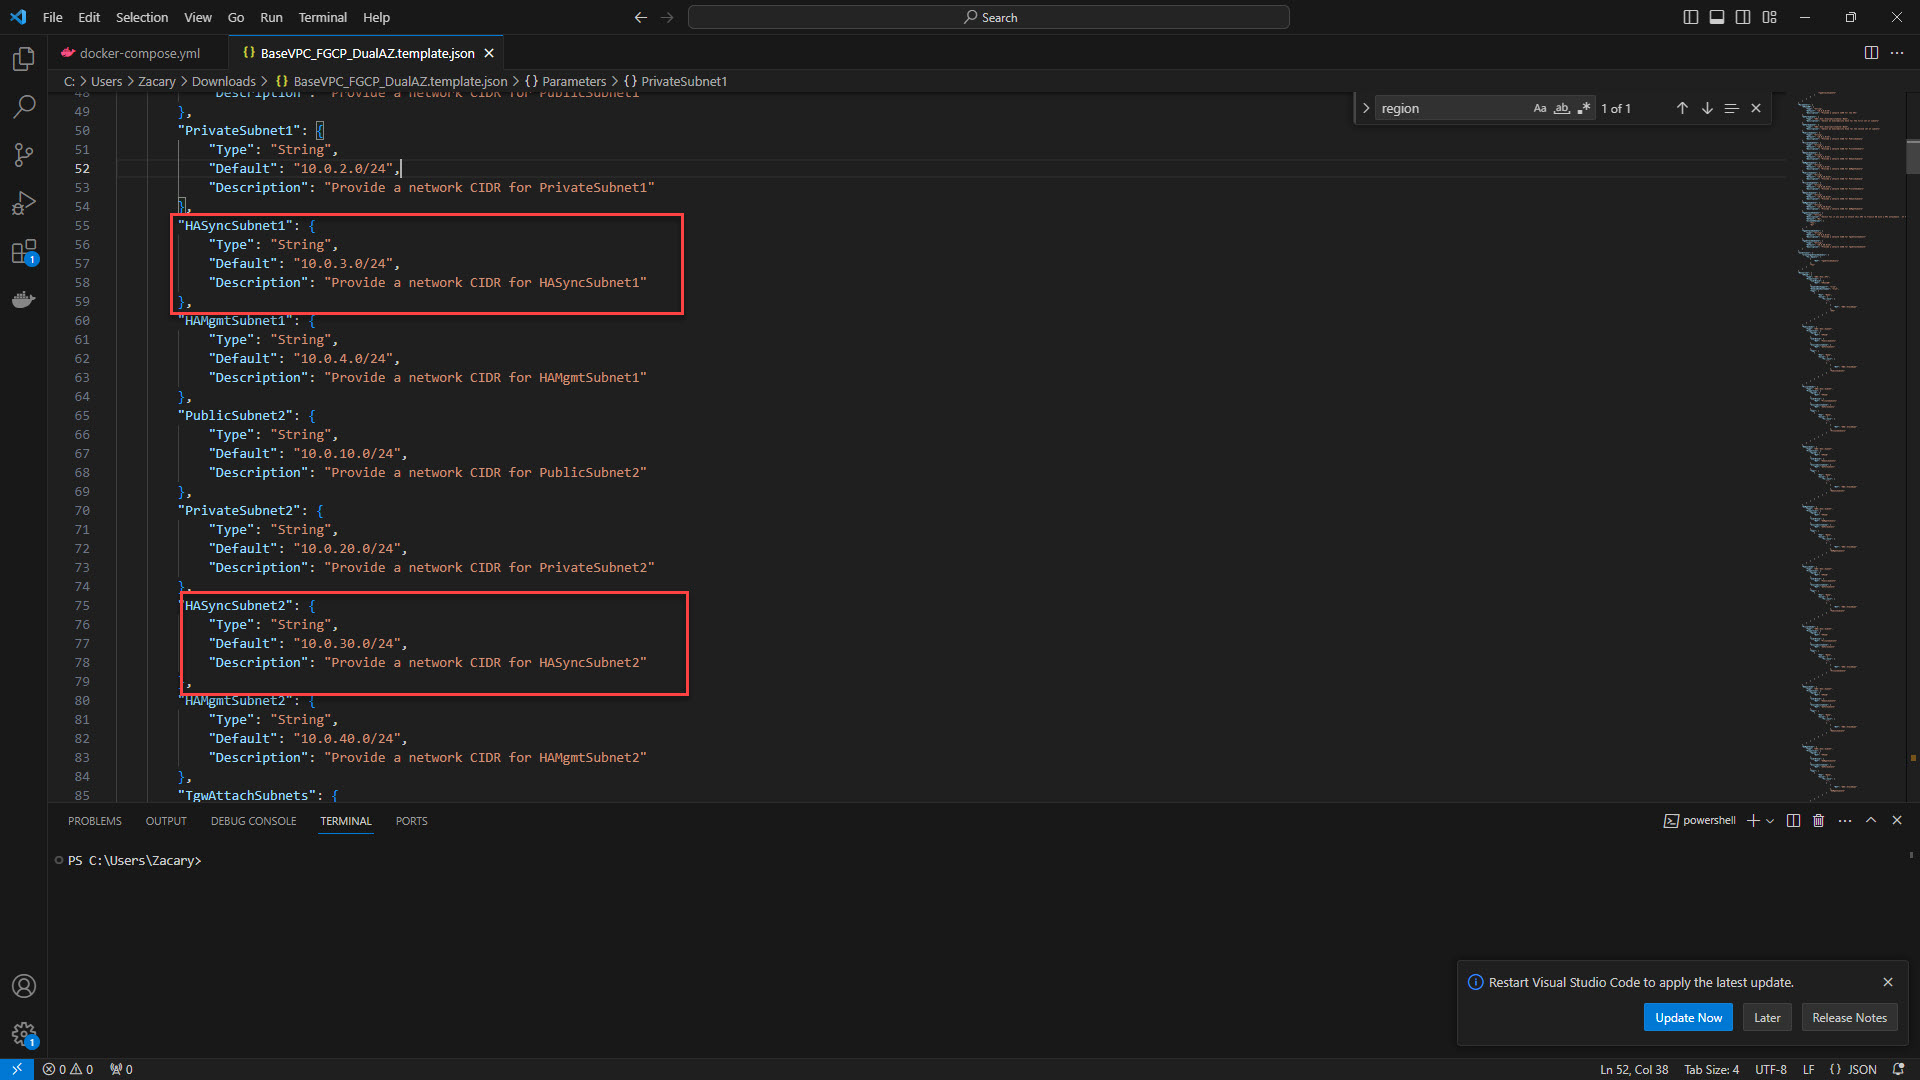
11. Provide HA Managment Subnet for each firewall.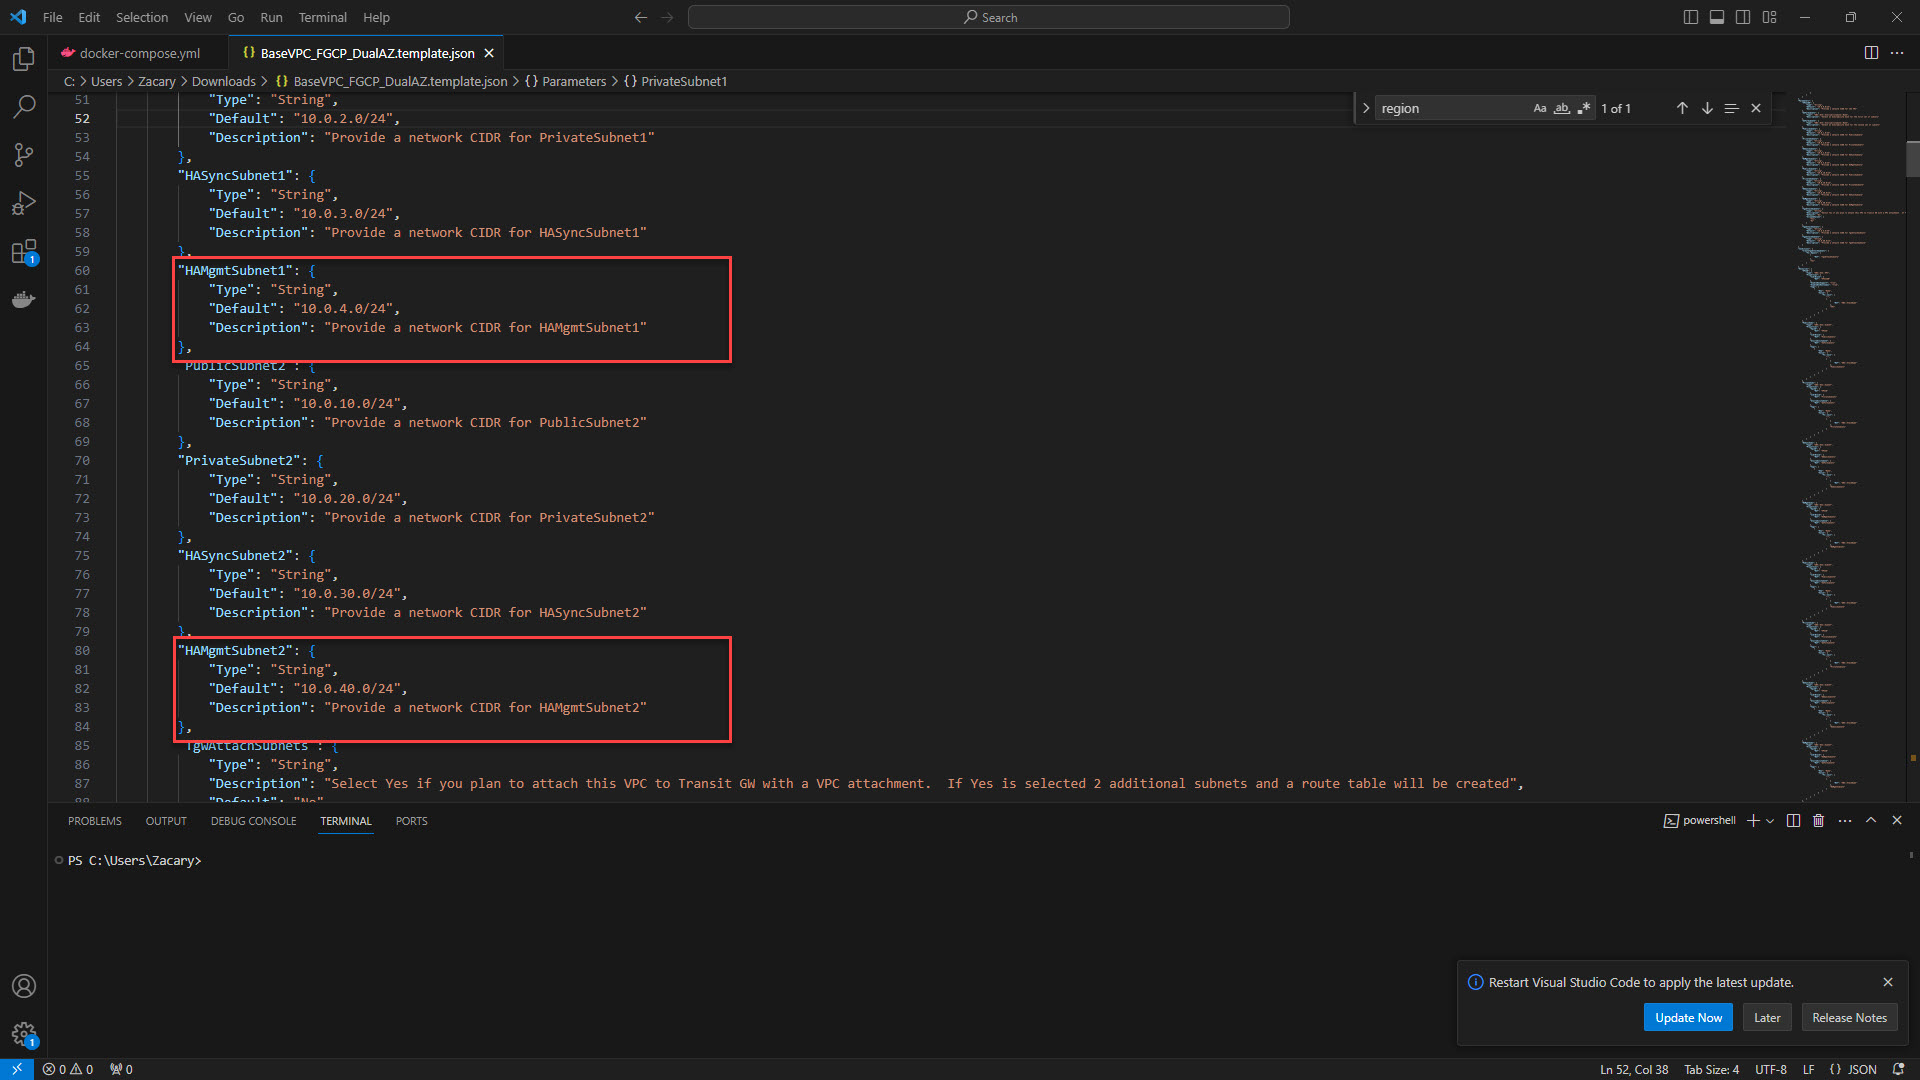
Create AWS access key and use AWS Configure to login to AWS console inside VS Code for deploying the template.
1. Create a new IAM user that will be used for AWS CLI Access. Name the User and select next.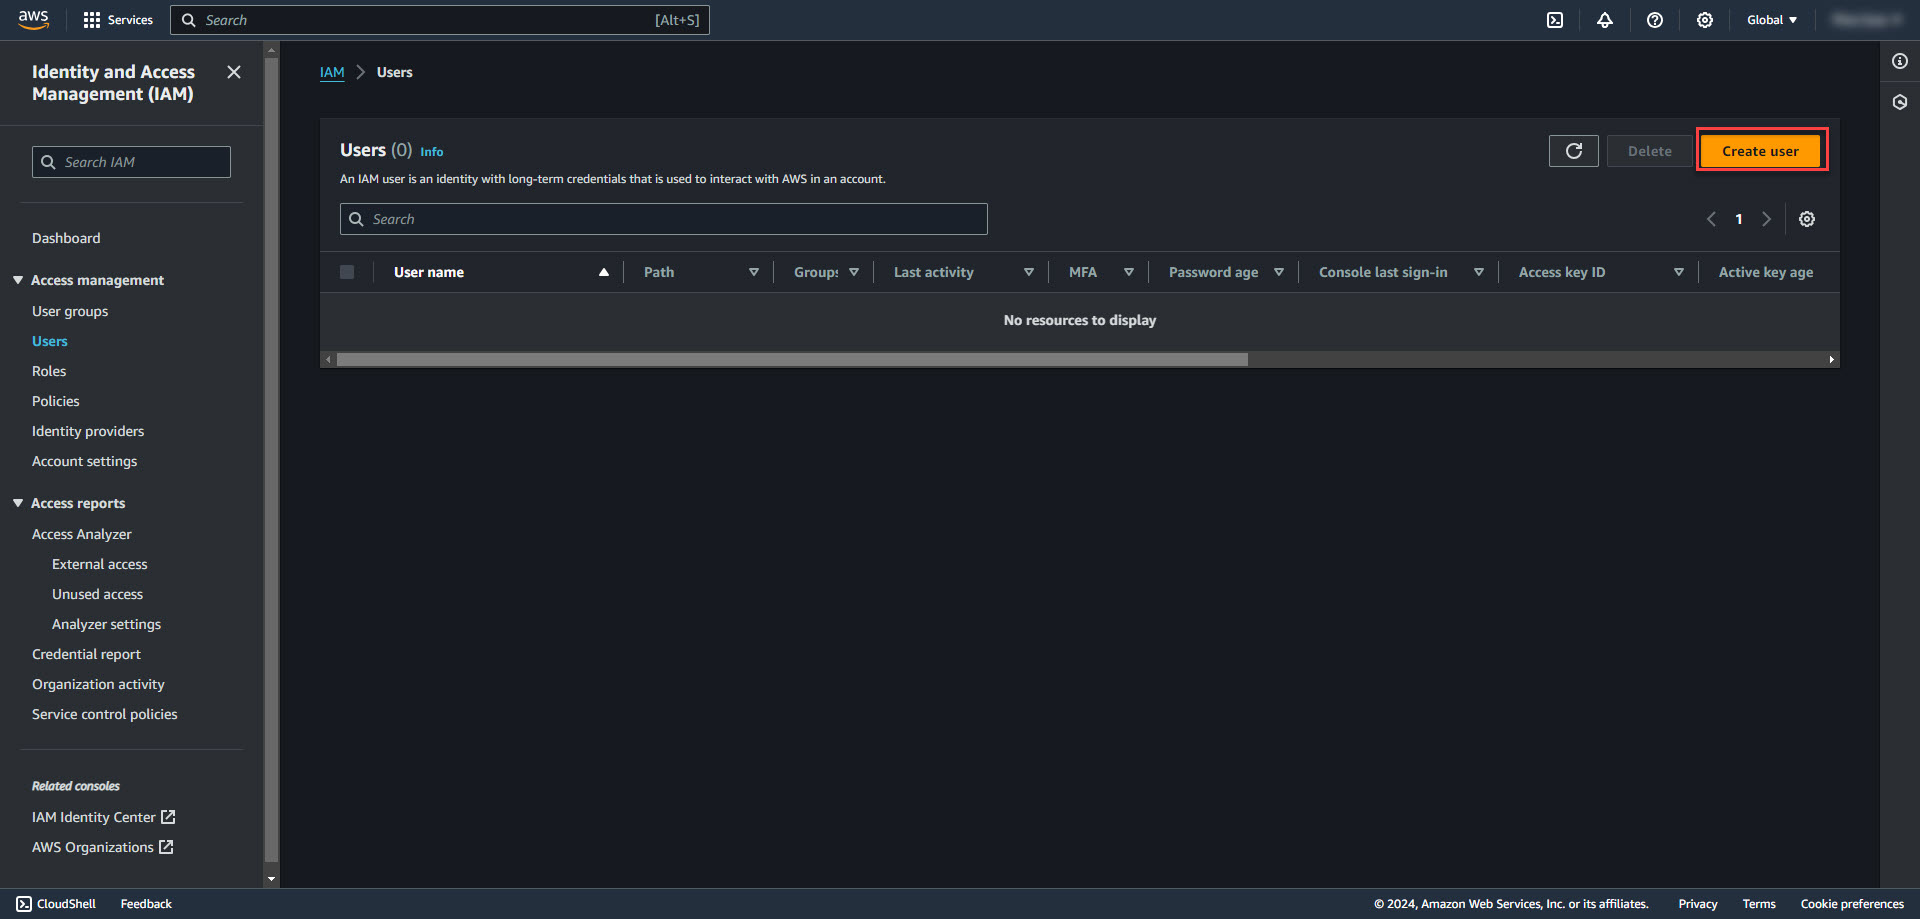
2. Select Attach policies directly and select the AdministratorAccess policy. Select next and create user.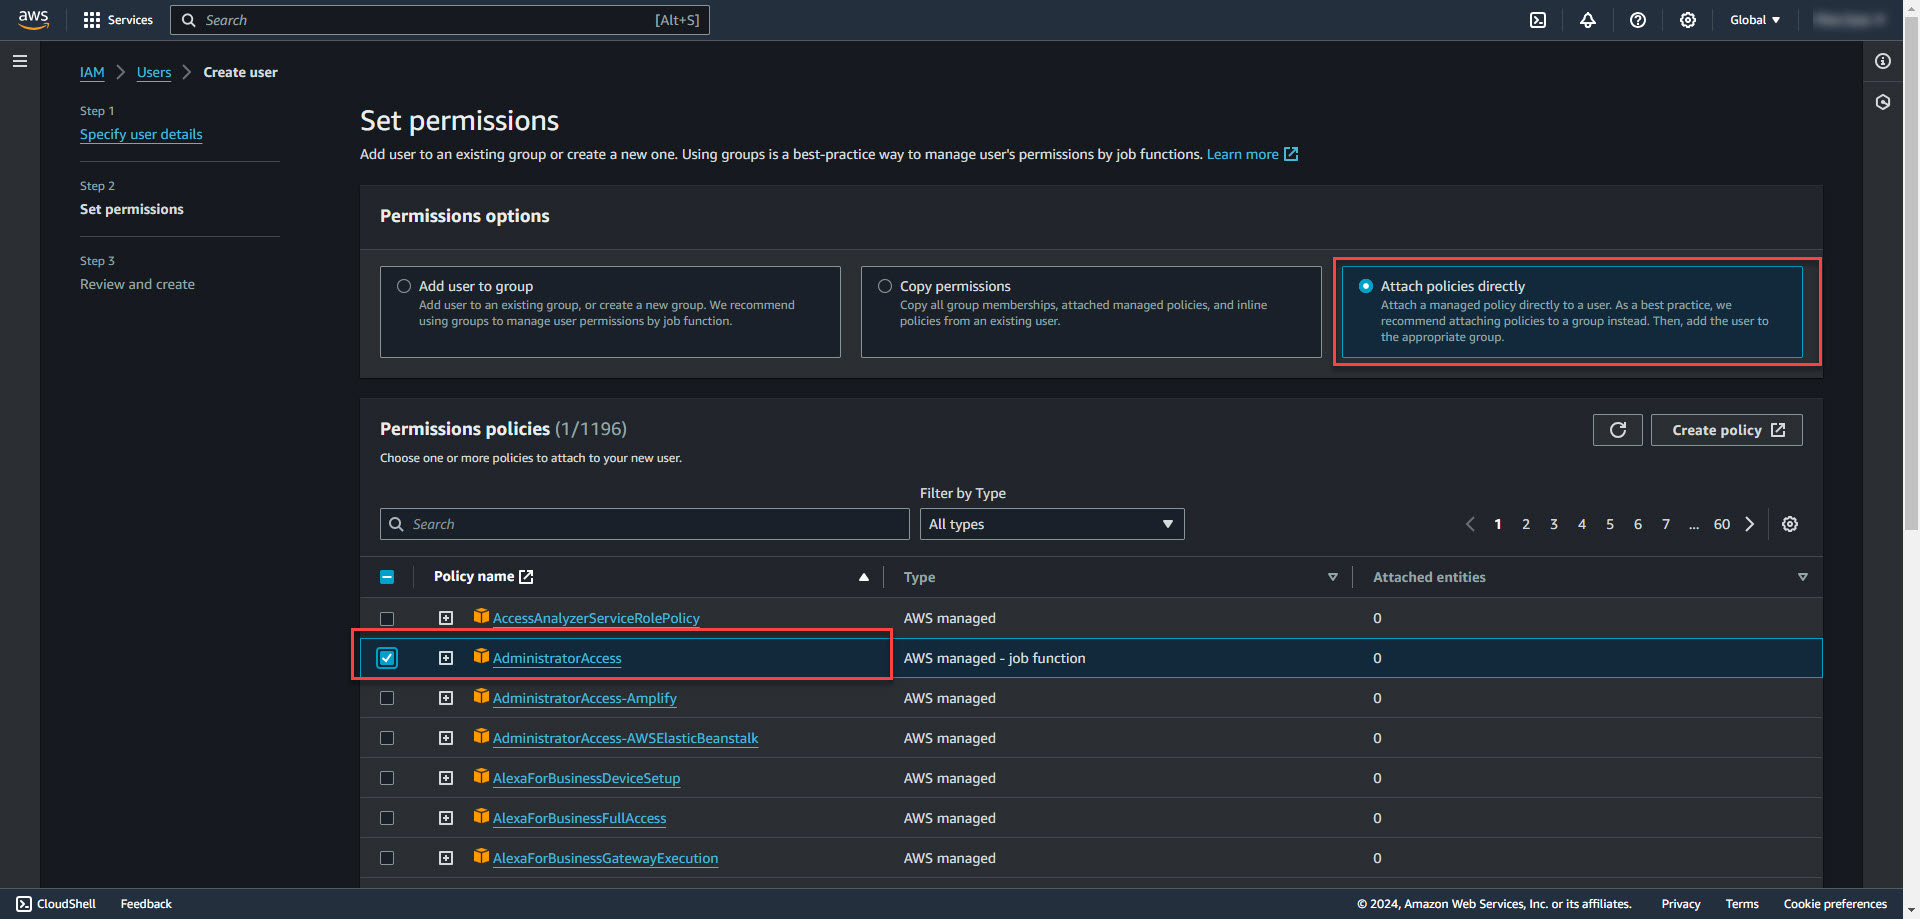
3. On the Security Credentials tab of the user details page, scroll down to Access Keys. Select Create access key.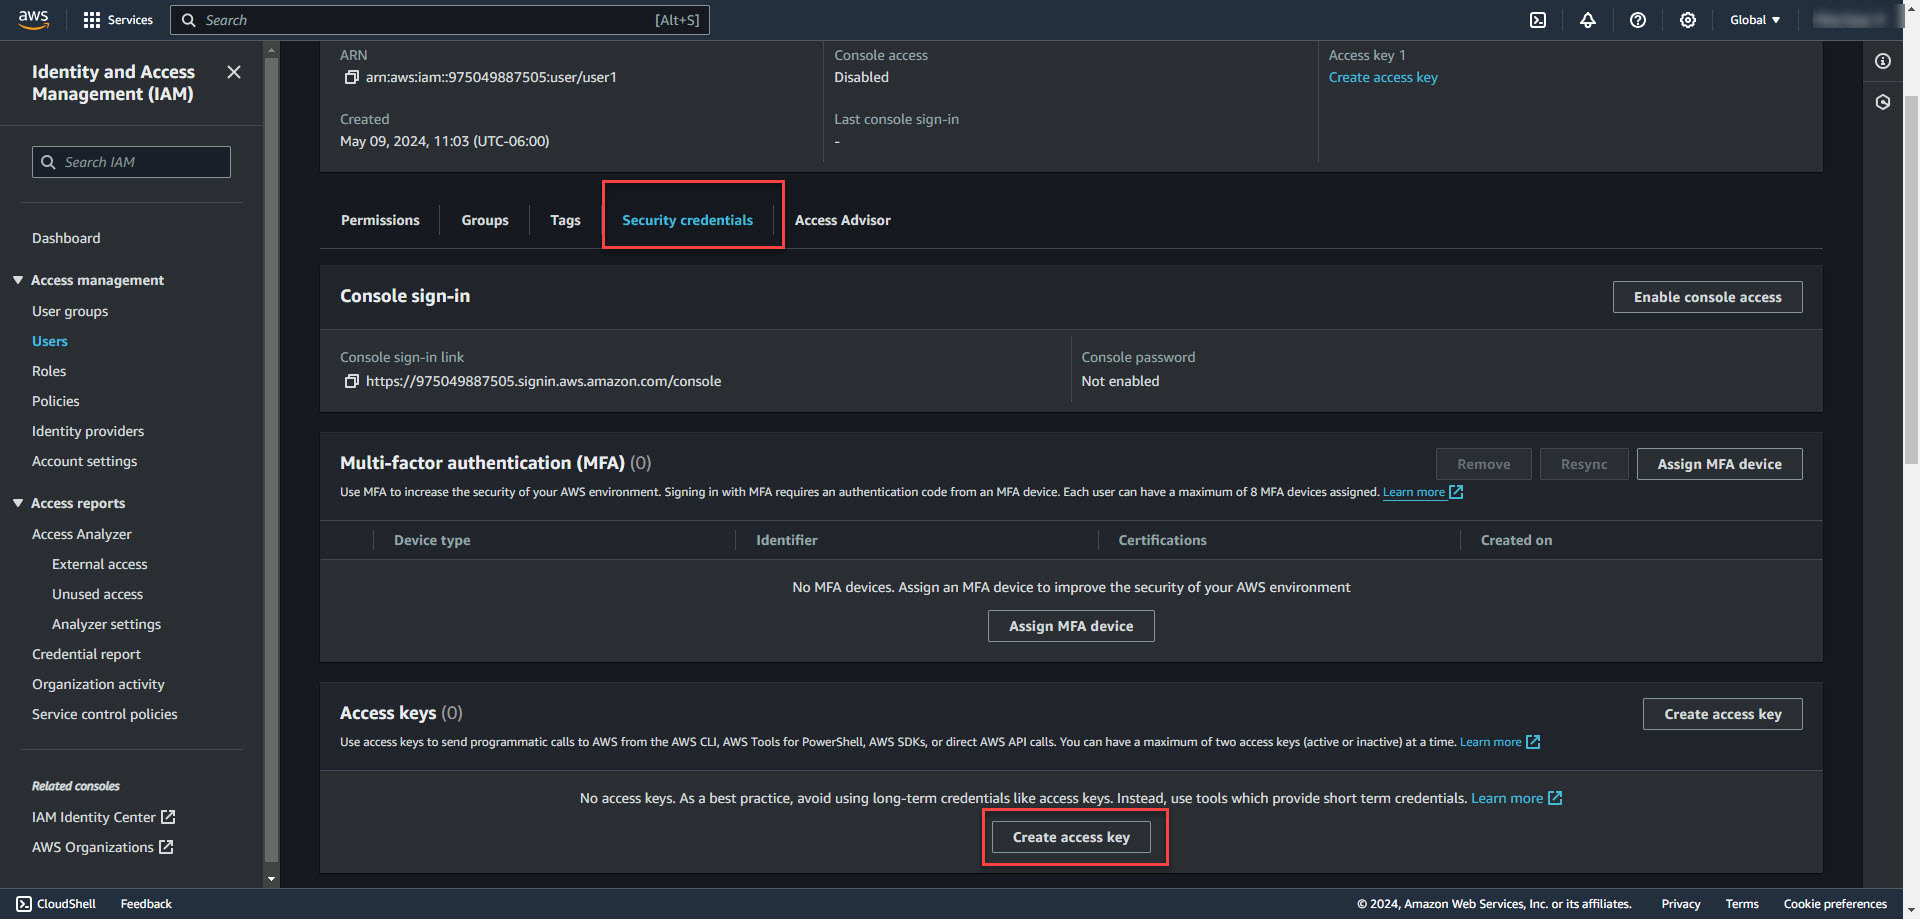
4. Select Command Line Interface (CLI) and create the key. Save the access key. The access key can only be viewed once at creation.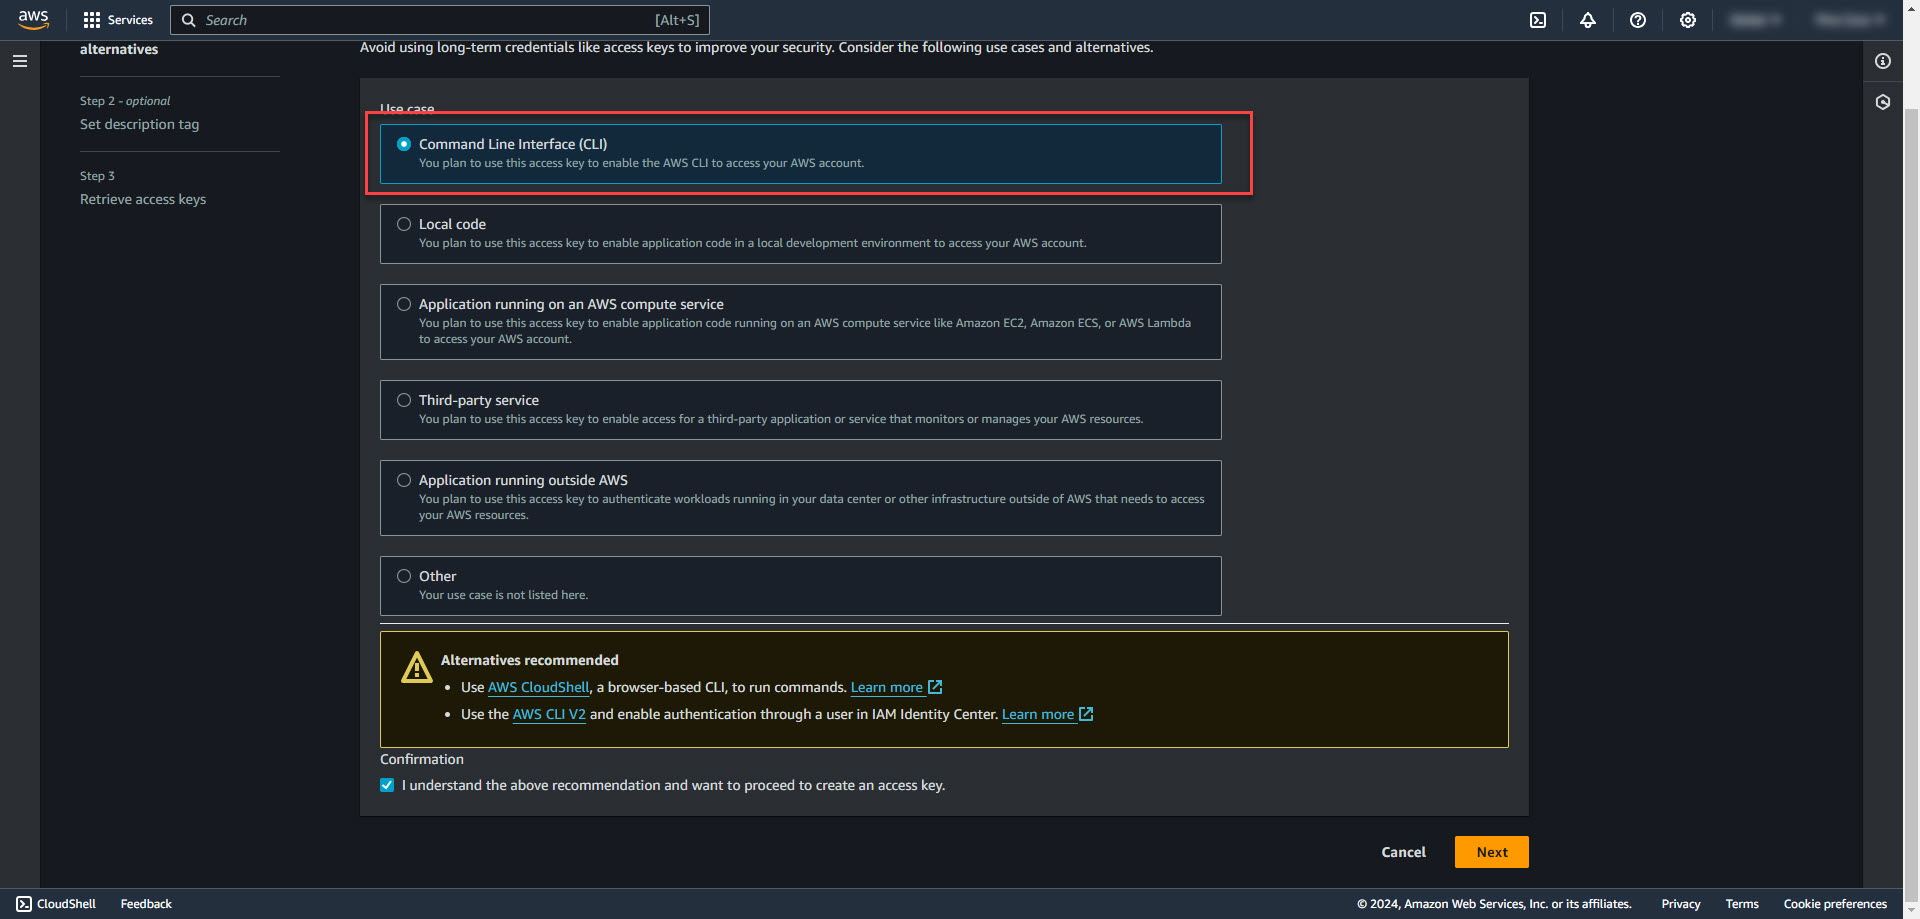
5. Run the below command in a Windows Command Line to install AWS CLI.
Commnad: msiexec.exe /i https://awscli.amazonaws.com/AWSCLIV2.msi
6. Run aws configure, adding in the Access Key ID and Secret Access Key saved from earlier. Set default region. Leave default output set to default (none). After configured, AWS CLI will be logged in.
Command: aws configure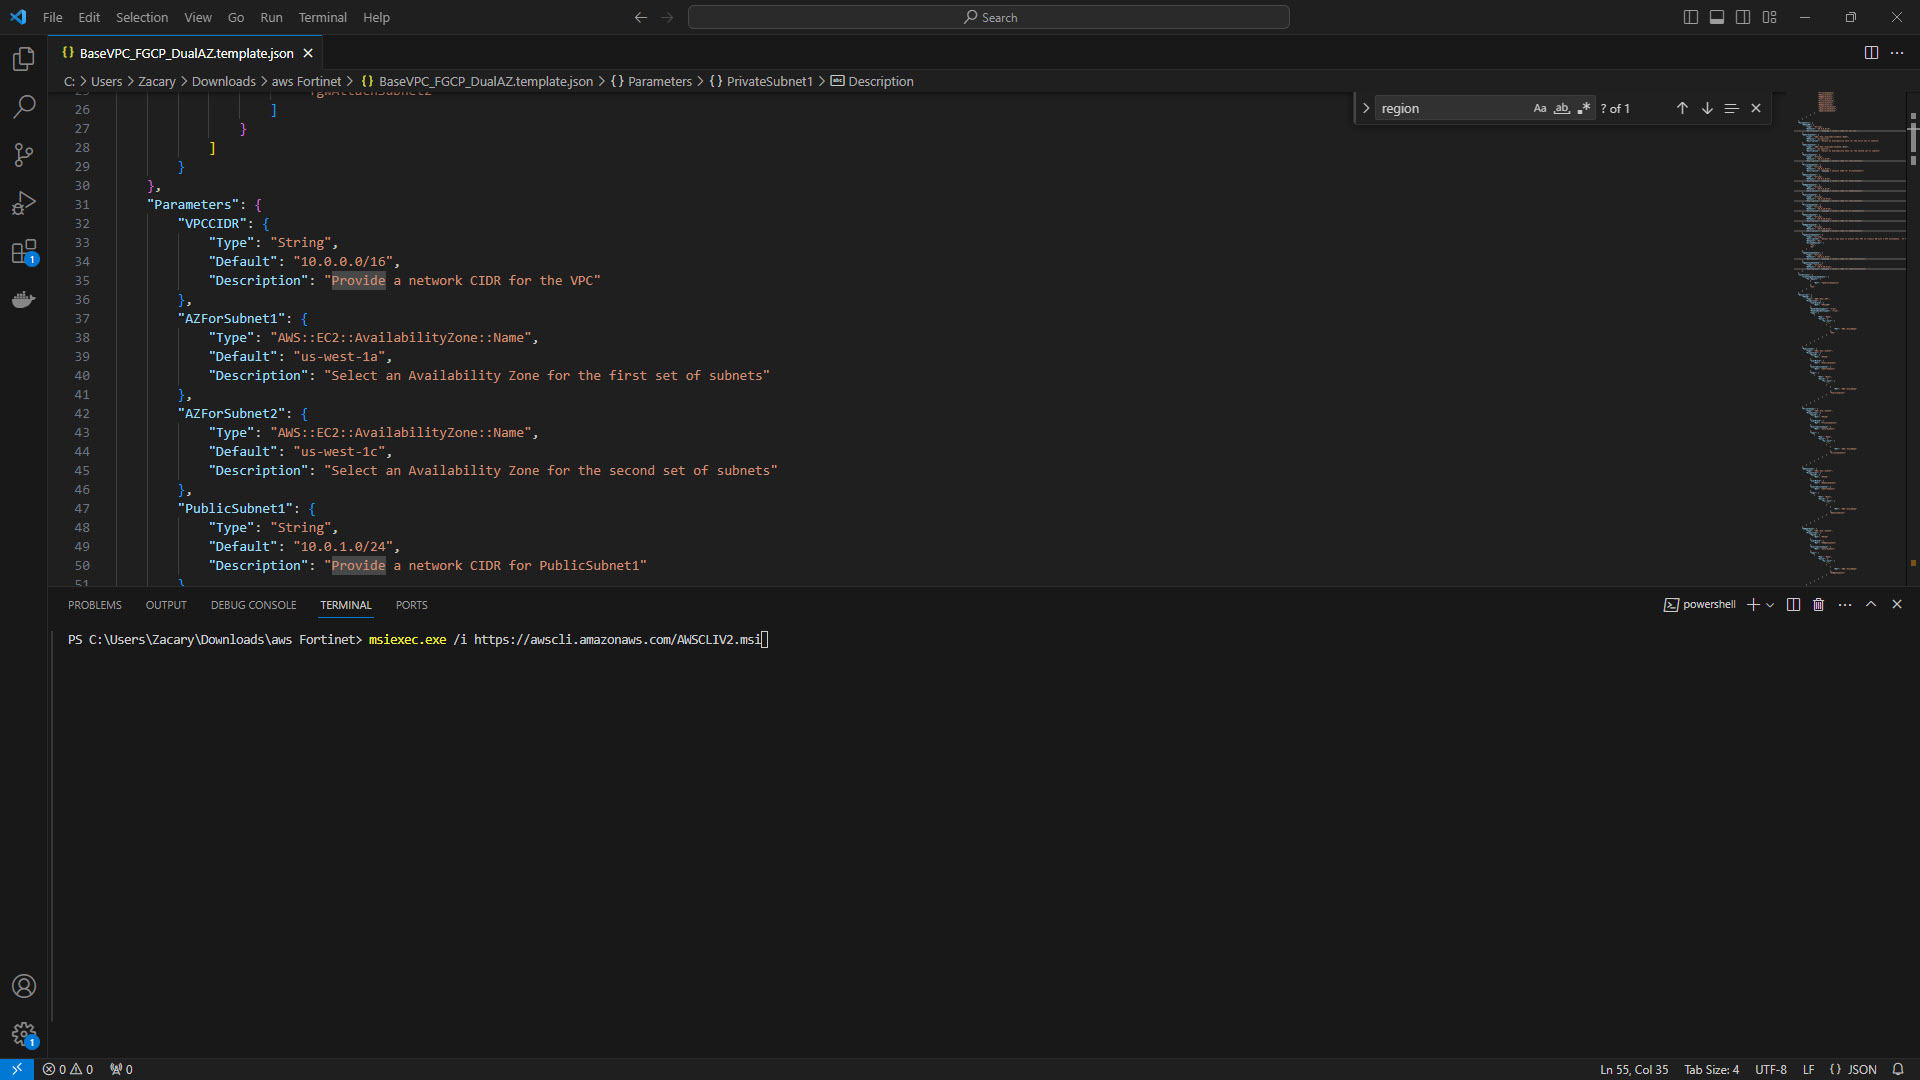
Run Cloud Formation Stack for deploying firewall networking resources
1. Change directory to the template file and run below command to create template stack.
Command: aws cloudformation create-stack --stack-name <YOURSTACKNAME> --template-body file://BaseVPC_FGCP_DualAZ.template.json 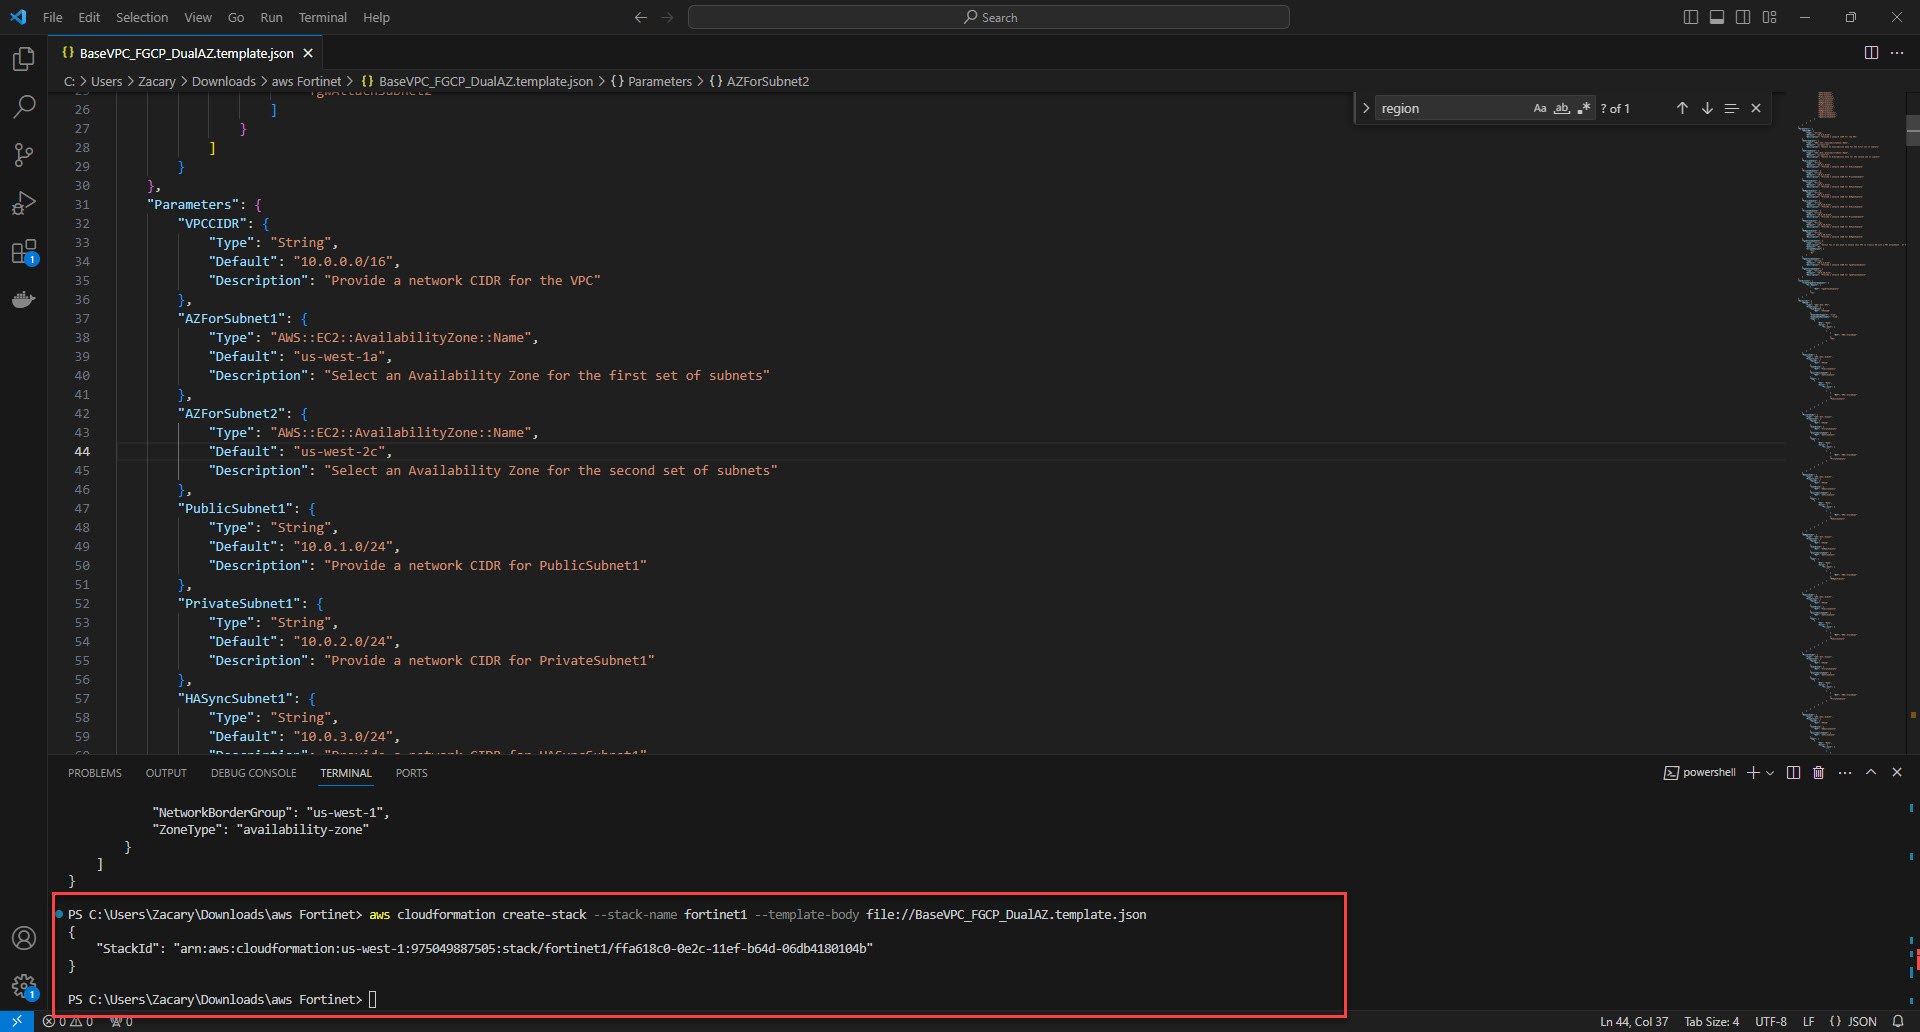
2. Below command will show status of the resources being created, creation success, and error/troubleshooting info.
Command: aws cloudformation describe-stack-events --stack-name <YOURSTACKNAME>
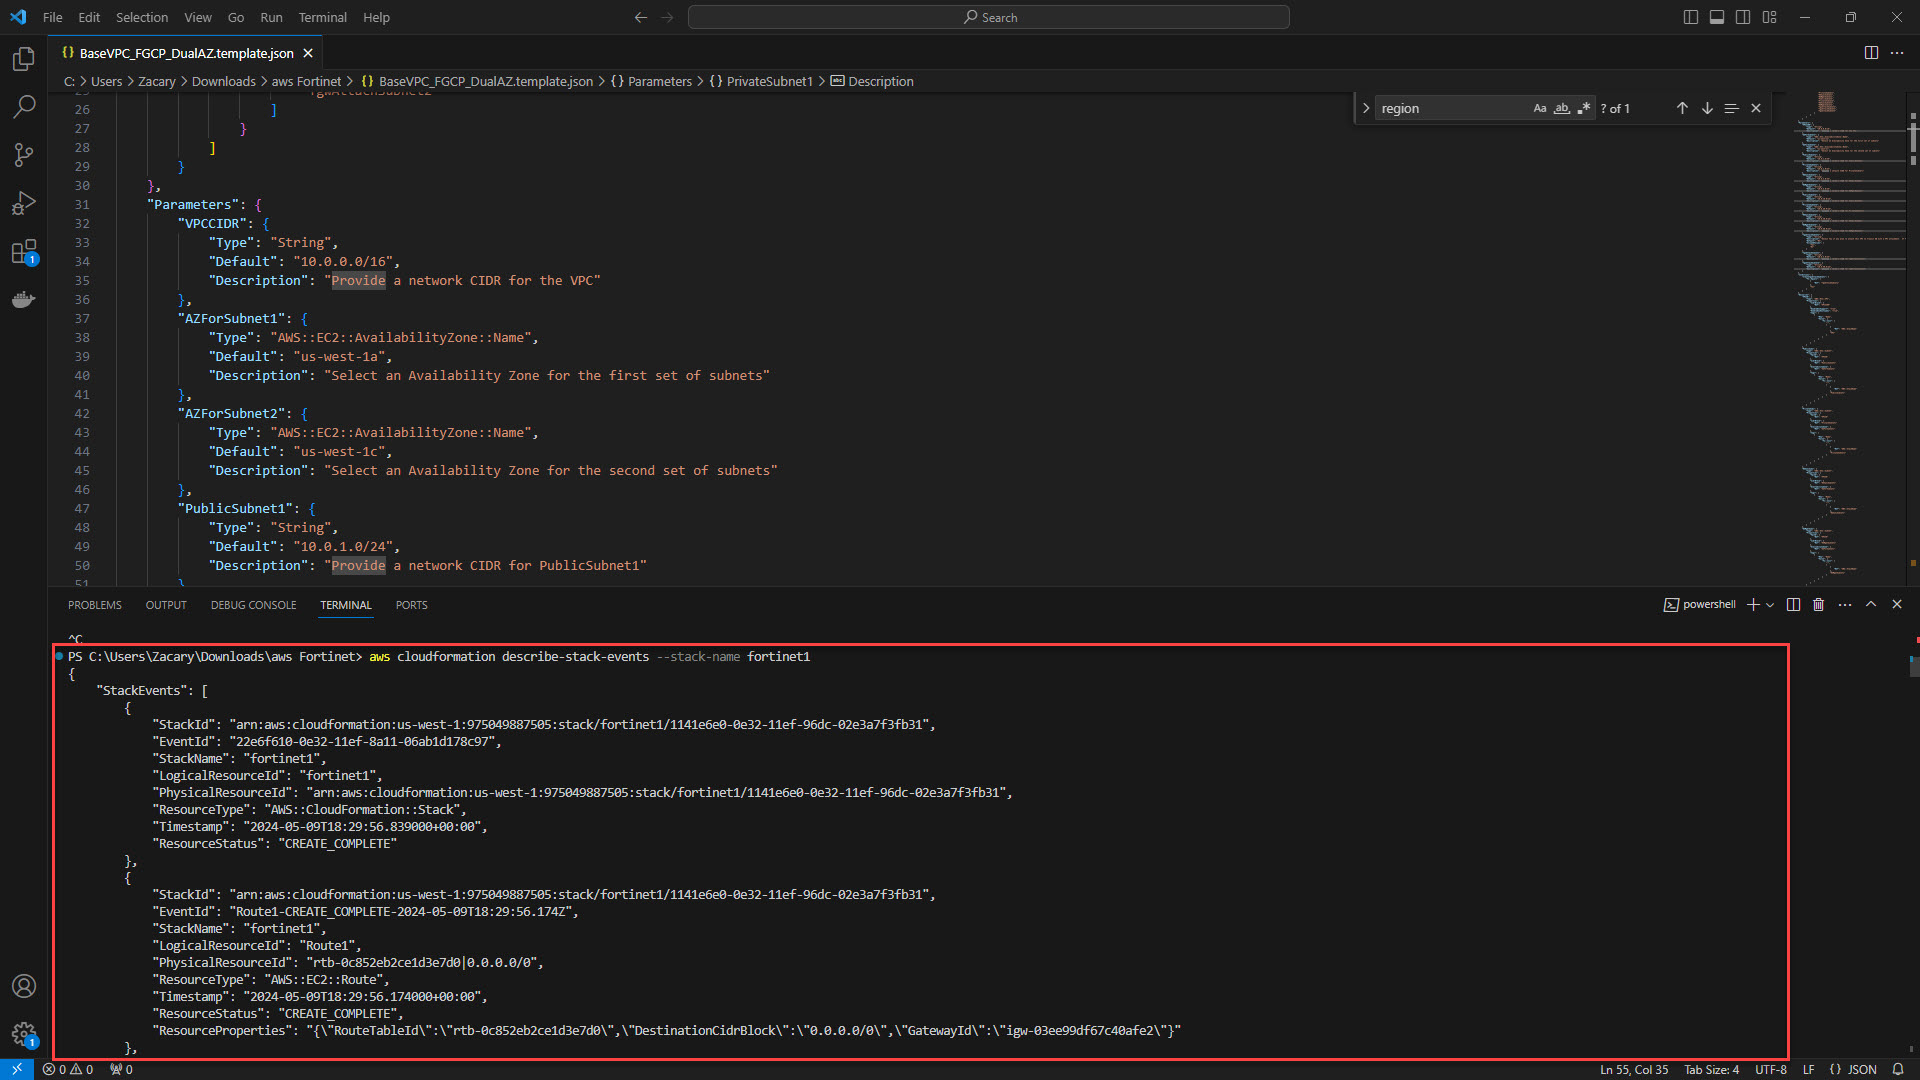
3. Successful creation of resources will also show up in the console under CloudFormation > Stacks > Fortinet1 > Resources
Activate FortiGate Subscription
1. Search for fortigate in AWS. Select Fortinet fortiGate Next-Generation Firewall under the Marketplace heading.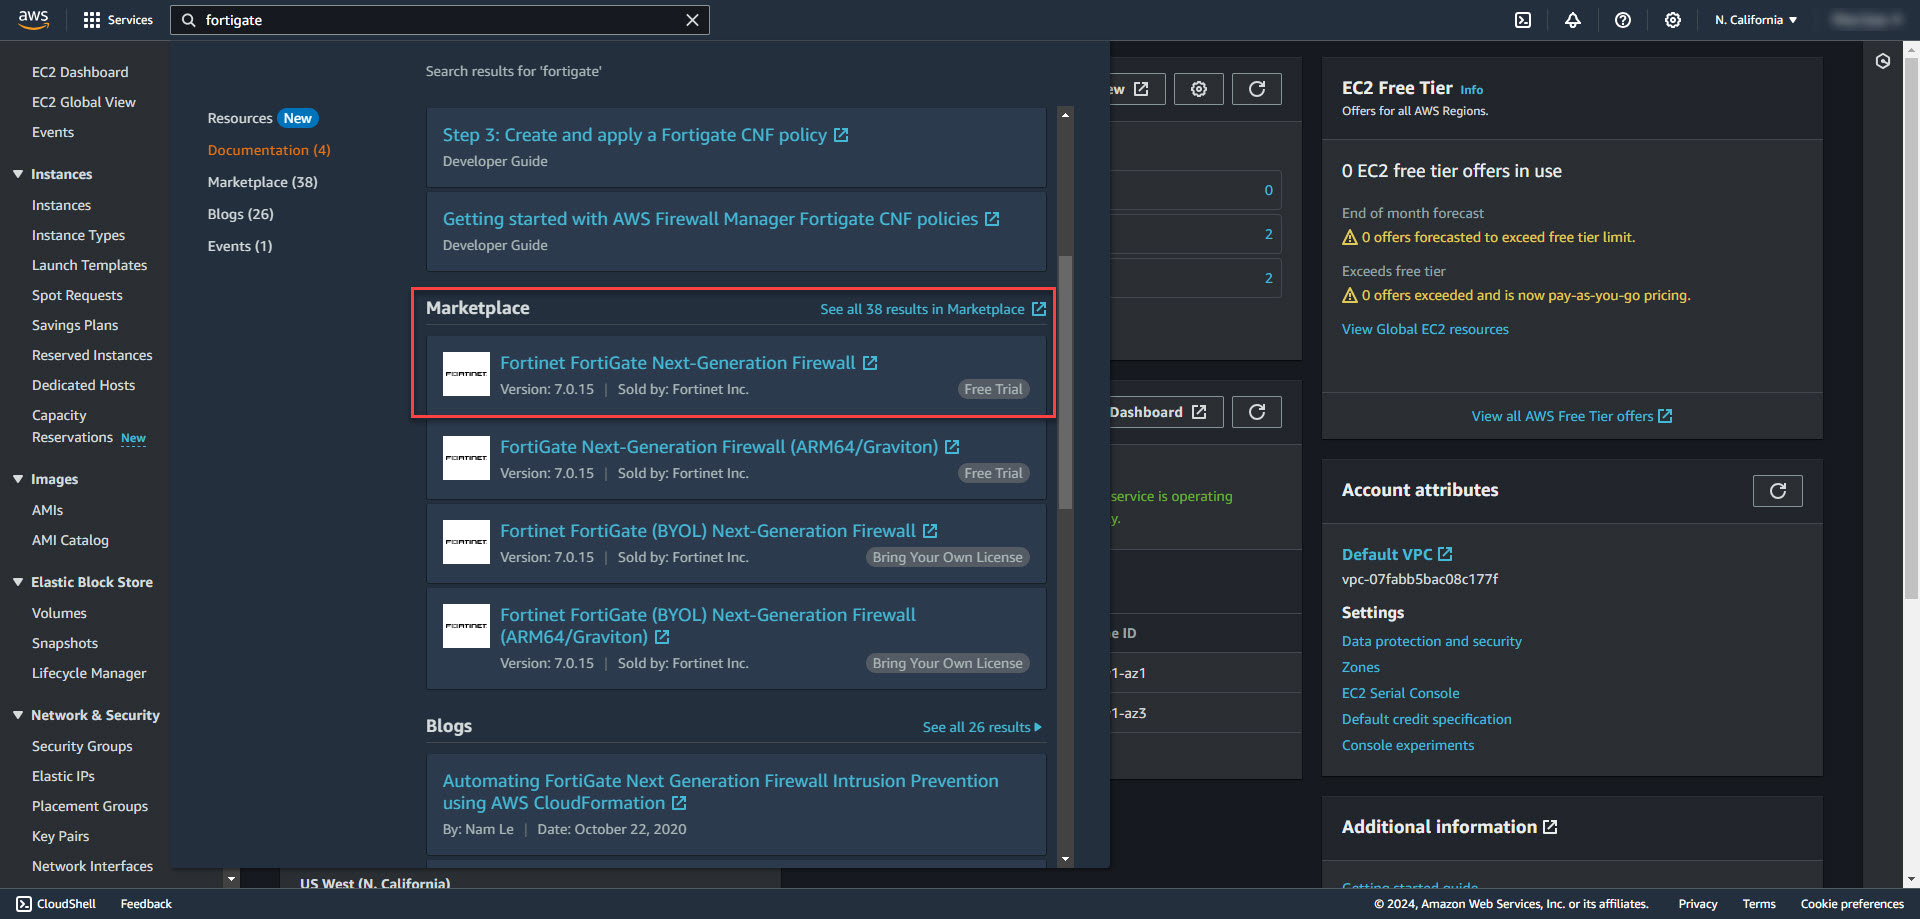
2. Select Continue to Subscribe.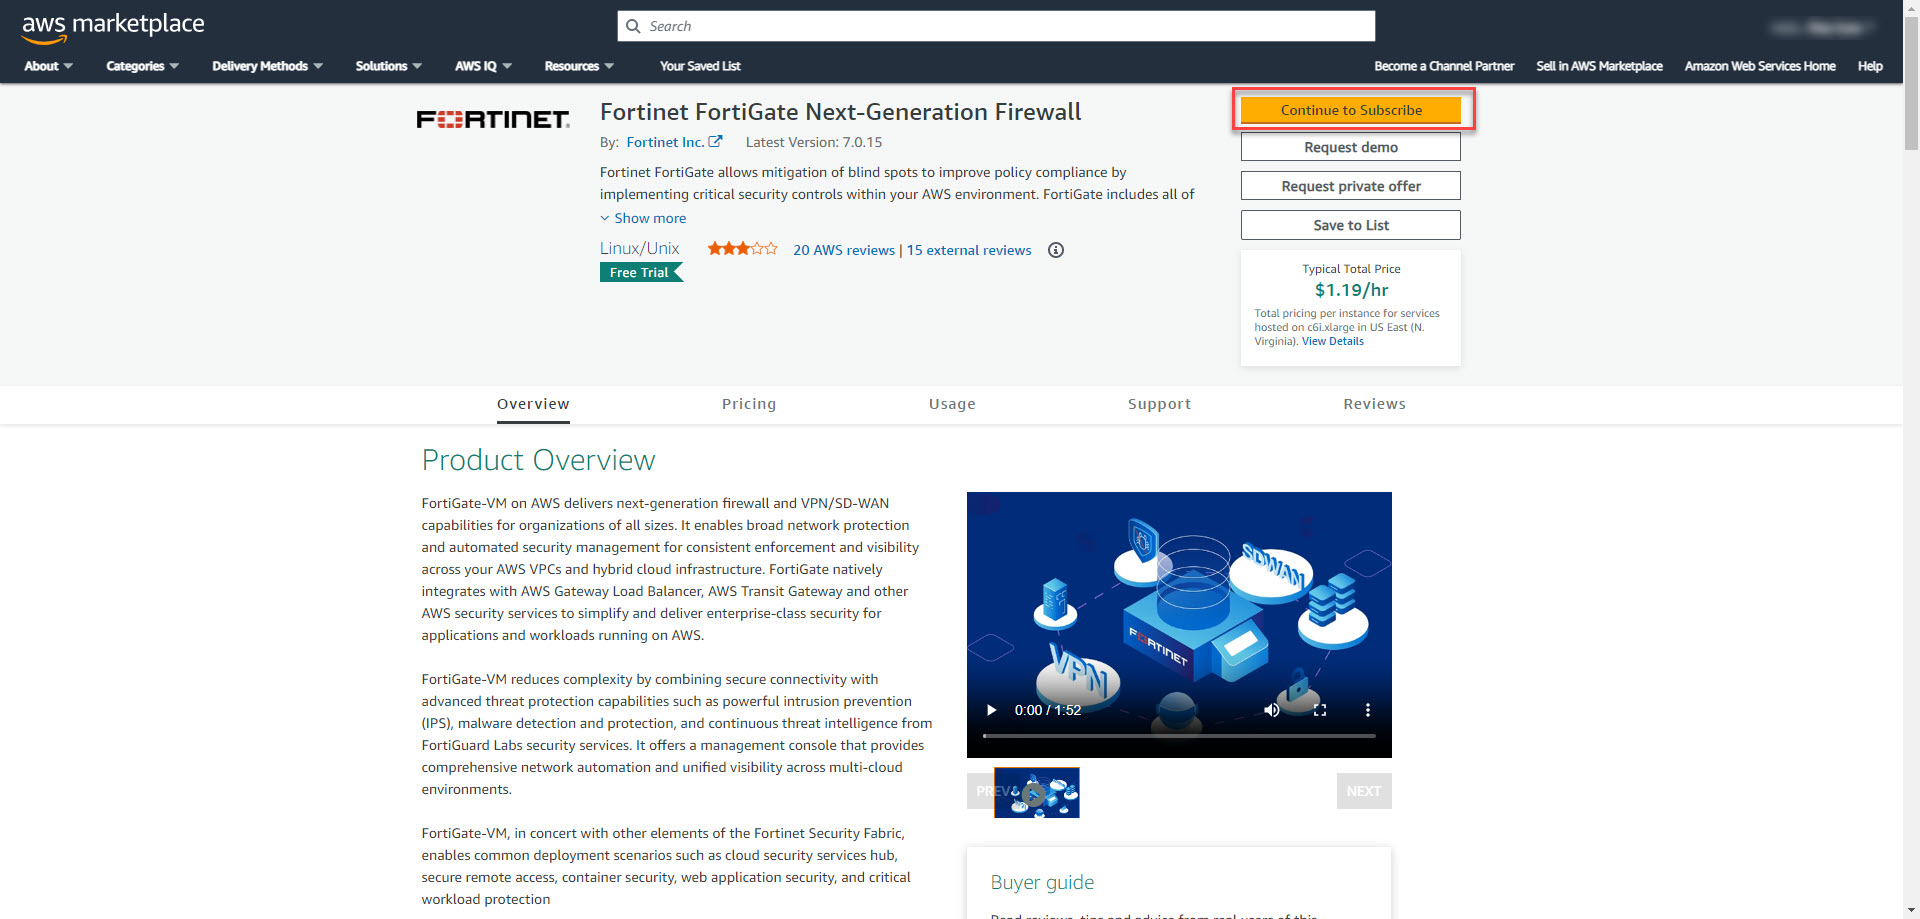
3. Except the terms statement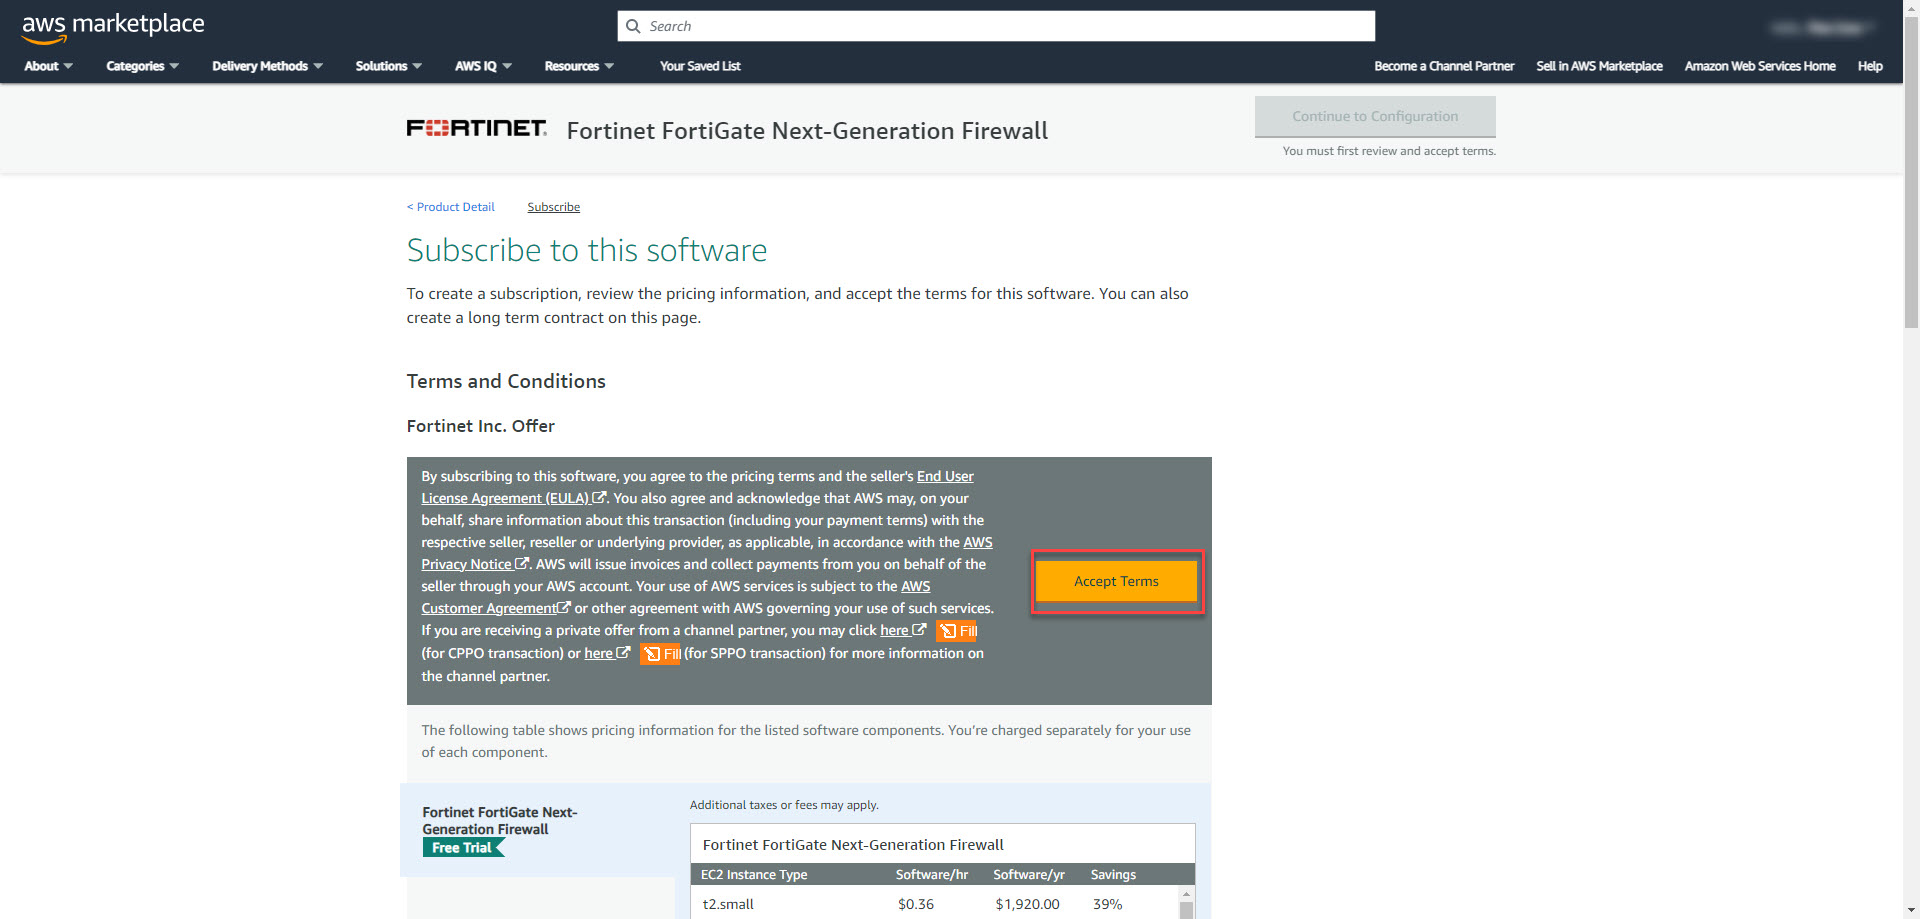
4. Wait till pending changes finish. Subscription will show completion message once process is complete.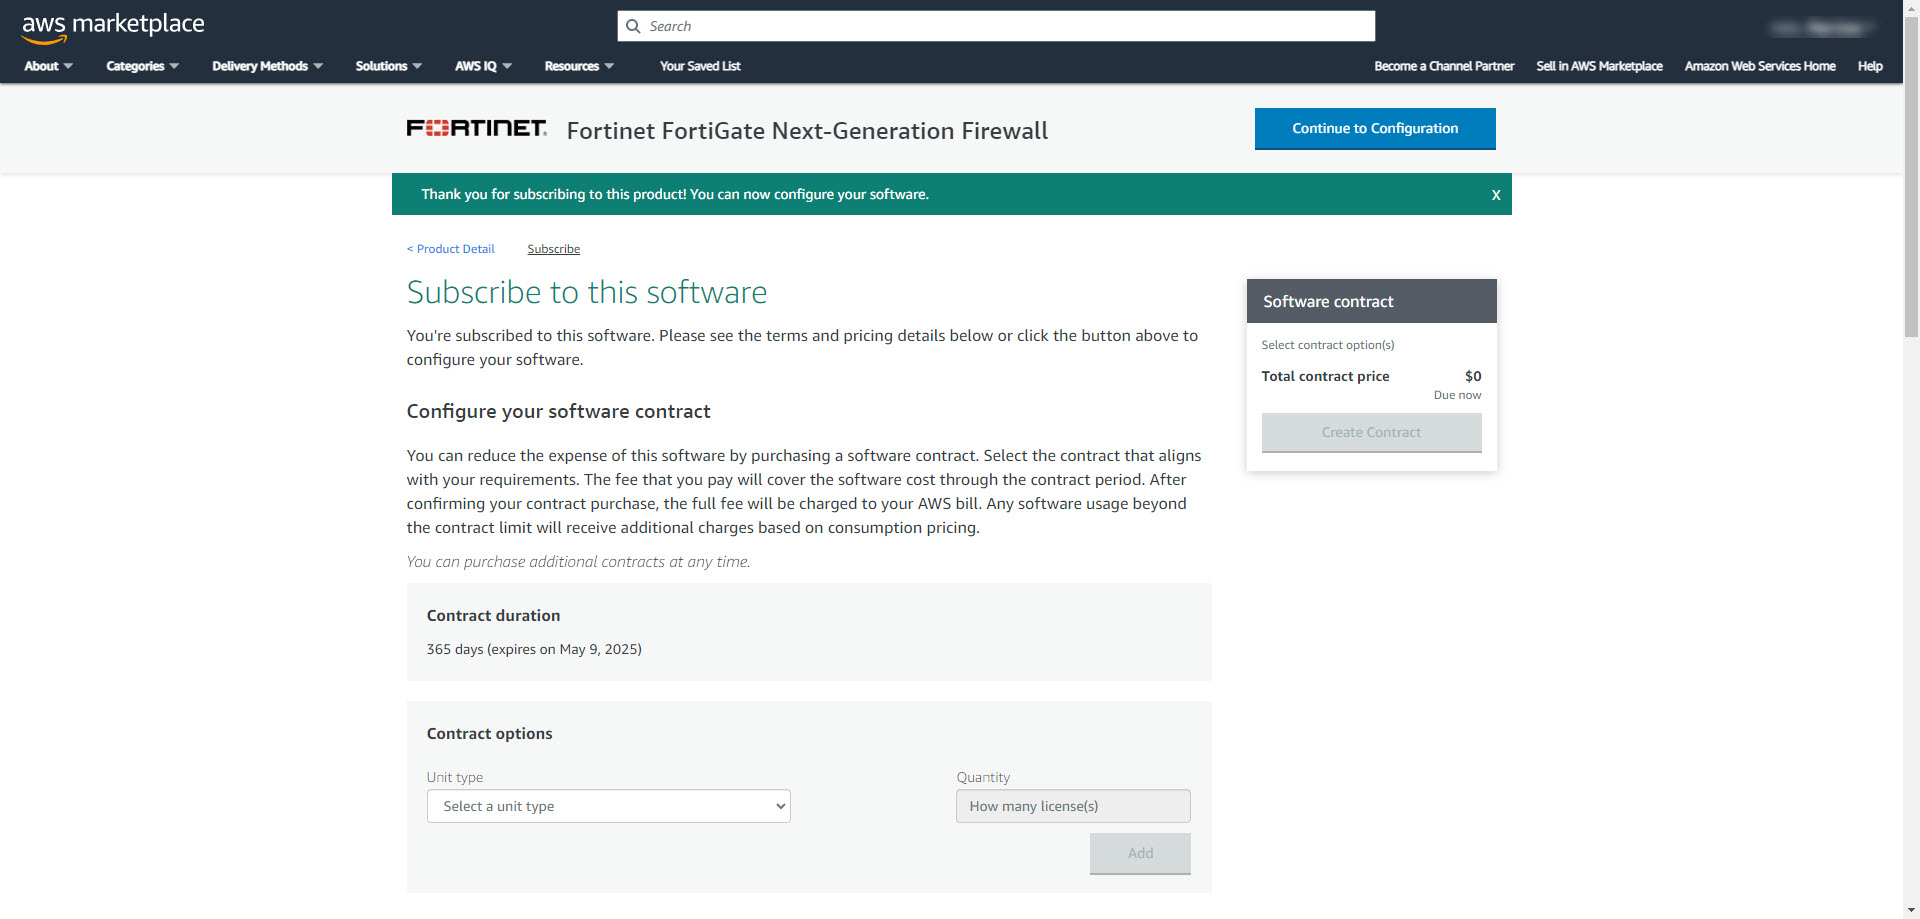
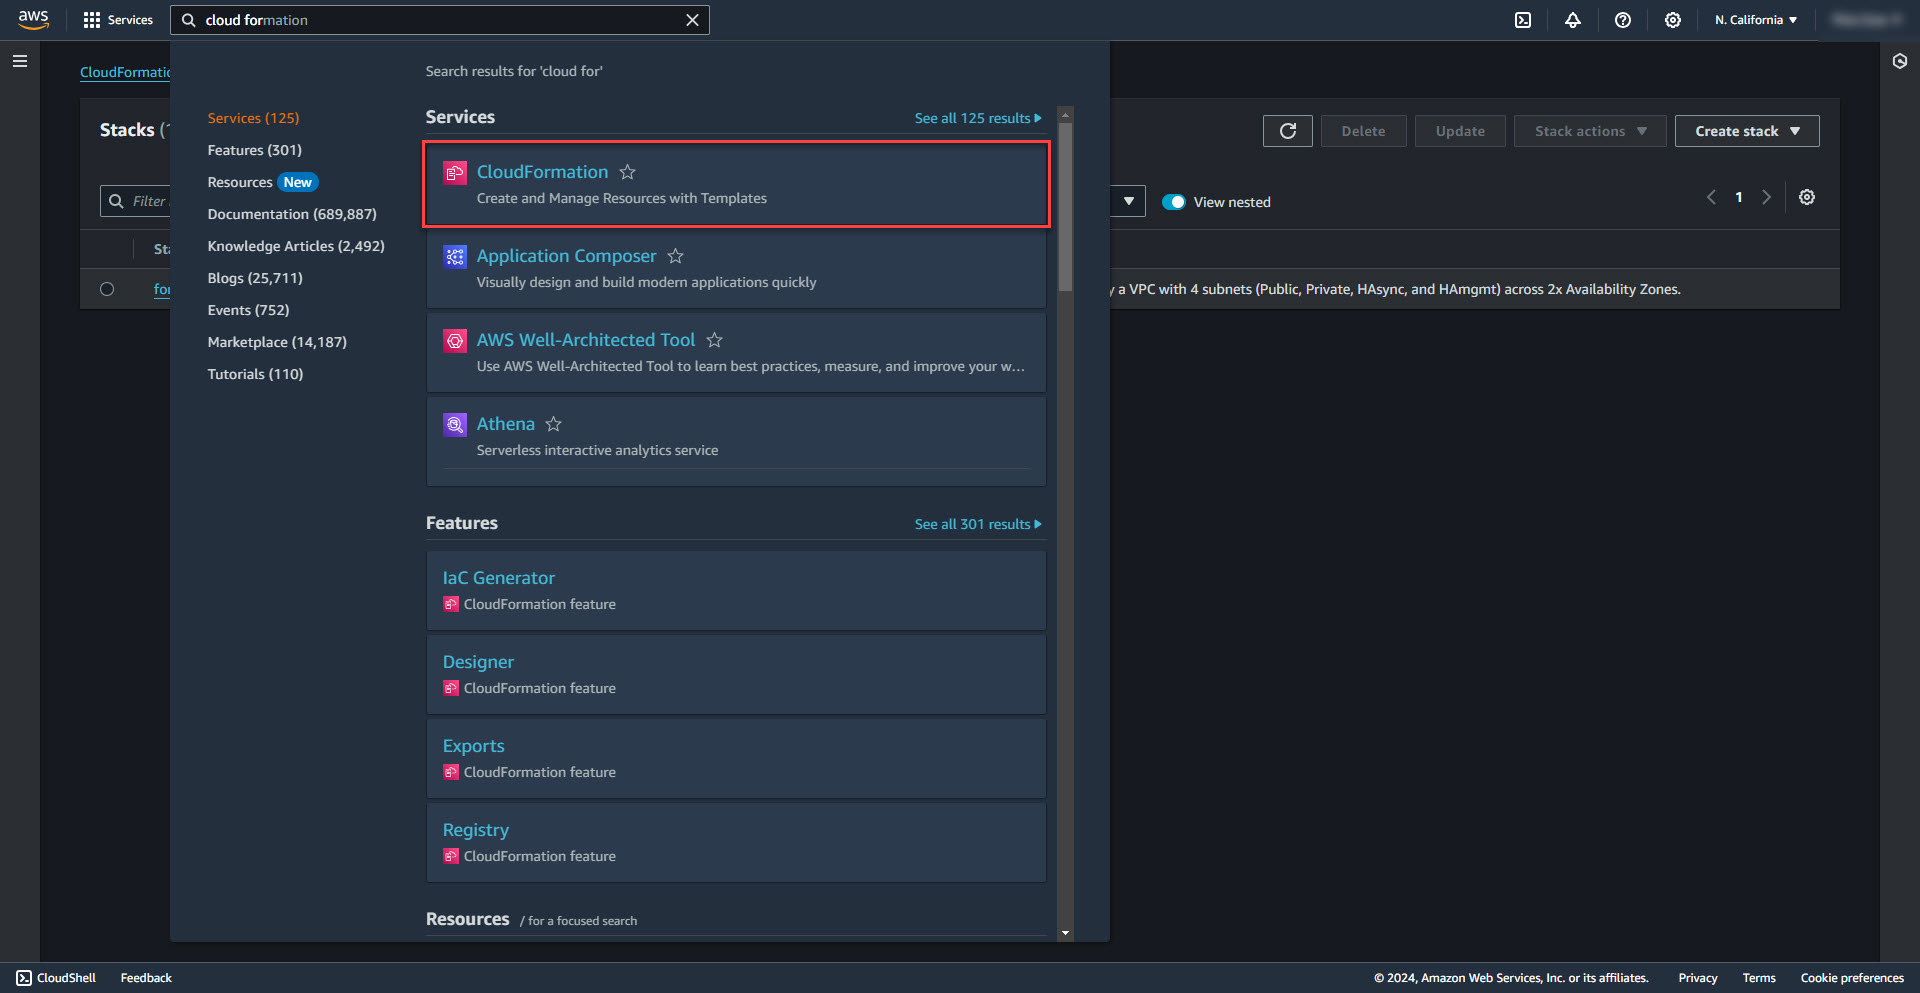
Deploy Firewall with CloudFormation
1. Search for CloudFormation in AWS
2. Create Stack with new resources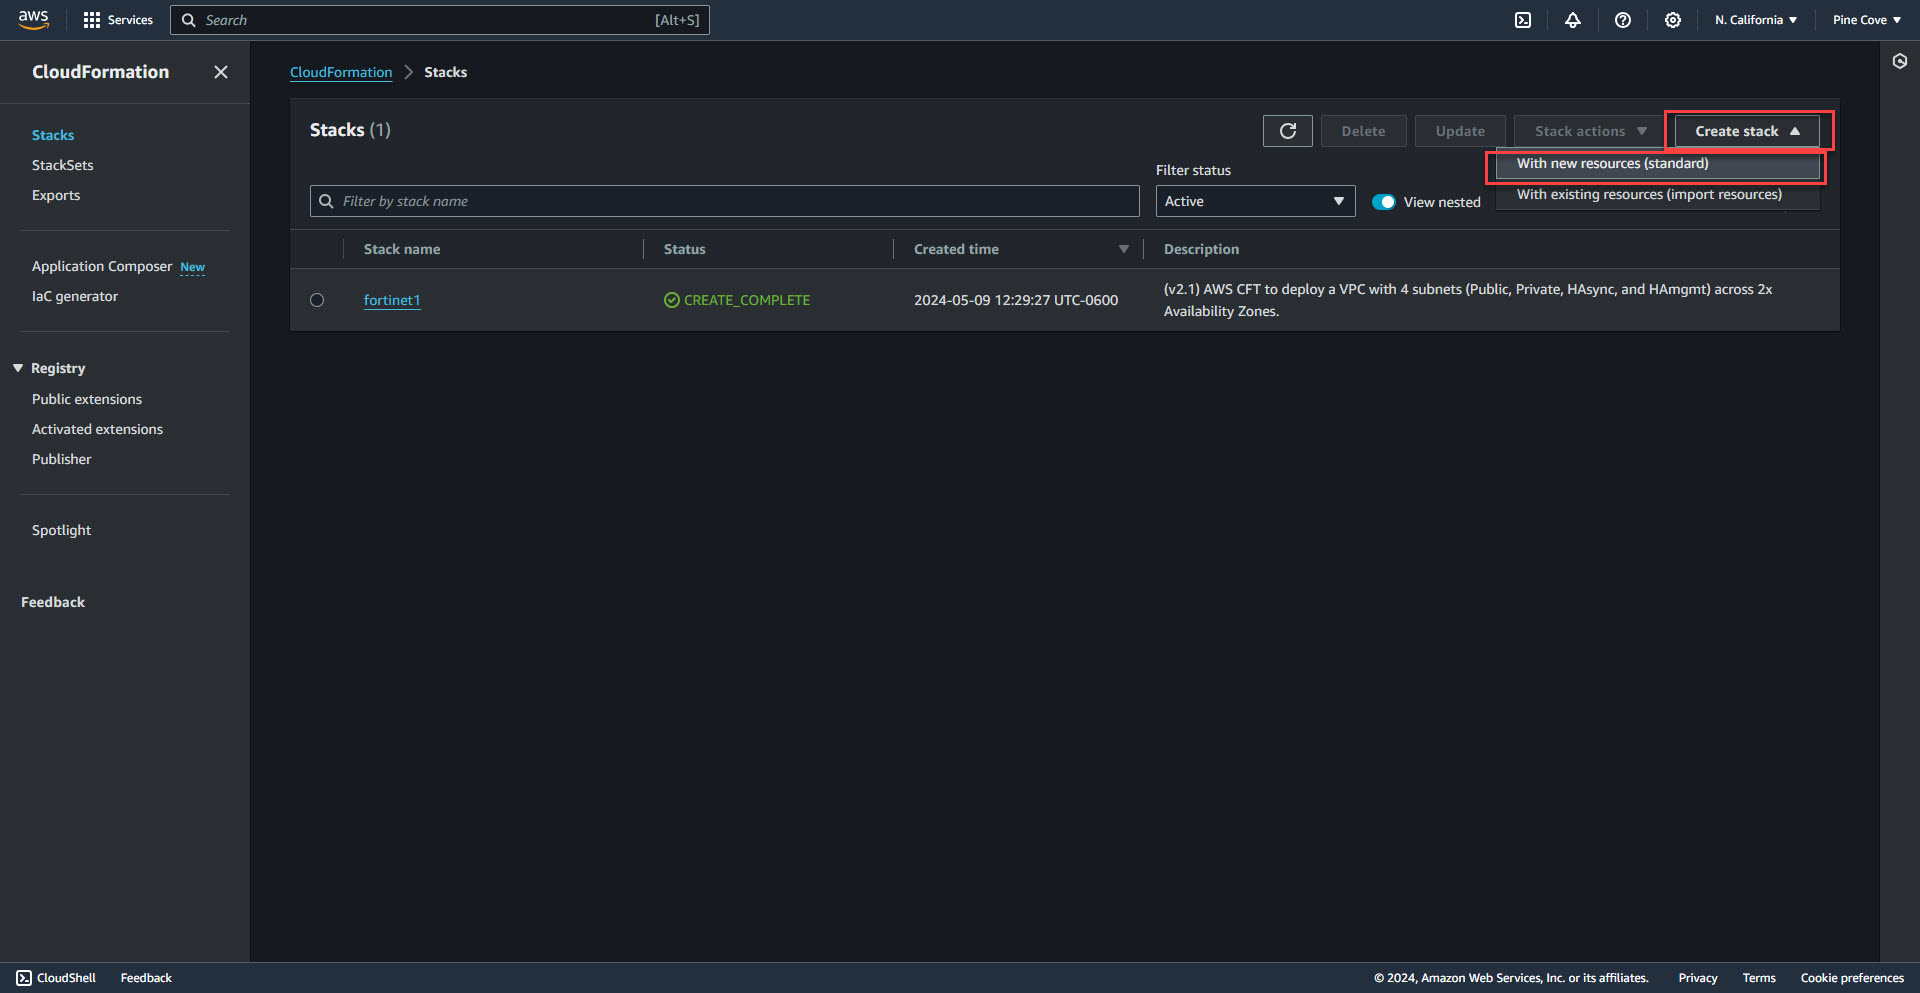
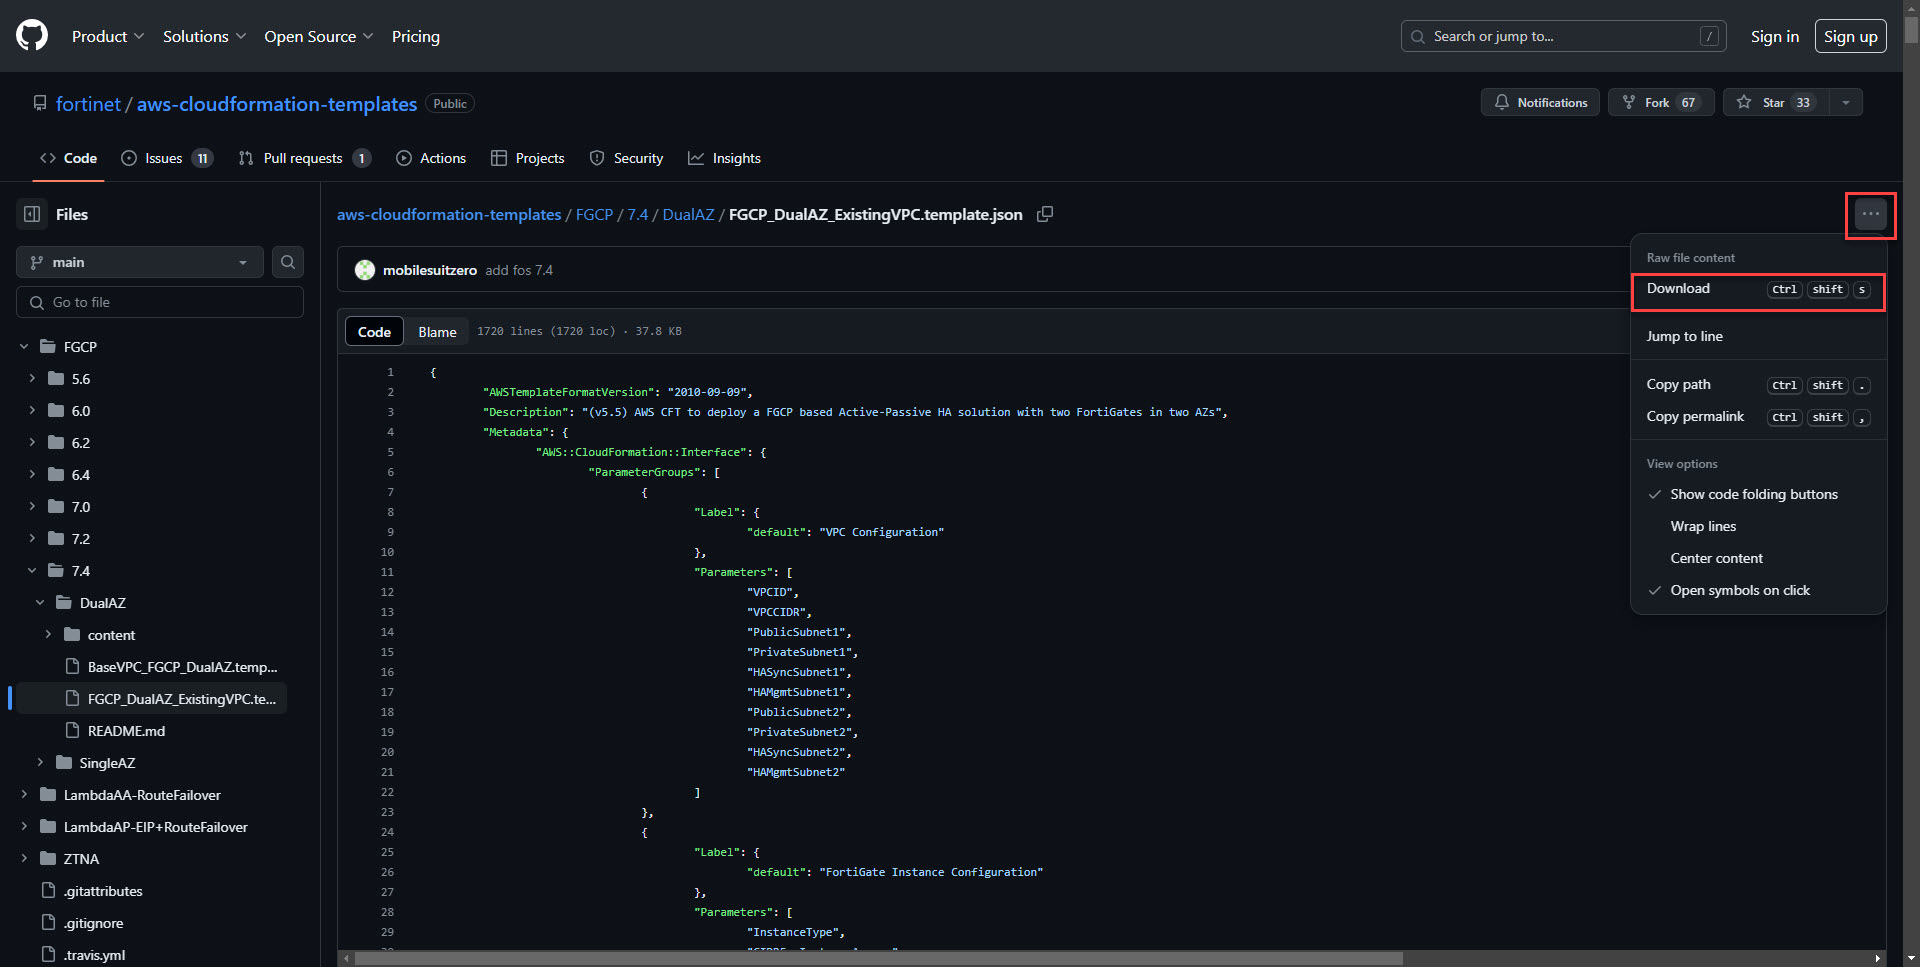
3. Select Choose an existing template and upload a template file. Select the second json file downloaded from GitHub. FGCP_DualAZ_ExistingVPC.template.json.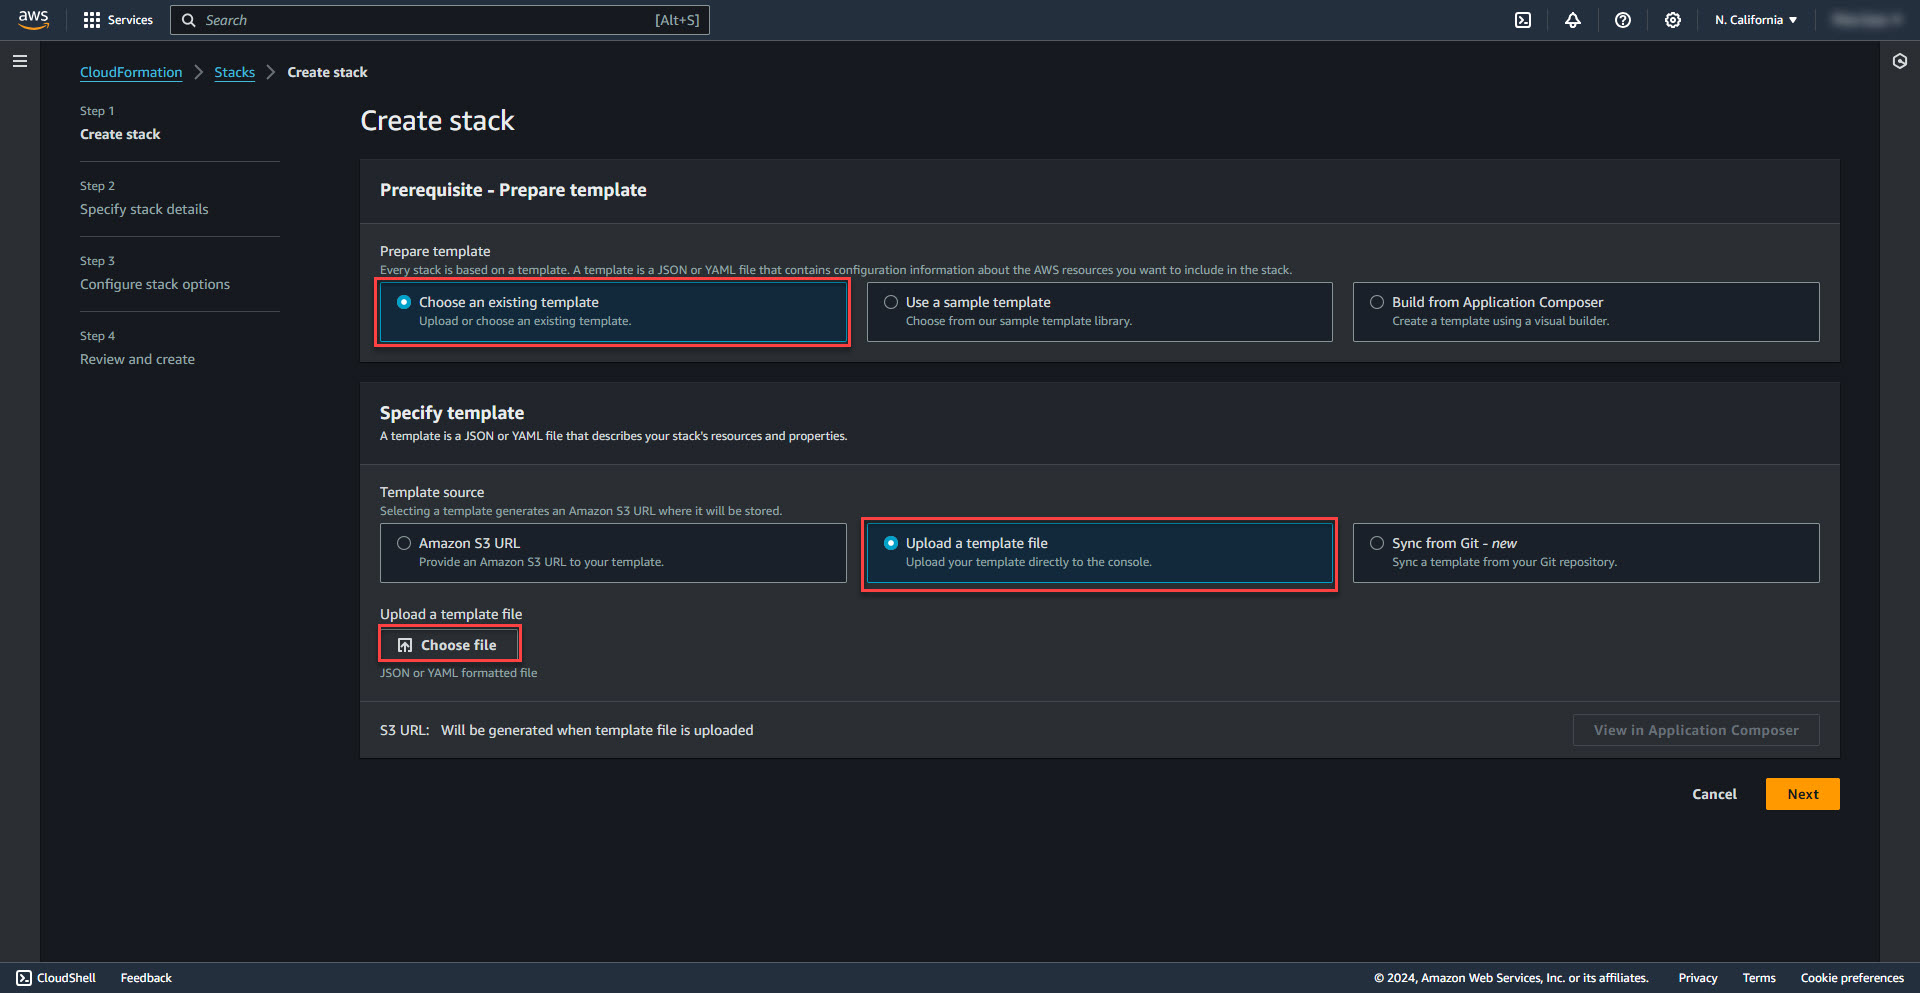
4. Enter name for the deployment stack.
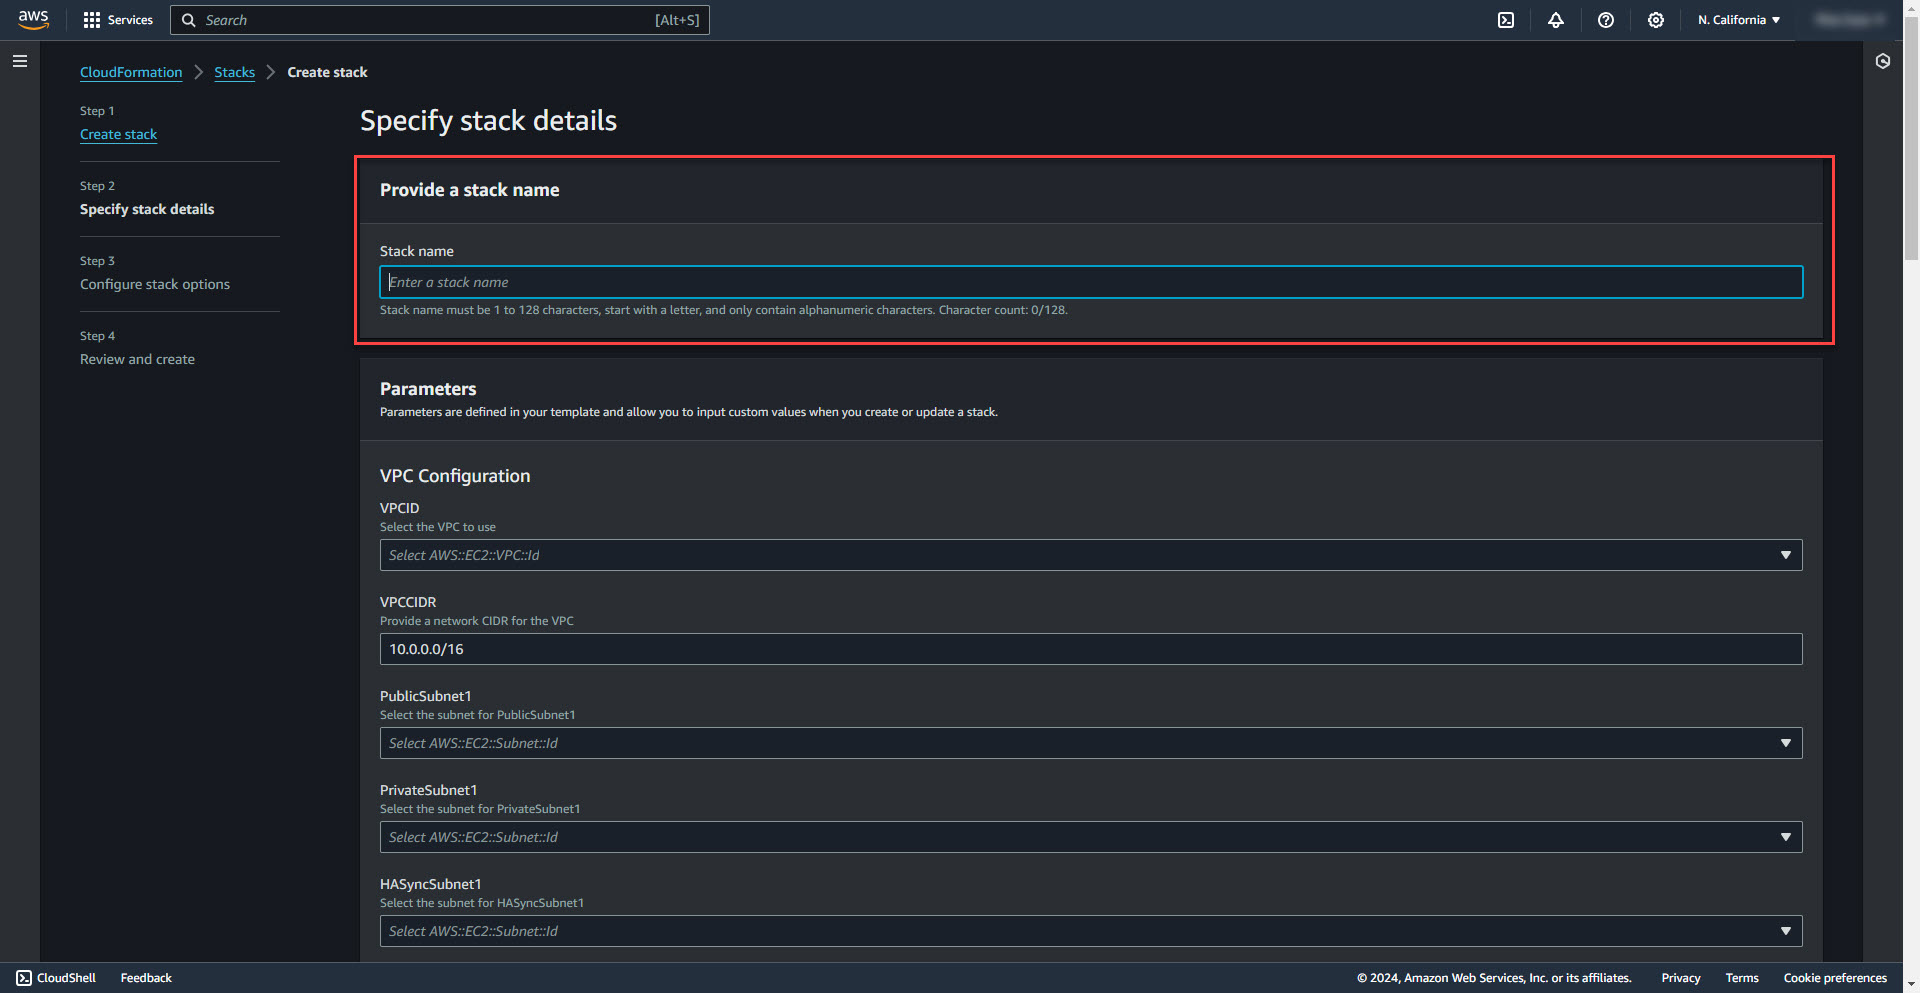
5. Select VPC from the drop down menu.

6. Enter VPCCIDR Range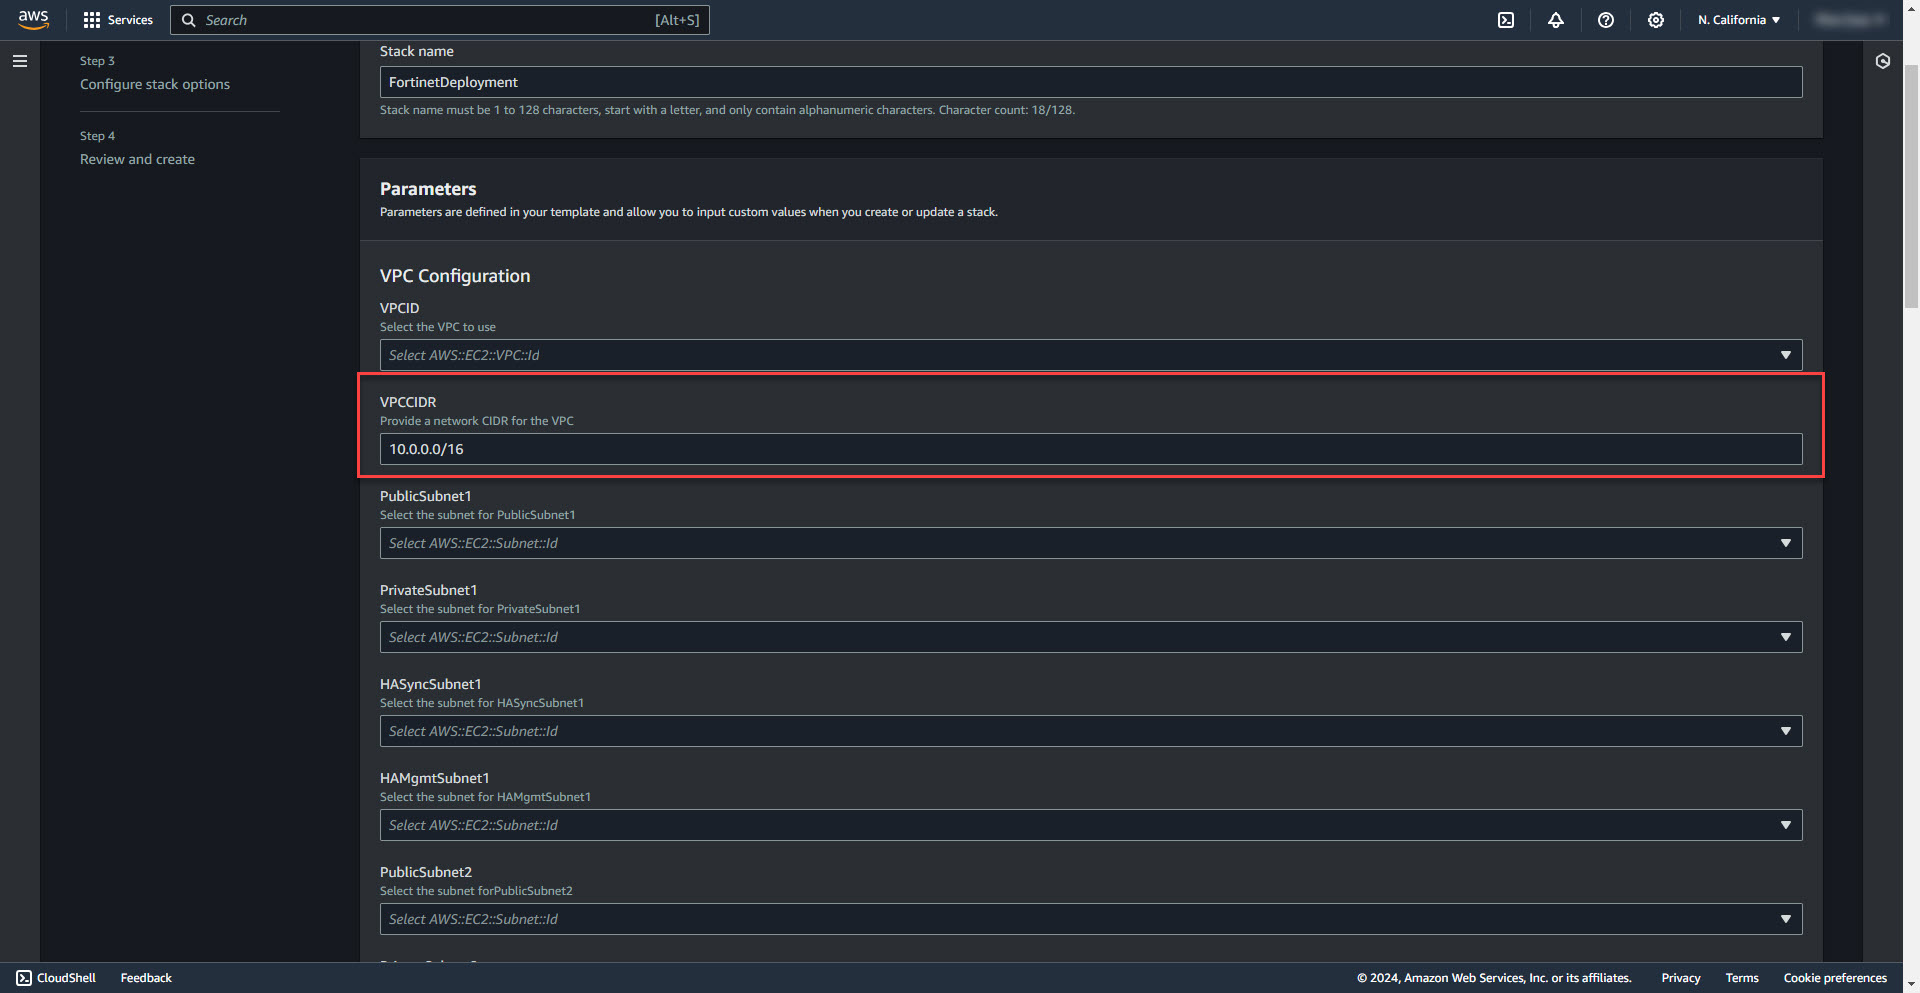
7. Select Public Subnet for firewall 1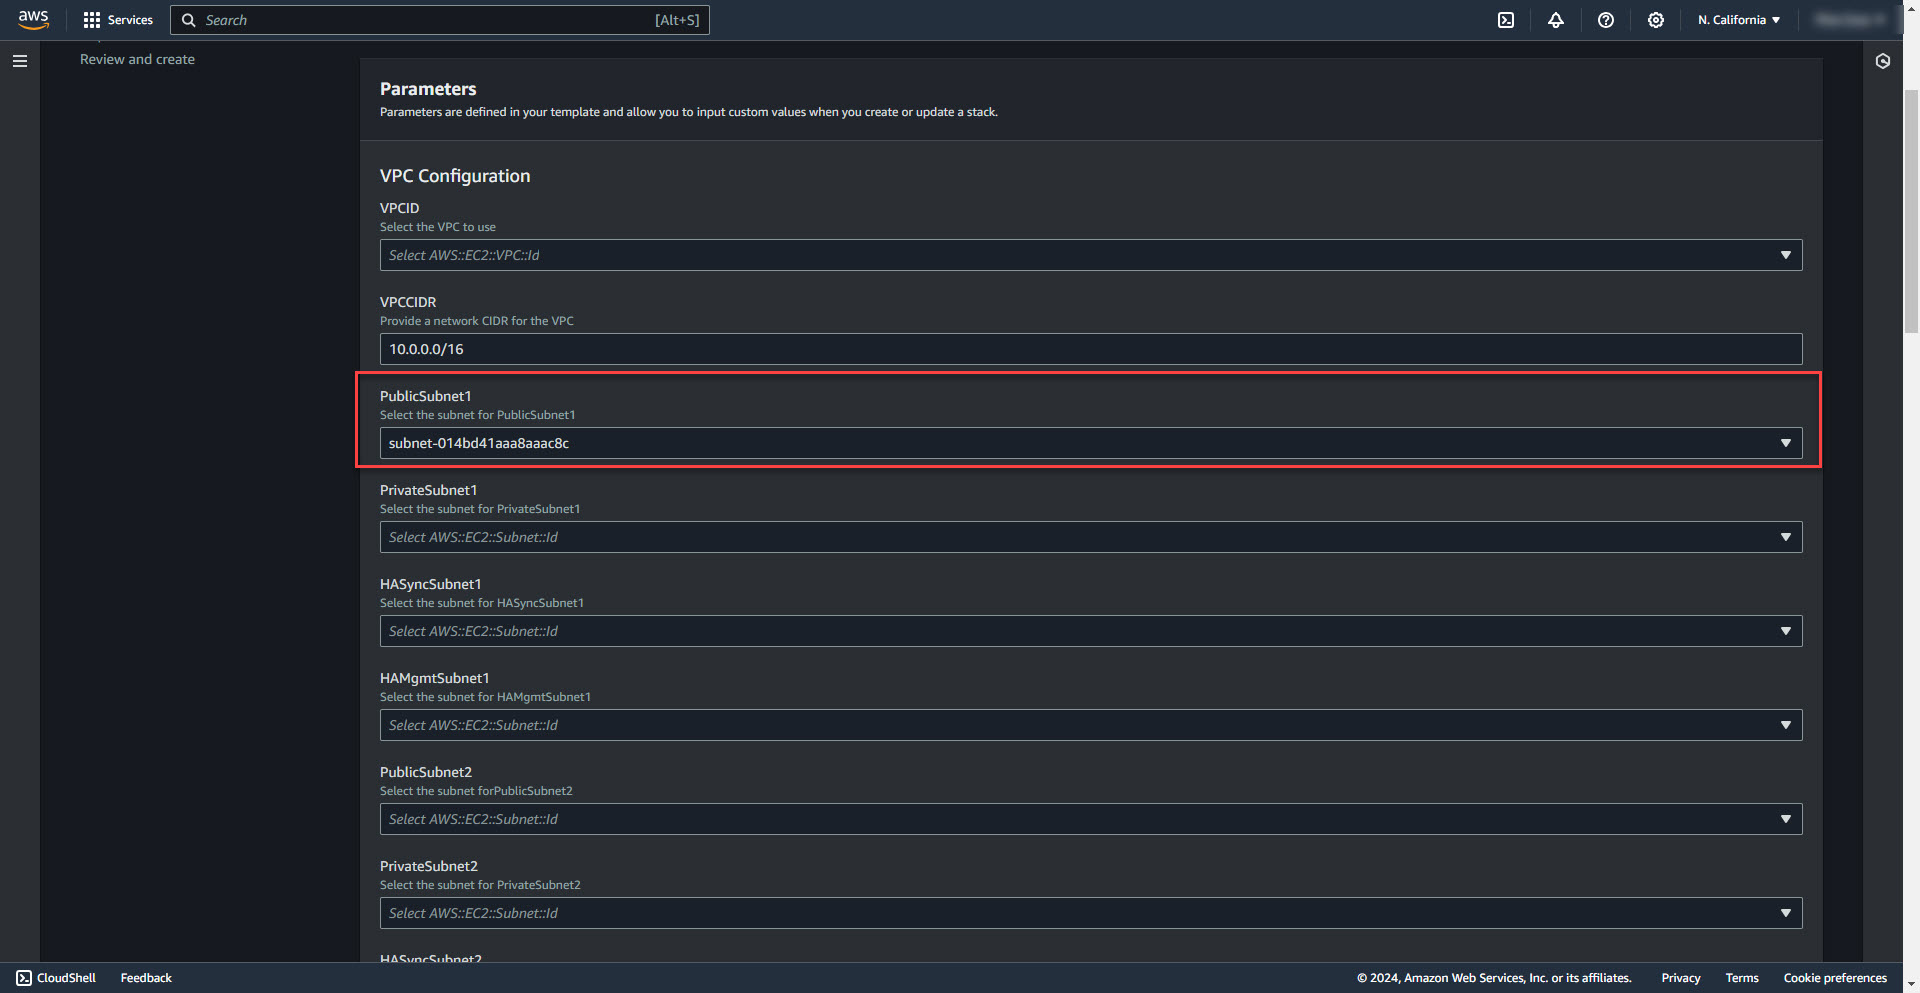
8. Select Private Subnet for firewall 1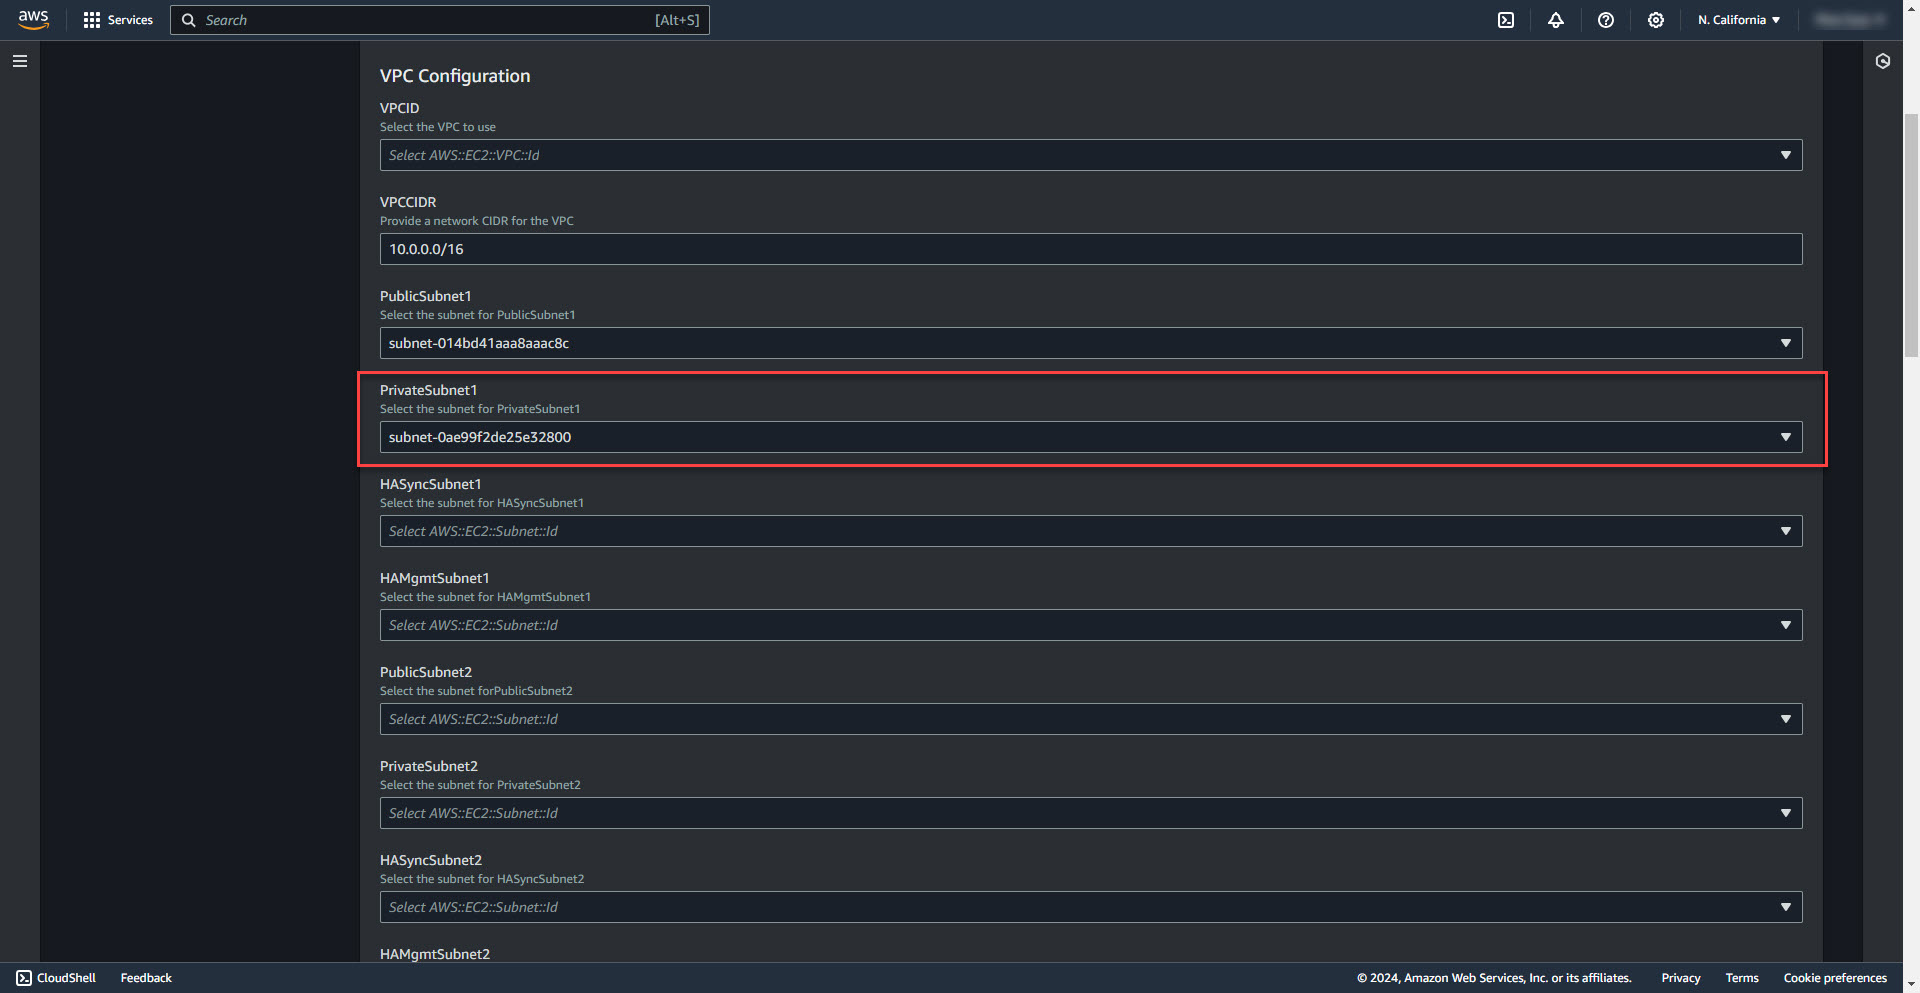
9. Select HASyncSubnet1

10. Select HA Managment Subnet 1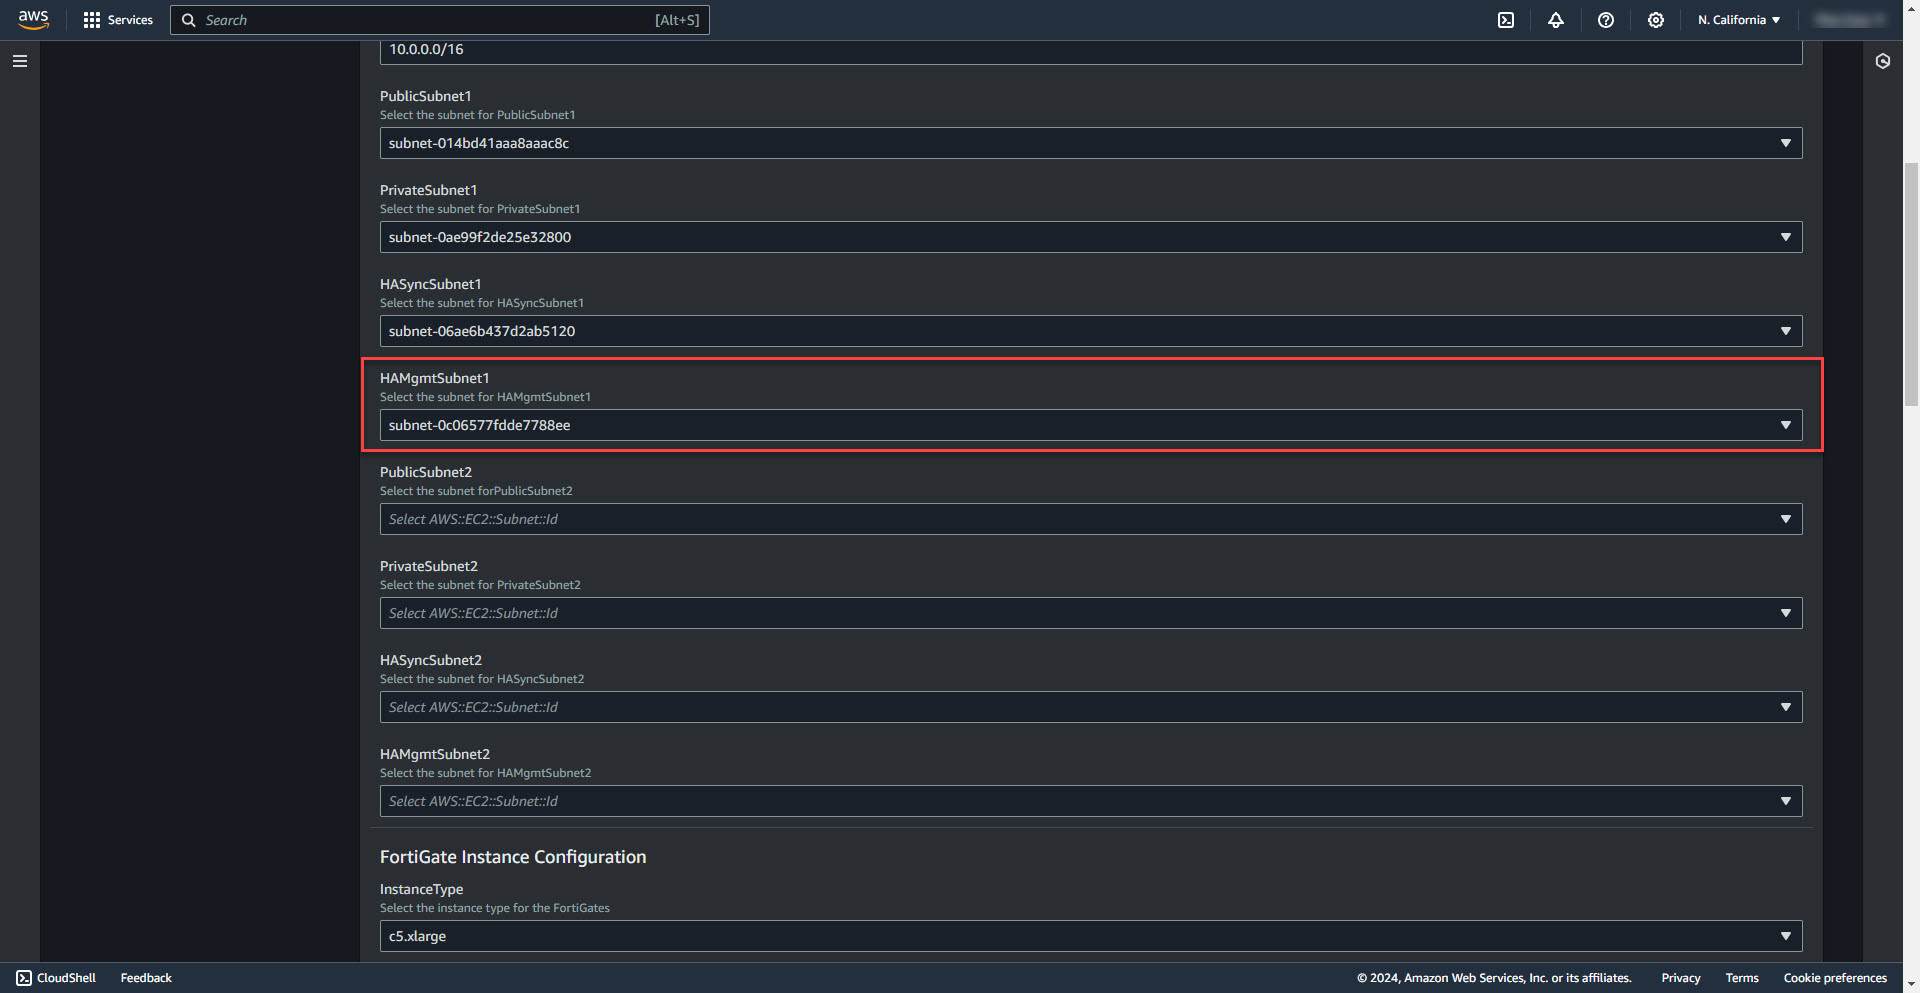
11. Select Public Subnet for firewall 2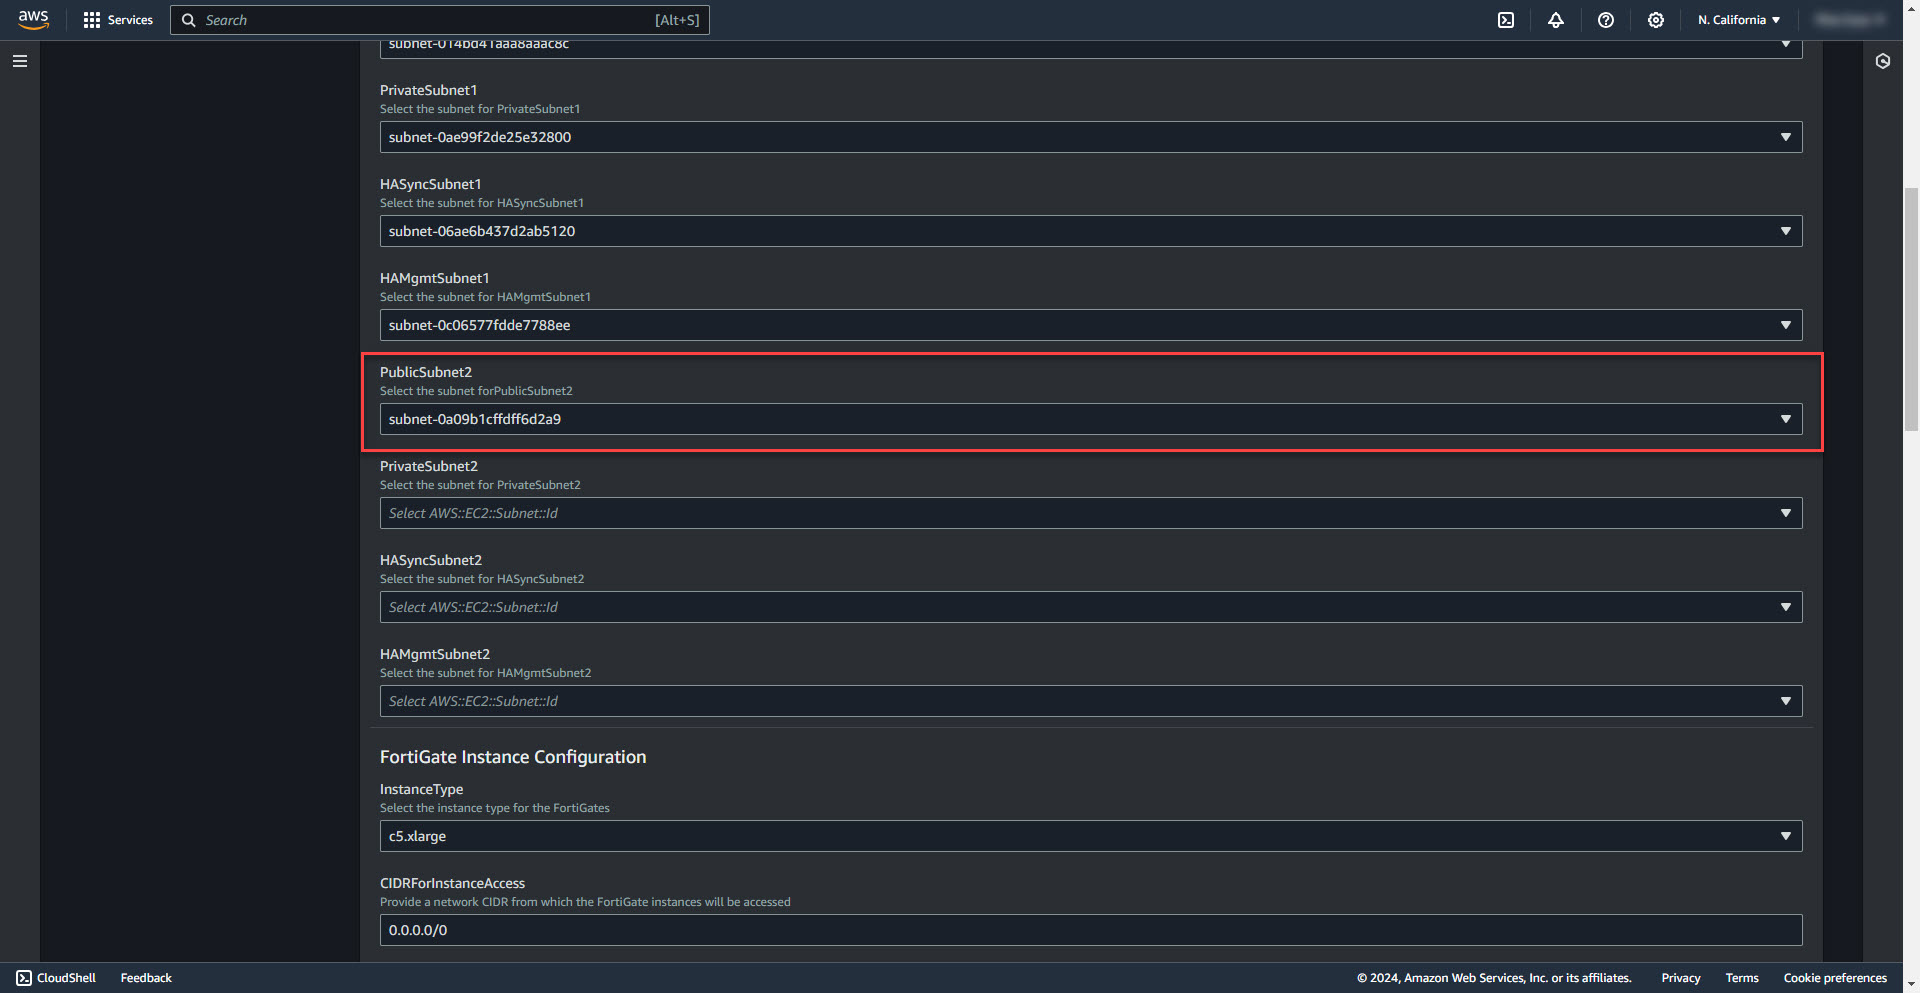
12. Select Private subnet for firewall 2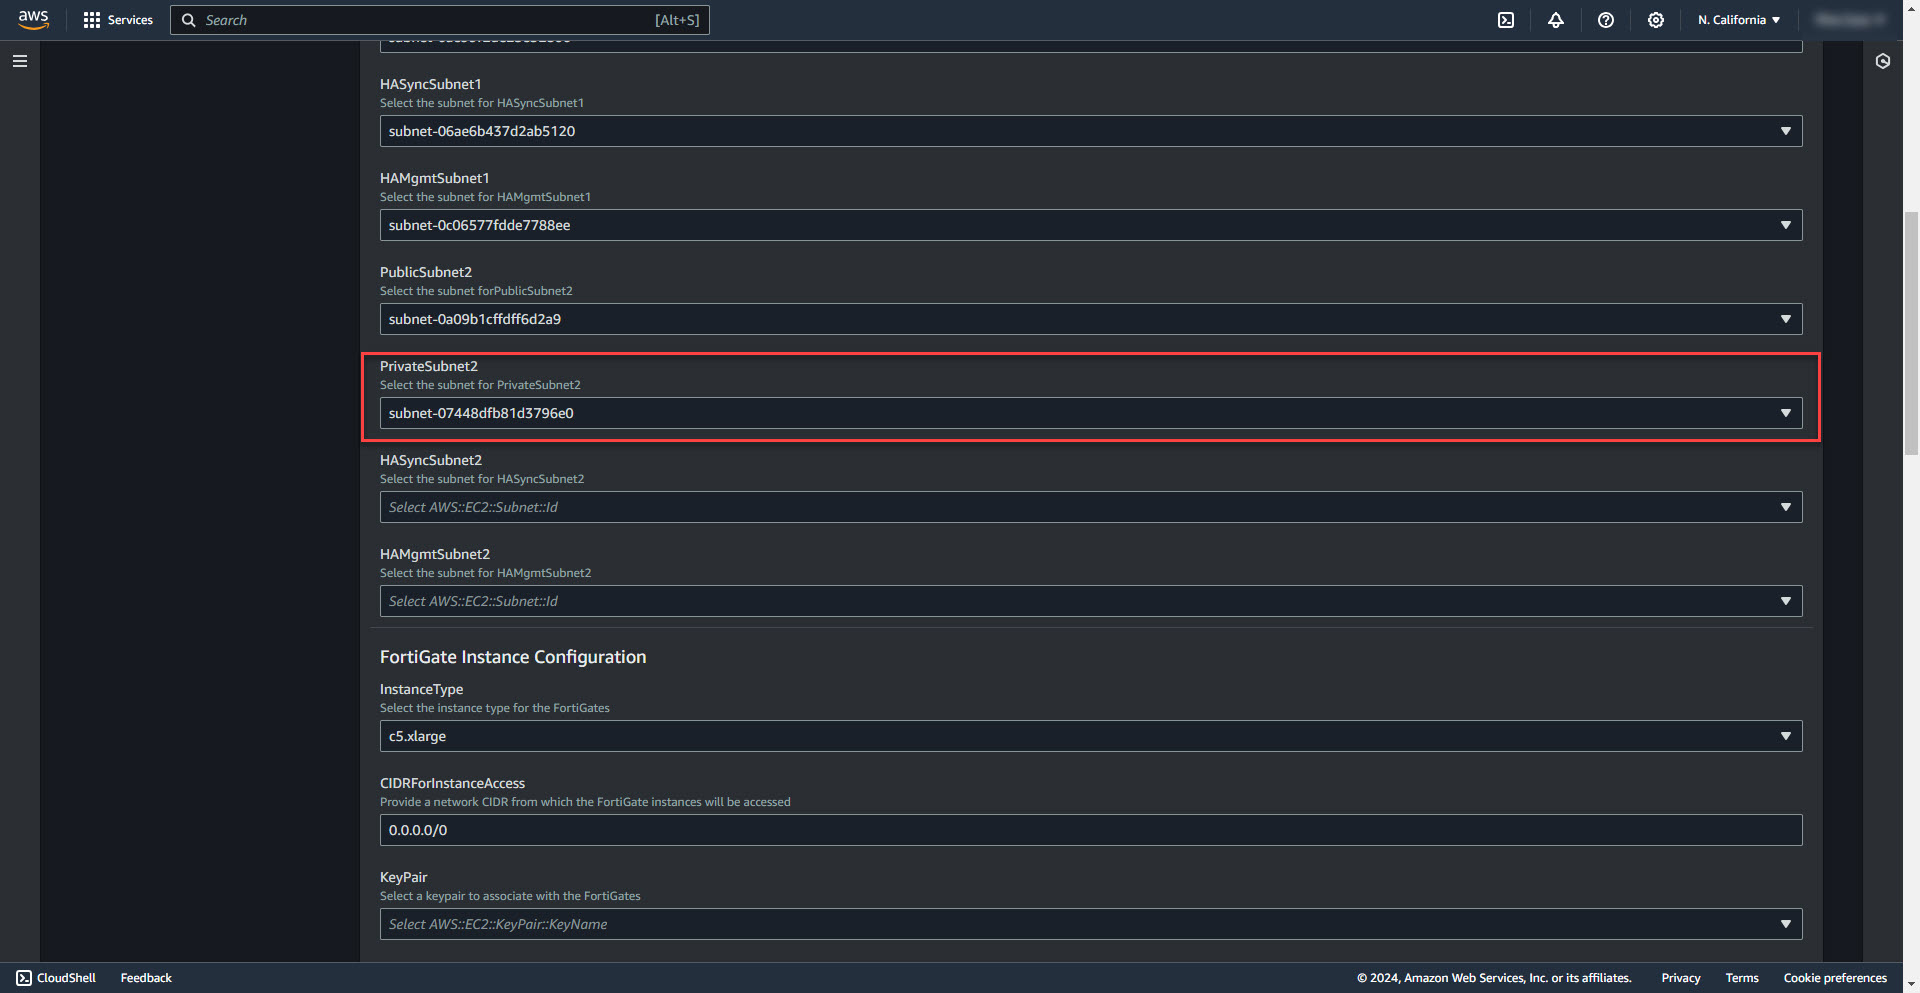
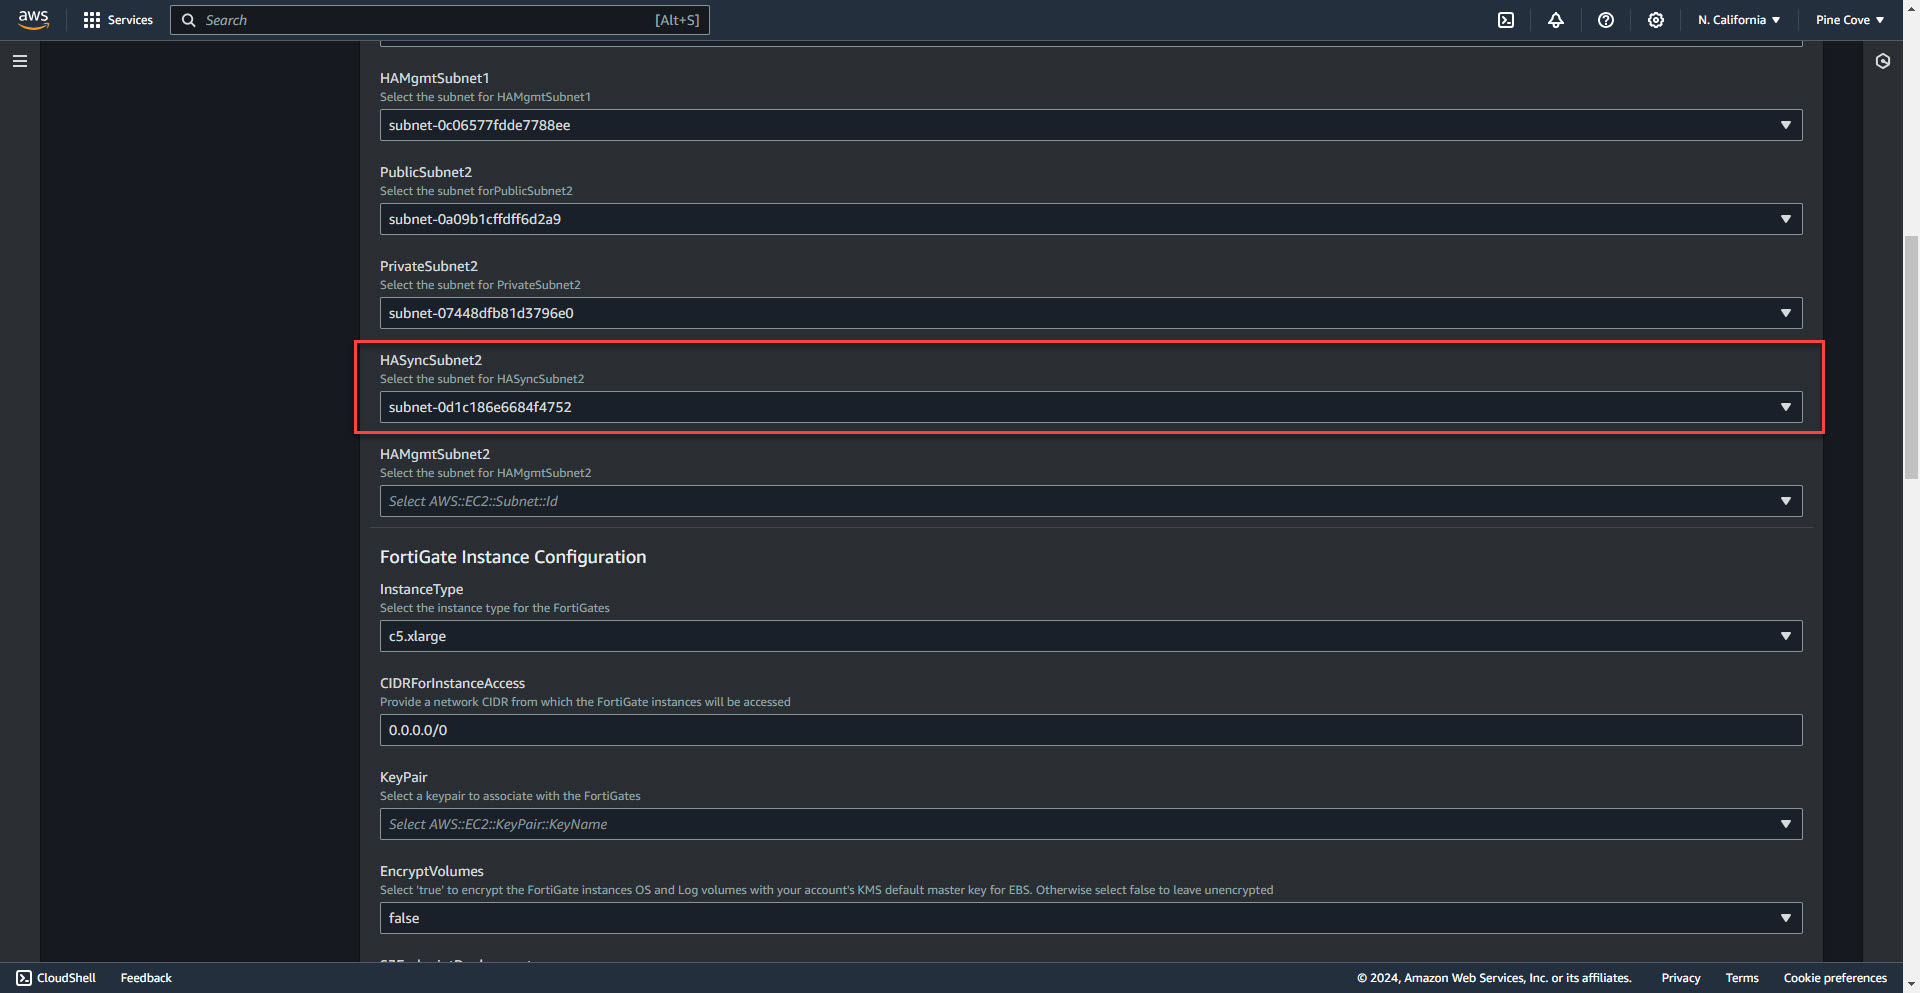
13. Select HA Sync Subnet 2
14. Select HA Managment Subnet 2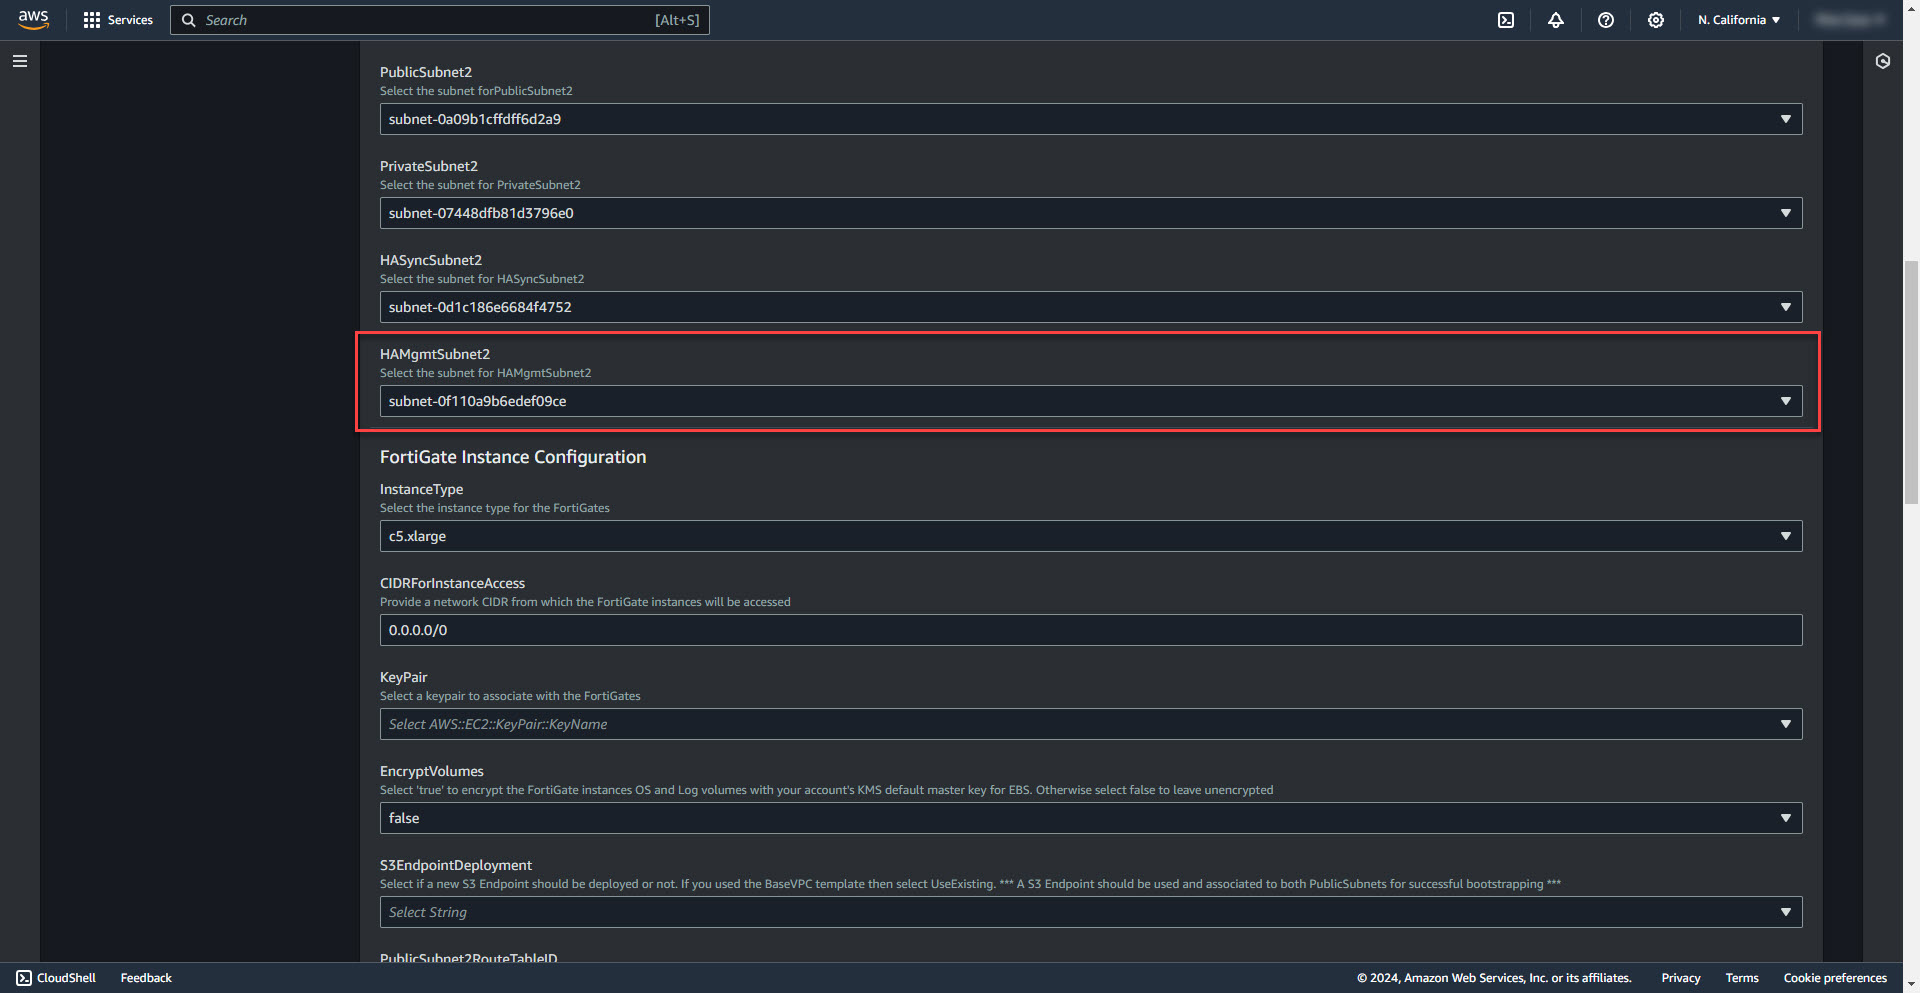
15. Select firewall instance size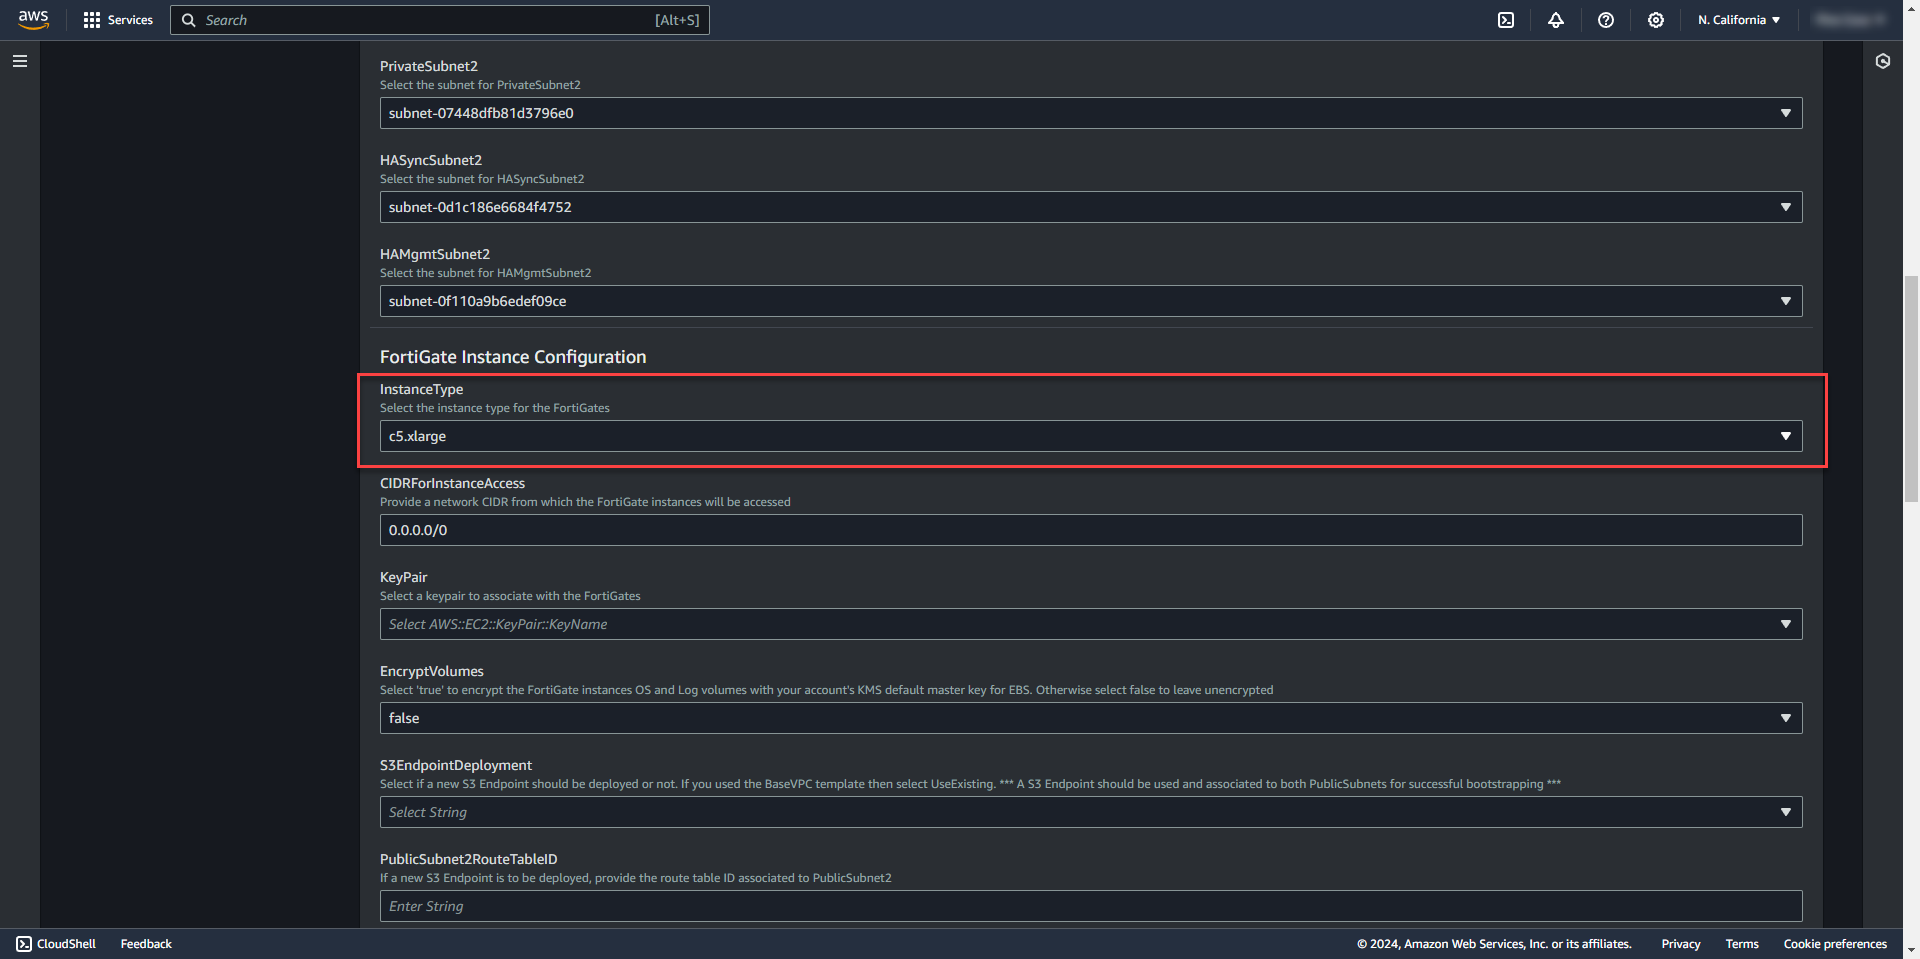
16. Select key pair for ssh access created from before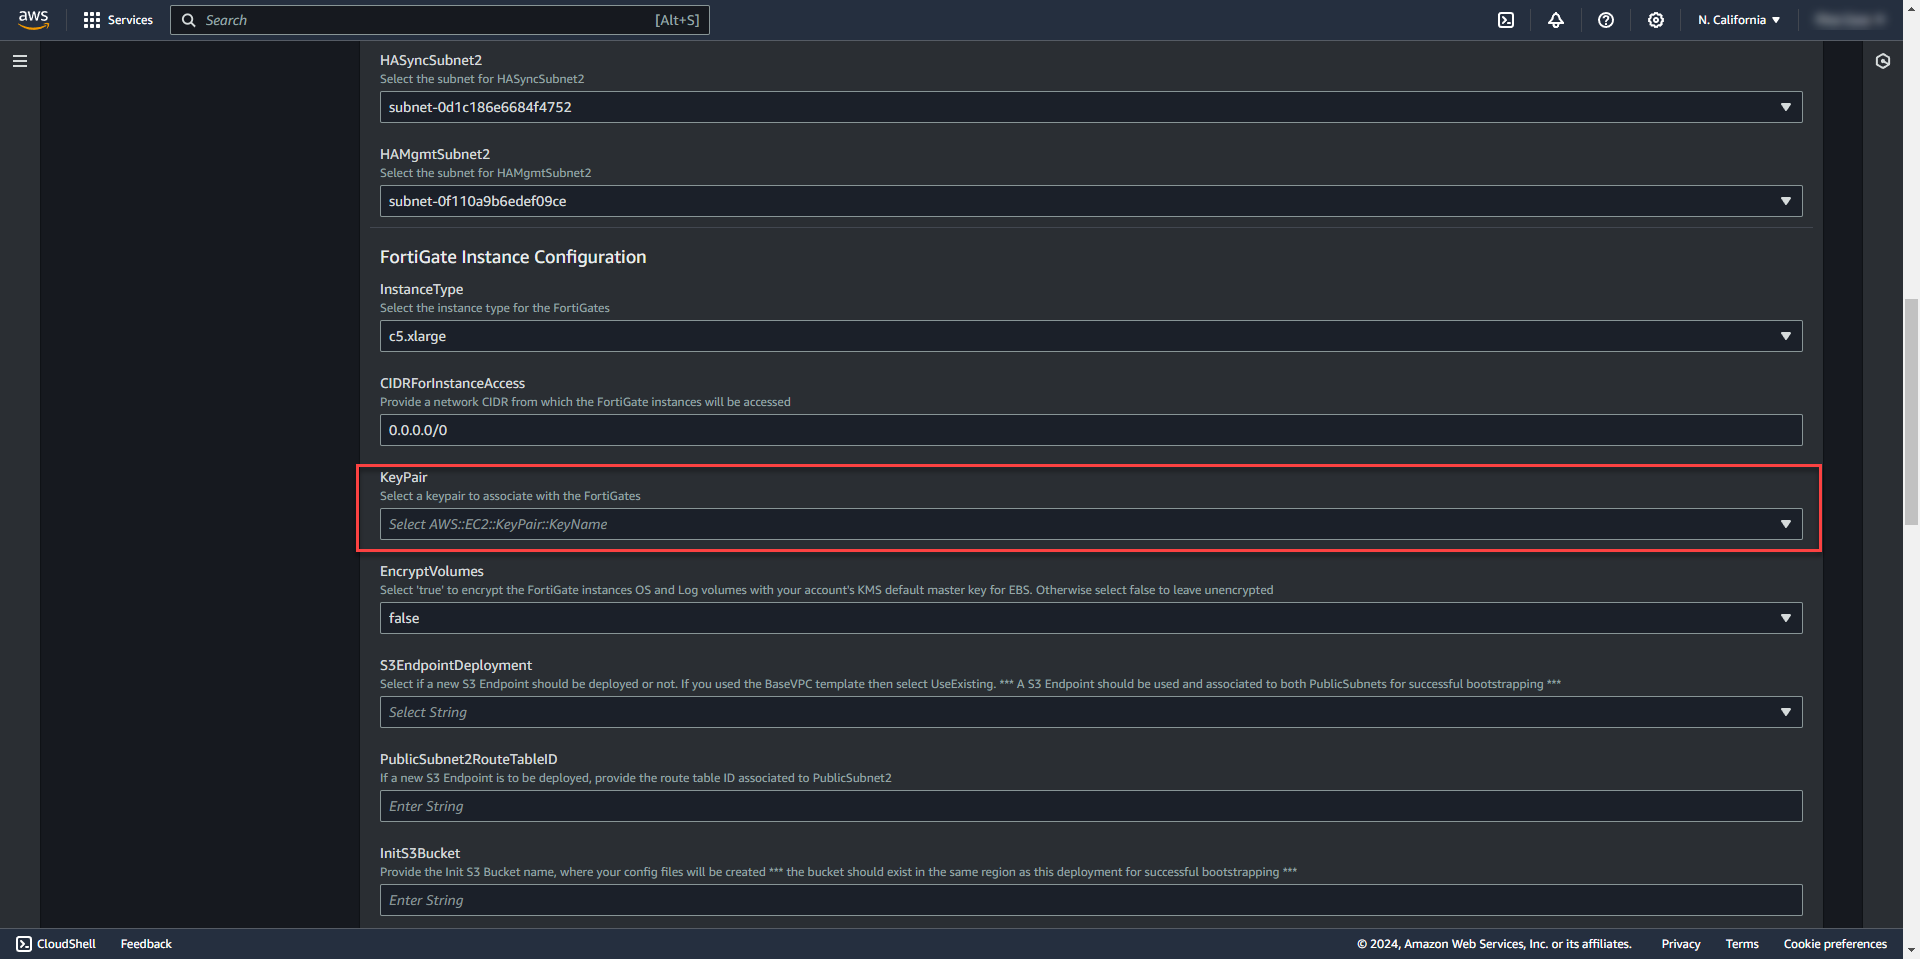
17. Select Use Existing S3 Endpoint since endpoint was created in previous template.
18. Leave PublicSubnet2RouteTableID blank 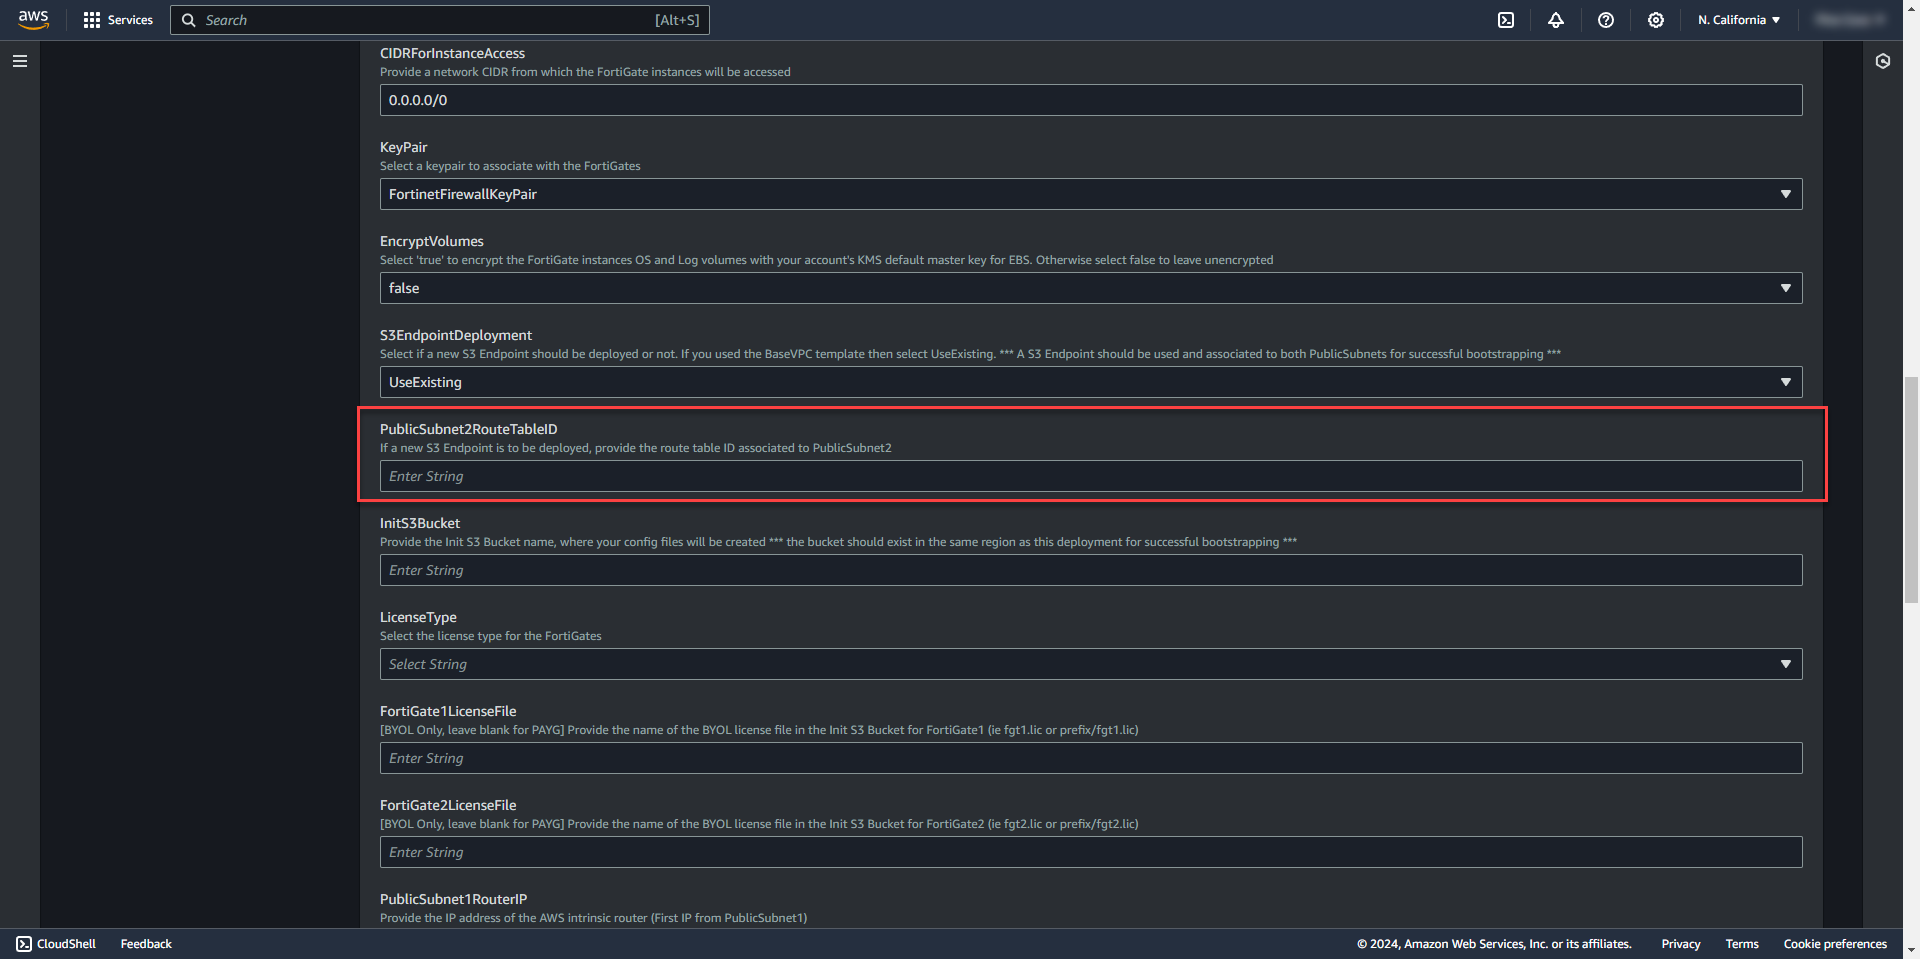
19. Get the S3Bucket name created earlier for the deployment data and add it to the template.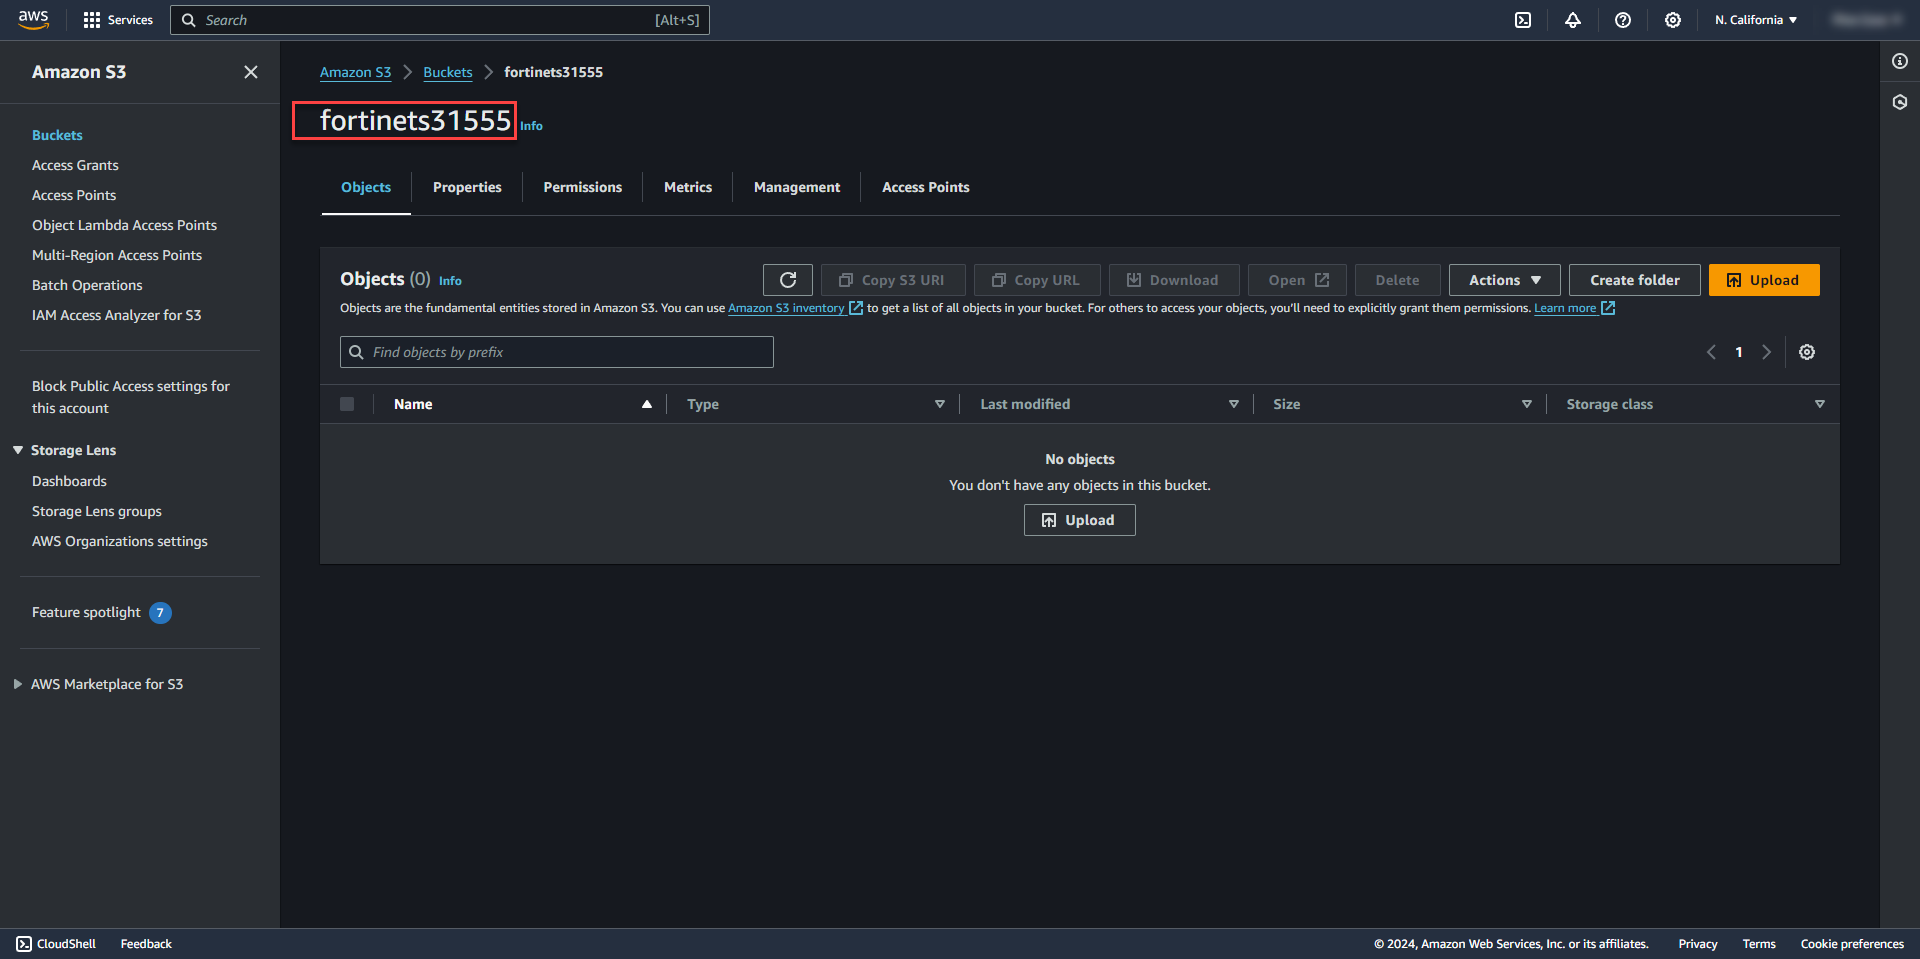
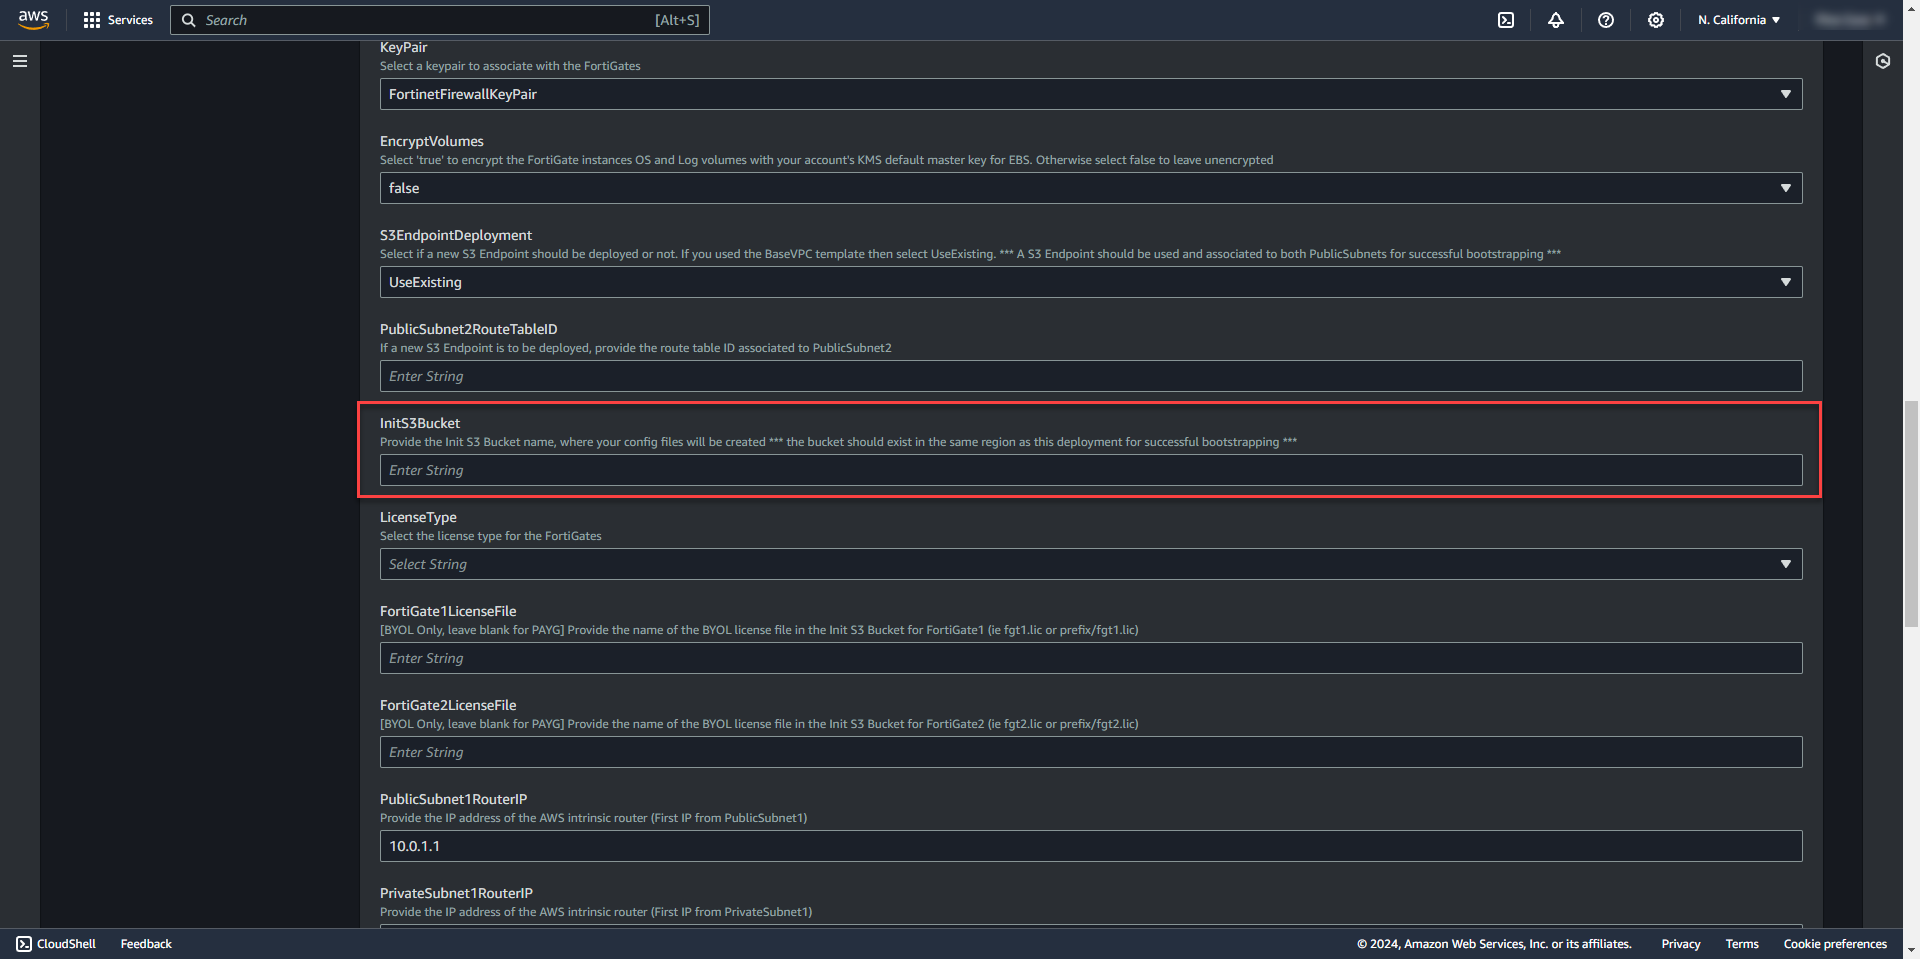
20. Select License Type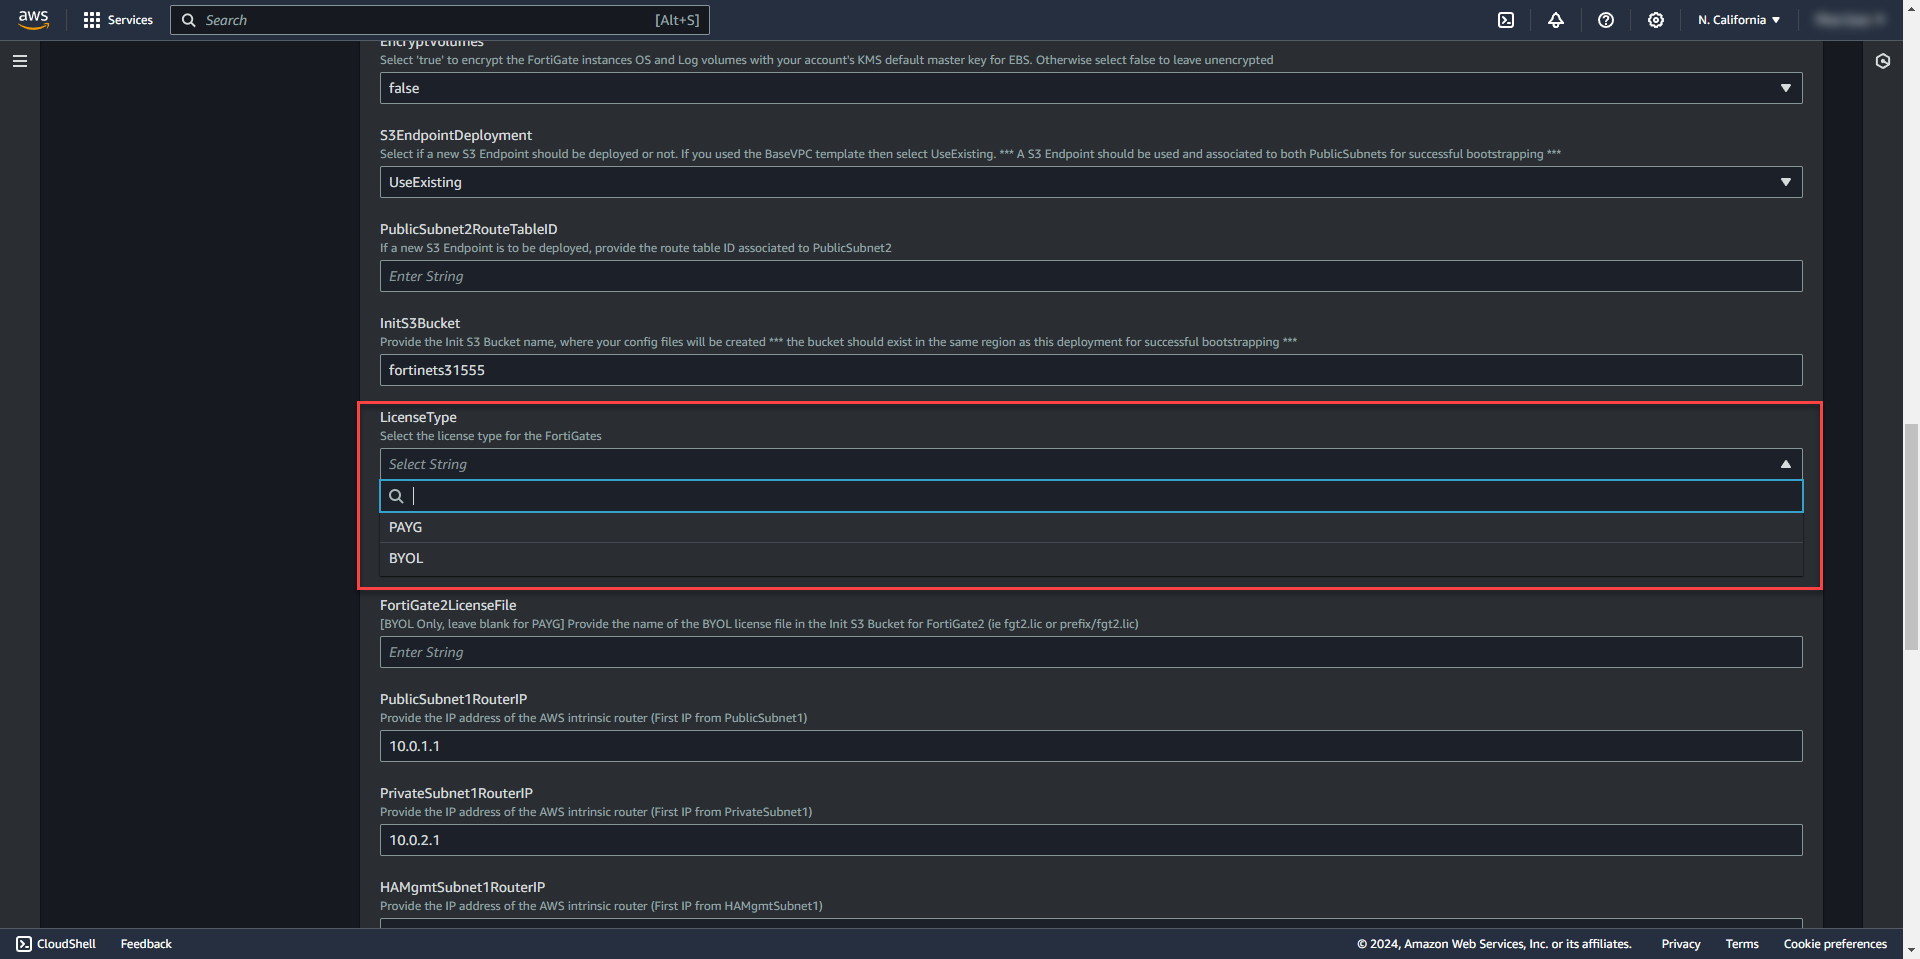
21. Change IP router info based on subnets or leave default for default subnets.
22. Change Interface IP configuration based on your subnet settings or leave default. 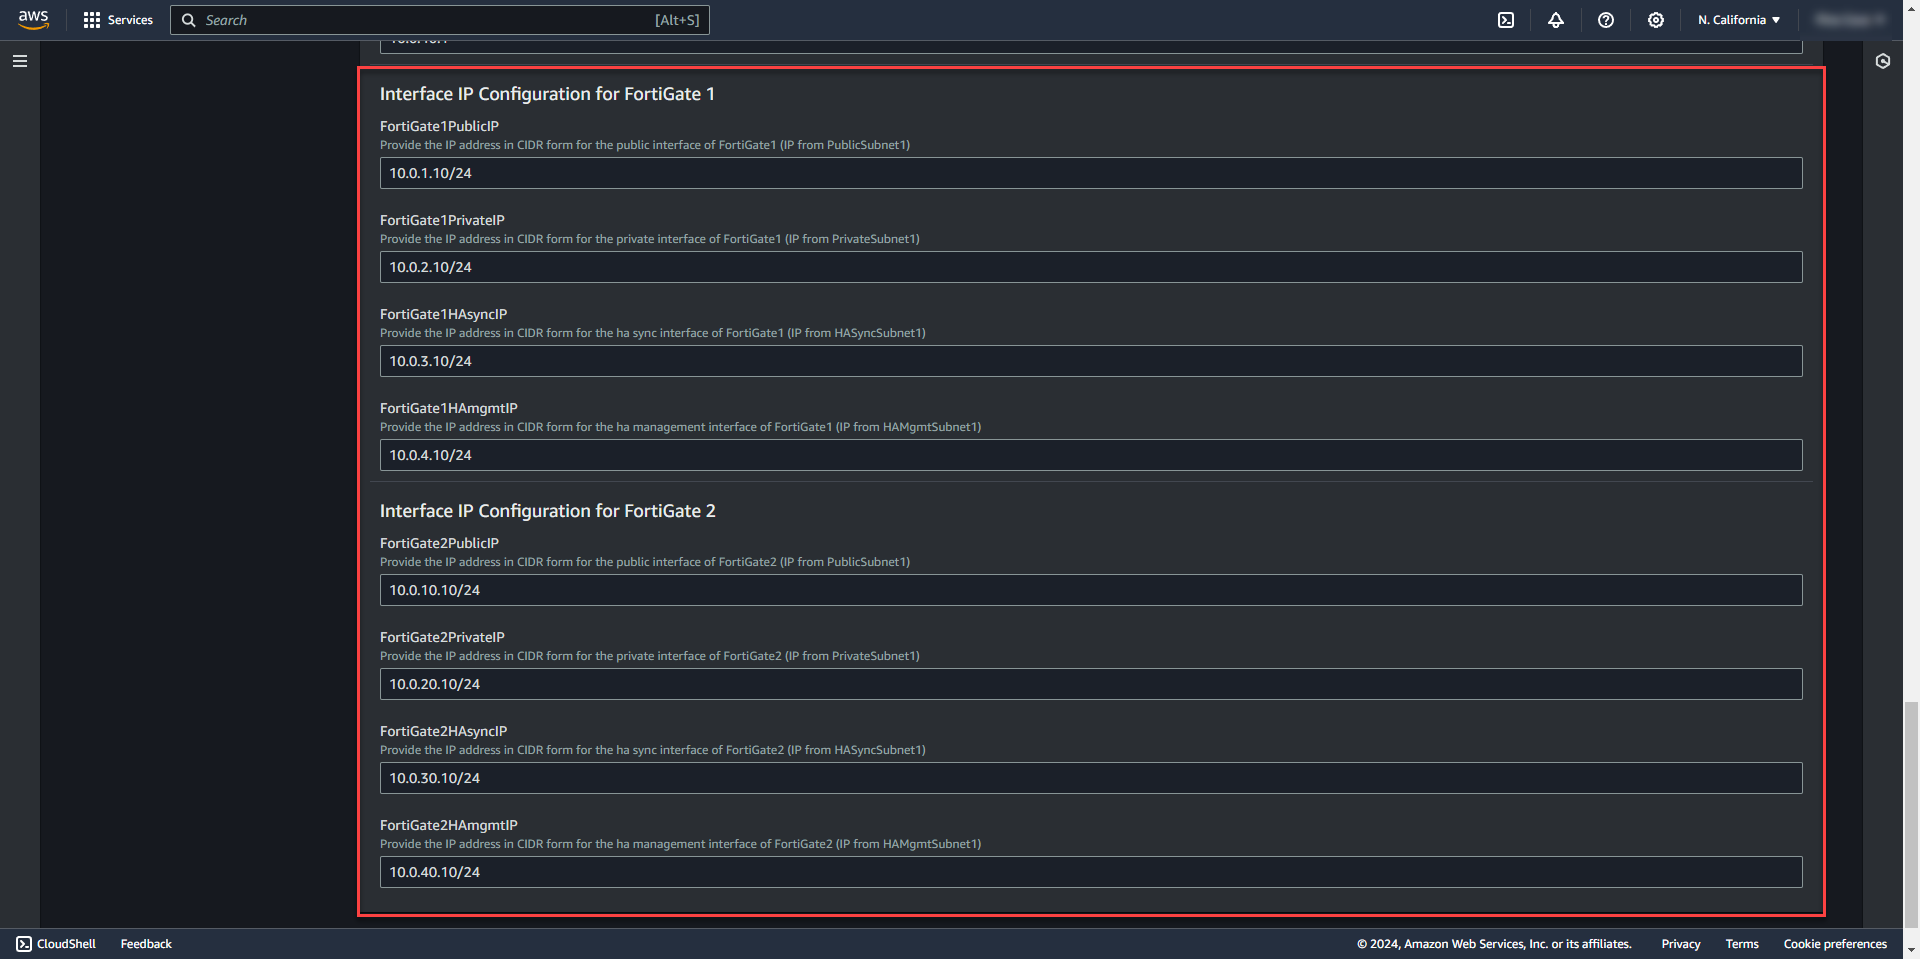
23. Select next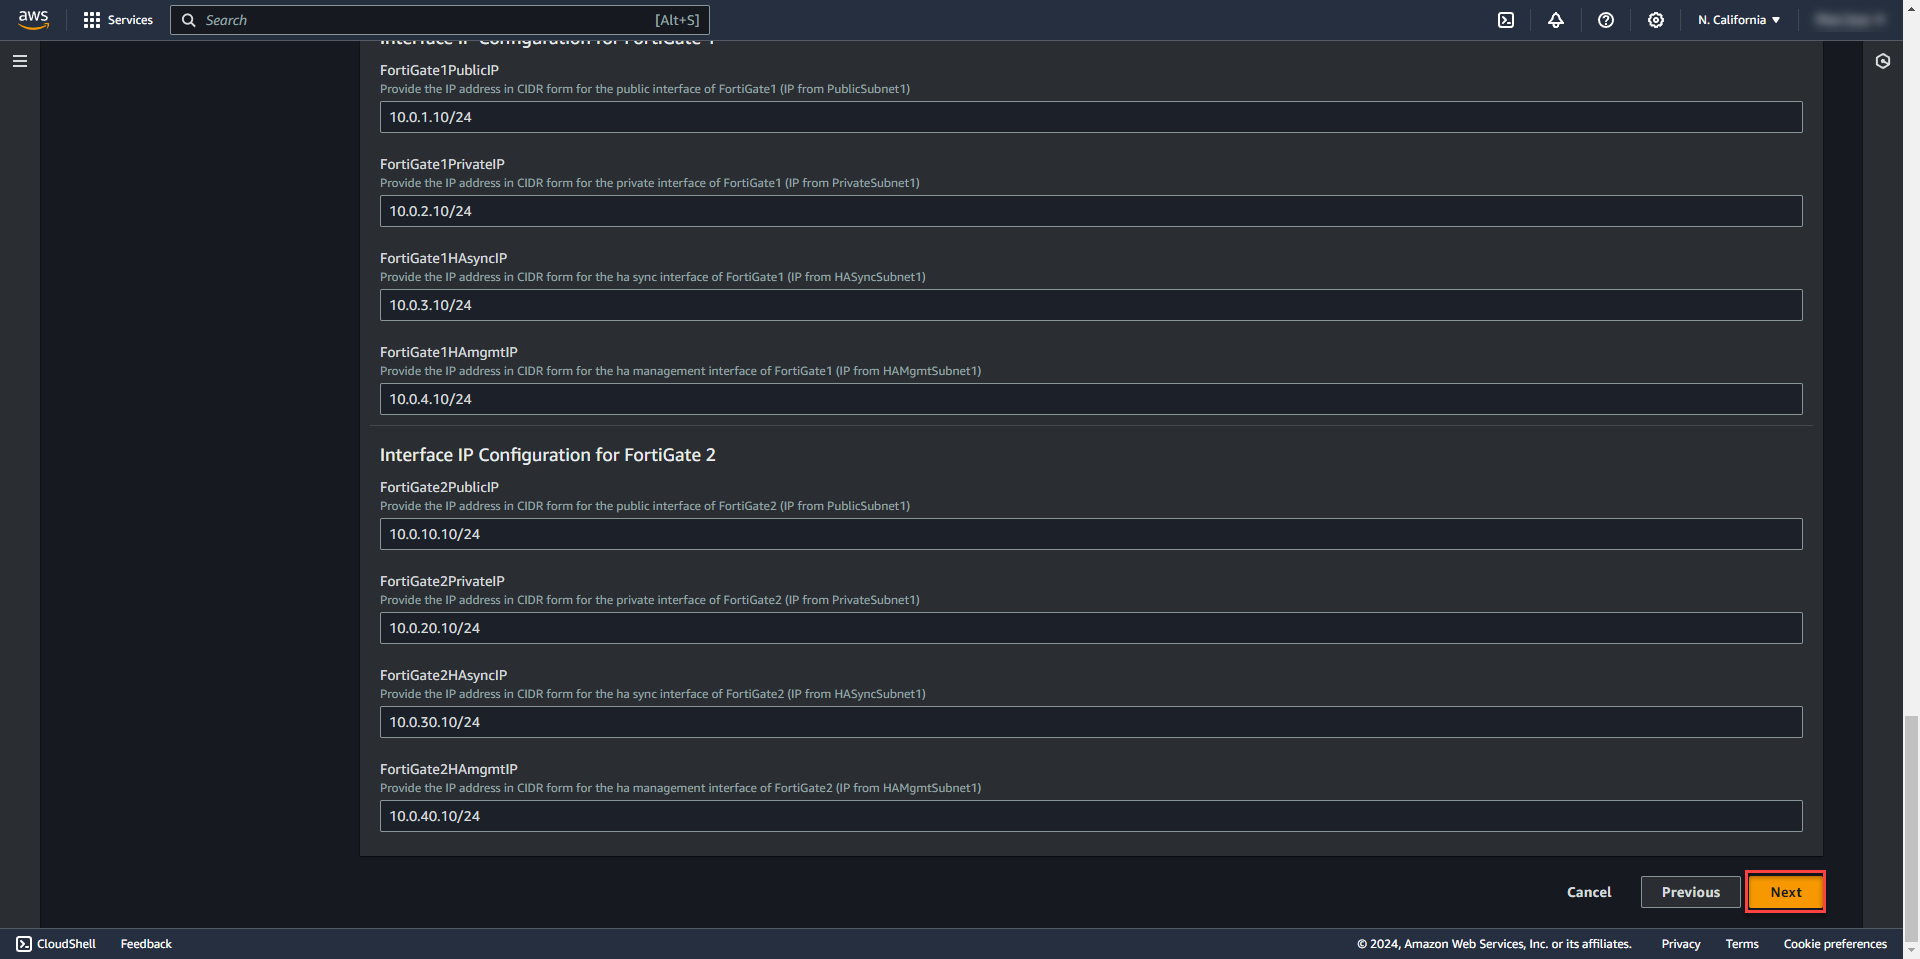
24. On the Configure Stack Options screen, select next.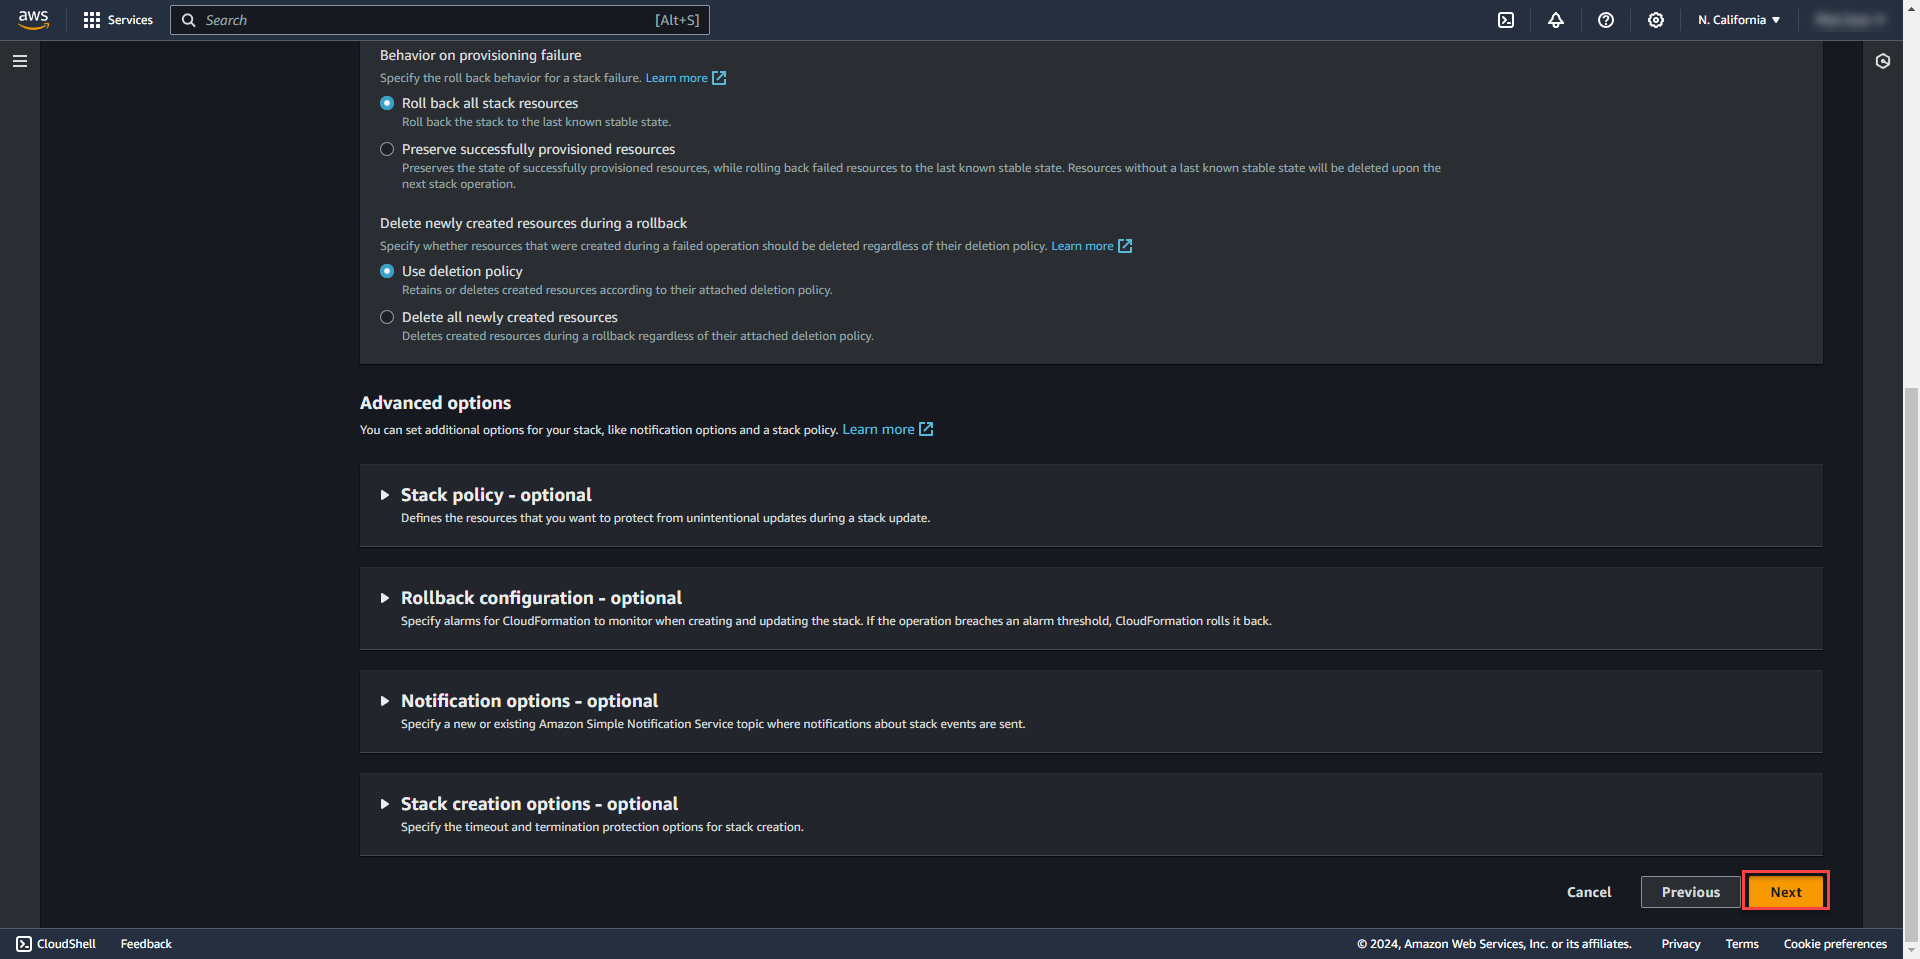
25. Select I acknowledge and Submit
26. Stack will start deploying resources and will show create complete for all resources once finished. The firewall instances will then show up in the EC2 Console.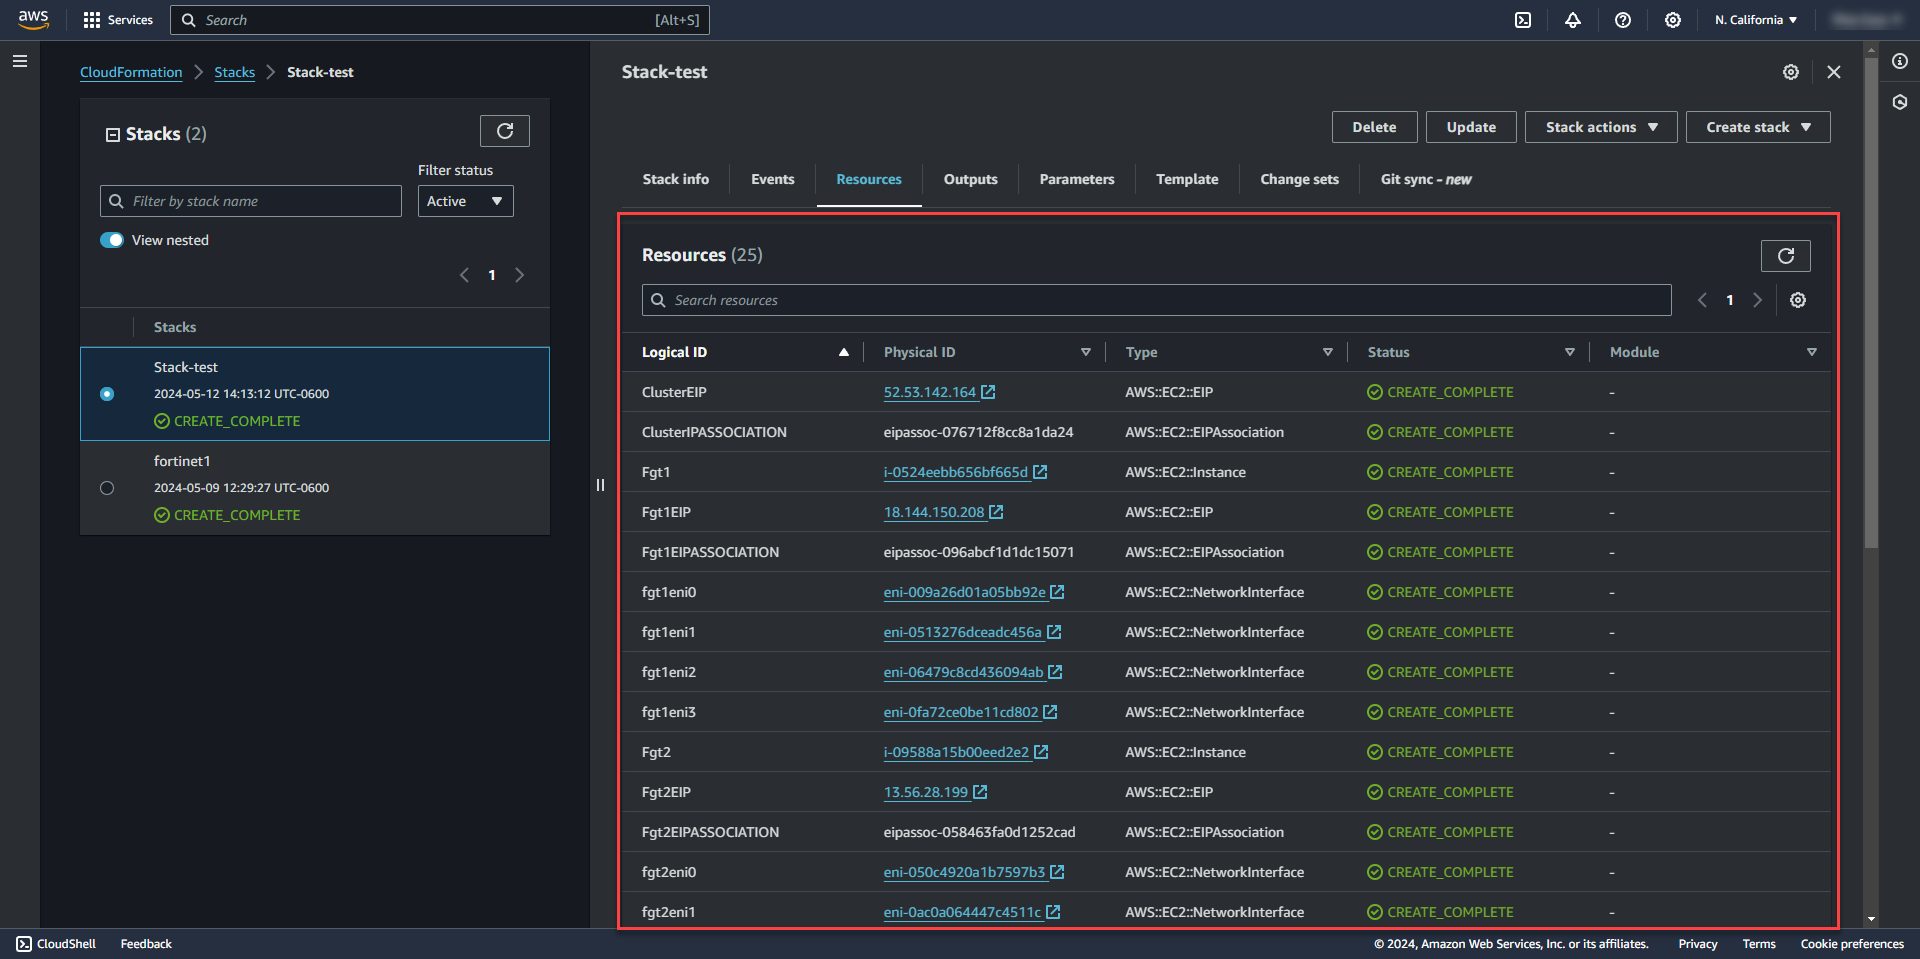
27. The outputs tab will show the web interface admin logins and the login credentials for the firewall.
28. Login to the Fortigate Web Interface with the Cluster IP. Cluster IP will actually log into the primary firewall and will automatically change to the secondary firewall when failover occurs.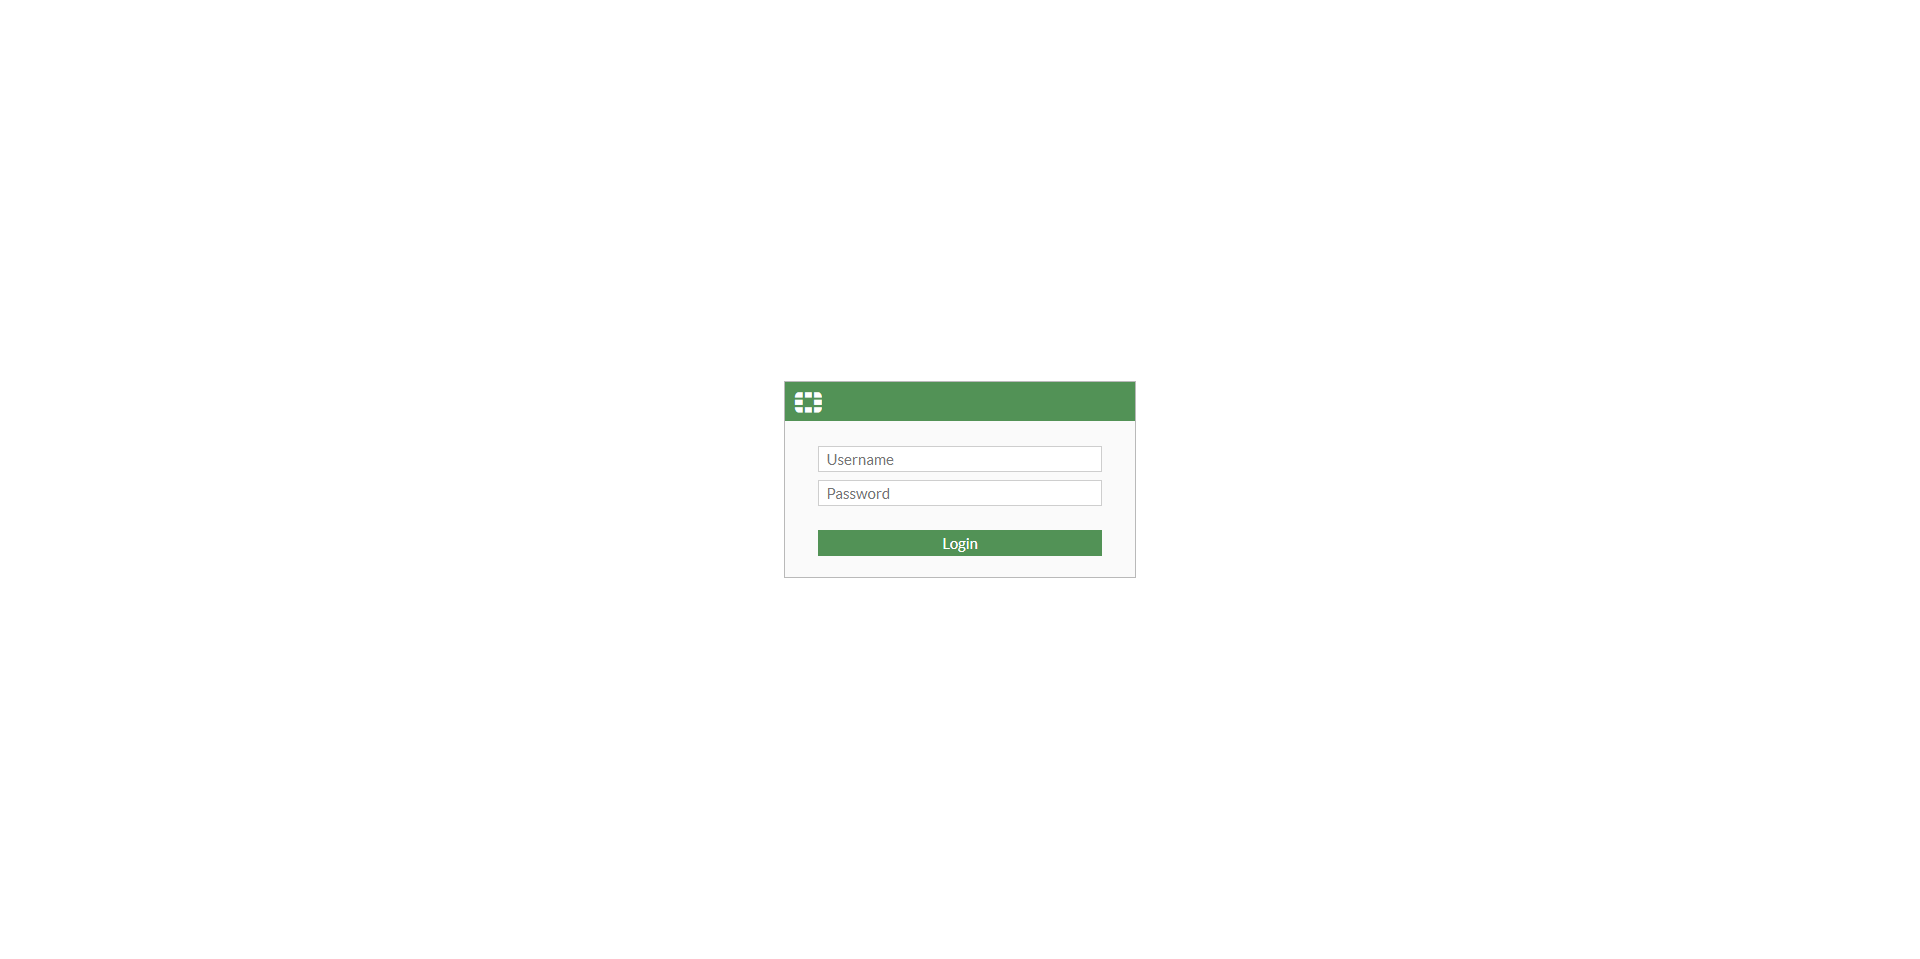
29. Password change for admin password will be required on first login.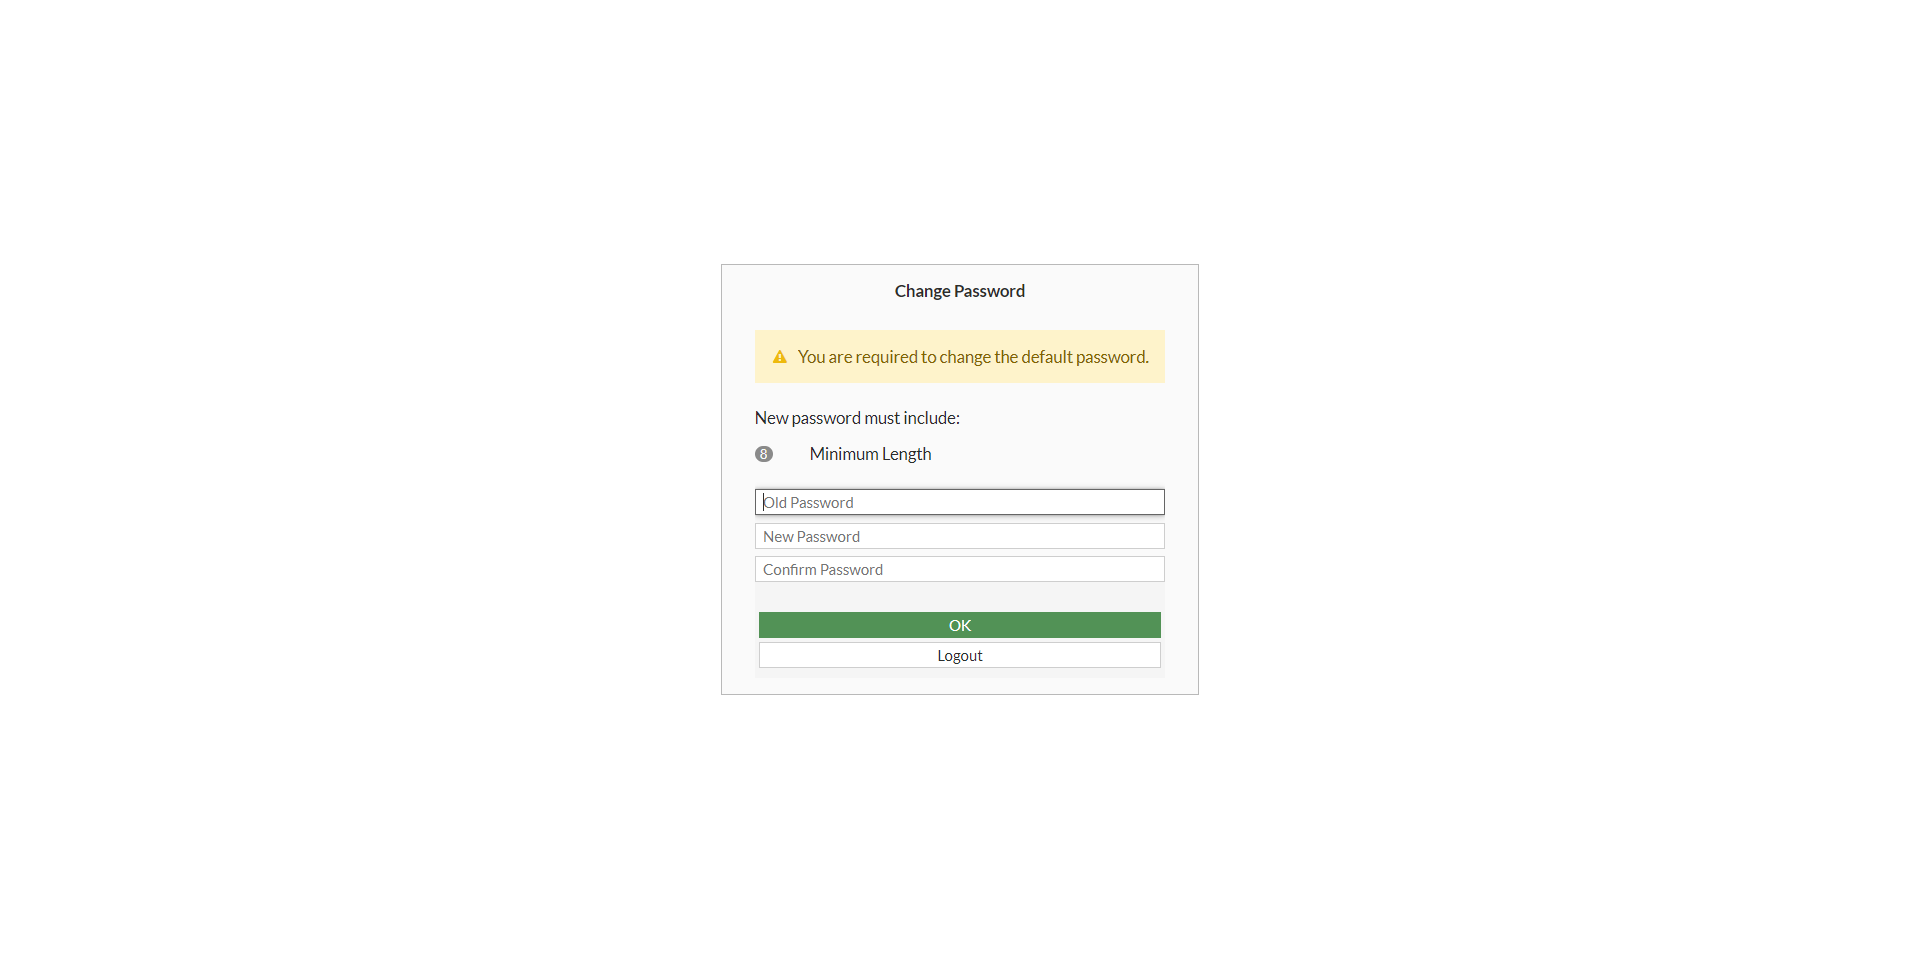
30. Select later on the migrate config with FortiConverter screen. 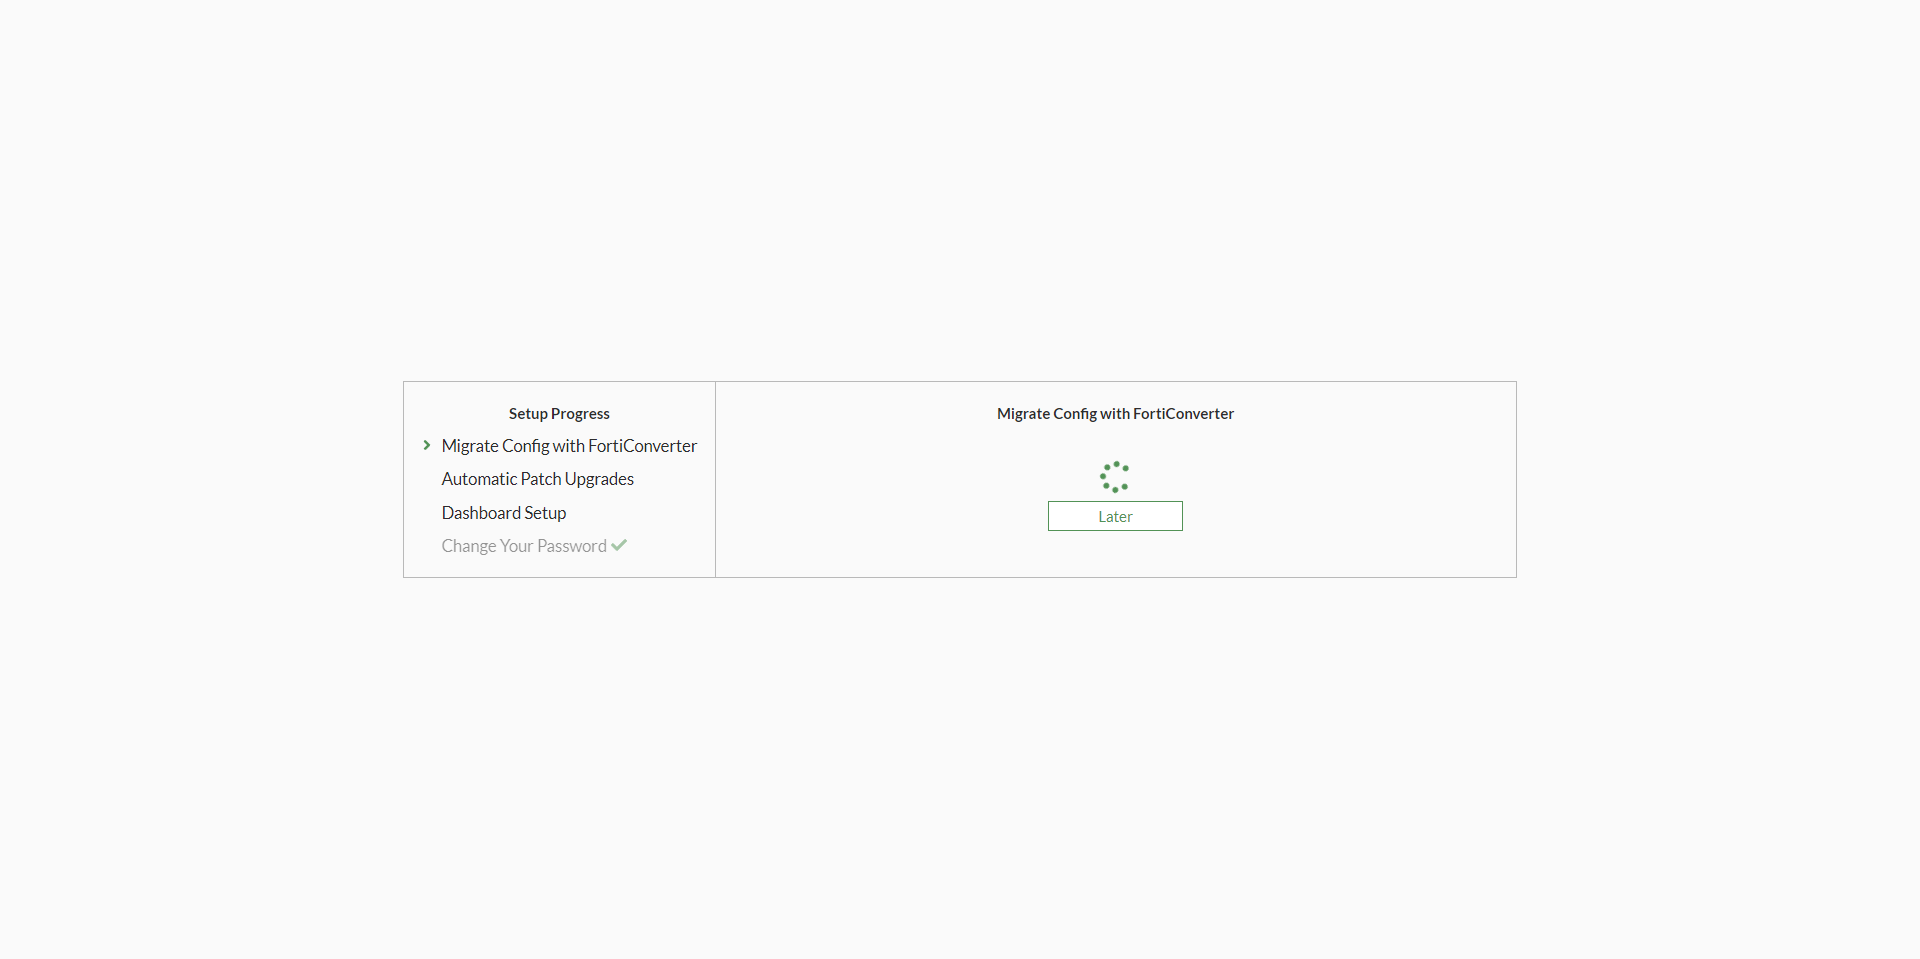
31. On the next page, Select your Auto Patch Upgrade preferences.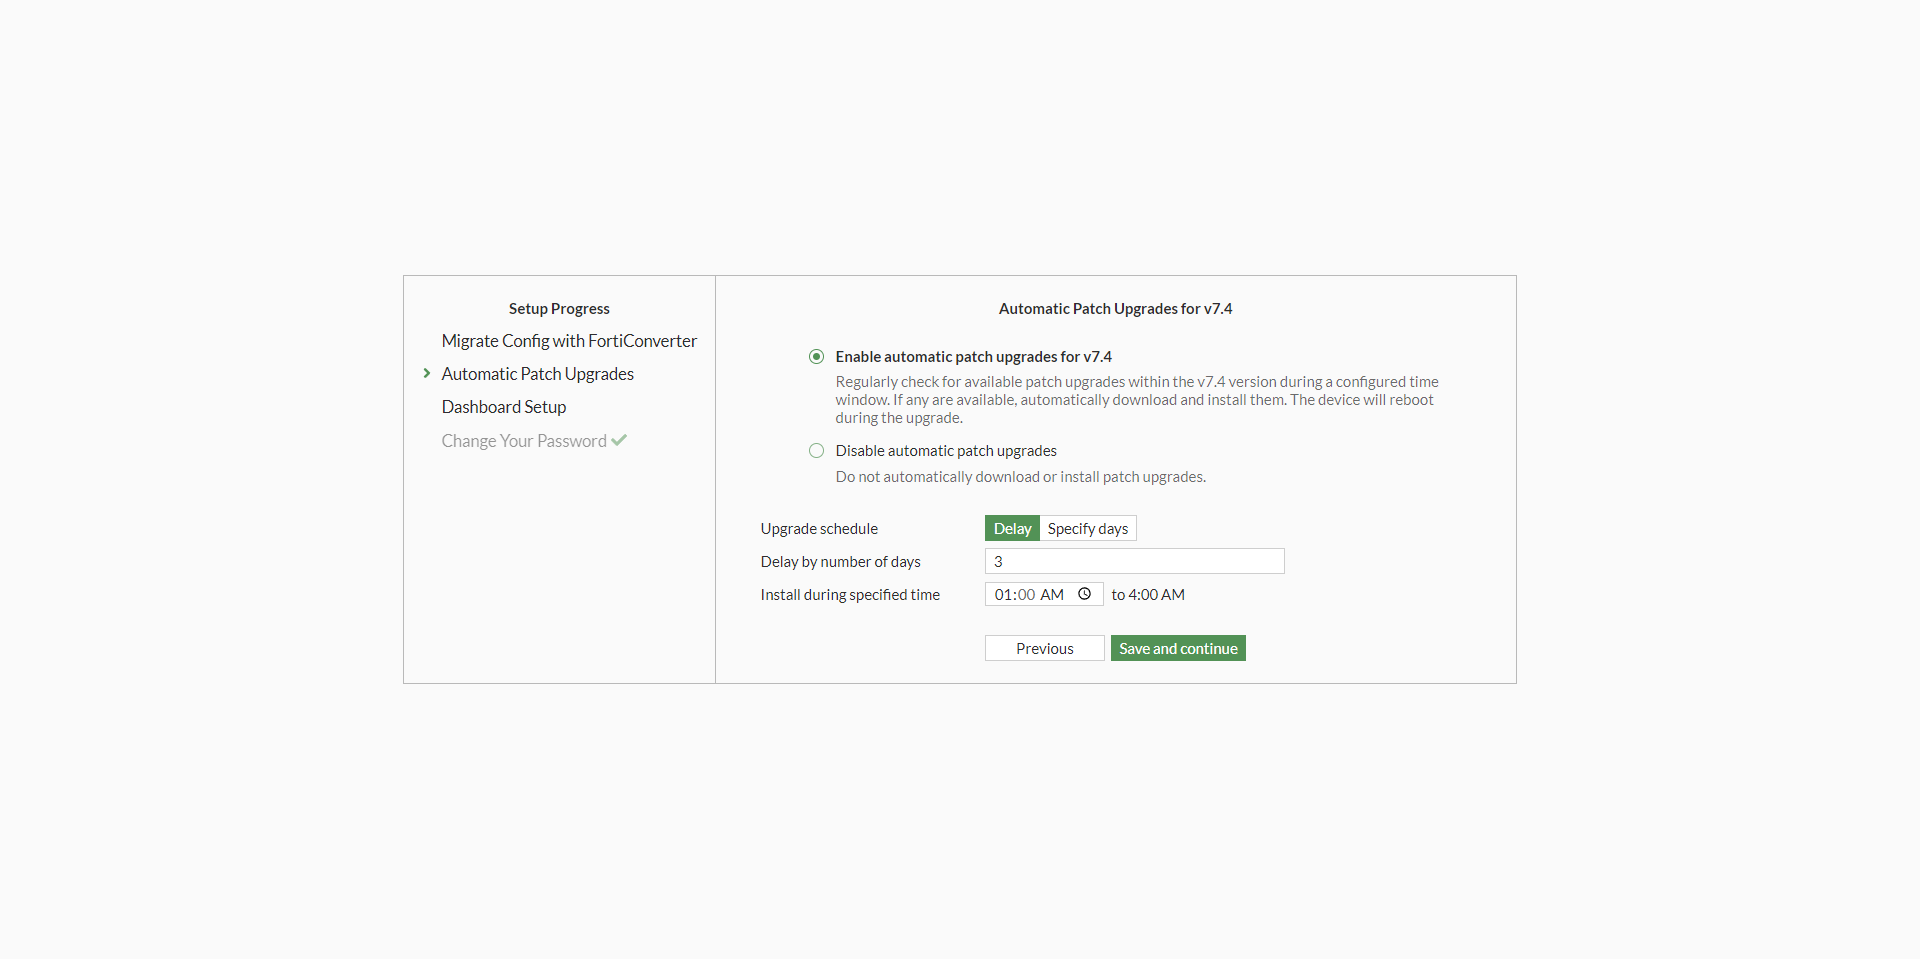
32. Select FortiView Dashboard preferences.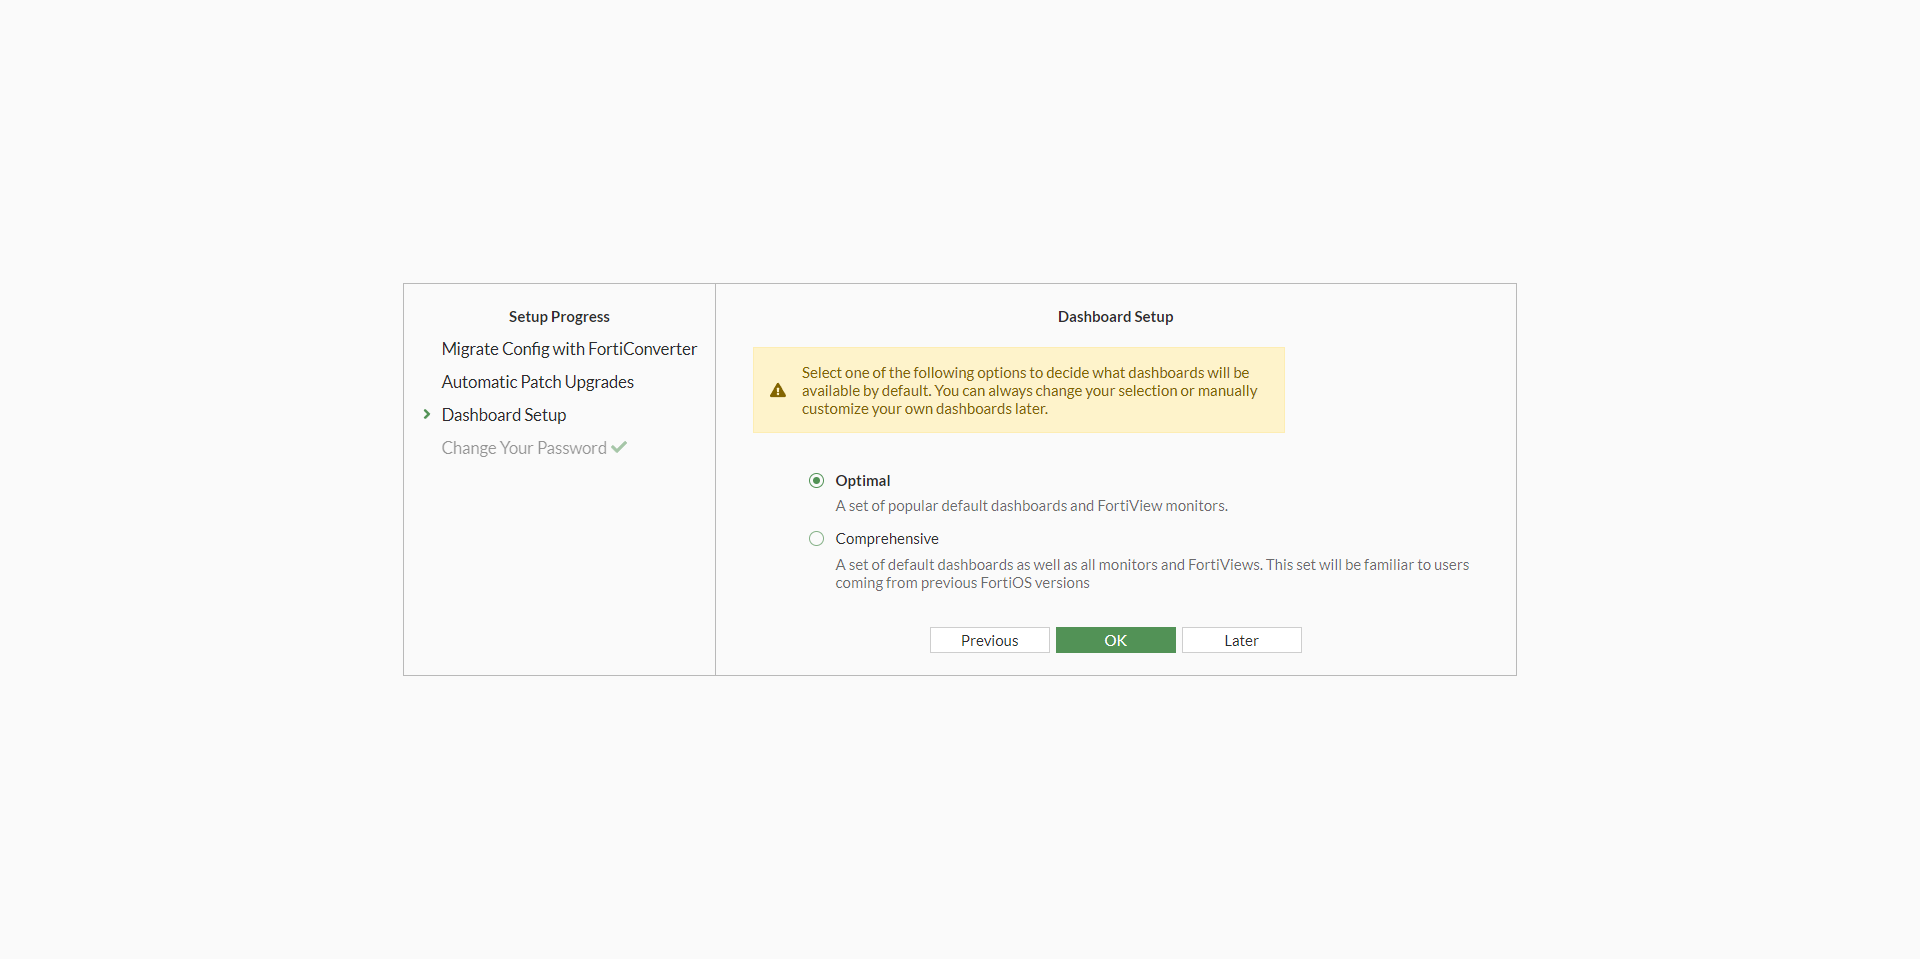
33. Firewall will now show the dashboard for the firewall. Initial setup for Fortigate firewall in HA is now complete. Settings can be changed directly from the web interface and will be synced to the second firewall.
Testing Failover
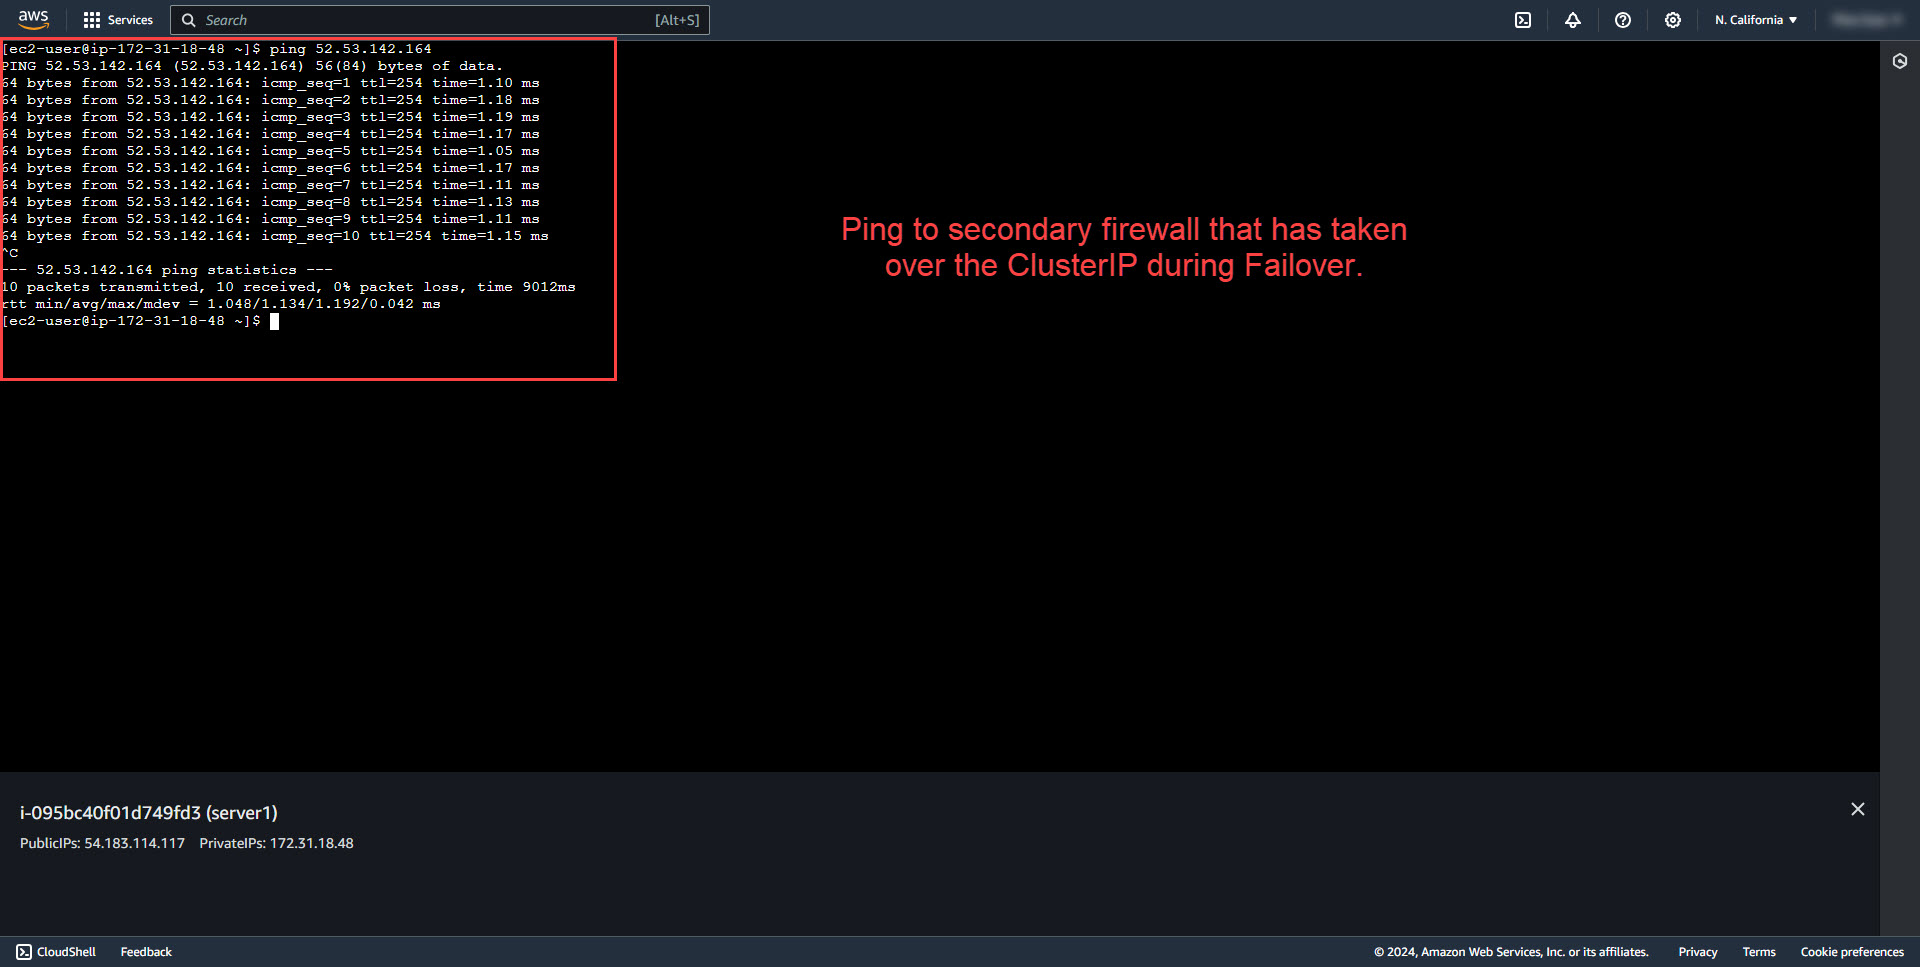
I have created a new subnet called servers and added it to the fortinet1-PrivateRouteTable. Then created an EC2 server within the servers subnet to test with. As you can see, the EC2 instance has gotten the Fortigate ClusterIP as the EC2 public ip.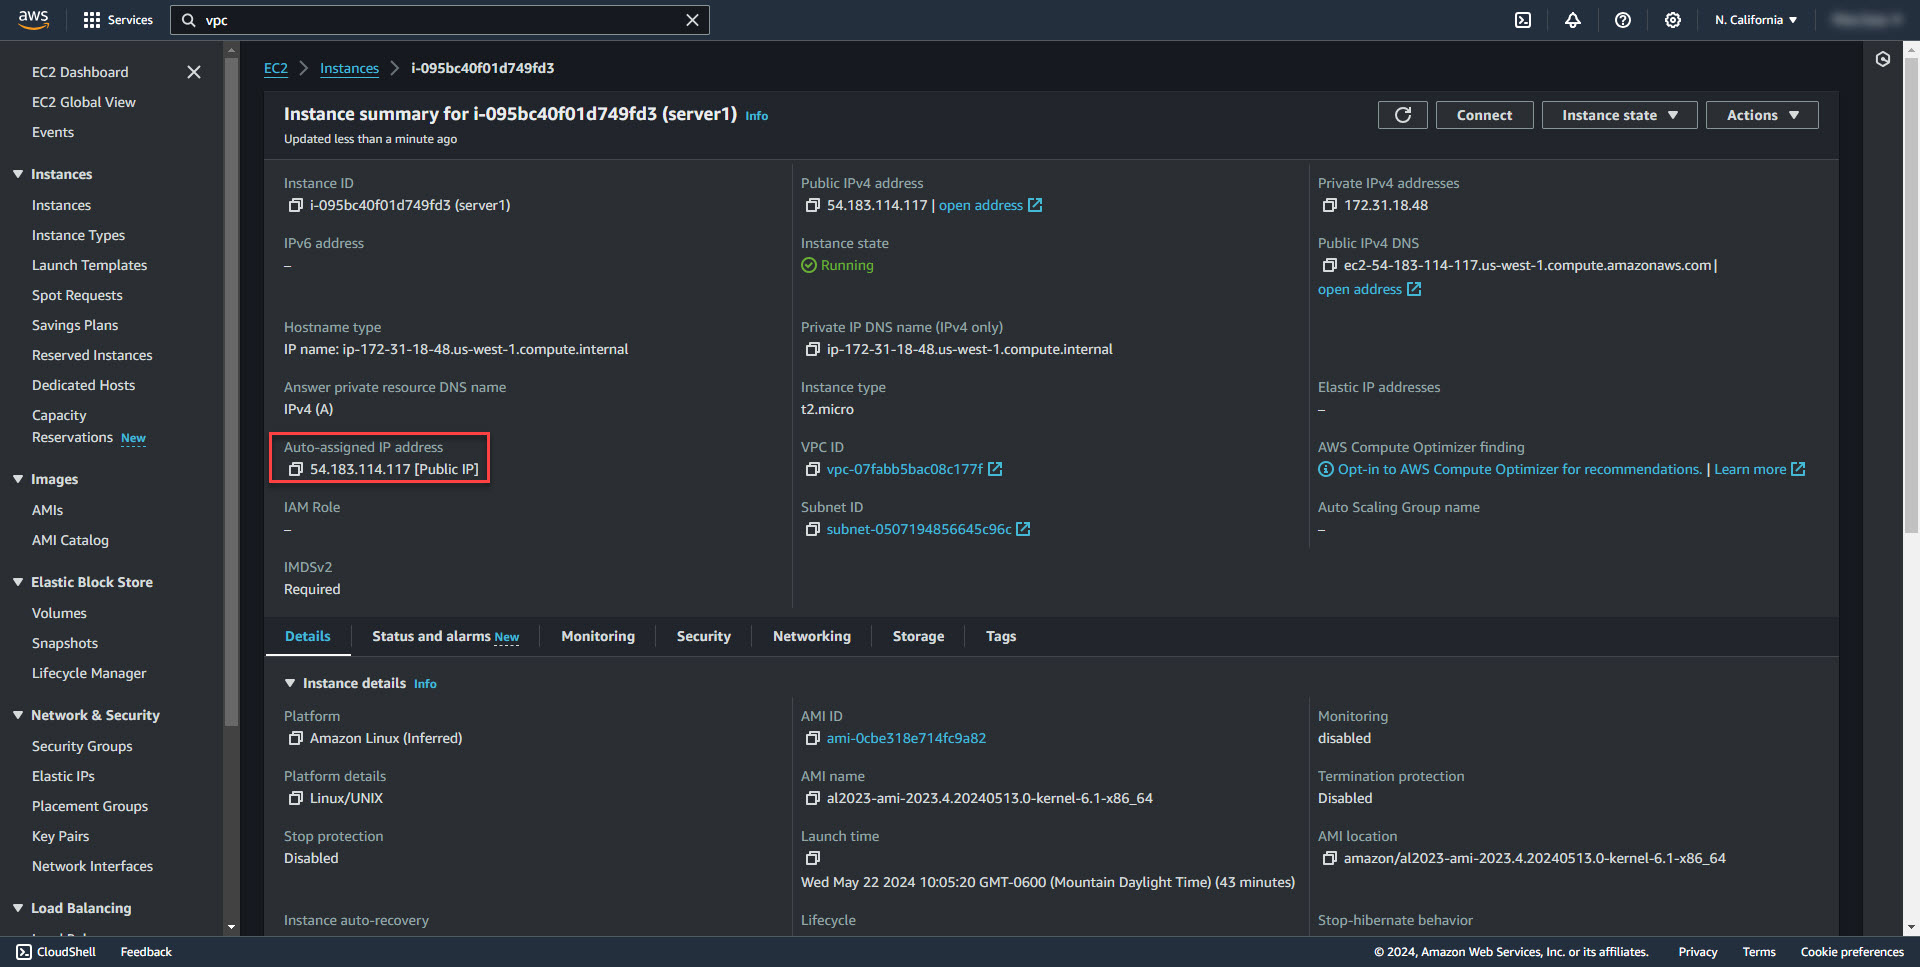
The ClusterIP 52.53.142.164 shows that it's currently connected to the Primary Fortigate. EC2 Instance is also able to ping the ClusterIP. 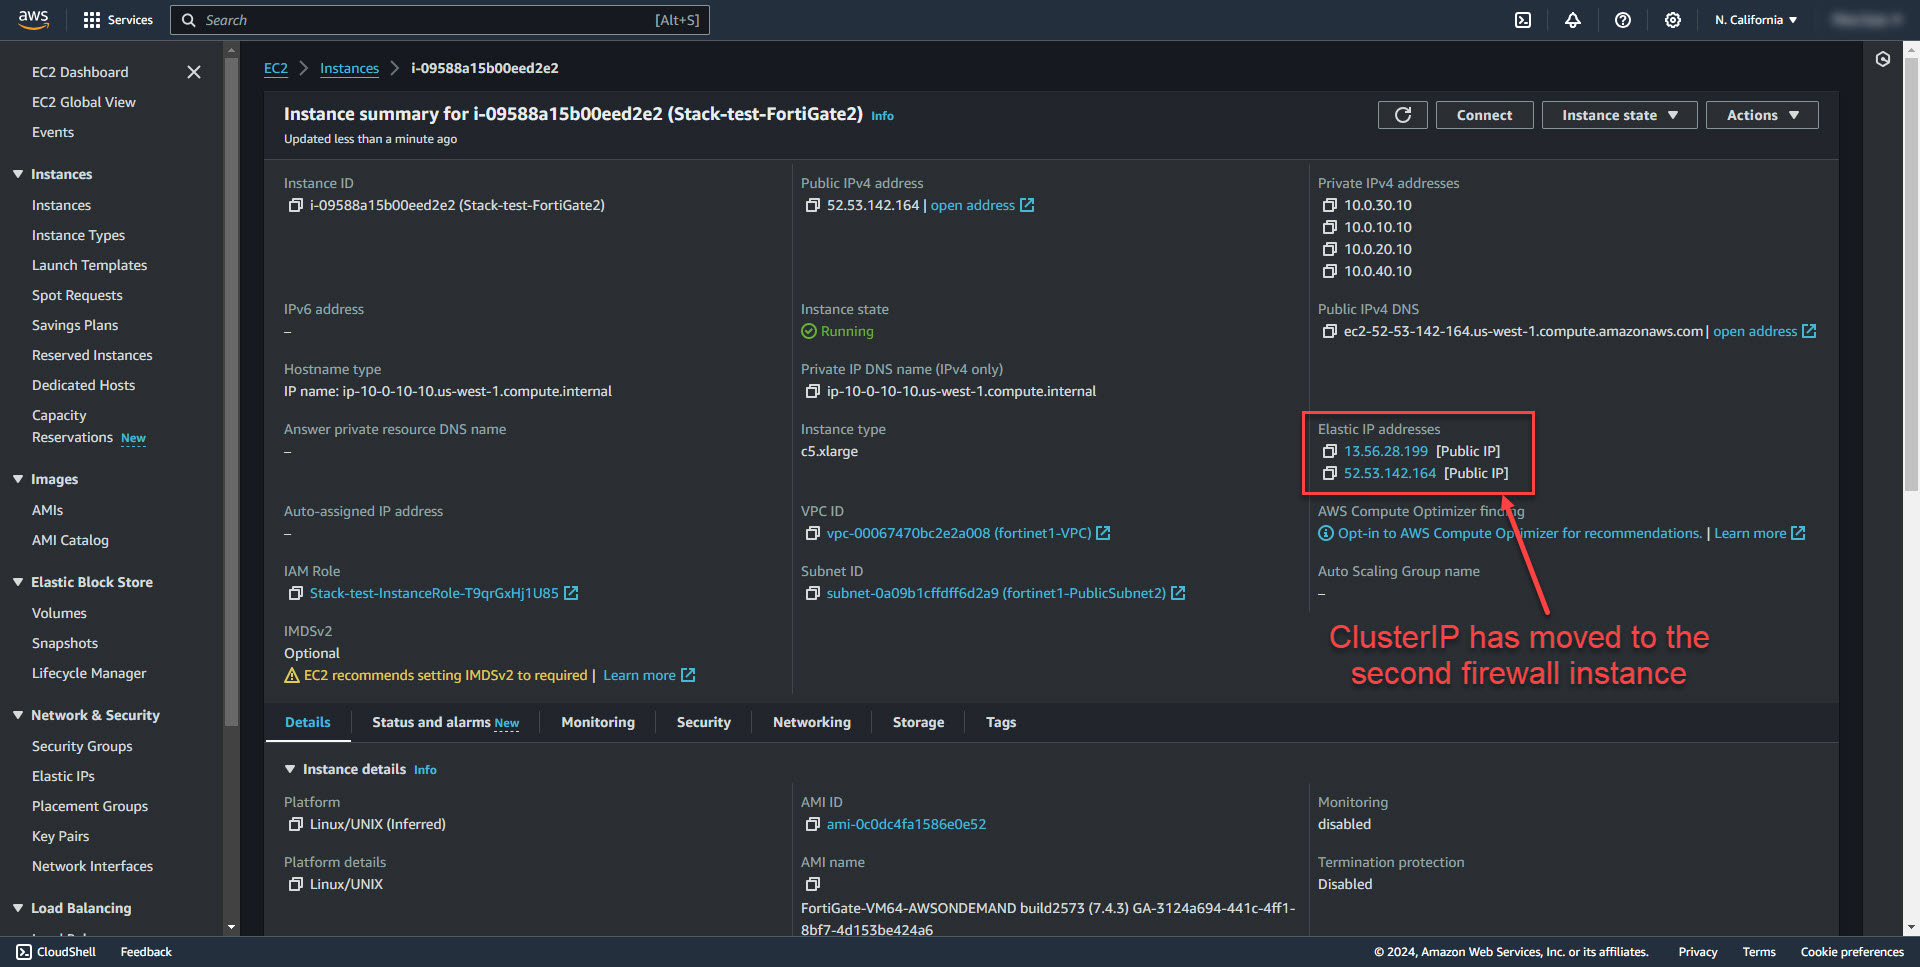

In initiating failover to the secondary firewall by stoping the primary firewall instance, the clusterIP moves to the secondary instance. EC2 test instance is also able to still ping the clusterIP.
Example Firewall Rule with the Fortigate for allowing SSH access to EC2 Instances
Creating the firewall policy
1. Firewall Policy is under the Policy & Objects tab. Select Create new.
2. Enter the name for the rule. Select Incoming Interface as public. Select outgoing interface as private. Source should be set to all or you can restrict the source to the public IP's that SSH is allowed to connect from. Security best practices is to restrict the traffic down. An even secure option would be to use a vpn to connect in and leave the ports closed to the public.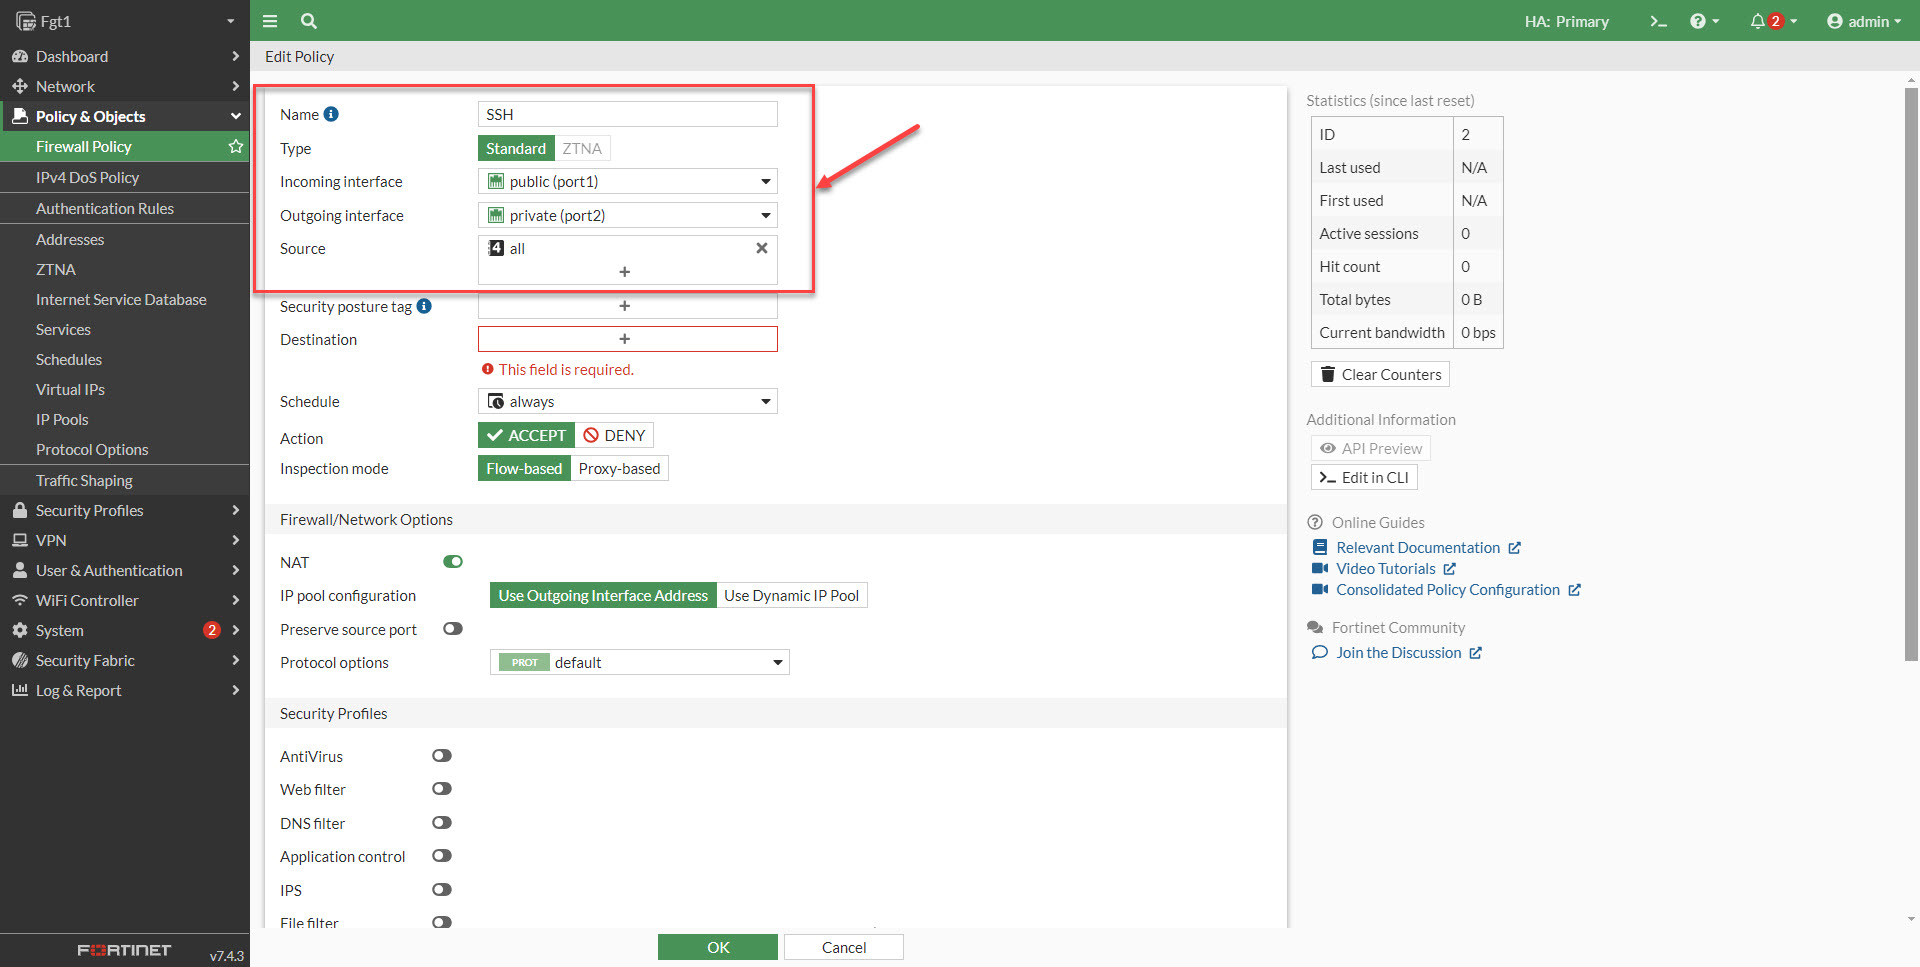
3. Add a new destination. Select the plus sign in the create entries menu and select address.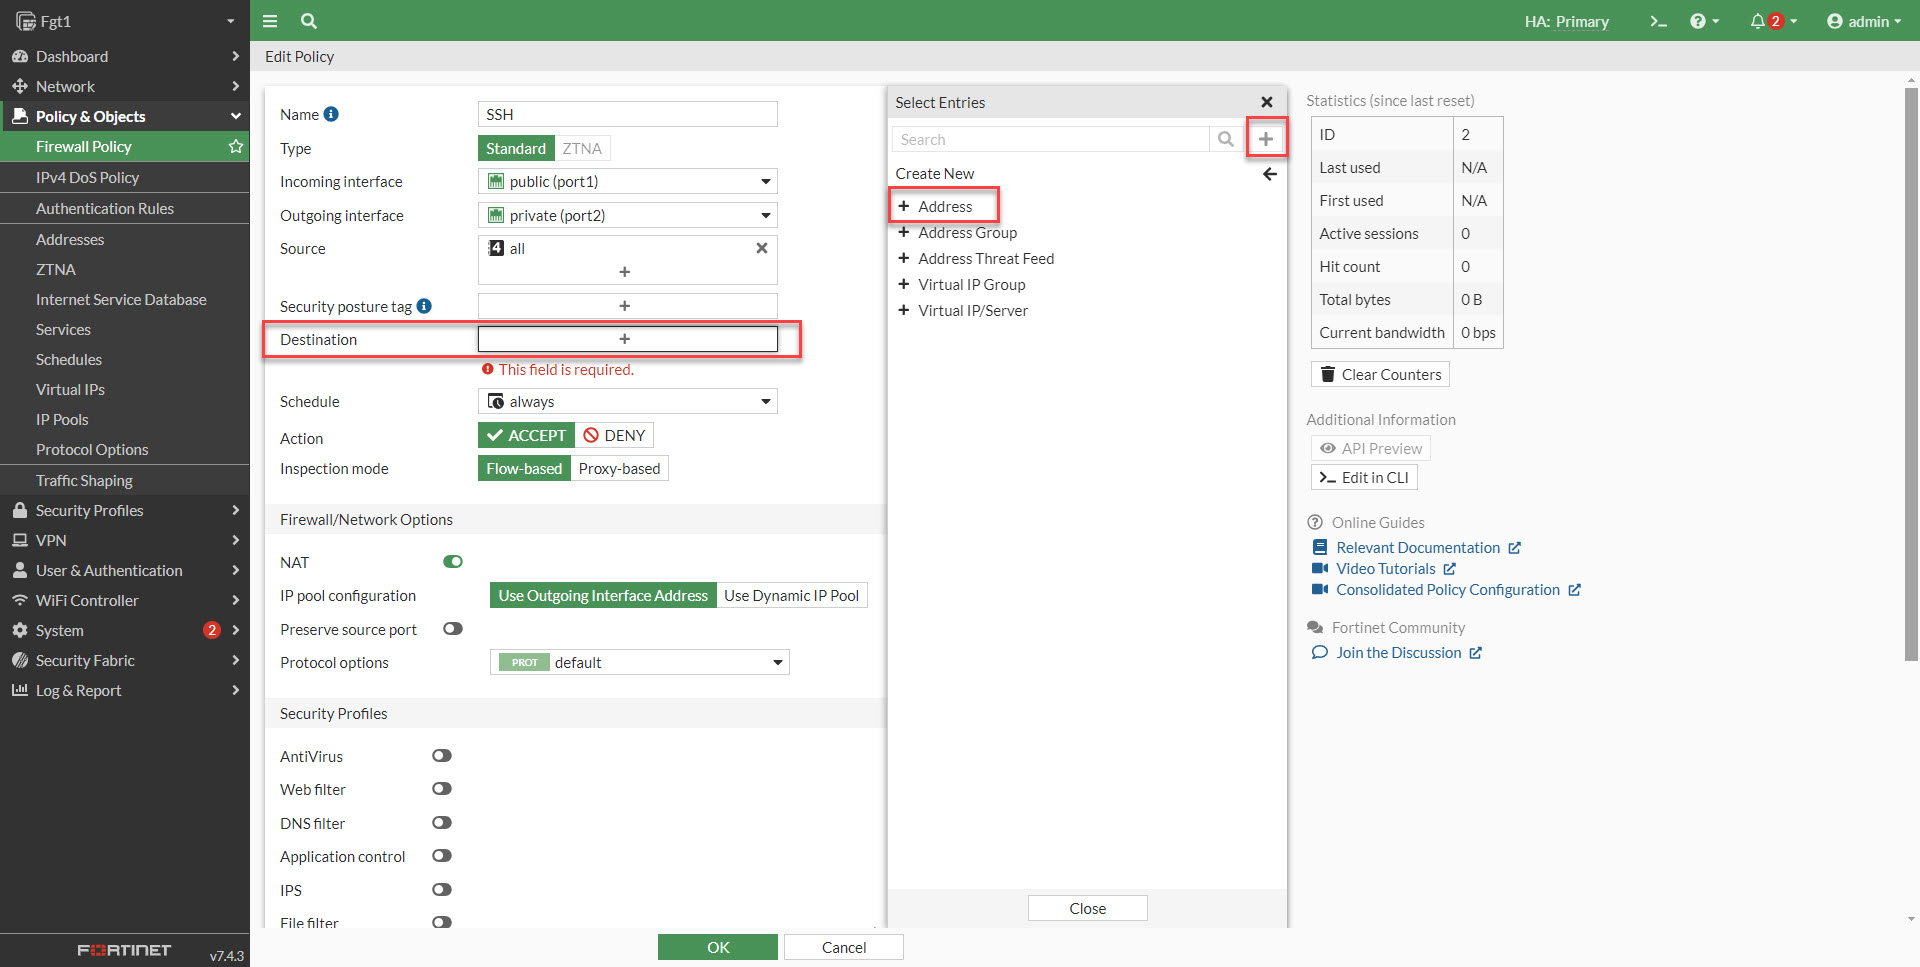
4. Add a name for the server/resource. Select the interface the device/resource is on. Type can be set as a subnet or restricted to an IP in the form of an IP Range.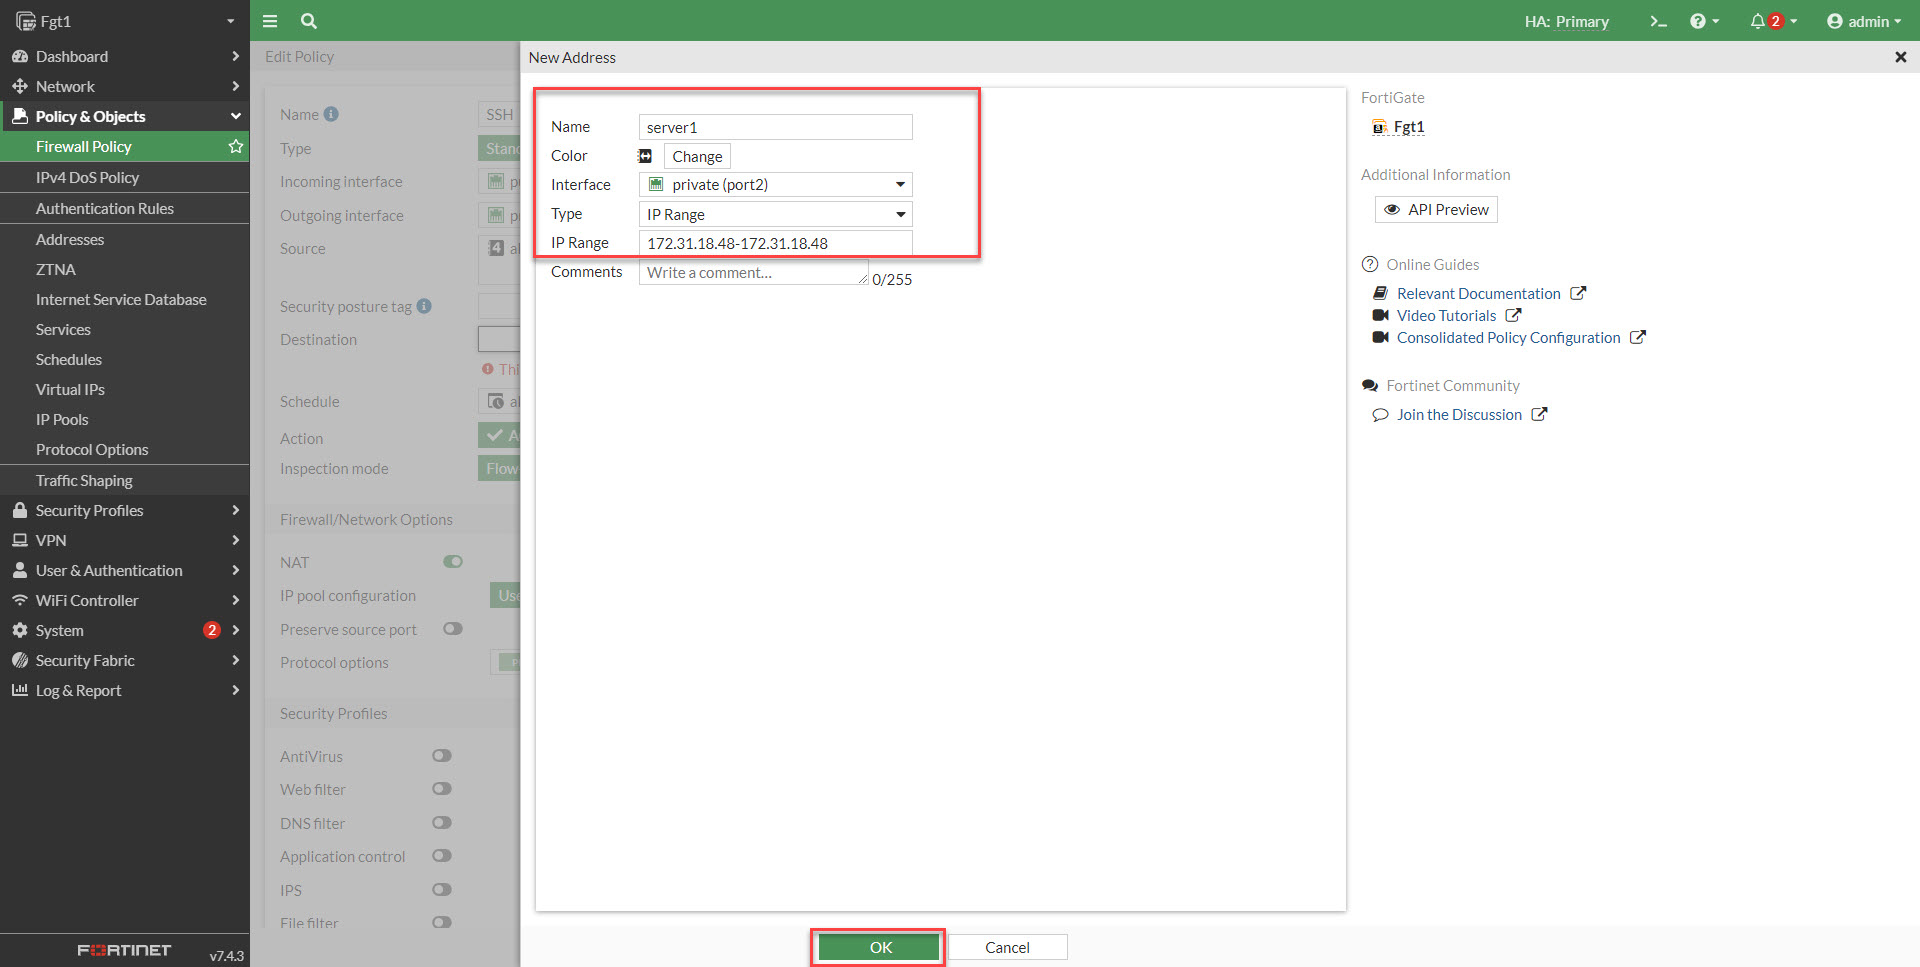
5. Select SSH from the services menu.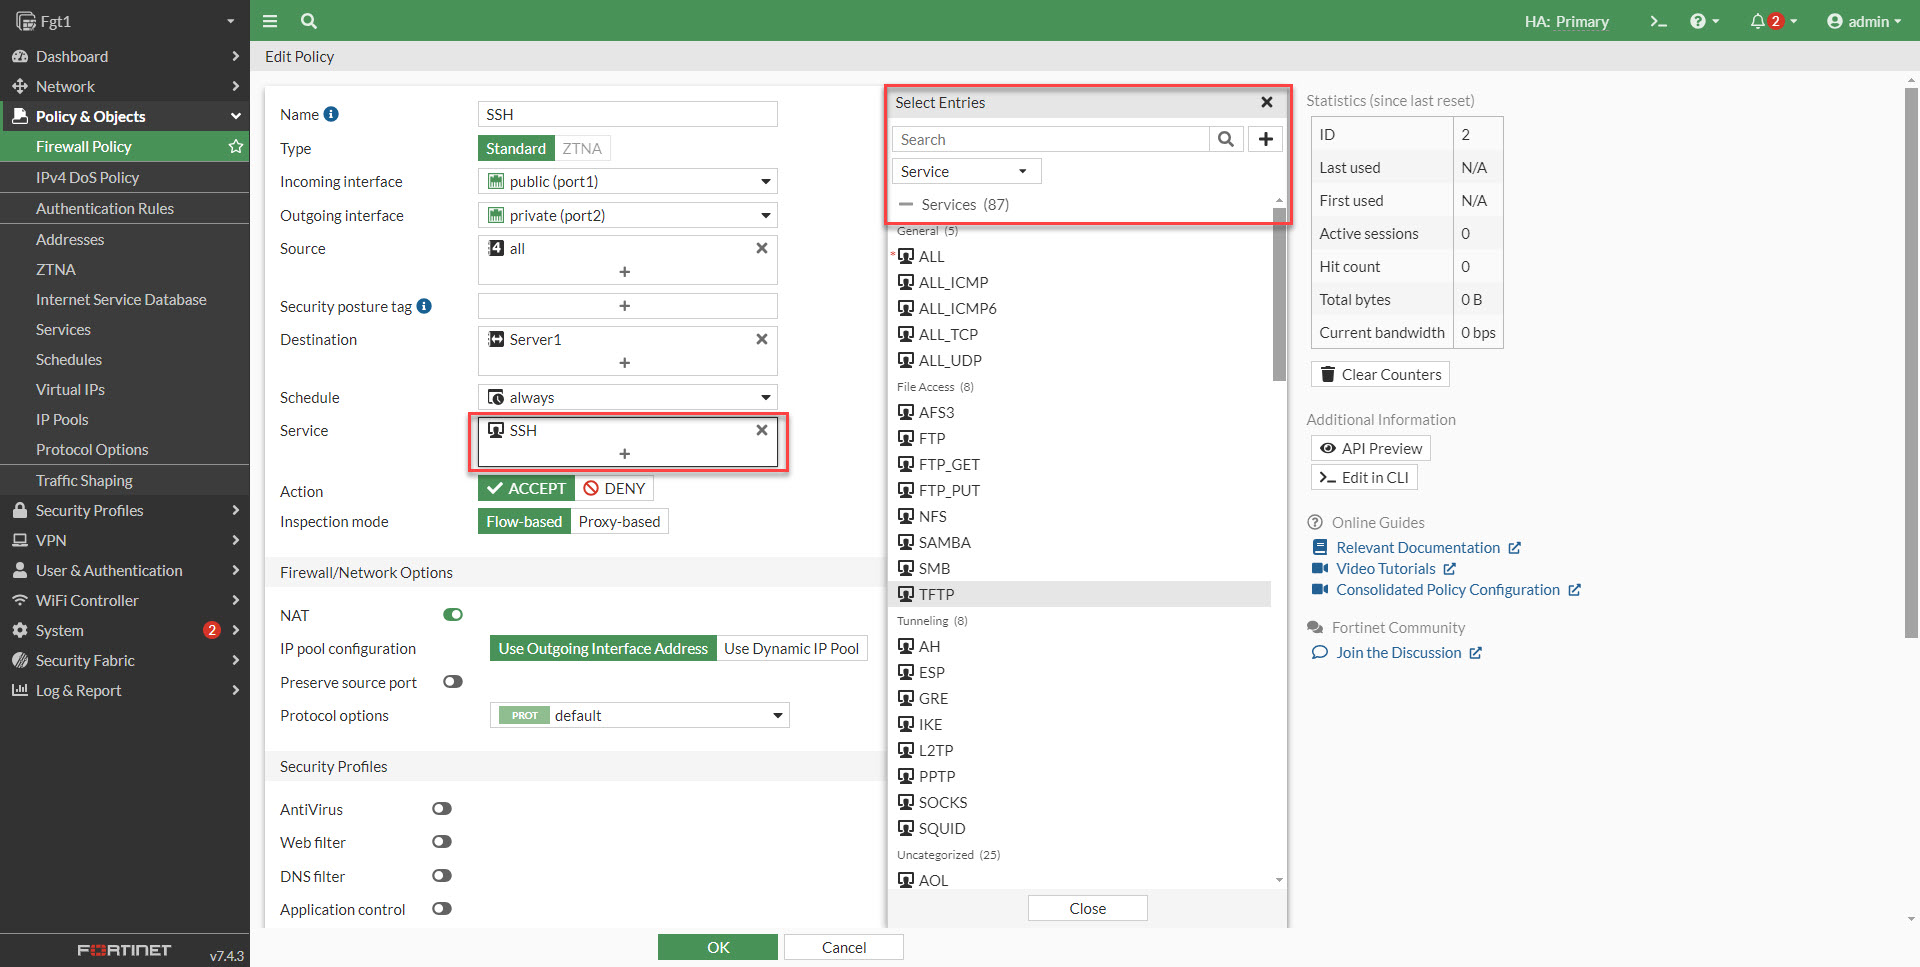
6. Leave the rest of the settings in the firewall policy as default. the rule will show up on the firewall policies page.
7. SSH Connections will be allowed to the IP's/AWS Resources defined in the rule.