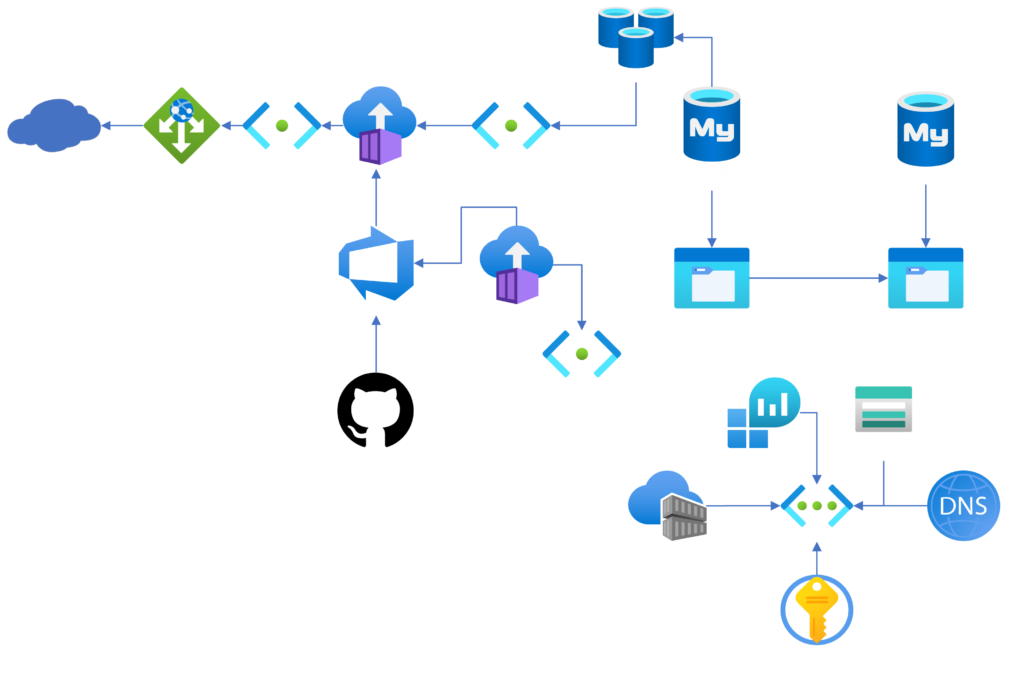
Resources created in this project
Application Gateway: Layer 7 load balancer with Web Application Firewall. Requests come in through the gateway and privately connects to container instances.
Container Instances: Hosts the WordPress Application using the Official WordPress Docker Image.
Azure Cache for Redis: Caches MySQL Database for faster database reads by the WordPress Application.
Azure Database MySQL Flexible Server: Highly Available MySQL Database serving as the database server for the WordPress Instance.
Azure Storage Account: Allows access for editing container instances files through Azure File Share. Also stores AOF backups for Redis Cache which will allow for faster spin up times when the cache/database is offline for a while.
Azure Private DNS Zone: All resources are accessed via private endpoint when possible with Public Access turned off. The DNS zone allows vnet connected resources to reach the Storage Account through DNS Name pointing the resource to Private IP.
Log Analytics Workspace: Retrieve logs from resources.
Azure Keyvault: Keeps resource secrets/passwords in Vault that can be securely accessed/used.
Azure Devops Pipline: CI/CD pipeline gets updated theme files/plug ins/data from GitHub and adds them to the WordPress Container.
Self Hosted Azure Devops Container Instance: allows Azure Devops private network connectivity to Azure Resources. Runs the pipeline from the container.
Container Registry: Hosts images for container deployment. In this case the image for Self Hosted Devops Agent.
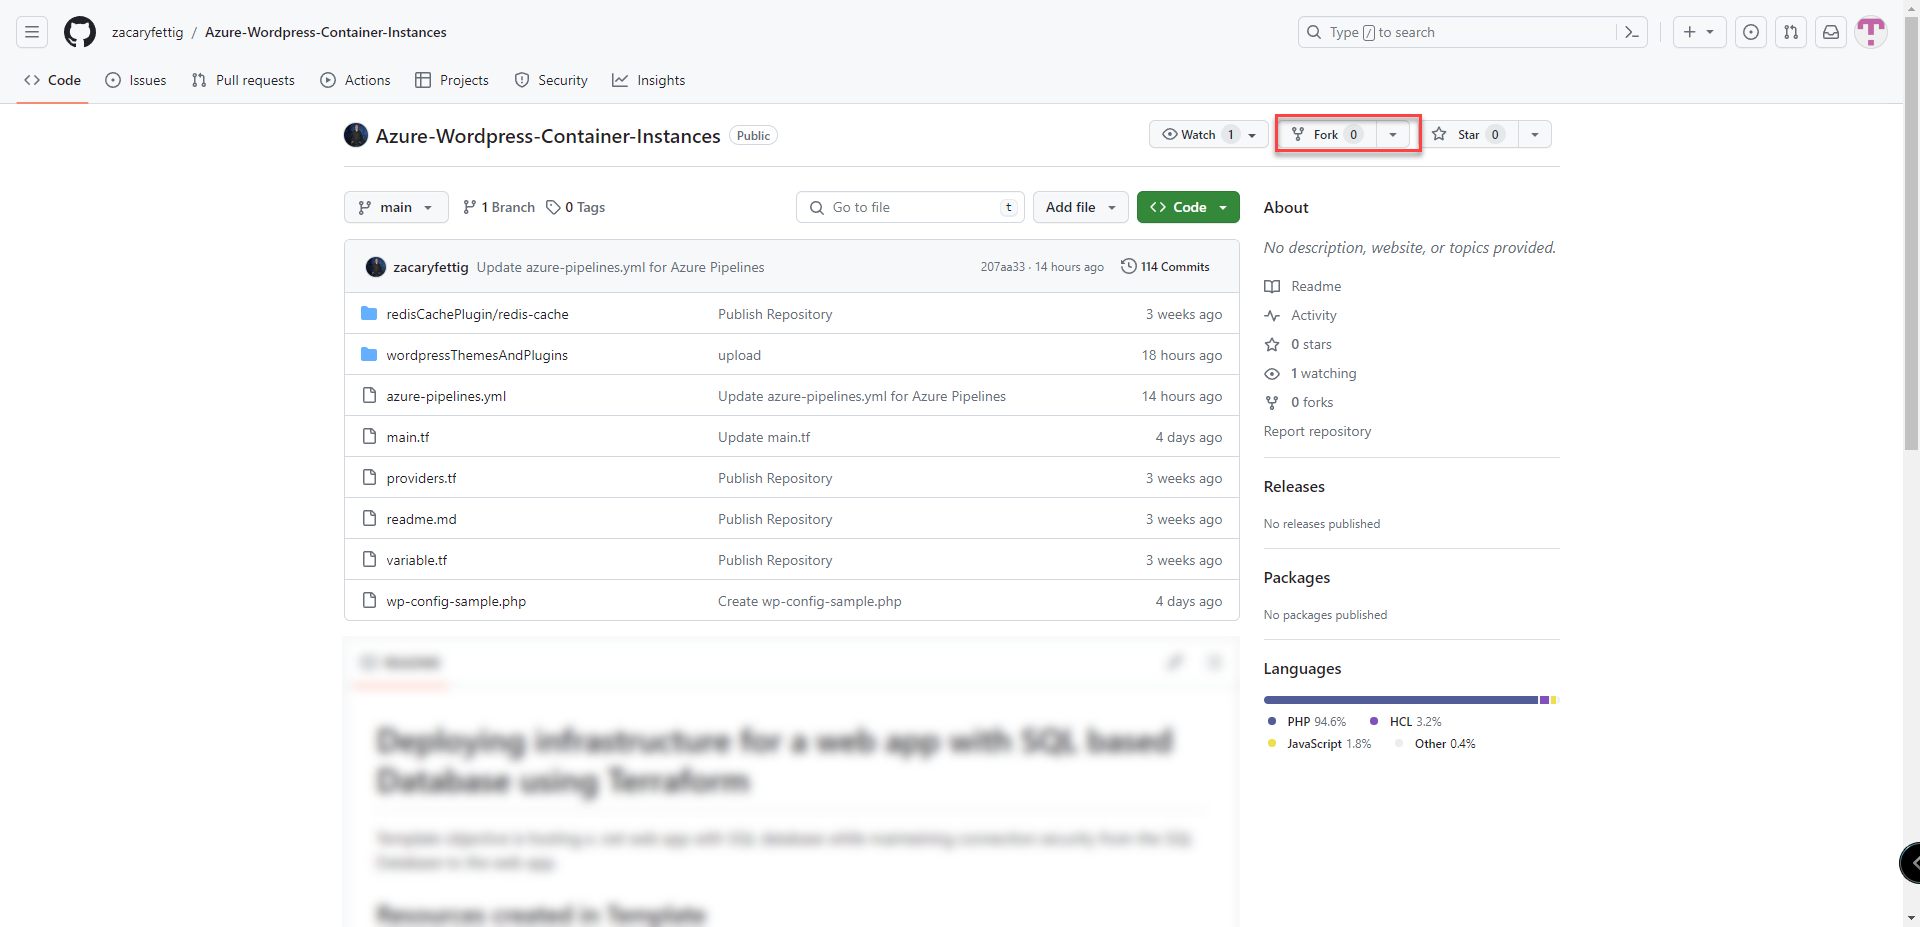
Fork a copy of the GitHub Repository
1. Go to https://github.com/zacaryfettig/Azure-Wordpress-Container-Instances
2. Select Fork. This will add the repository to your GitHub Account
3. Select create fork
4. Your account will now have a copy of the Azure WordPress Container Instances project
5. Adding themes to wordpressThemesAndPlugins/themes folder or plugins to the wordpressThemesAndPlugins/plugins folder will add these items to the project via Azure Devops Pipline once setup.
Create an Azure Devops Project and connect GitHub Repository
1. In your Azure Devops Organization select new project
2. Enter project name and select create
3. Under Pipeline select Create Pipeline
4. Select GitHub
5. Sign into your GitHub account and select repository used in this project.
6. Enter your Azure Subscription Name followed by the Subscription ID. Subscription details can be found by heading over to the Azure Subscription Resource. Subscription name and ID will be shown on the main page.
7. After entering subscription details, select the caret menu item and select save
8. Commit change to branch. At this point all the GitHub repository code has been loaded into the Azure Devops Project. Keep the Azure Devops tab open, as we will be referencing the page in future steps.
Add Azure Devops Application to KeyVault access policy
1. In the KeyVault select the Access Policies tab. Select the create button to add.
2. Select the Get and List Permissions.
3. Select the application principal for your project and select next.
4. Select next.
5. Application will show up in list of access policies.
6. Enter Keyvault name by selecting the settings button on the AzureKeyVault Pipeline section inside the pipeline.
Configure Azure Devops Pipeline Self Hosted Agent and Pipeline Settings.
Note: nativly, Azure Devops can only talk to public resources. Having an Agent Pool VM or Container inside the network will allow Azure Devops to run bigger workloads and securely access the private network.
1. Open your Azure Devops organization
2. Go to Settings. Select Agent Pools tab. Select Add Pool.
3. Pool Type is self hosted. Name the agent pool "linux-container-instances". Select grant access permissions to all pipelines. Select Create.
4. Once the Terraform Template is run in future steps, the Agent Pools Agent will auto connect and show a green status.
Create a personal access token so that the pipeline and container will be able to communicate.
1. Select the user settings icon and select Personal Access Token from the menu.
2. Select add new token
3. Create new name for token. Select Expiration for the token. Select show all scopes at the bottom of the screen and select read + read & manage under agent pools scope. Select create.
4. Save access token. Token will be only viewable once. 
Download GitHub Repository Files needed in order to run the Terraform Template
1. Download repository files
Install Docker Desktop that will be used to pull/push container container image in the Terraform File.
1. Download Docker Desktop from the link below.
Docker Desktop Download: https://www.docker.com/products/docker-desktop

2. Launch Docker Desktop Installer and install

3. Open application and accept Service Agreement
4. Select continue without signing in
5. Docker Desktop will continue to the main page. Keep Docker Desktop open as the service will be utilized in the background while running the Terraform Template.
Run Terraform Template to create Azure Infrastructure Resources.
1. Edit Template adding in the devops_organization_name value and DevopsToken created in previous steps.
2. Run Terraform init to initialize the Terraform deployment. This command downloads the Azure modules required to manage your Azure Resources. Terraform will be prompt to enter resource group name, location, and MySQL password.
command: terraform init
3. Terraform plan determines what actions are necessary to create the configuration specified in your configuration files.
command: terraform plan
4. Terraform apply executes the Terraform Plan creating the Azure Resources
command: terraform apply
4. Resources will appear in the Azure portal
Run Azure Devops Pipeline
1. Pushing a new file to the GitHub repository will kick off a new pipeline run or can be manually run from the Azure Devops interface.
Access WordPress website
1. Go to the Application Gateway Resource and copy the public IP on the main page into a web browser. wordpress will load the intial setup configuration page.

Activate Redis Cache Plugin inside WordPress
Note: Redis plugin was installed while running the Terraform Template, but requires extra activation through the WordPress Interface.
1. Select activate on the Installed Plugins page. 
2. After activation, WordPress will go to the Redis Object Cache Settings Page. Settings can be accessed in the future by going to the installed plugins menu and selecting settings under the Redis Plugin Heading. Select Enable Object Cache to enable the cache. 
3. Once successfully enabled, the status will show connected.


