Create ECS IAM Permissions for hosting the container application
1. In the IAM Console select Roles and create a new role.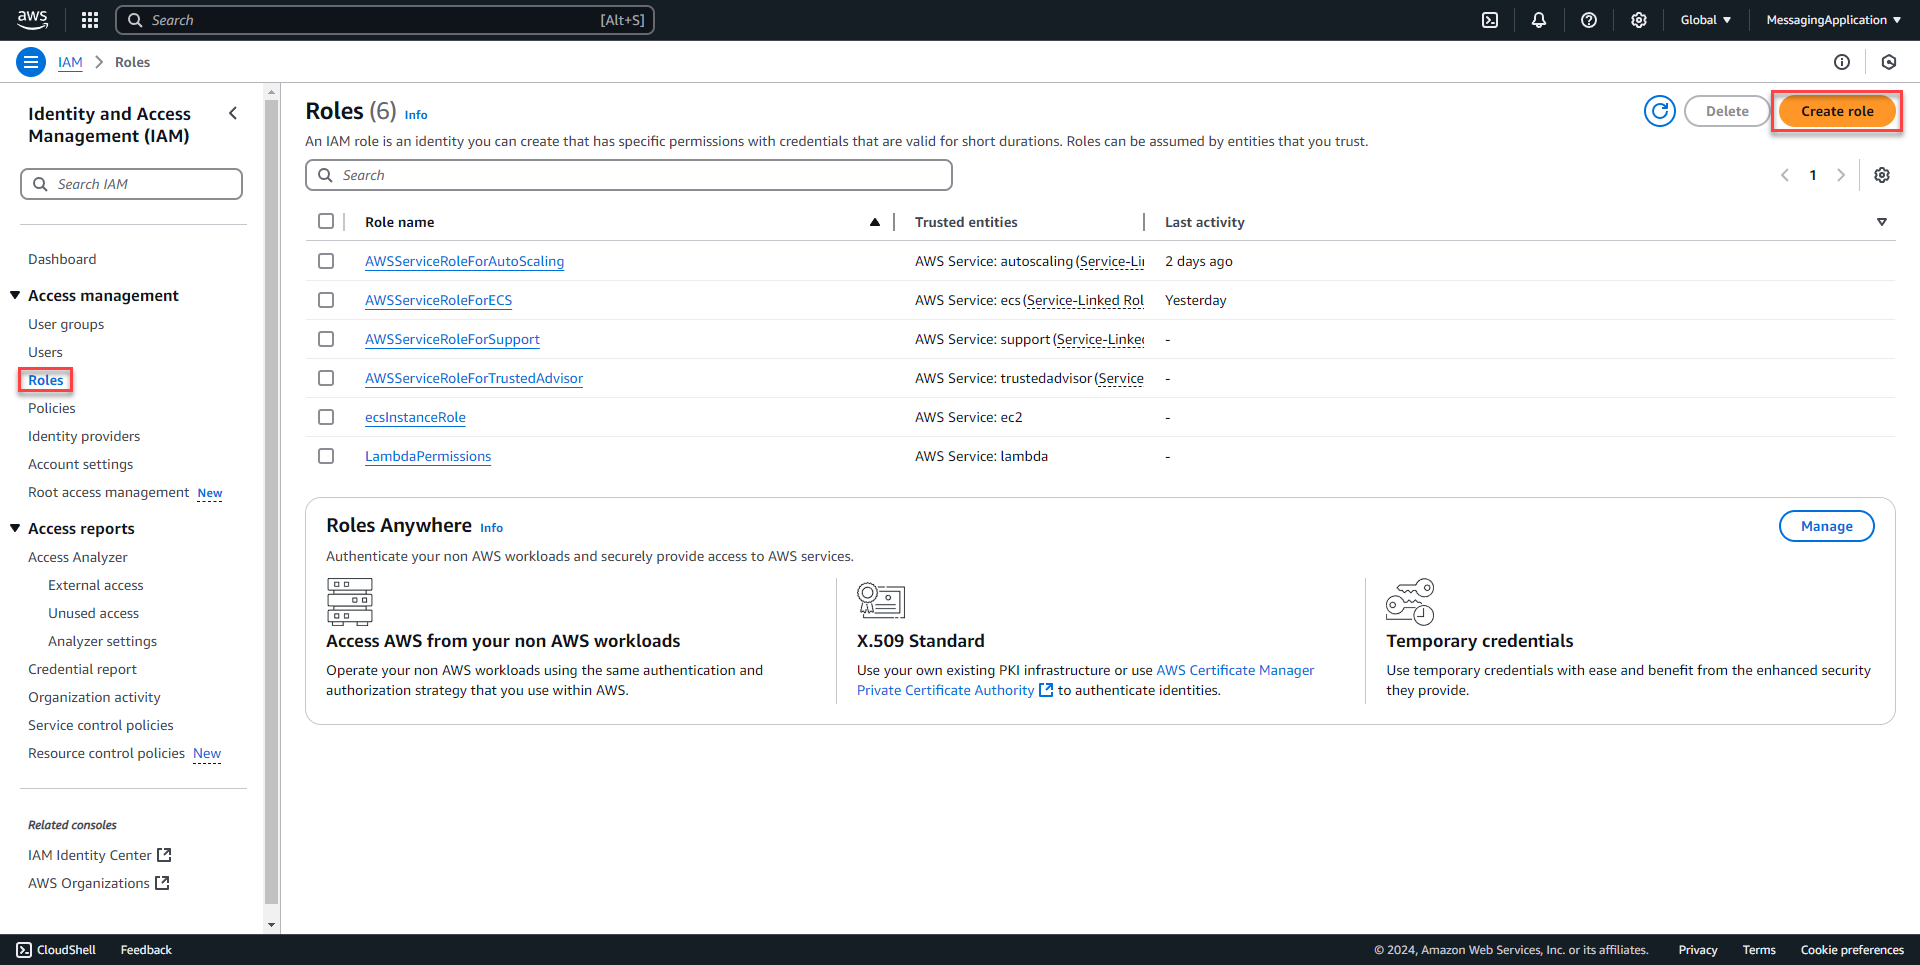
2. Select AWS service from the trusted entity type section. Under the use case section select Elastic Container Service. Select Elastic Container Service task from the list. Select next.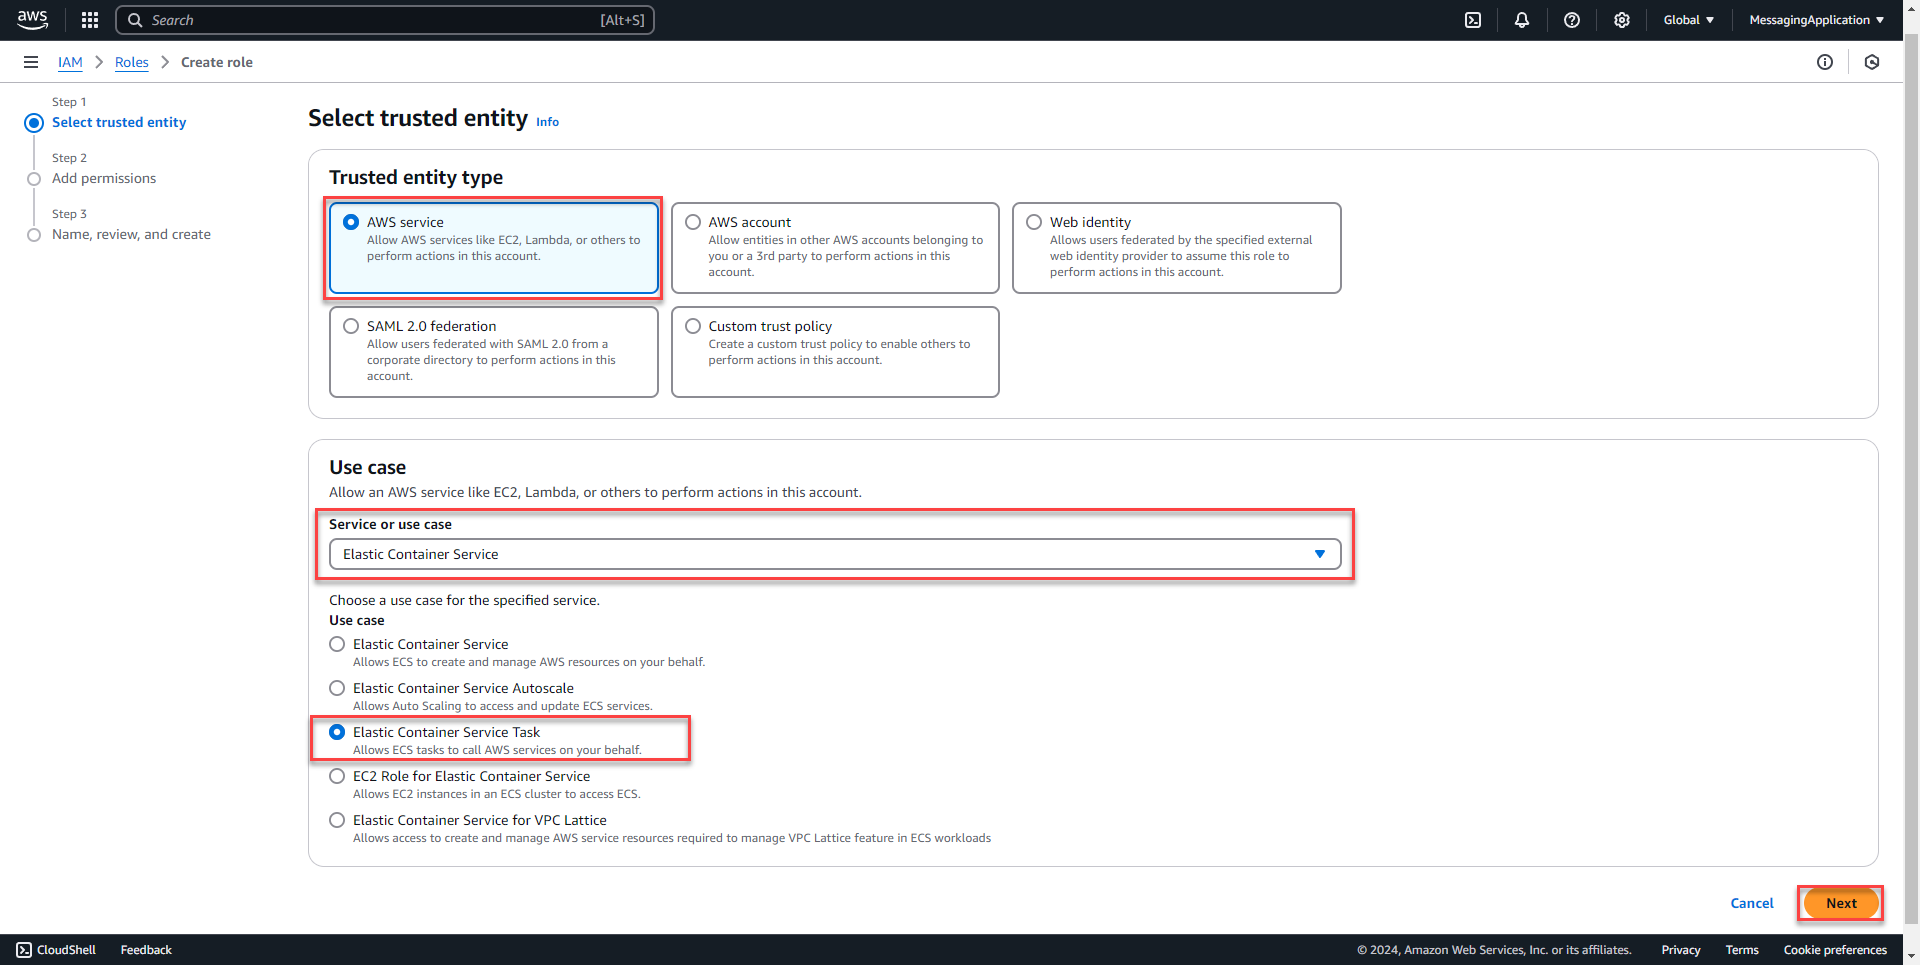
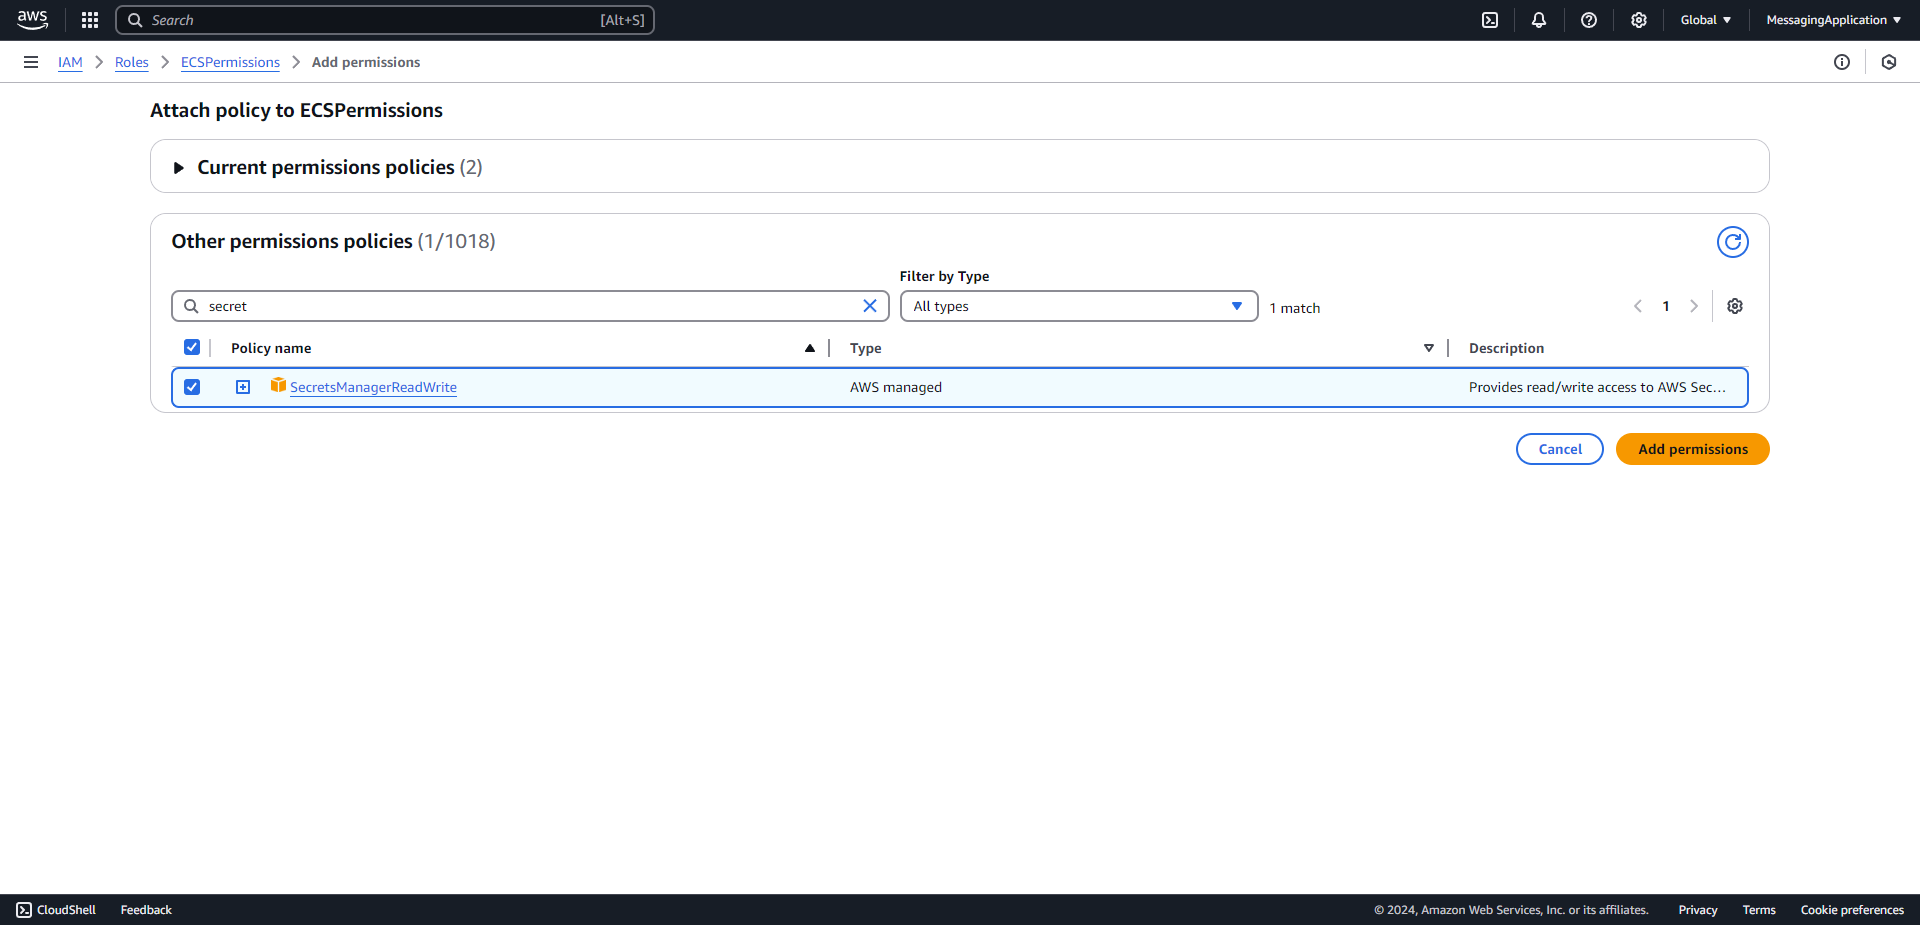
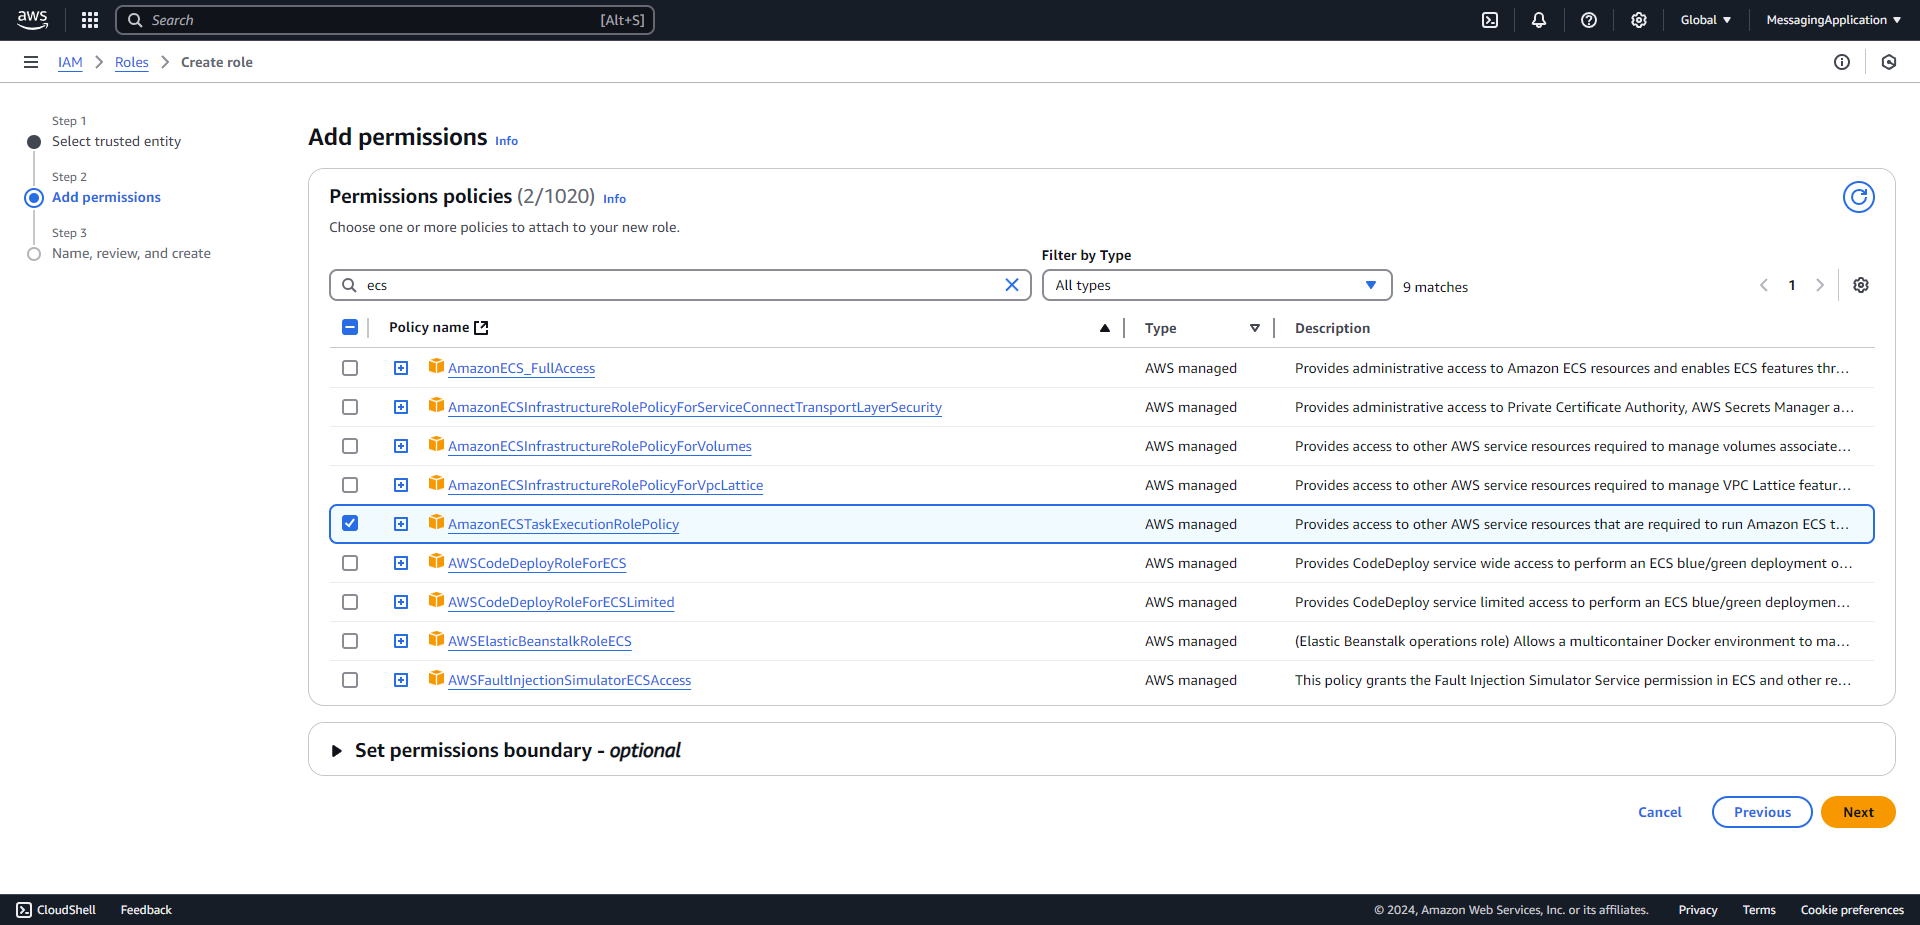
3. Add the policies AmazonSQSFullAccess, SecretsManagerReadWrite, and AmazonECSTaskExecutionRolePolicy. Select next when the three polcies have been checked. 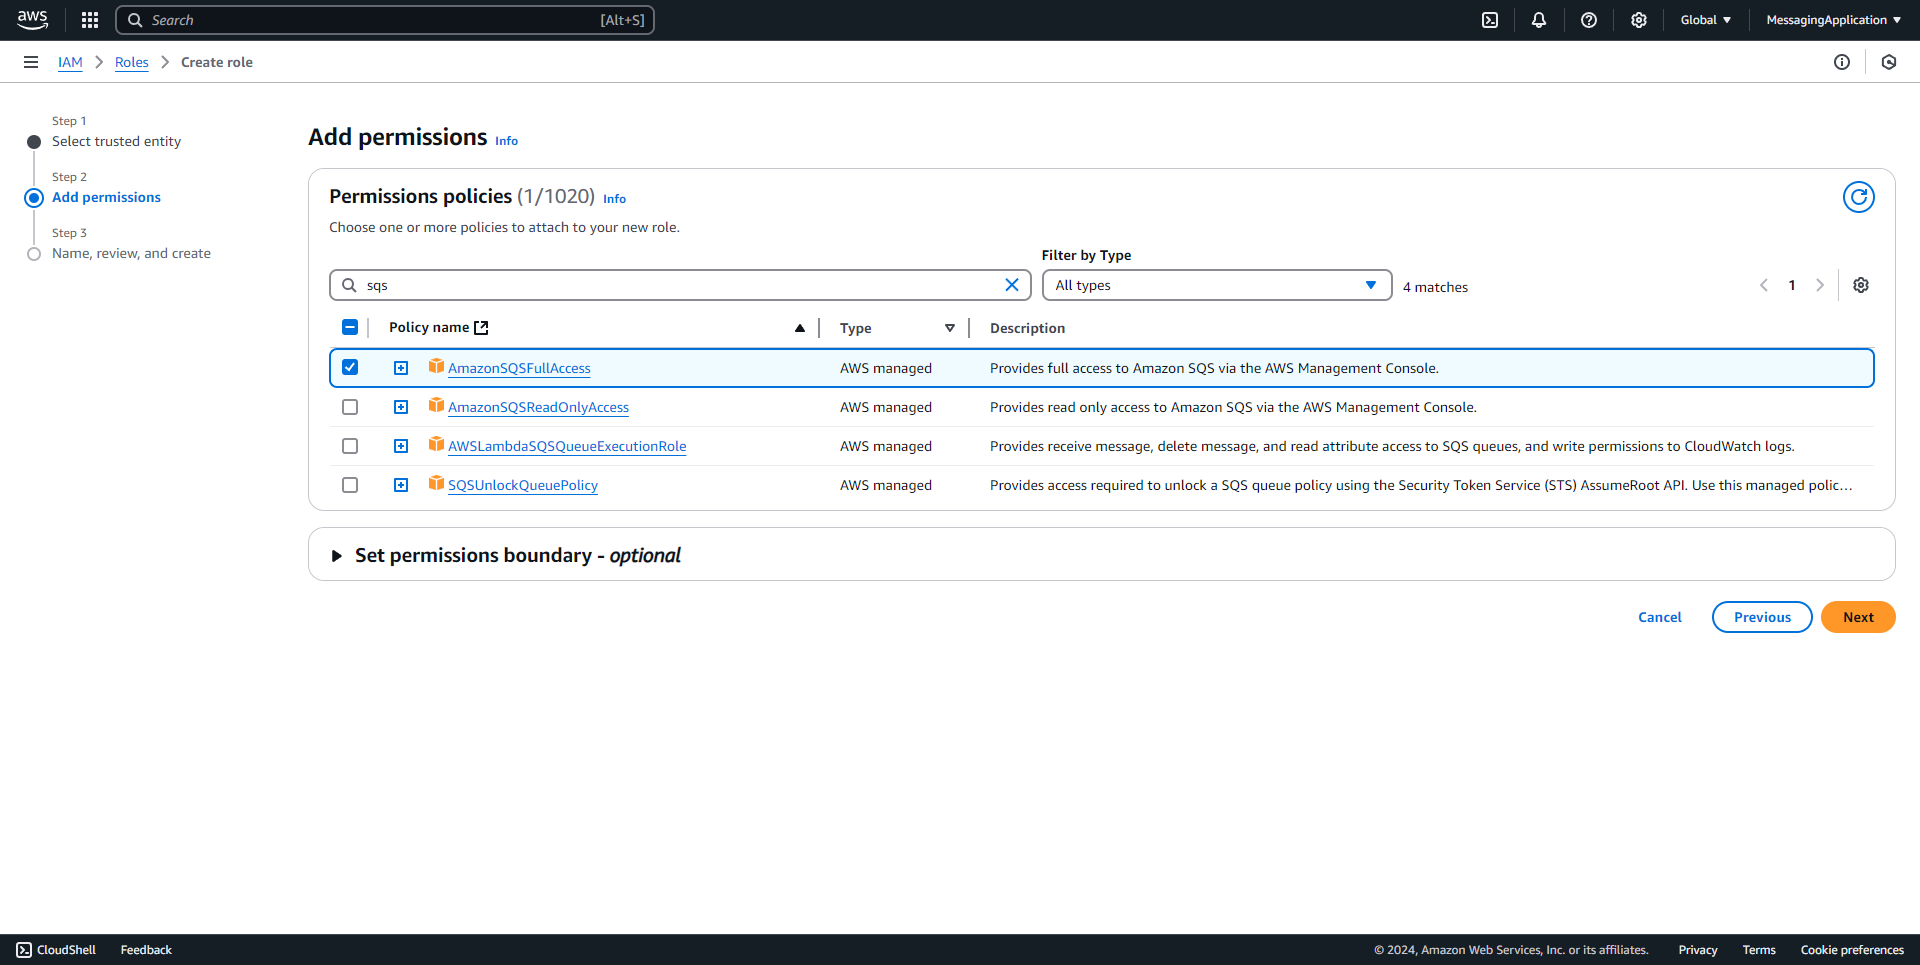
4. Name the role that holds the ECS Permissions. Select create role on the bottom of the page.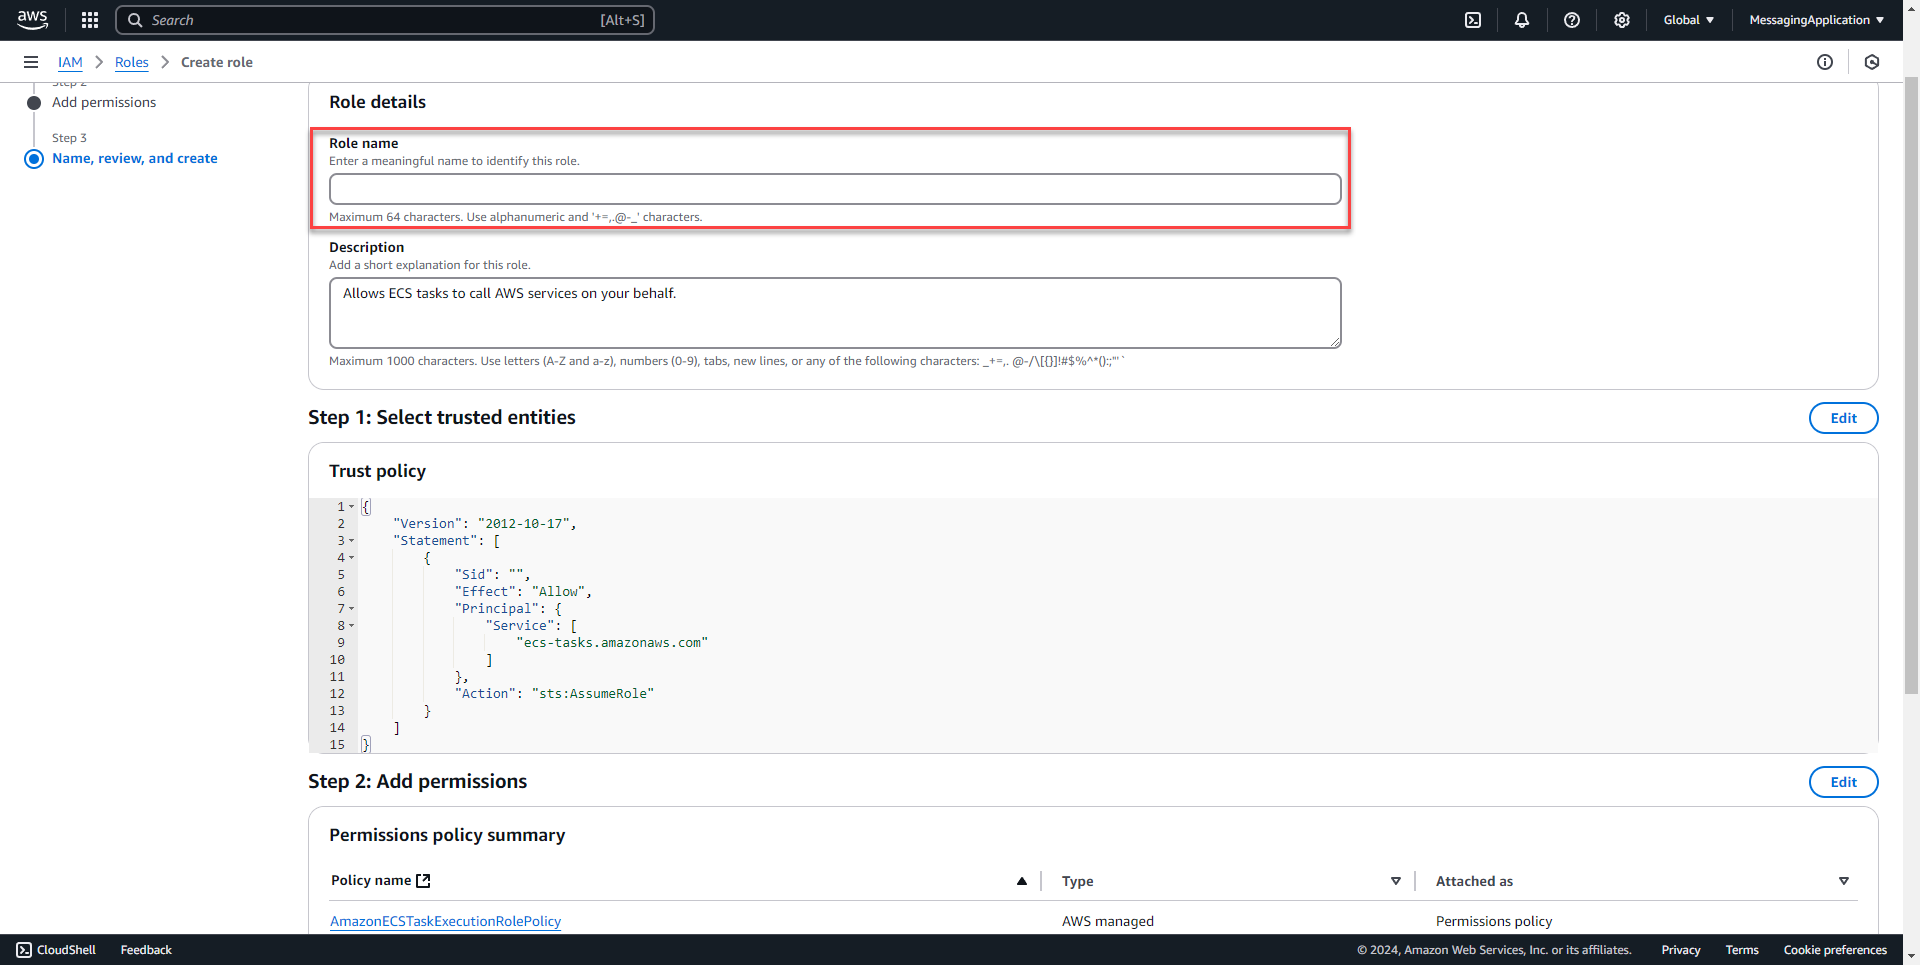
Create the ECS Resource to host the python application
Create the ECS Cluster
1. Select create cluster on the Elastic Container Services Page.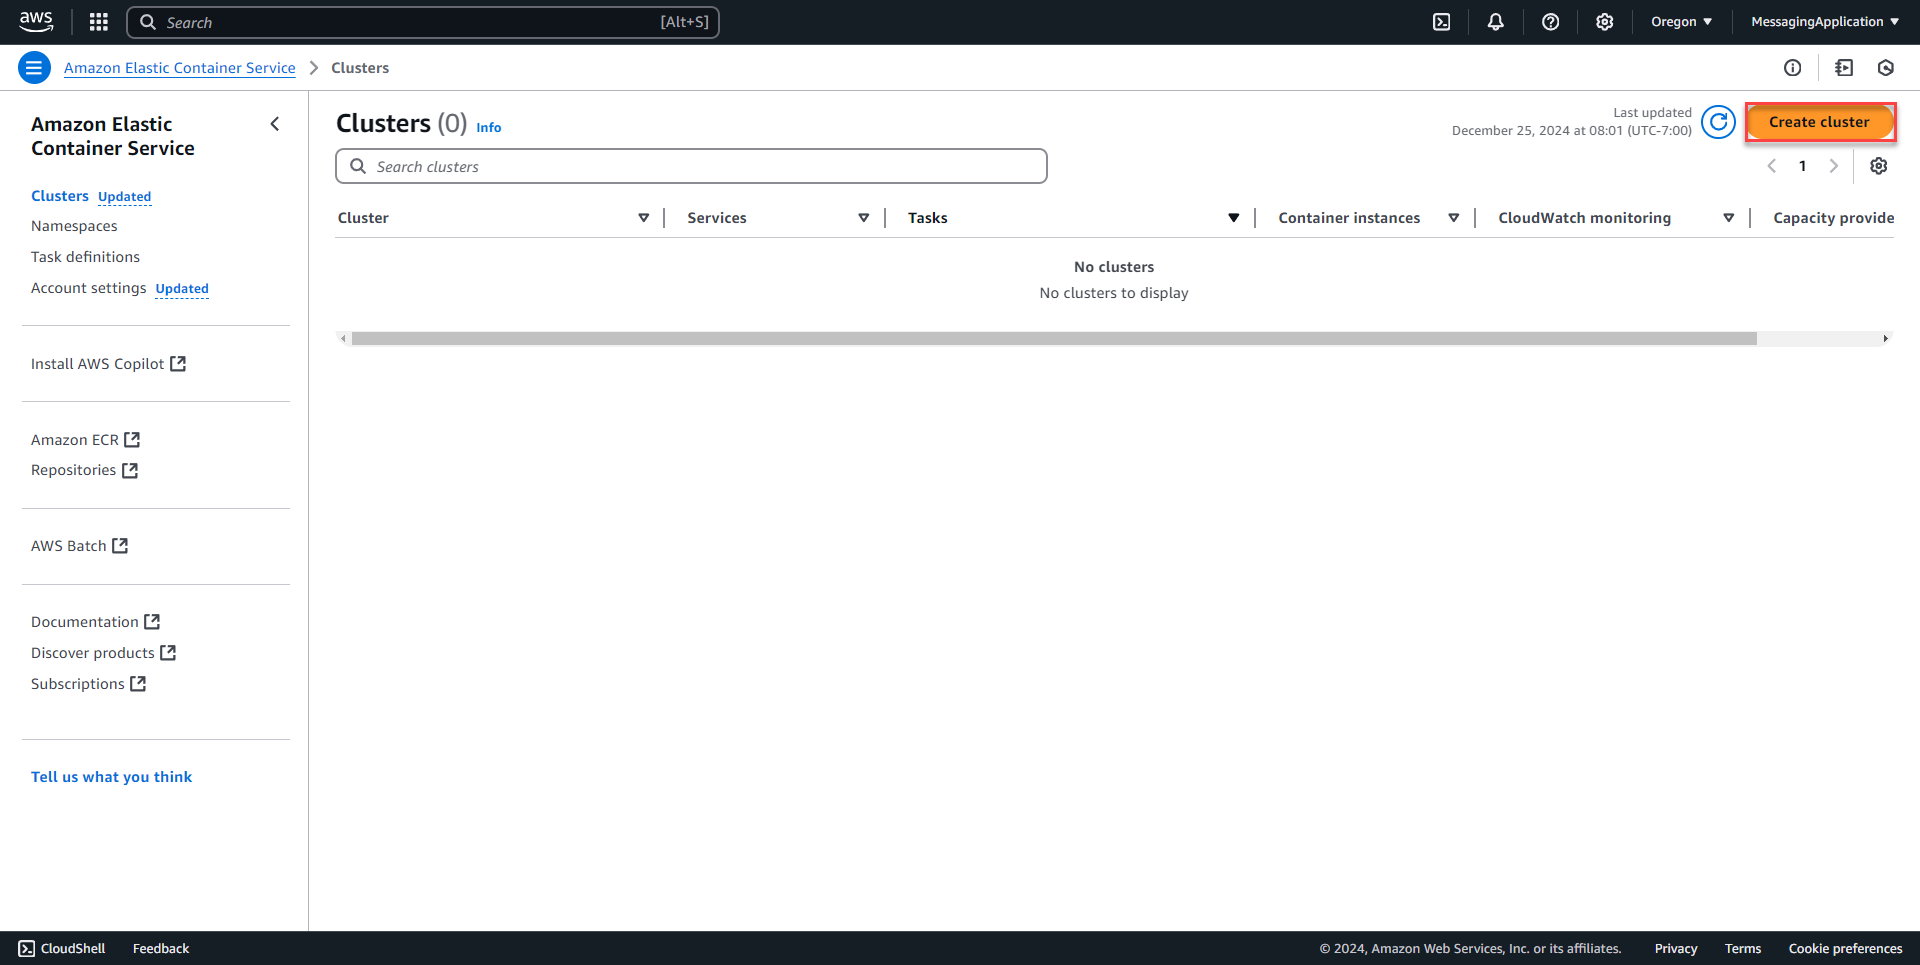
2. Enter name fore the cluster. Select AWS Fargate under the Infrastructure heading. Select create at the bottom of the page once finished.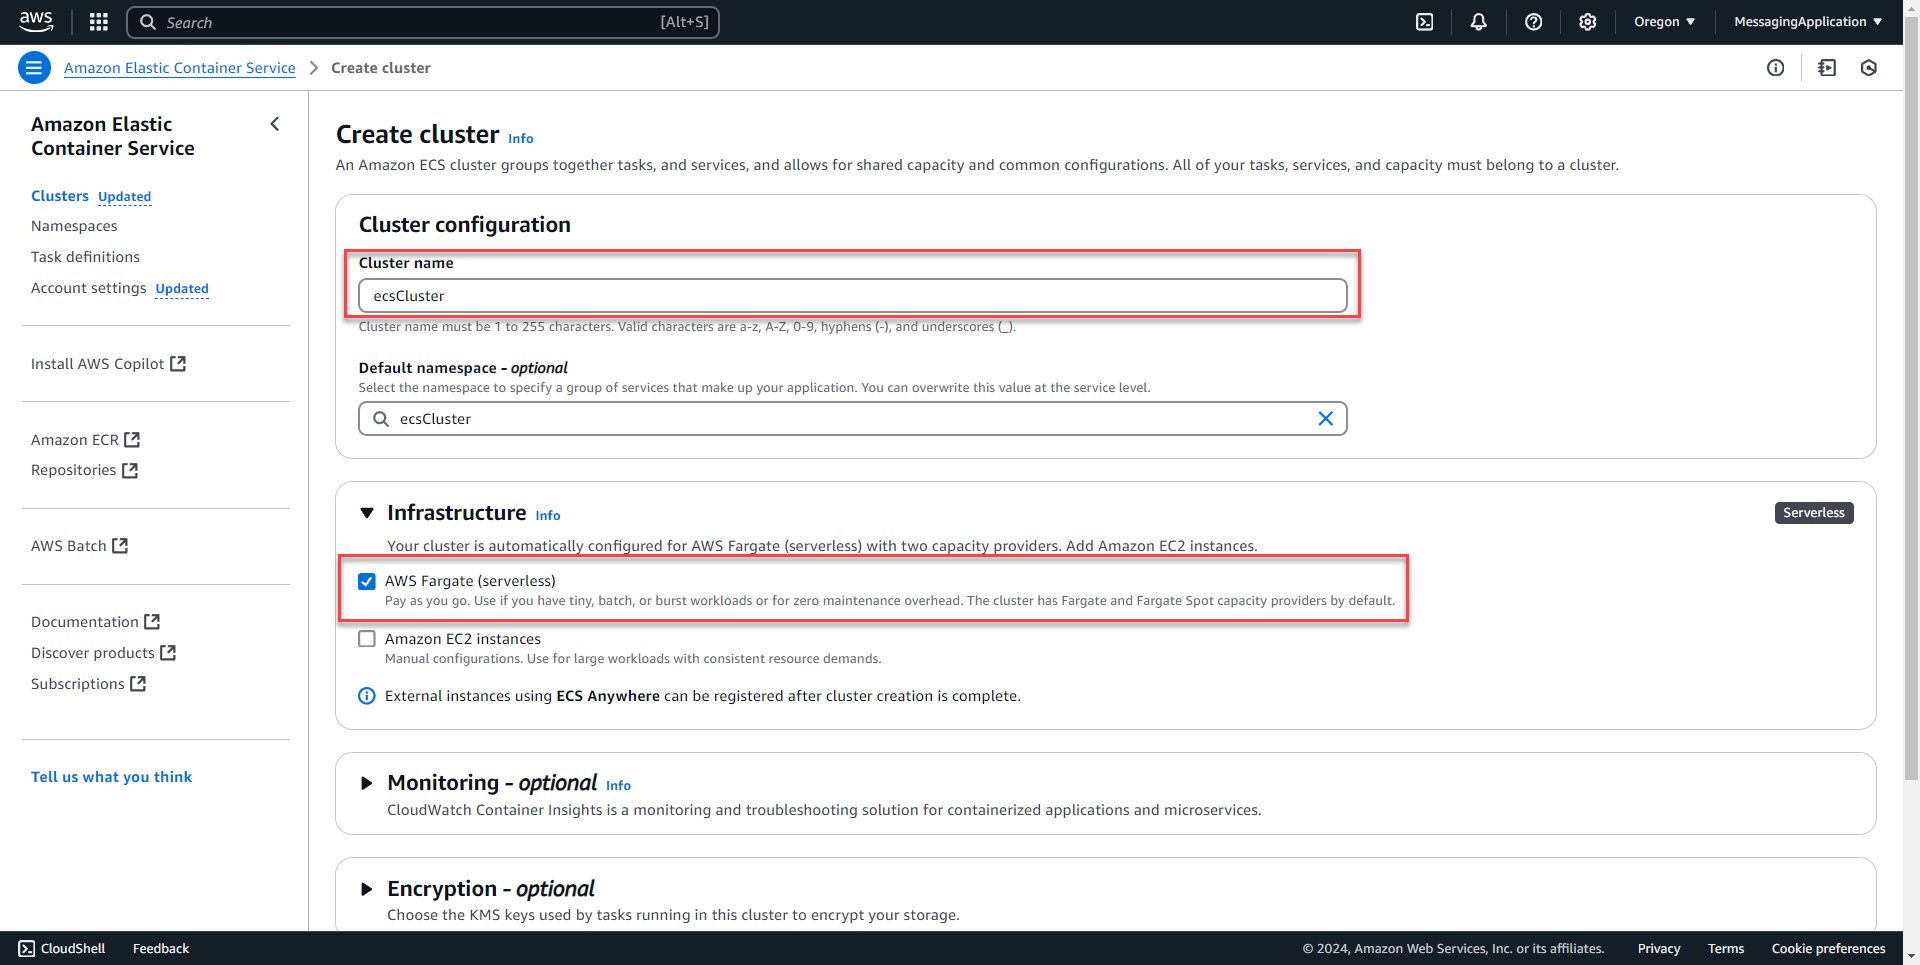
Create the task definition
1. Select task definition from the left menu and select the create new task definition button. On the drop down menu select create new task definition. 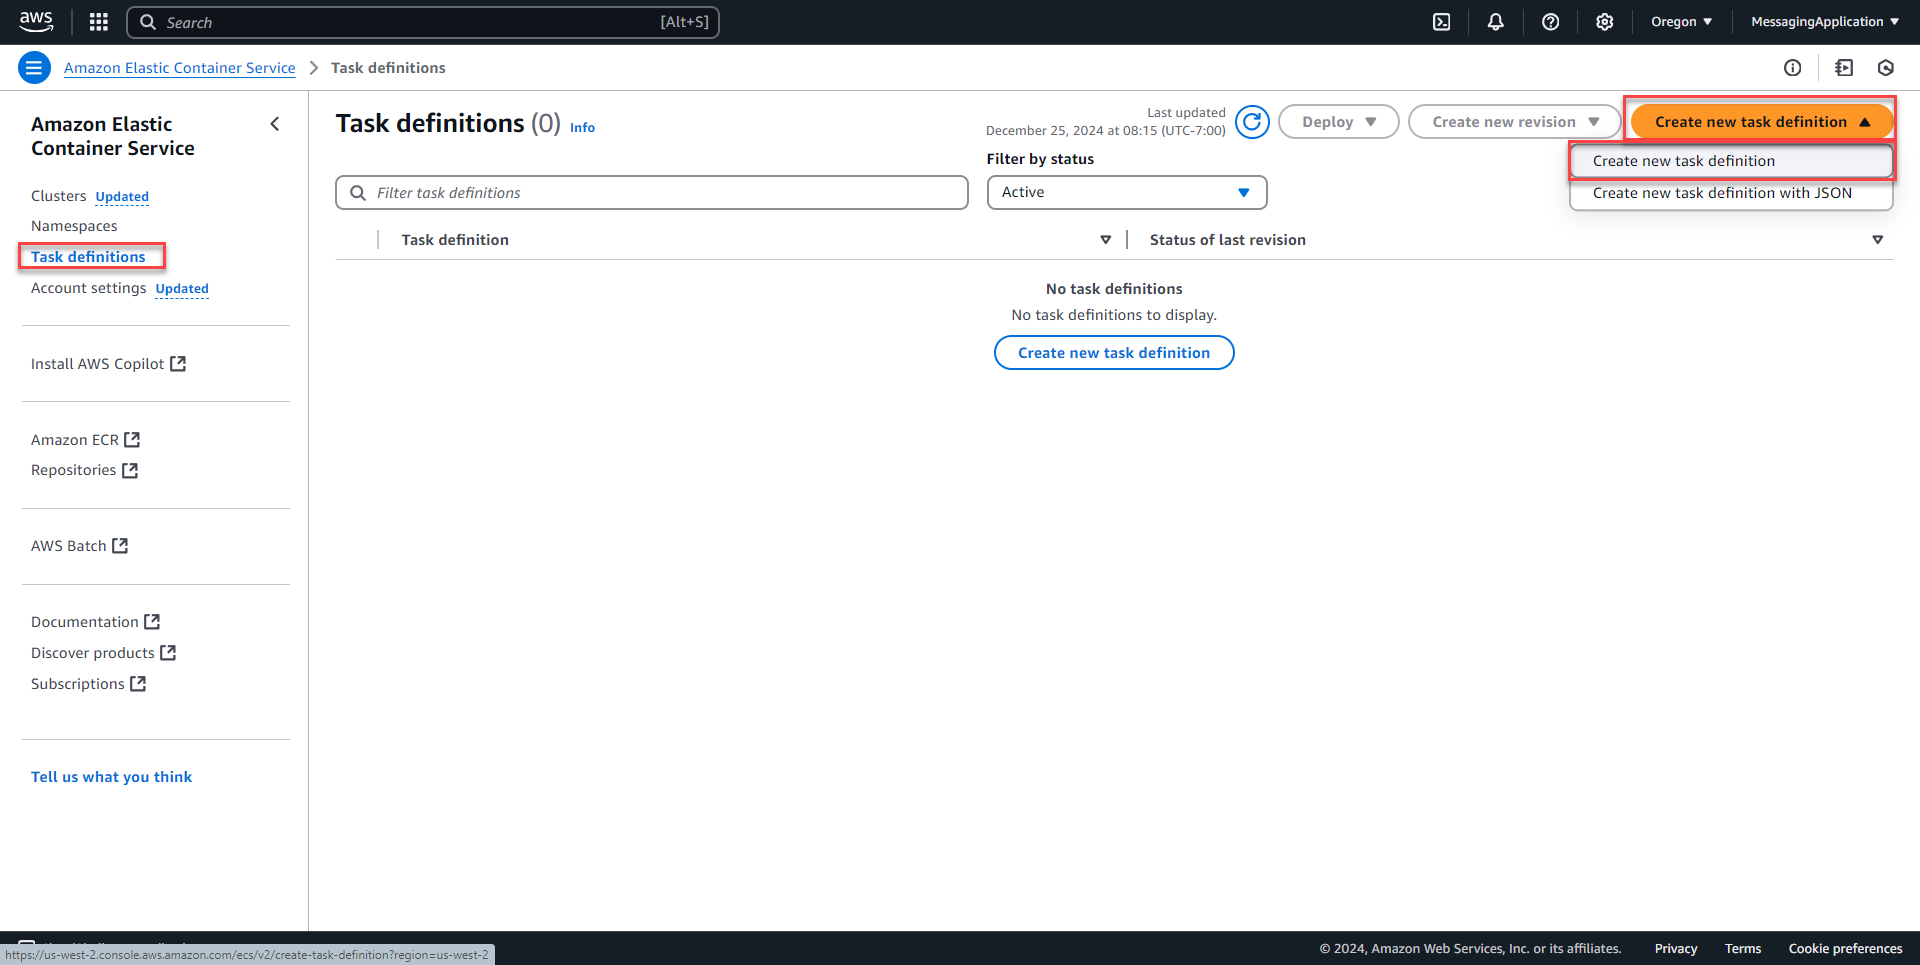
2. Create a name for the task definition under task definition family. Select launch type as AWS Fargate. OS will be Linux/x86_64. Select cpu and memory size for the container.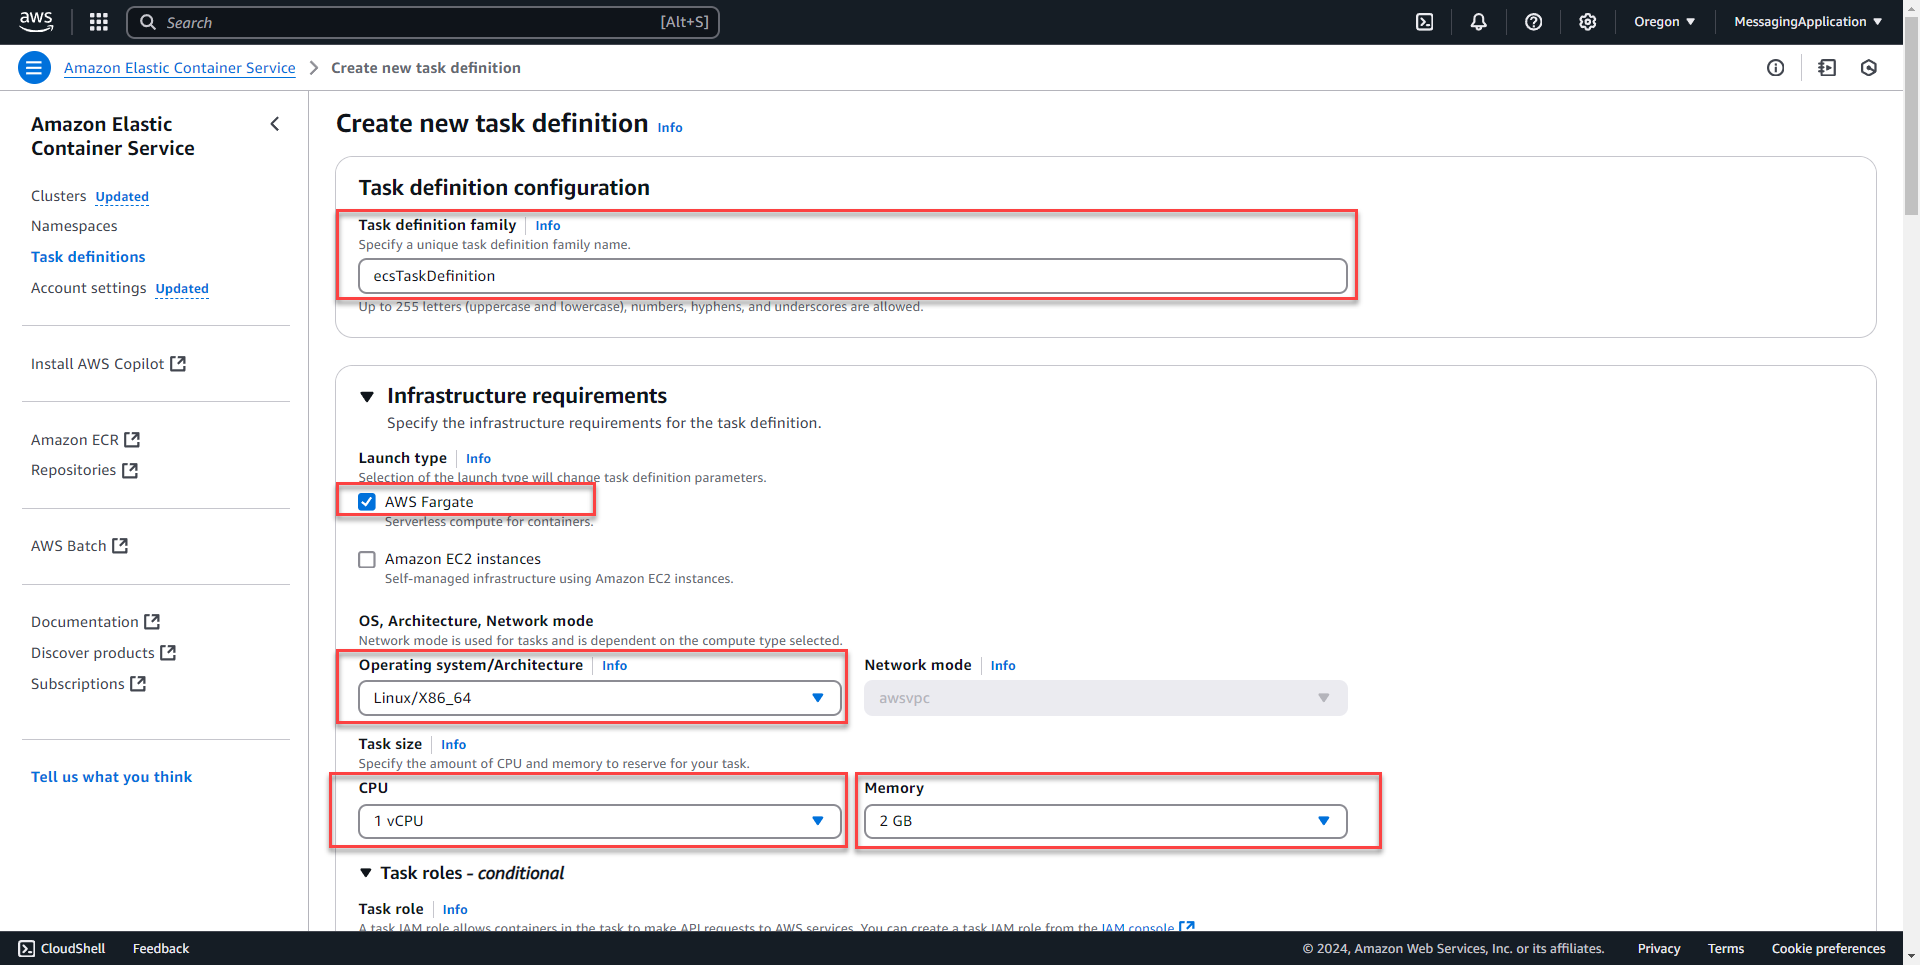
3. In the task role and task execution role section select the ecs IAM role created earlier. Under the contaienr section, Name the container image and supply the repository image url for the container. Repository for the application in this example is zacaryfettig/signupapplication:latest
4. Under port mappings for this application, the container port will be 5000, protocol TCP, and also enter a name to identify the port. Scrolling down to environment variables, select add environment variable that will be used to select the region that the the Sign Up Application will reference to access the secrets manager resource. The key will be REGION, value type will be set as value, and the value will be the region that you created secrets manager in.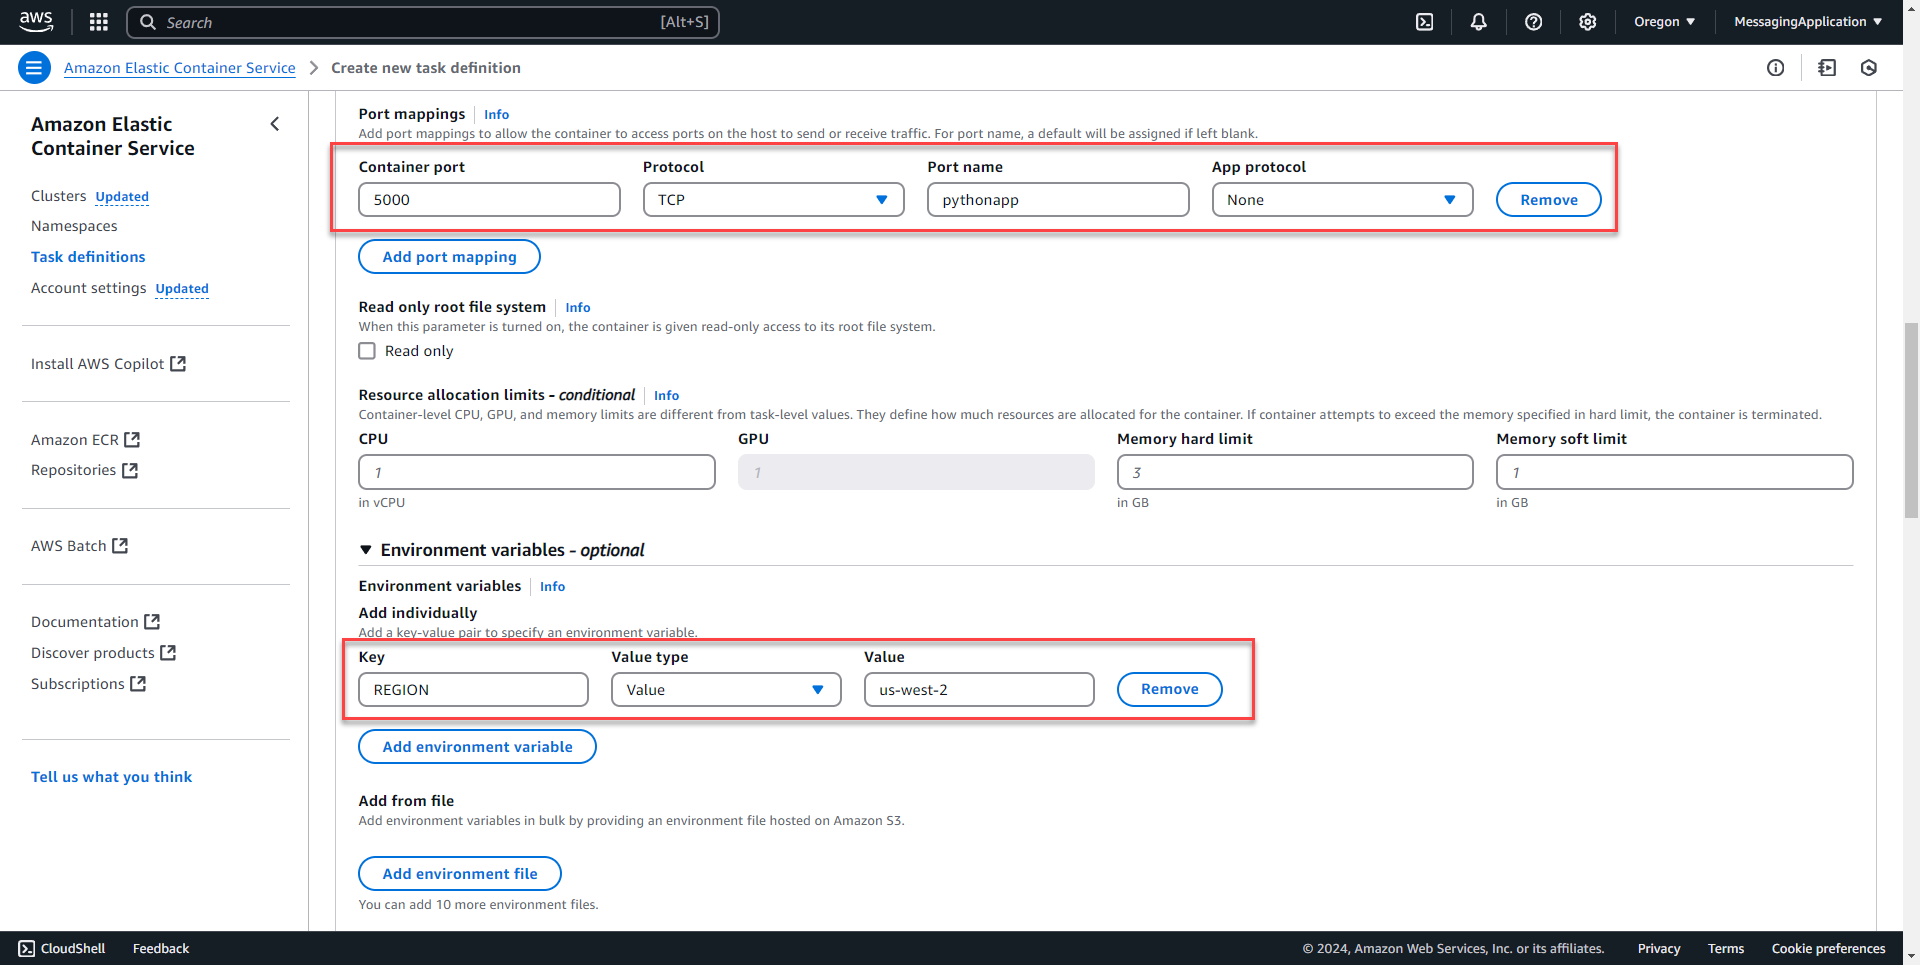
5. Leave the rest of the settings as default and select create at the bottom of the page.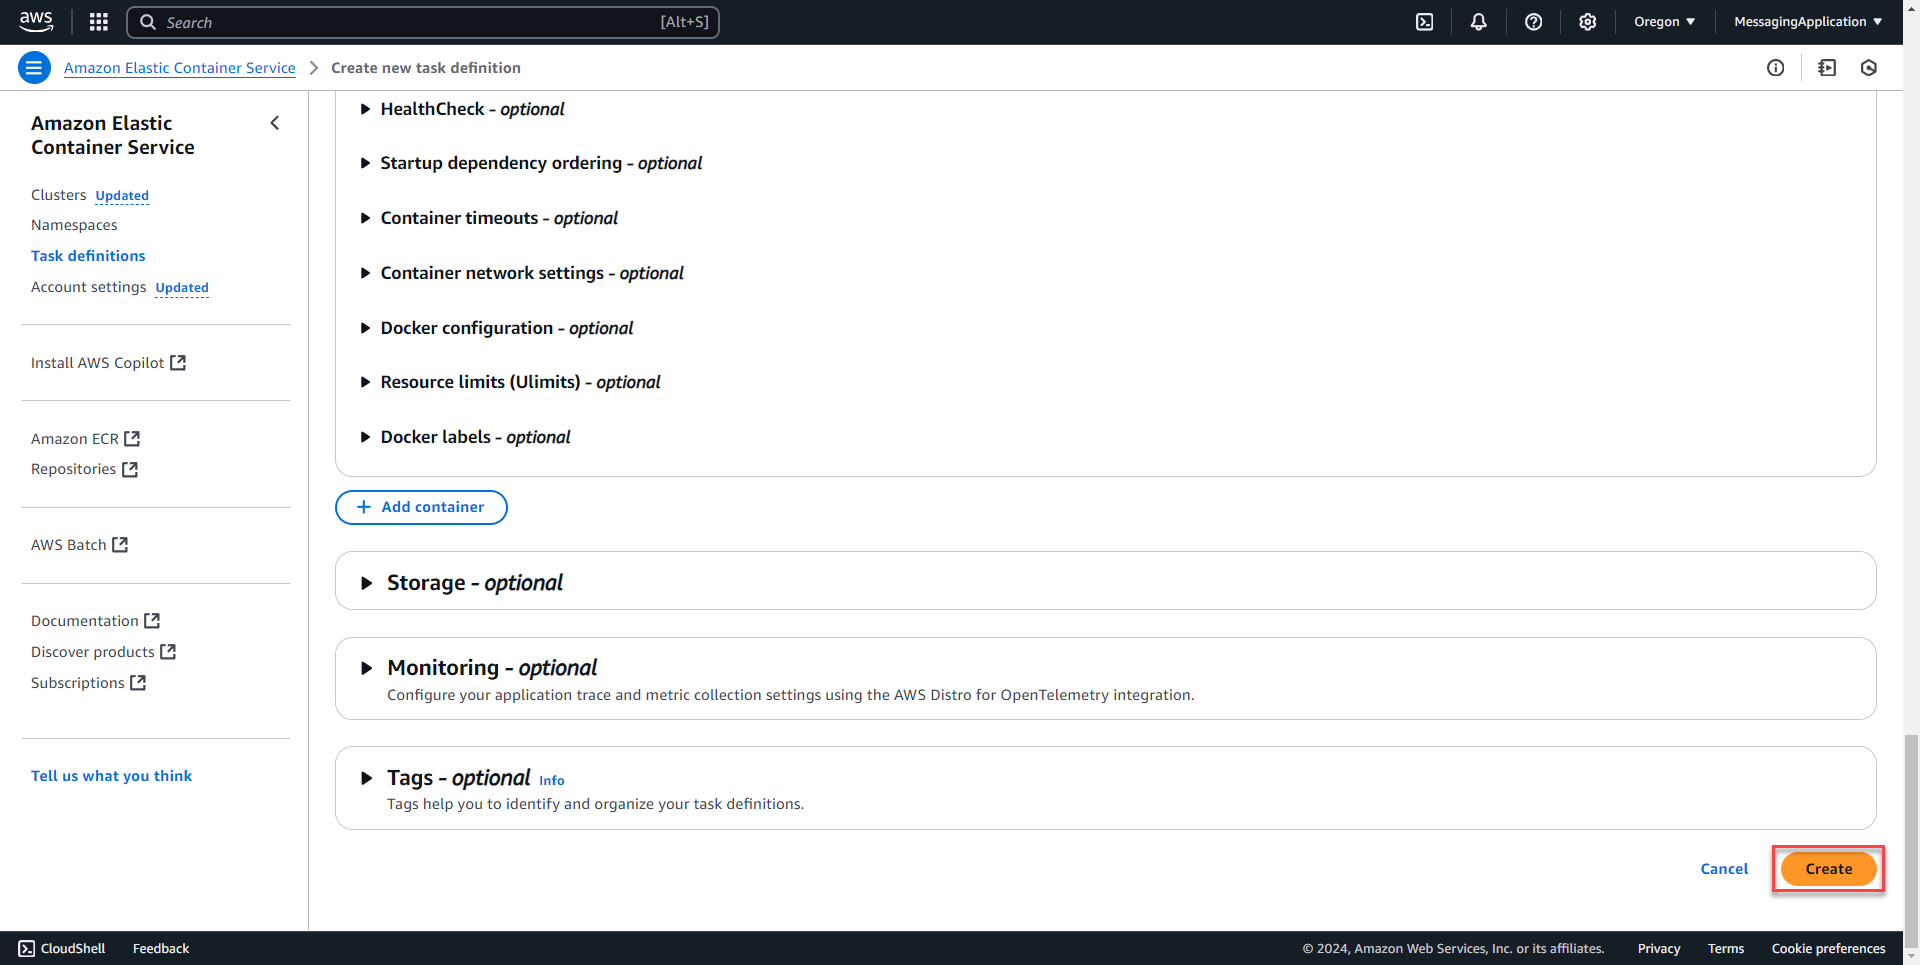
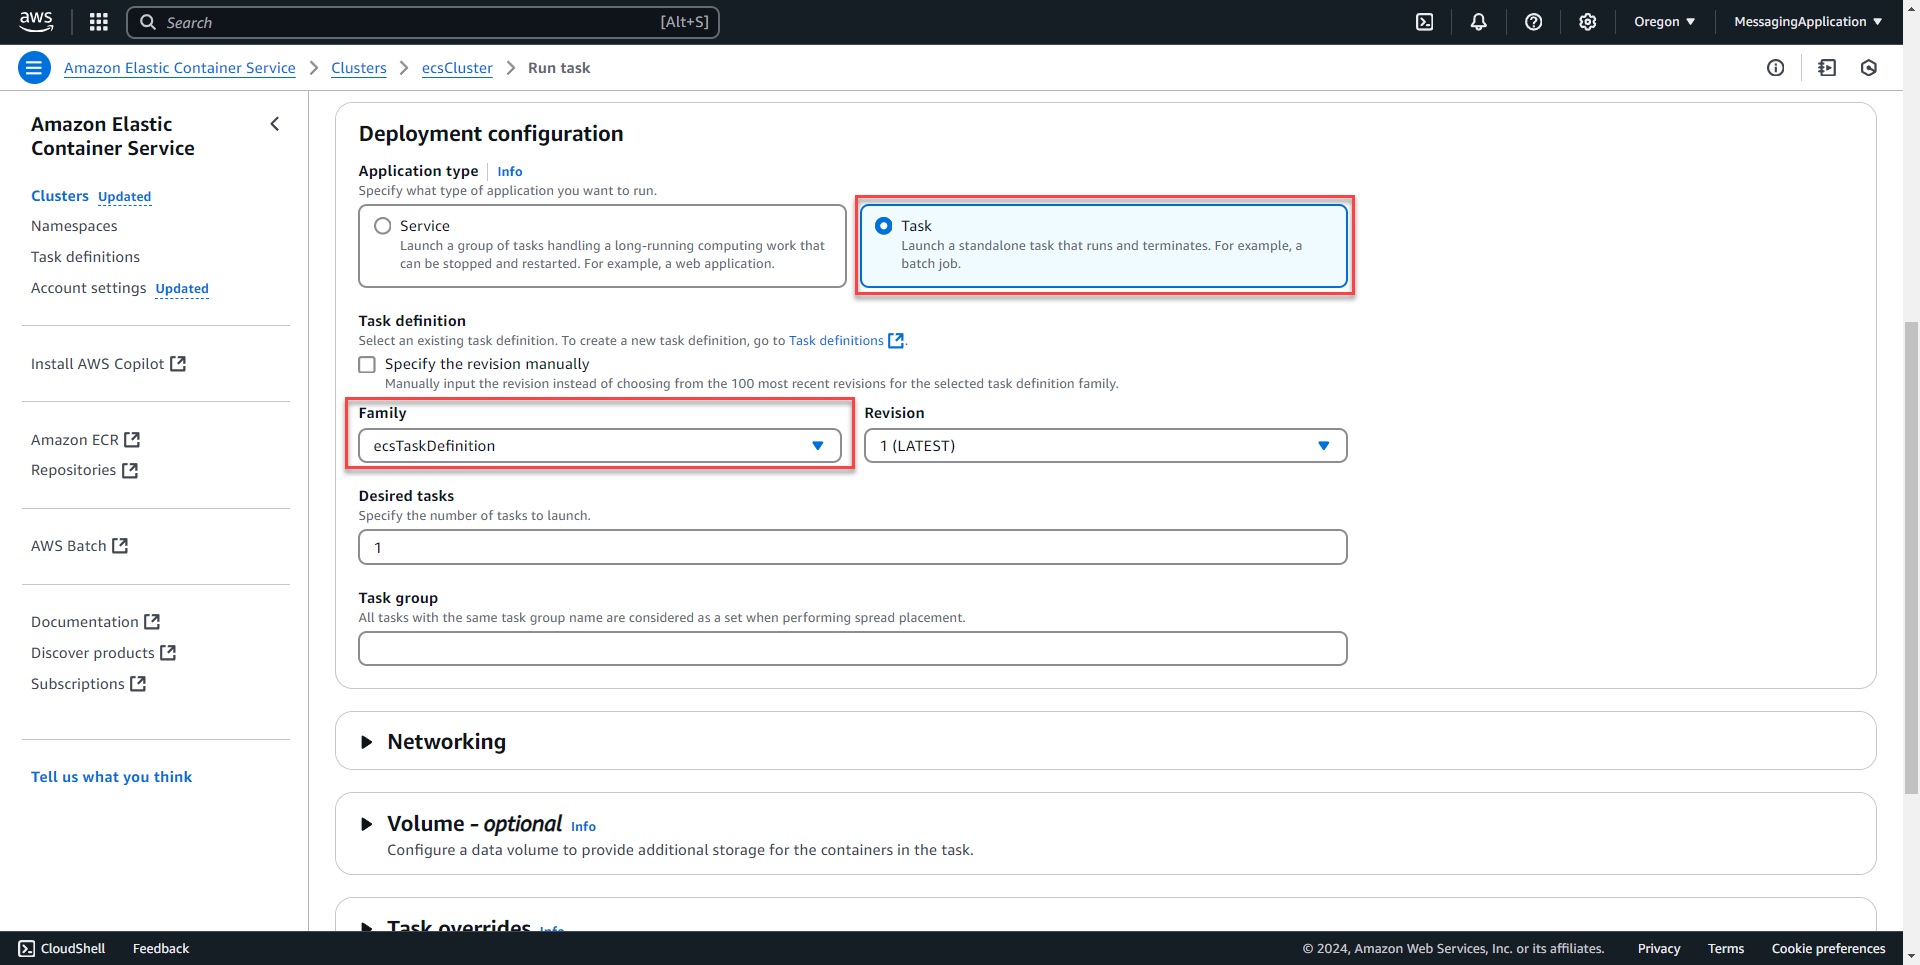
Create the task
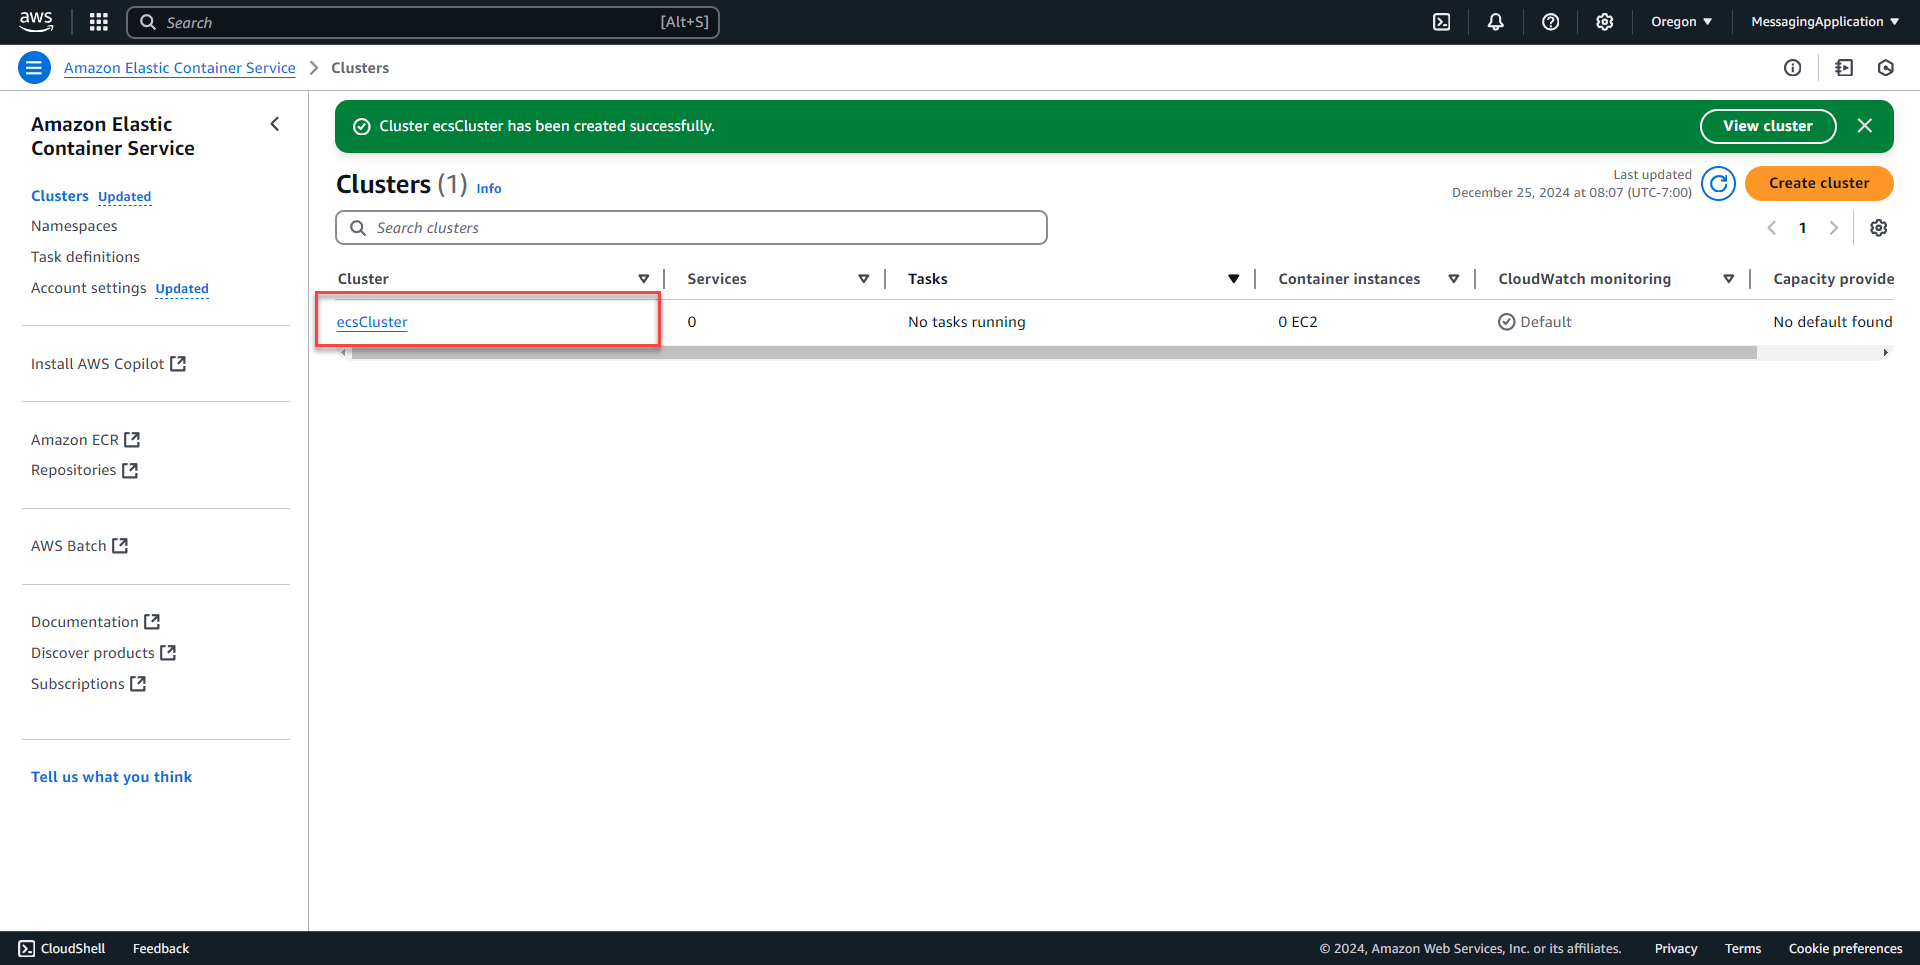
1. Go back to the clusters tab and select the cluster that was created in the previous steps.
2. On the tasks tab, select run new task.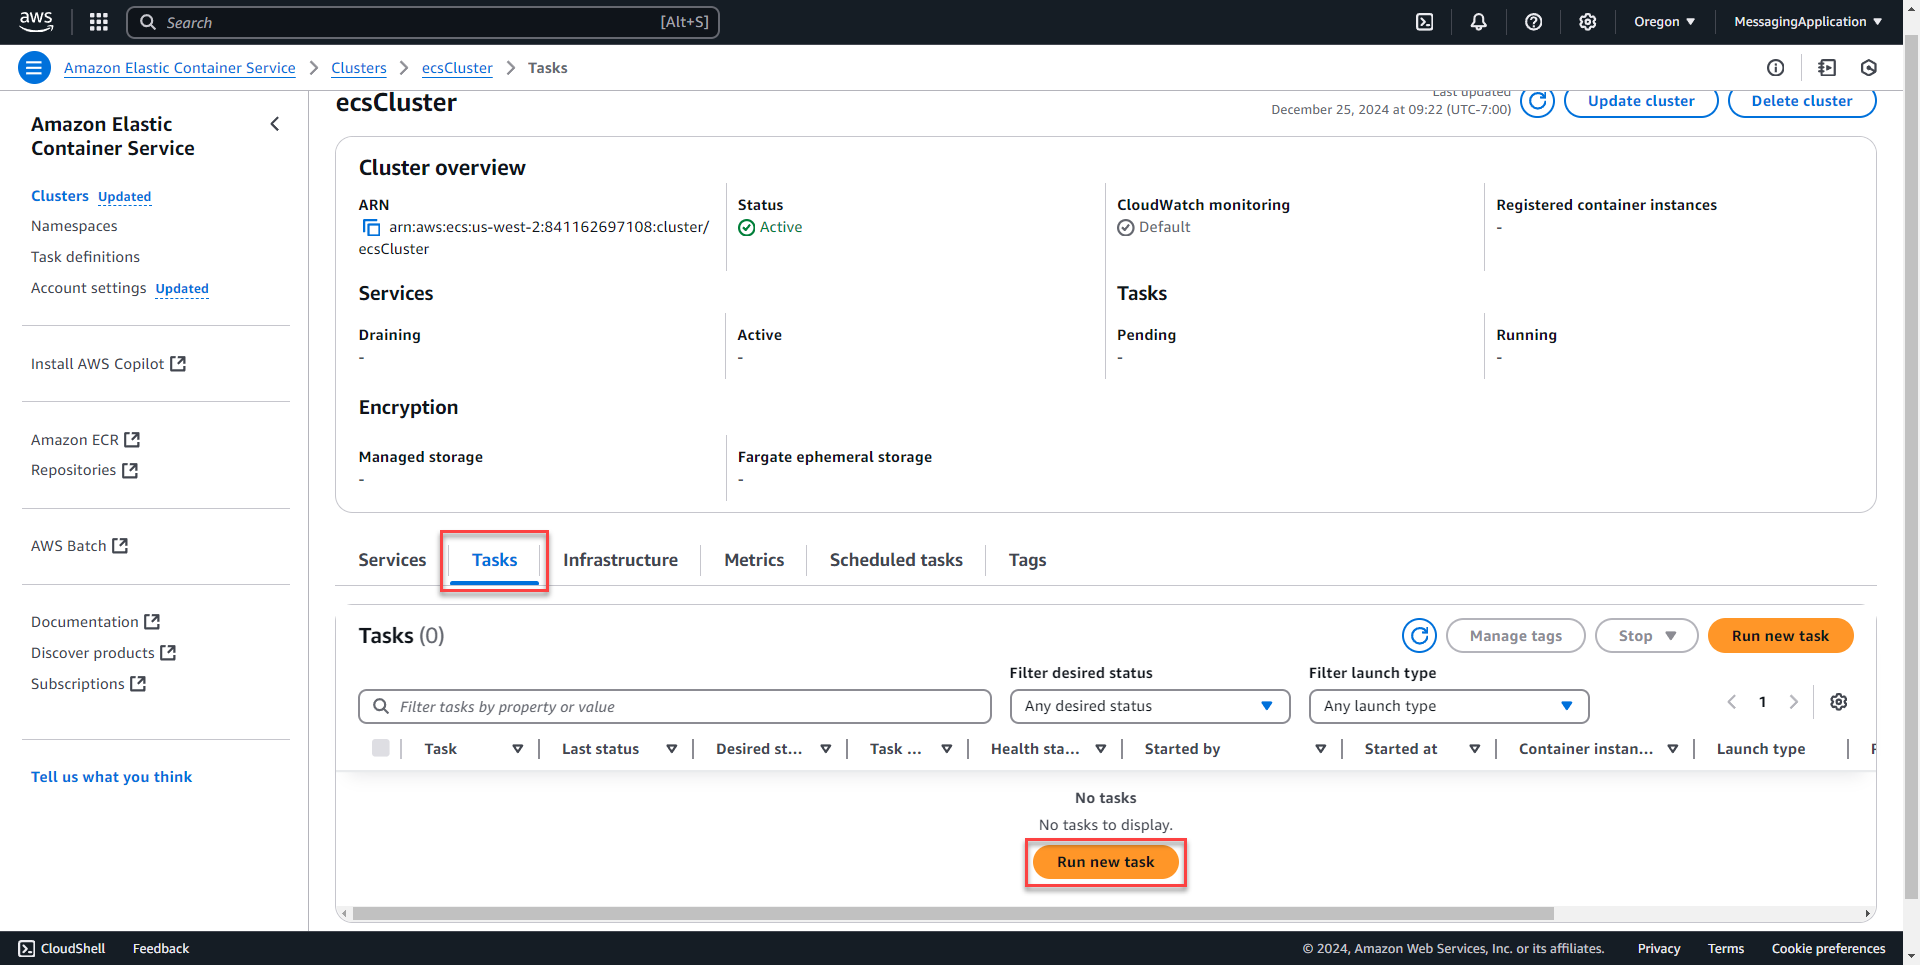
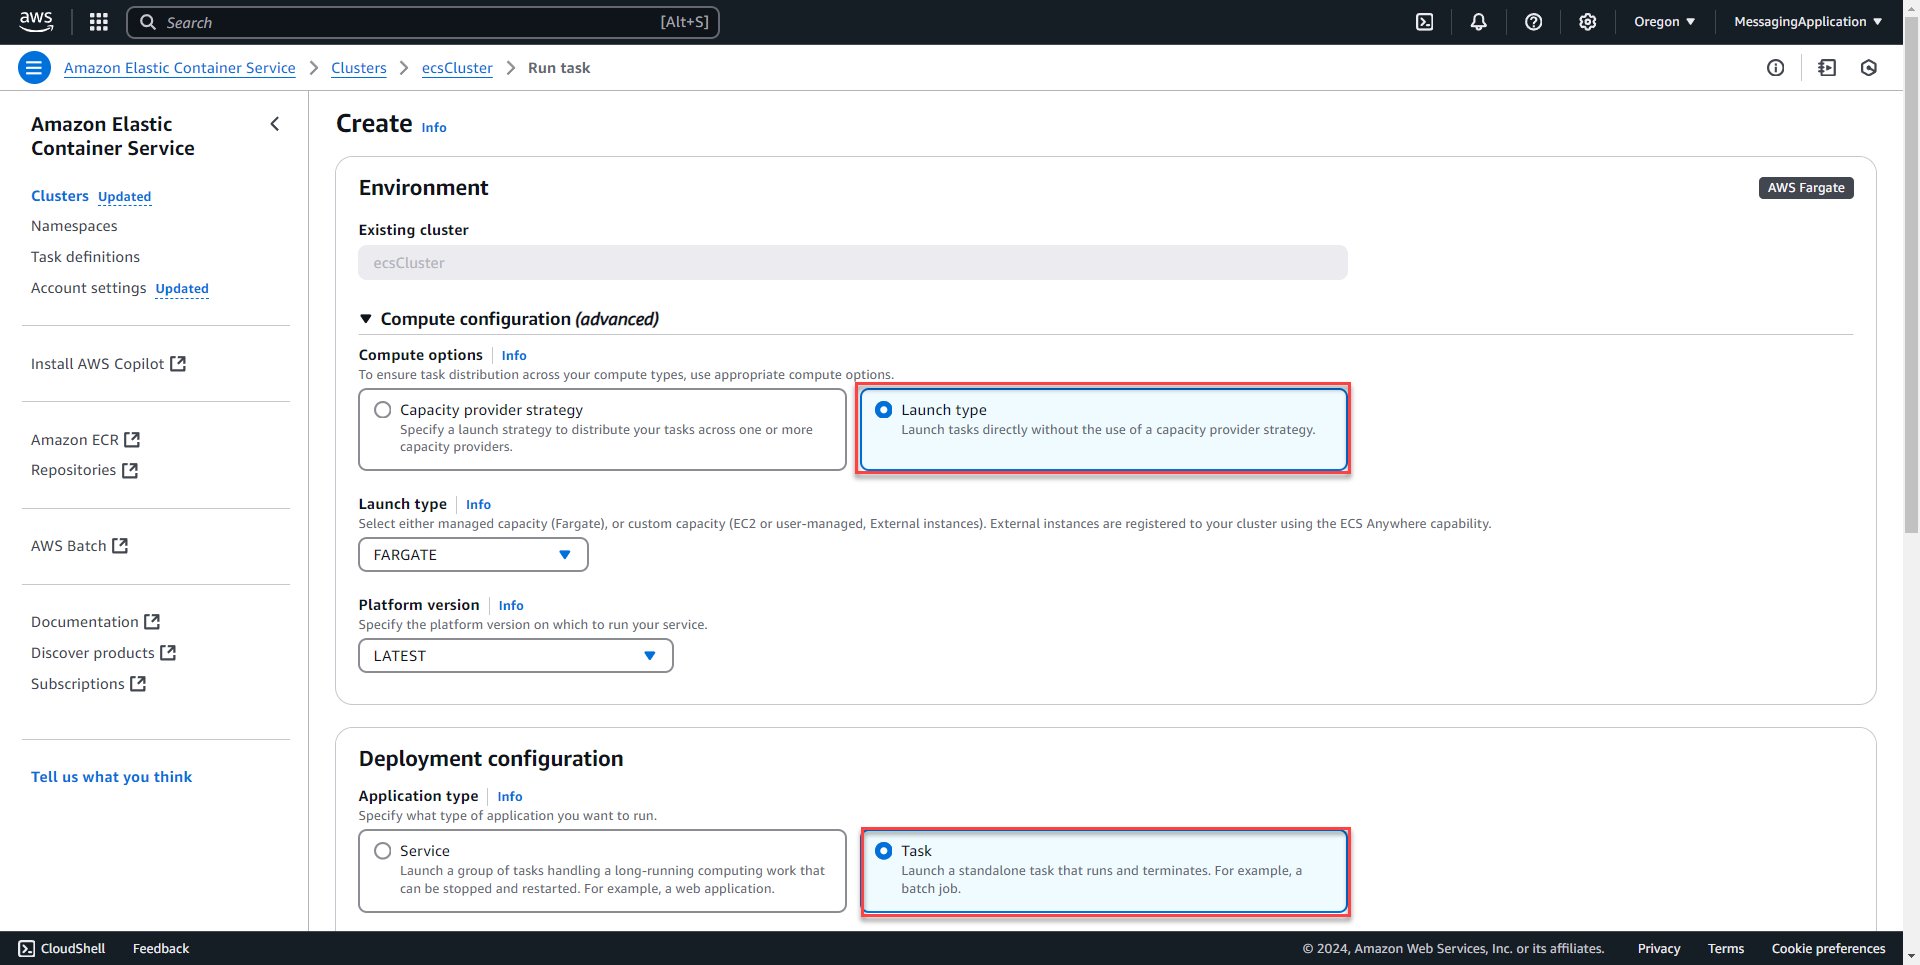
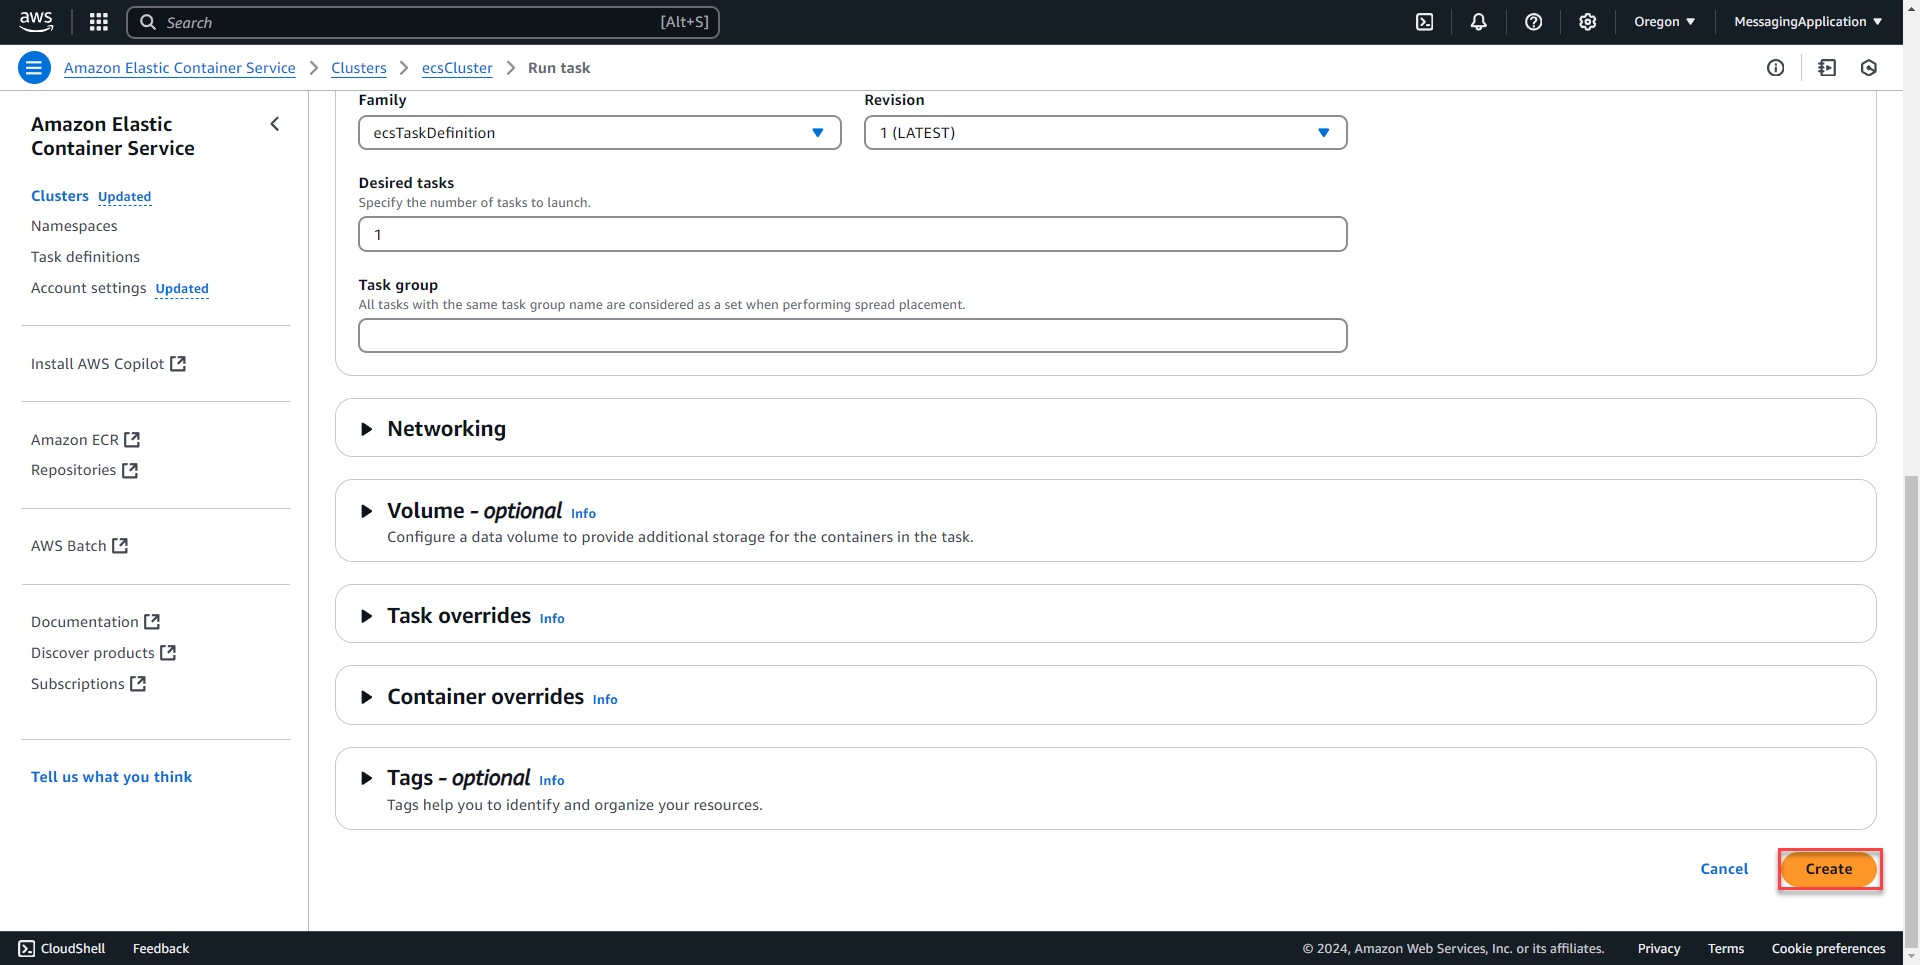
3. Under compute configuration select Launch Type. Scroll down to task and add the task definition family to the task. Leave the rest as default and select create at the bottom of the page.
Connecting to the application
1. Select the newly created task. On the network bindings tab of the configuration, the external link to the application is show with port 5000. Select open address or copy the link to connect to the application.
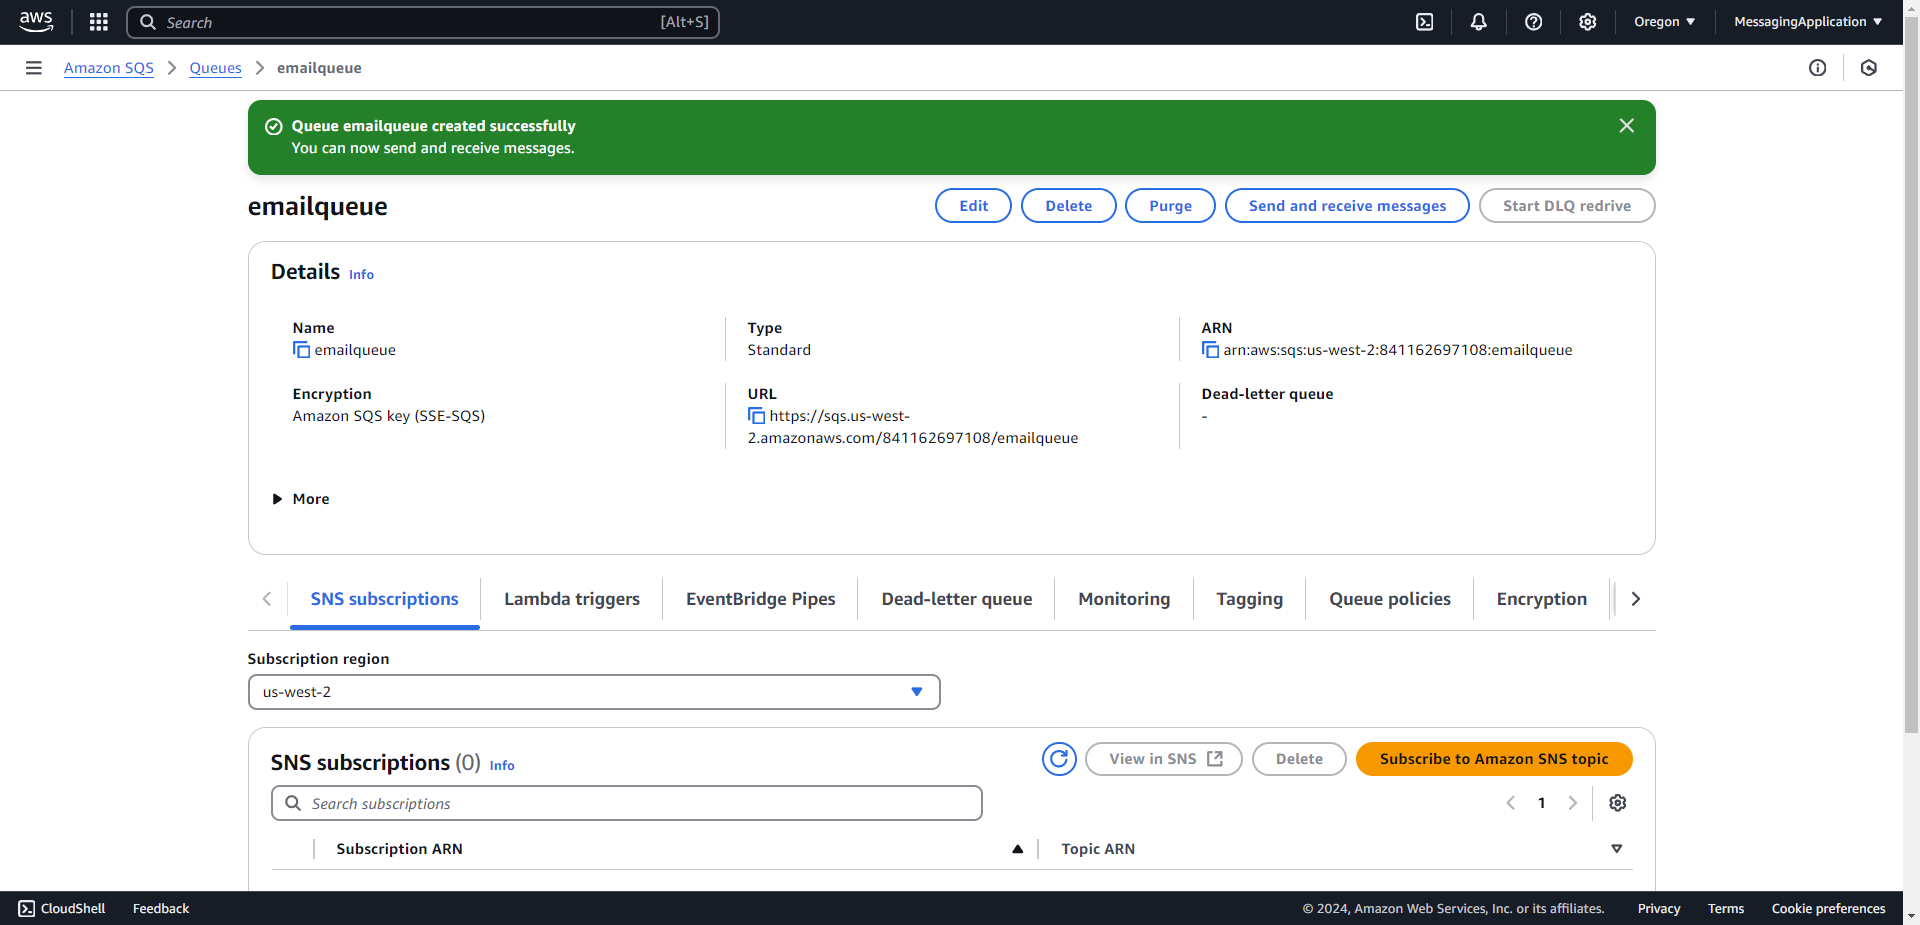
Creating the AWS SQS Queue
1. Go the sqs resource page and select create queue.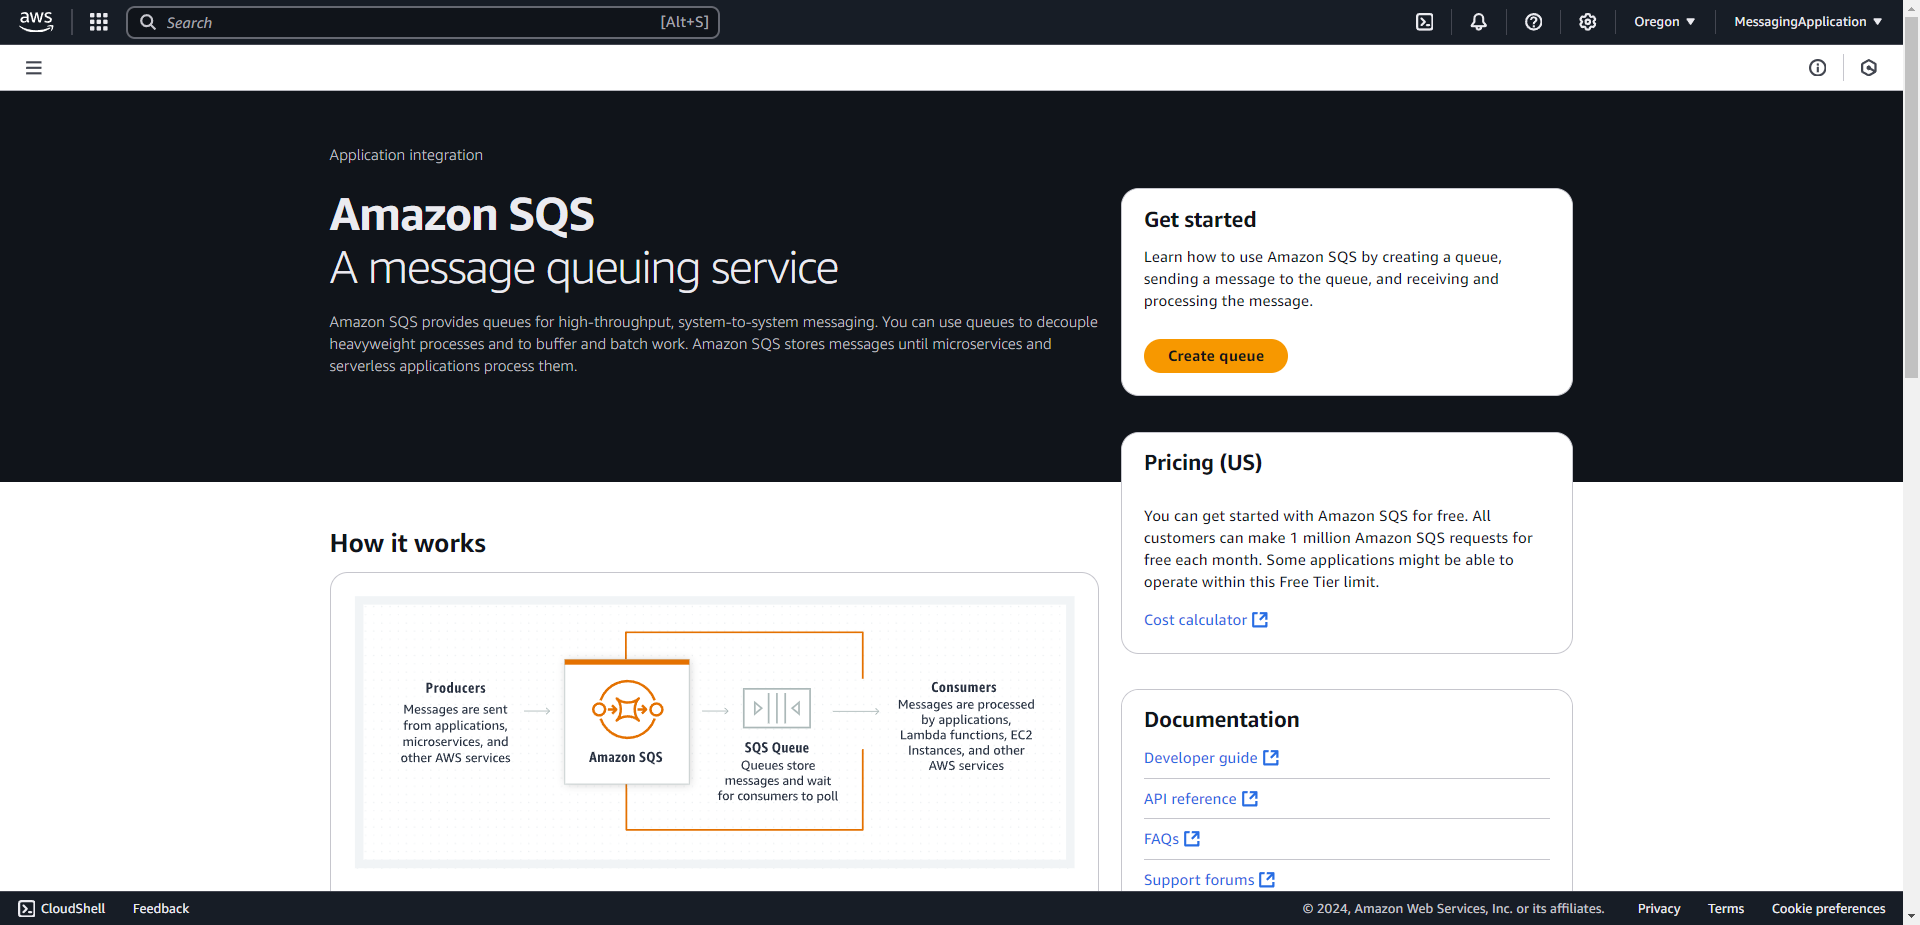
2. Select the type as standard. The more premium tier will give exact message processing order, but that is not needed in this case with the sign up confirmation email. Name the Queue and select create queue at the bottom of the page. 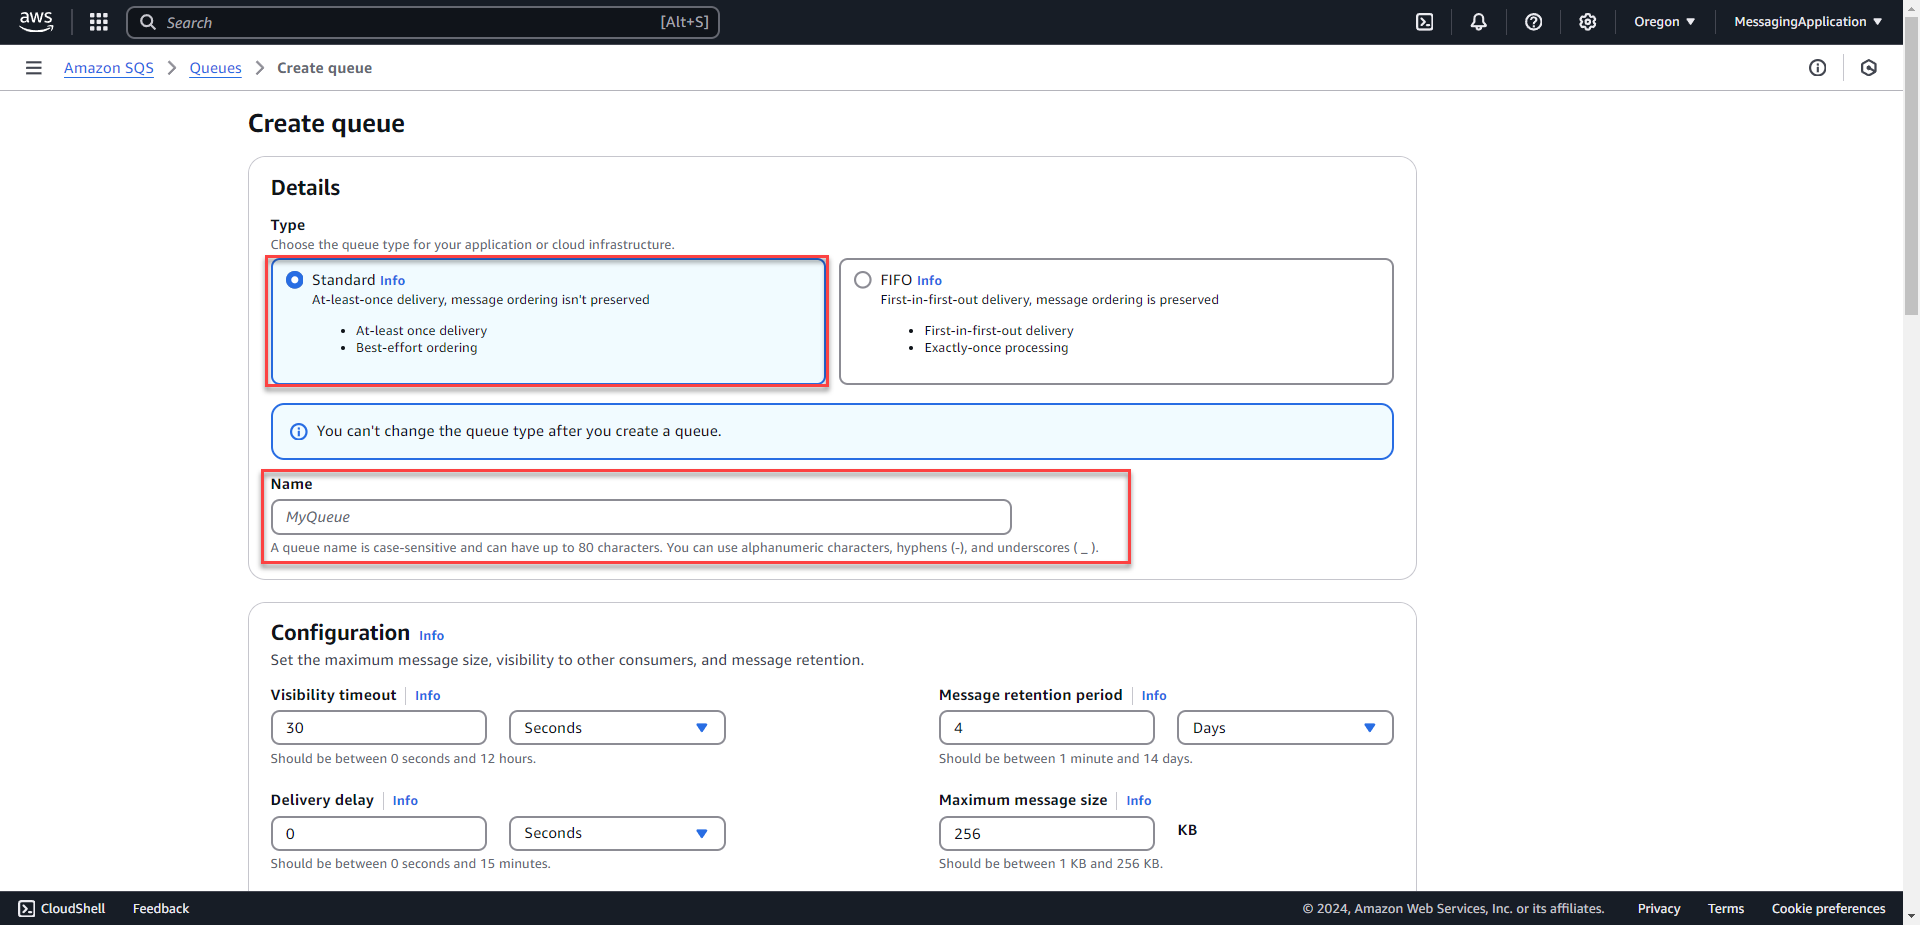
3. AWS will show a confirmation message when the queue creation is successful.
Adding SQS URL Secret to AWS Secrets Manager
1. Select the queue that was created earlier and copy the SQS URL from the queue configuration page.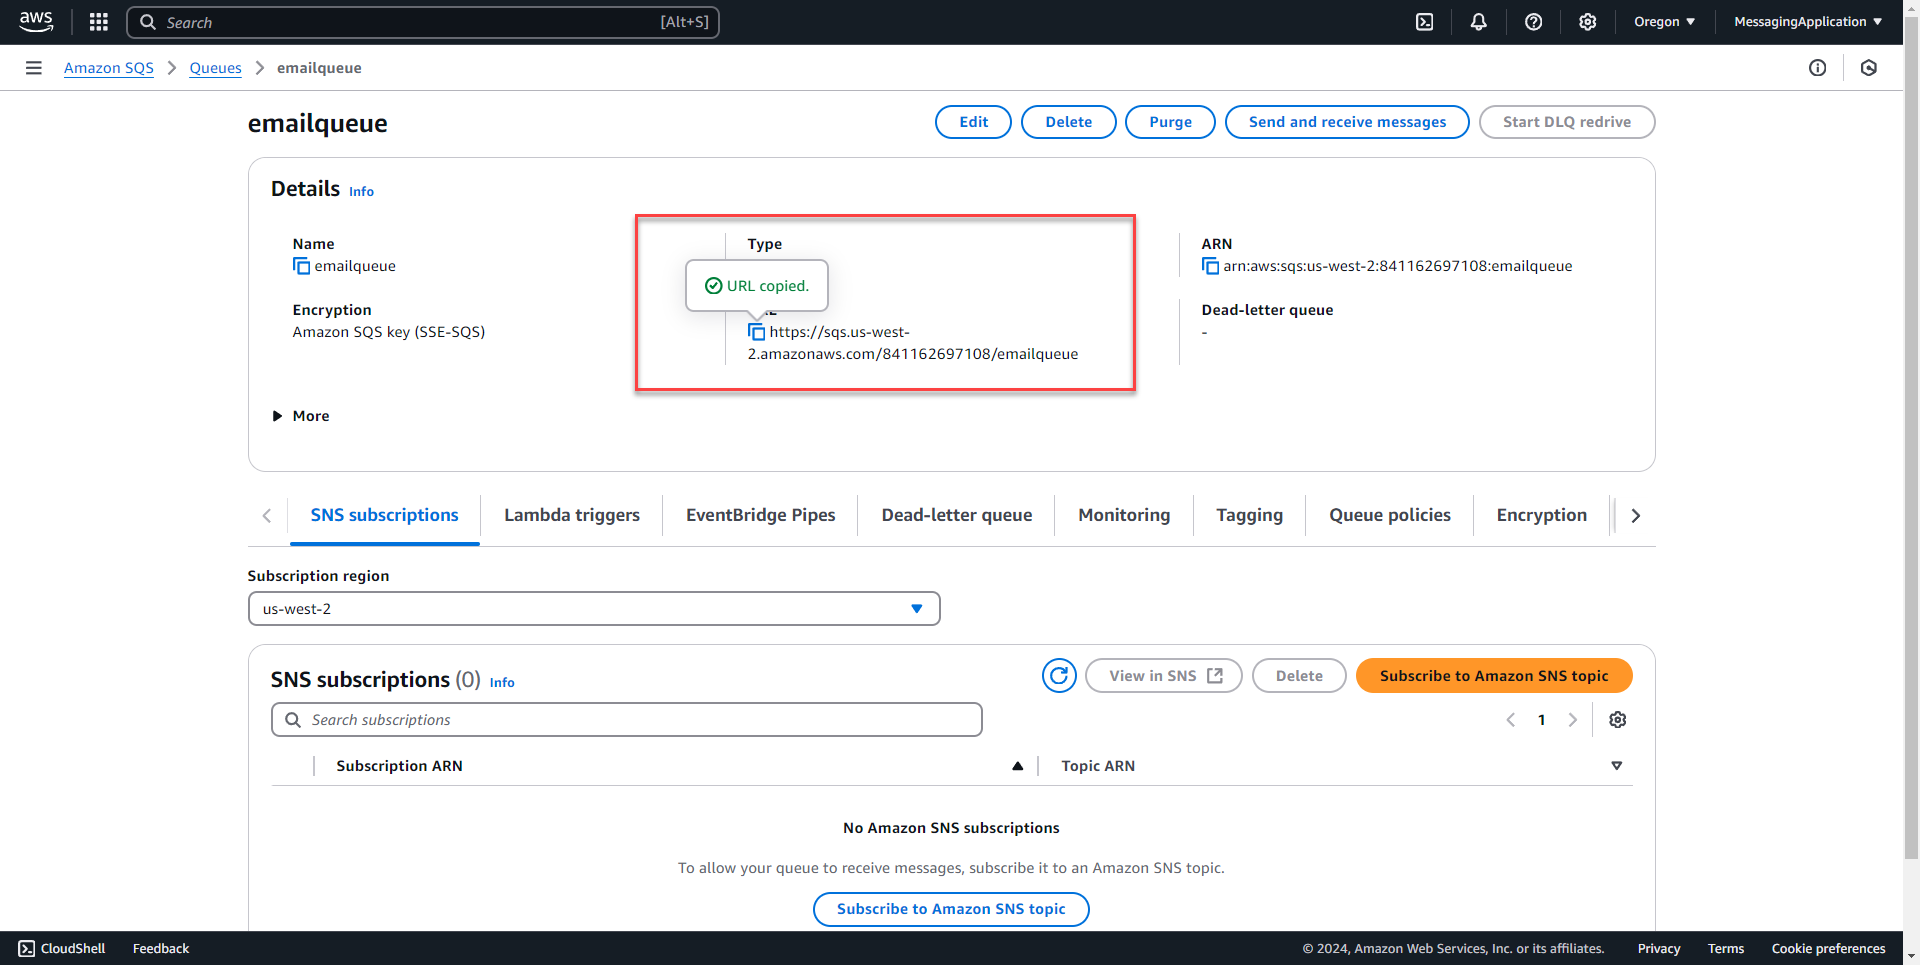
2. Go to AWS Secrets Manager and select store a new secret.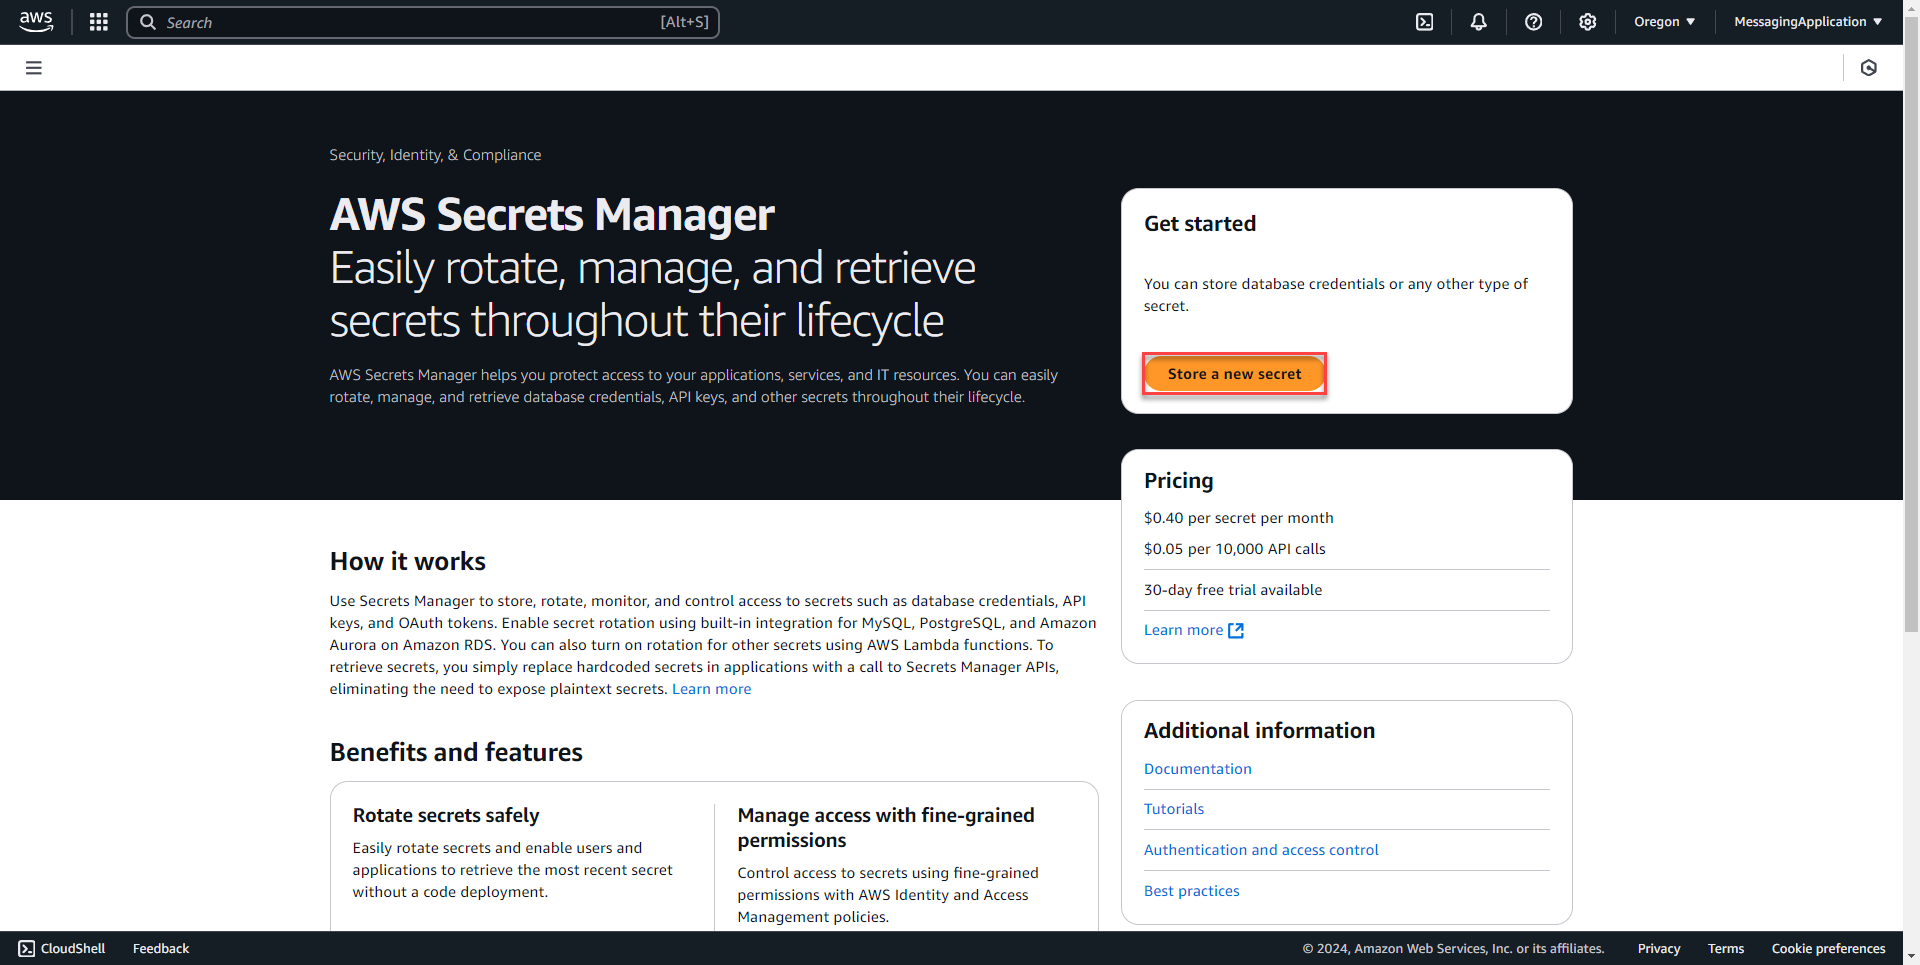
3. Select other type of secret from the secret type menu. Enter sqsurl as the key and paste the url from the SQS Page into the values field. Select next.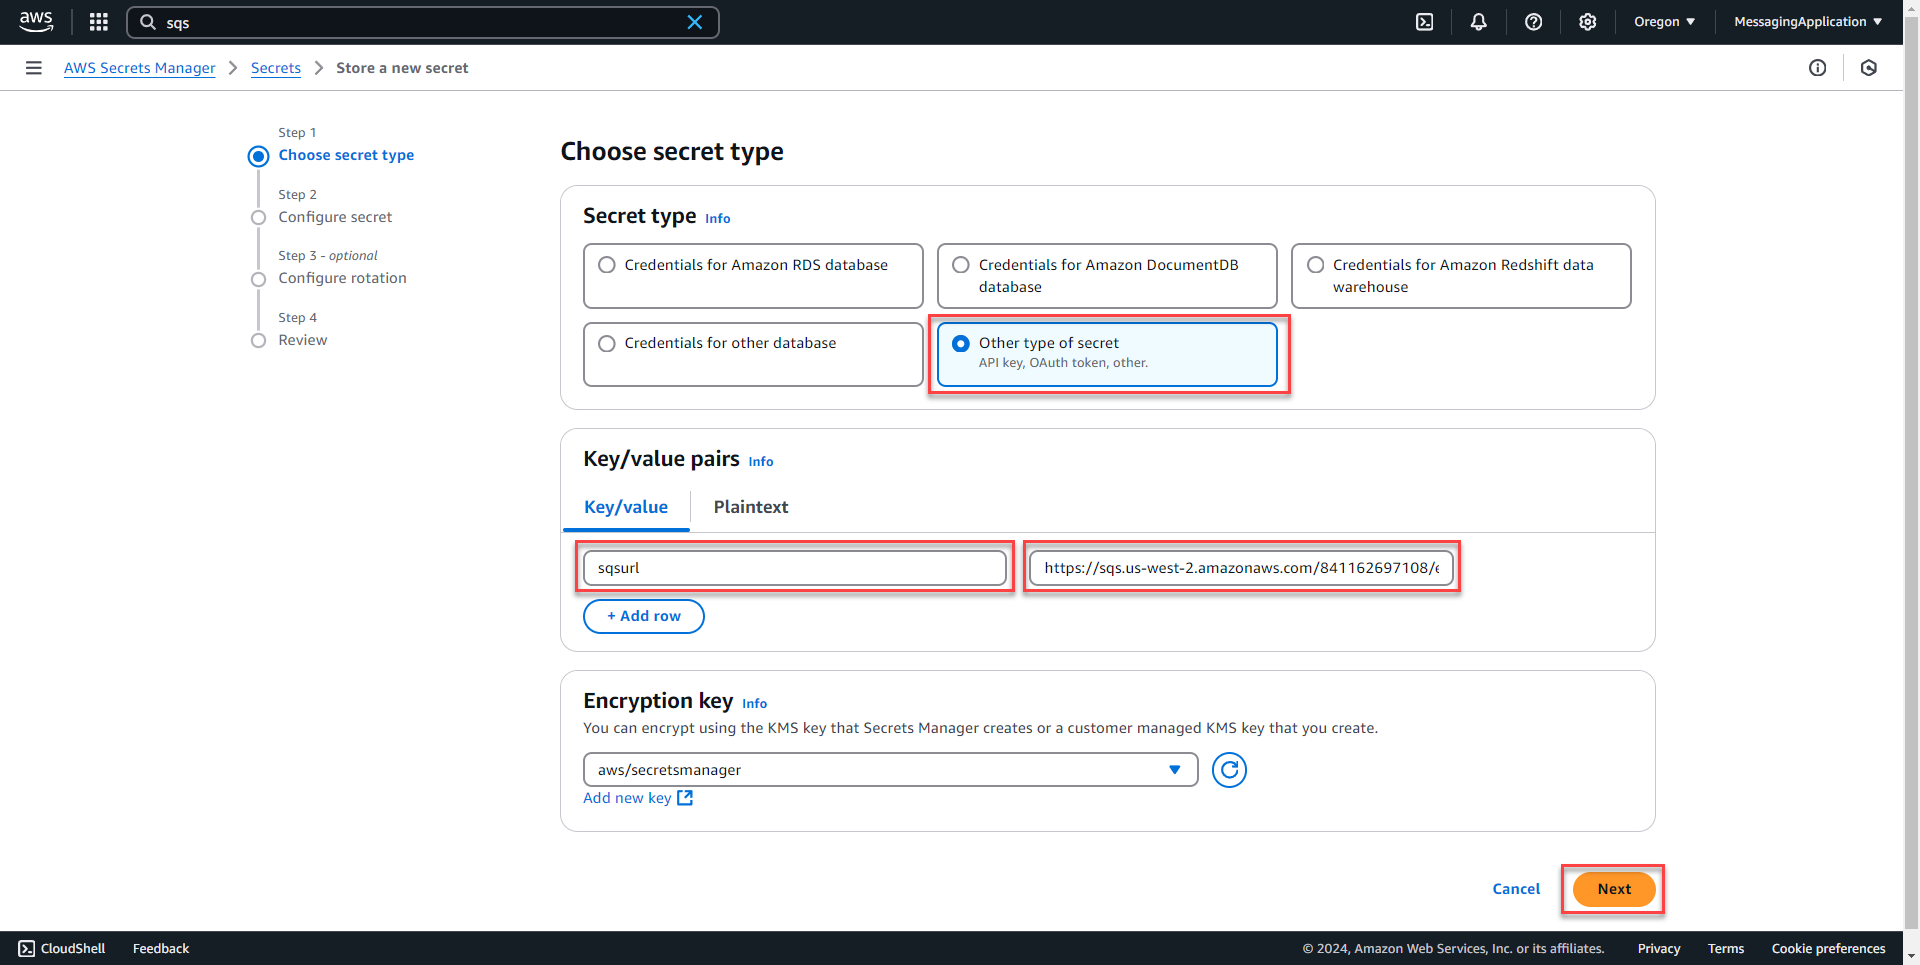
4. On the next page, enter sqsurl into the secret name field. Select next.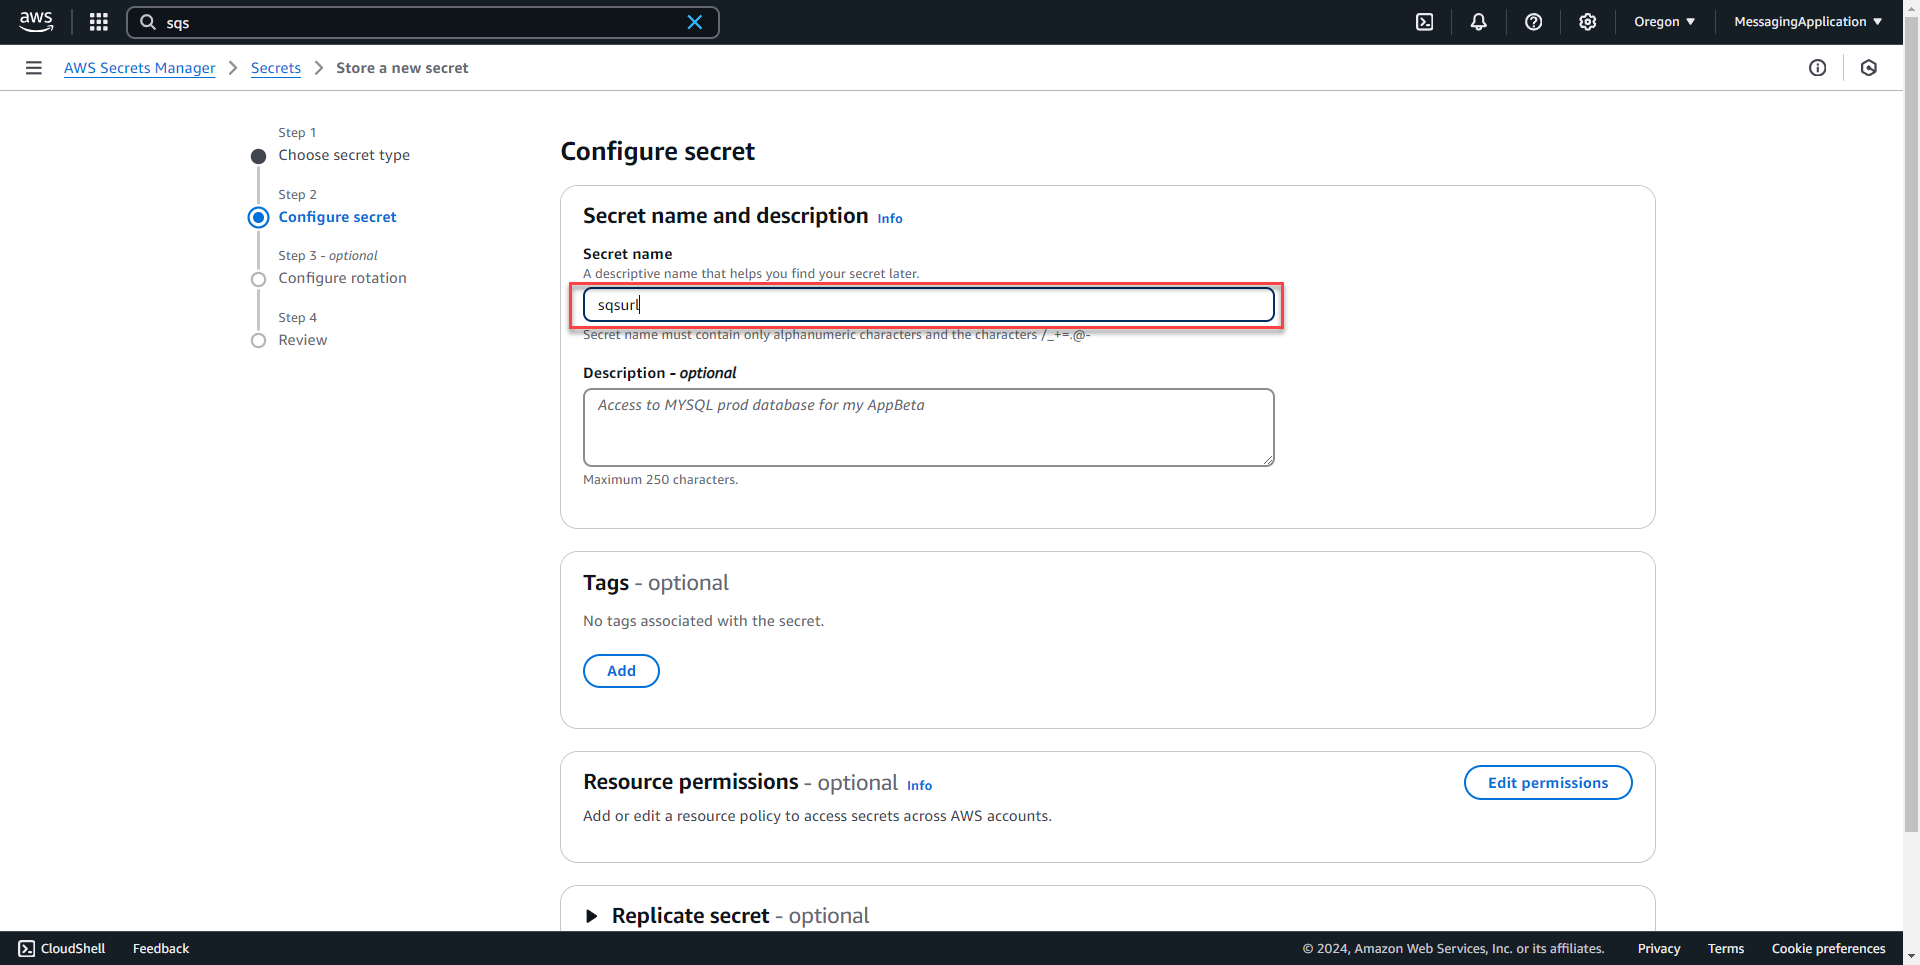
5. Toggle automatic rotation for scheduled rotation of secrets and select next.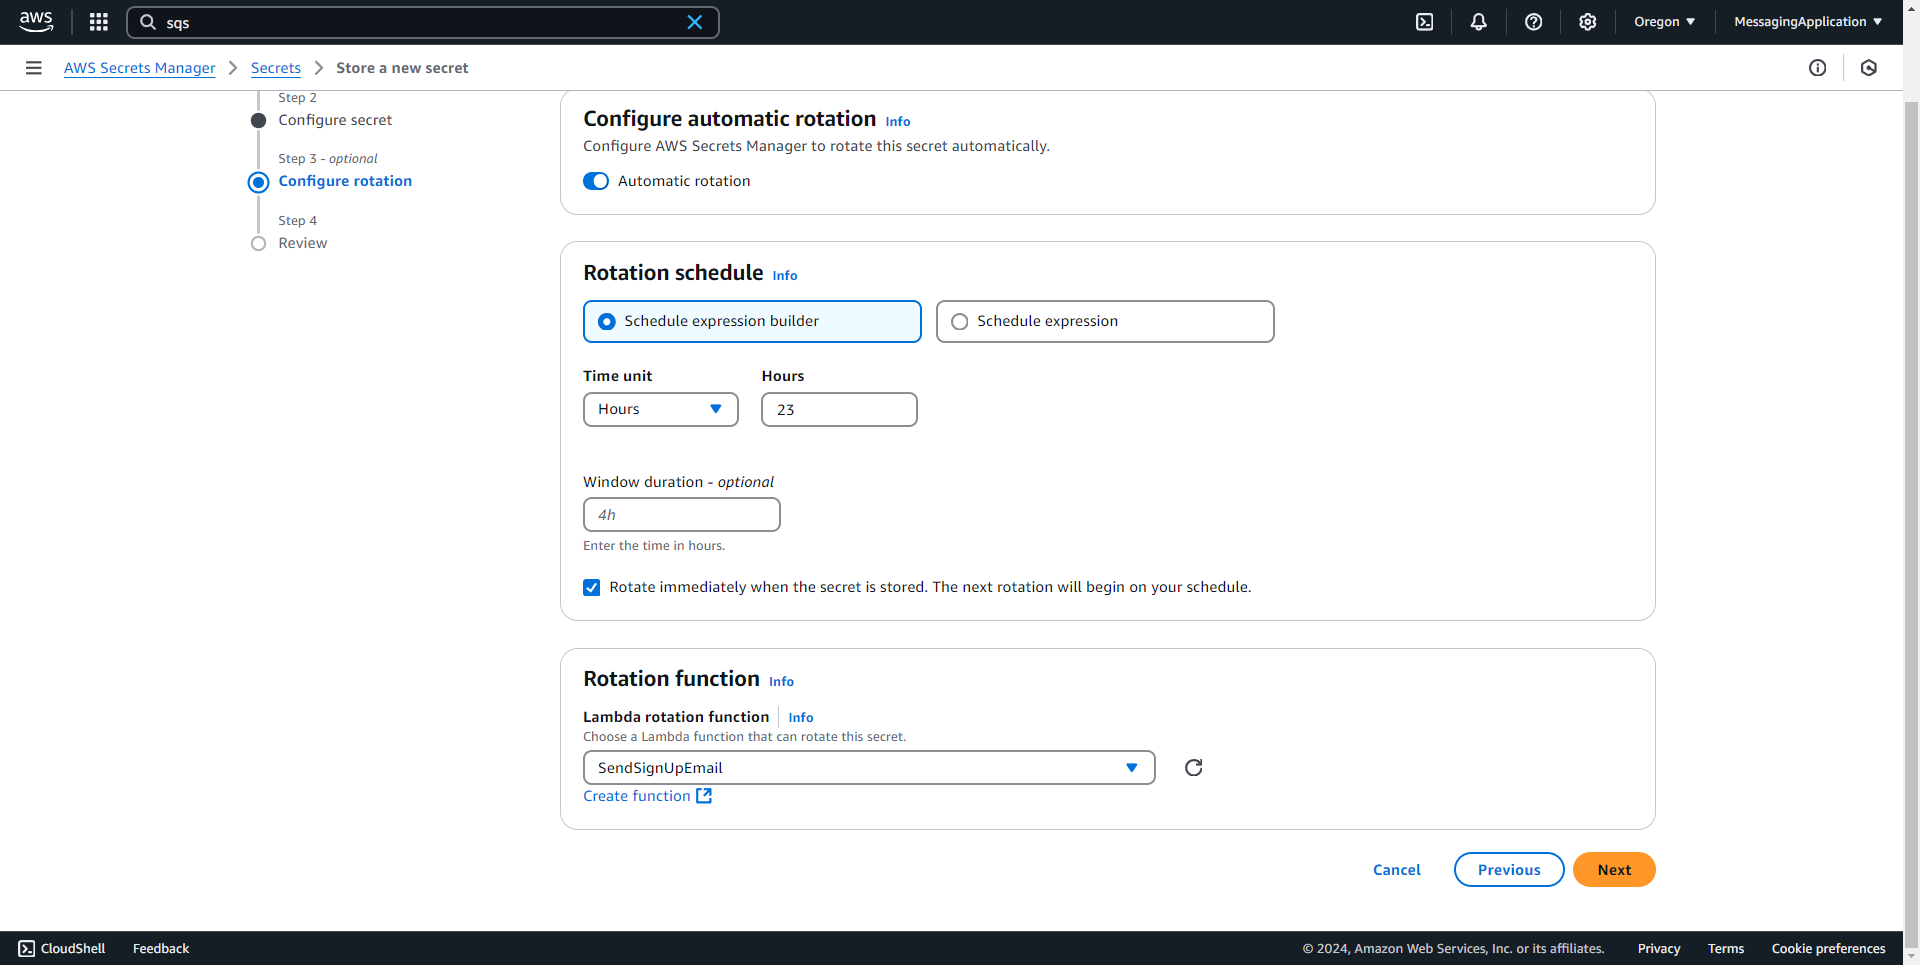
6. On the review page, the bottom of the page shows a sample of the Python Code used to get the secrets. This has been built into the code of the Sign Up Page Python Application. Select store on the bottom of the review page to finish the secret creation process.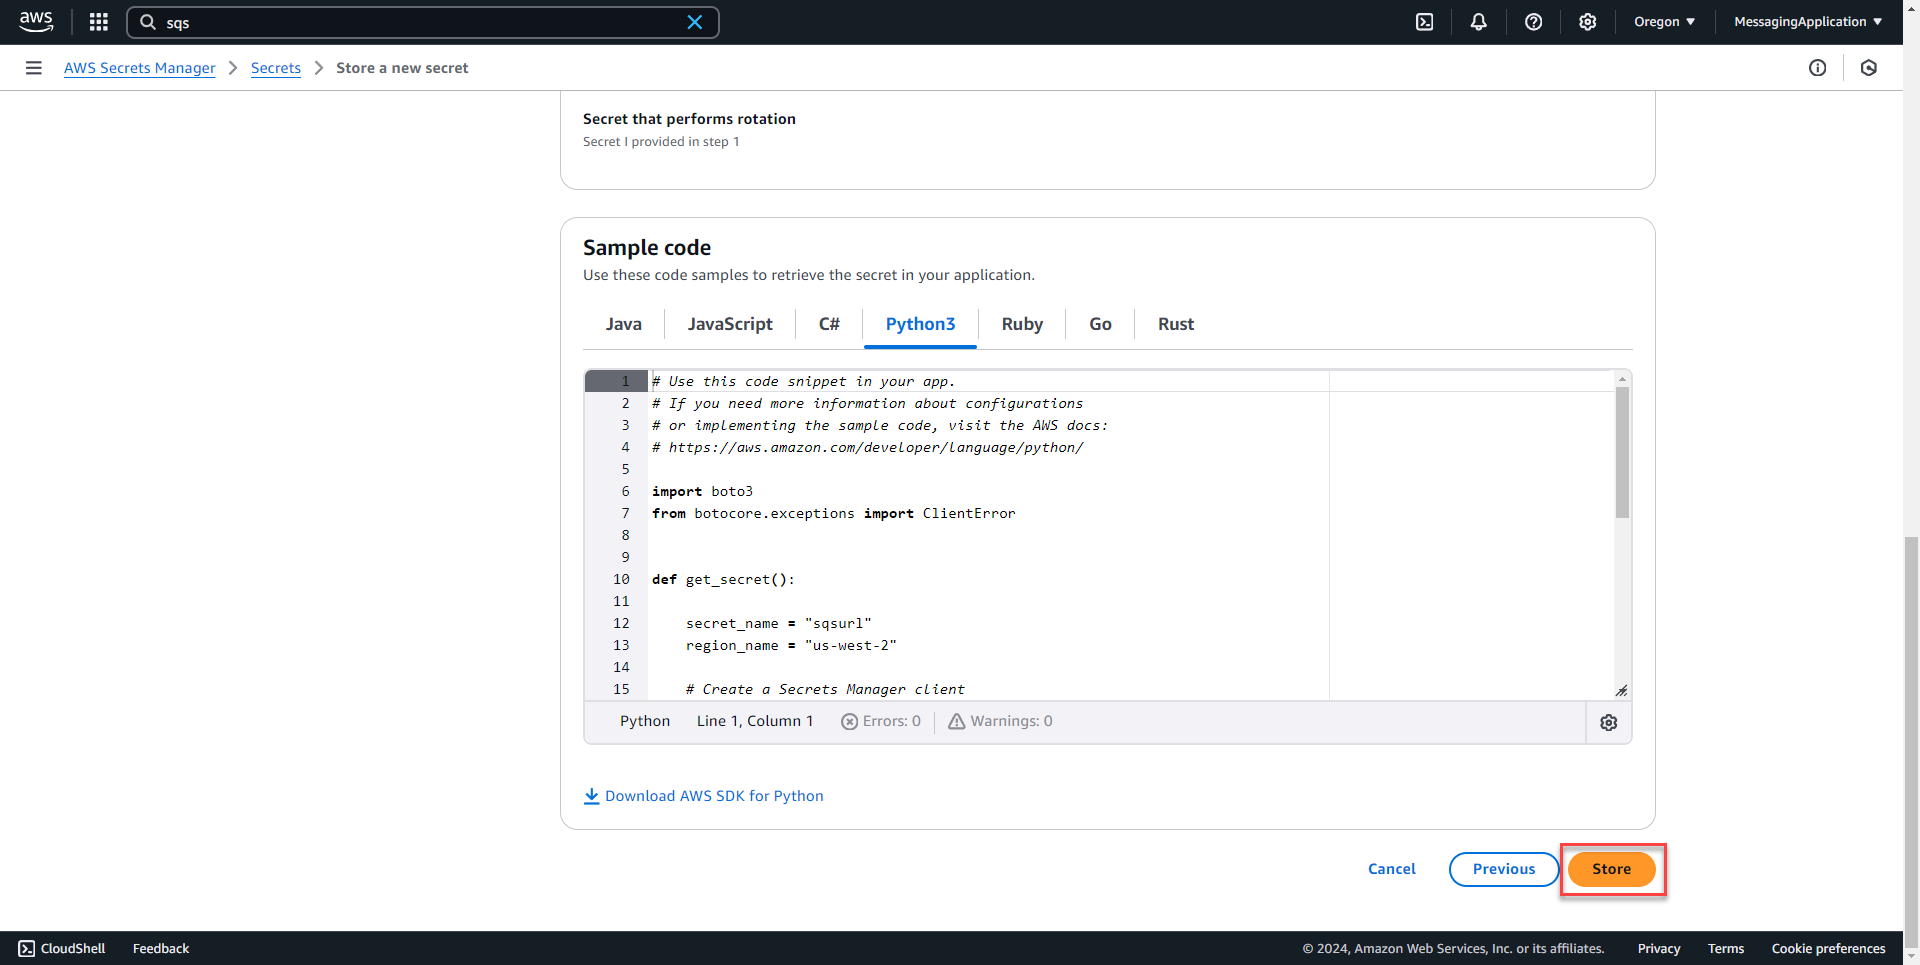
Setting Up SES Email Service
1. Search for the SES Service and select get started.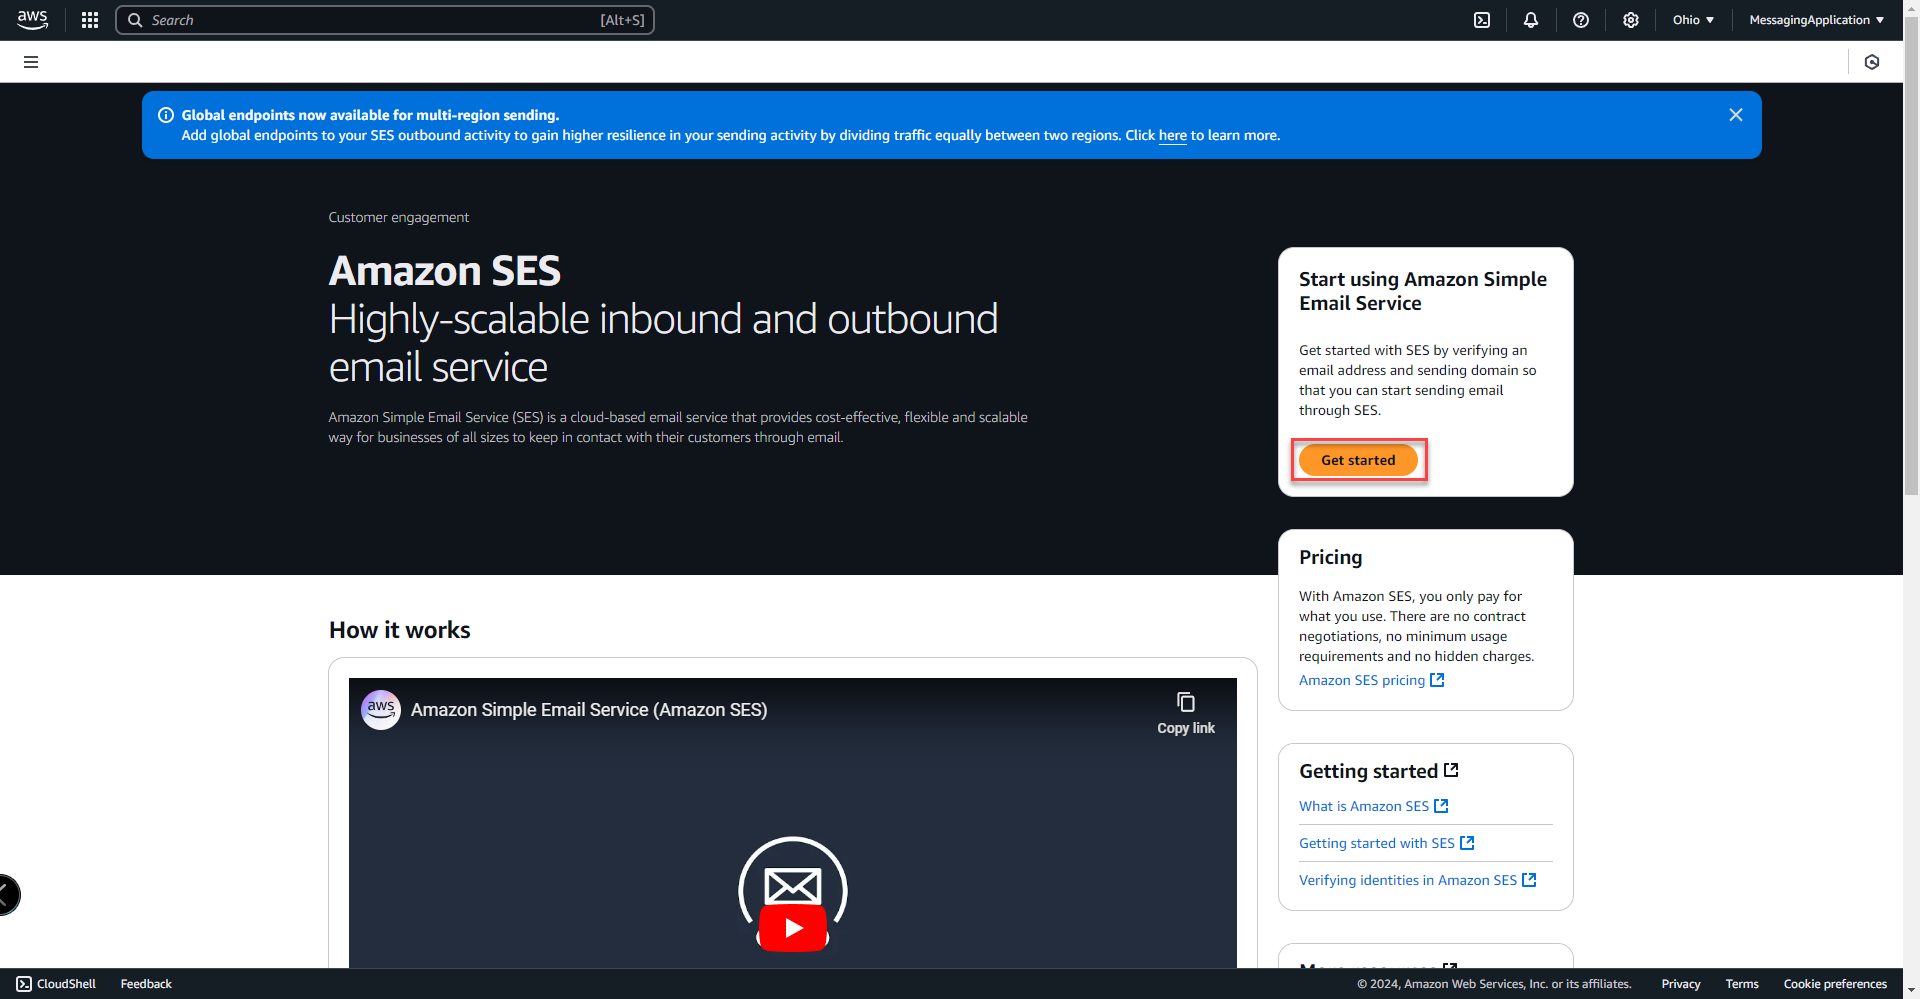
2. Add email address used to verify ownership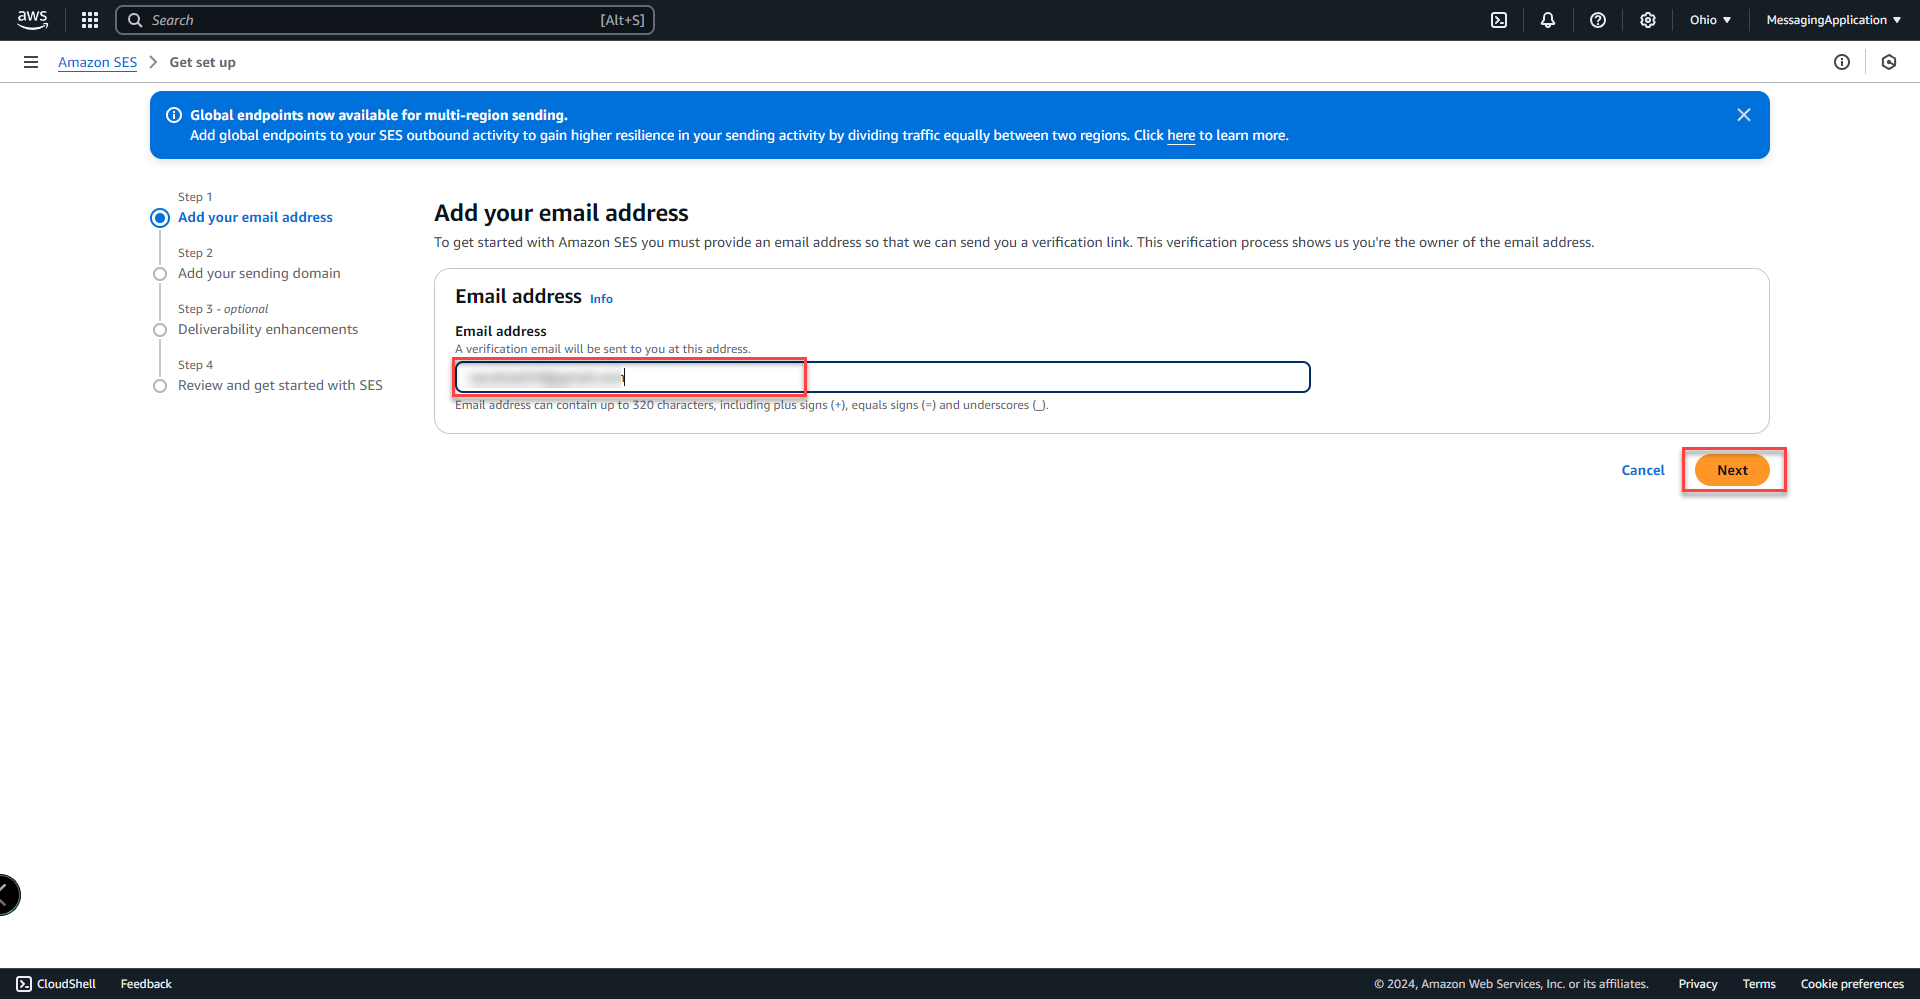
3. Enter sending domain that will be used for sending emails with SES. Domain record verification is required for the domain in next steps. Select Next.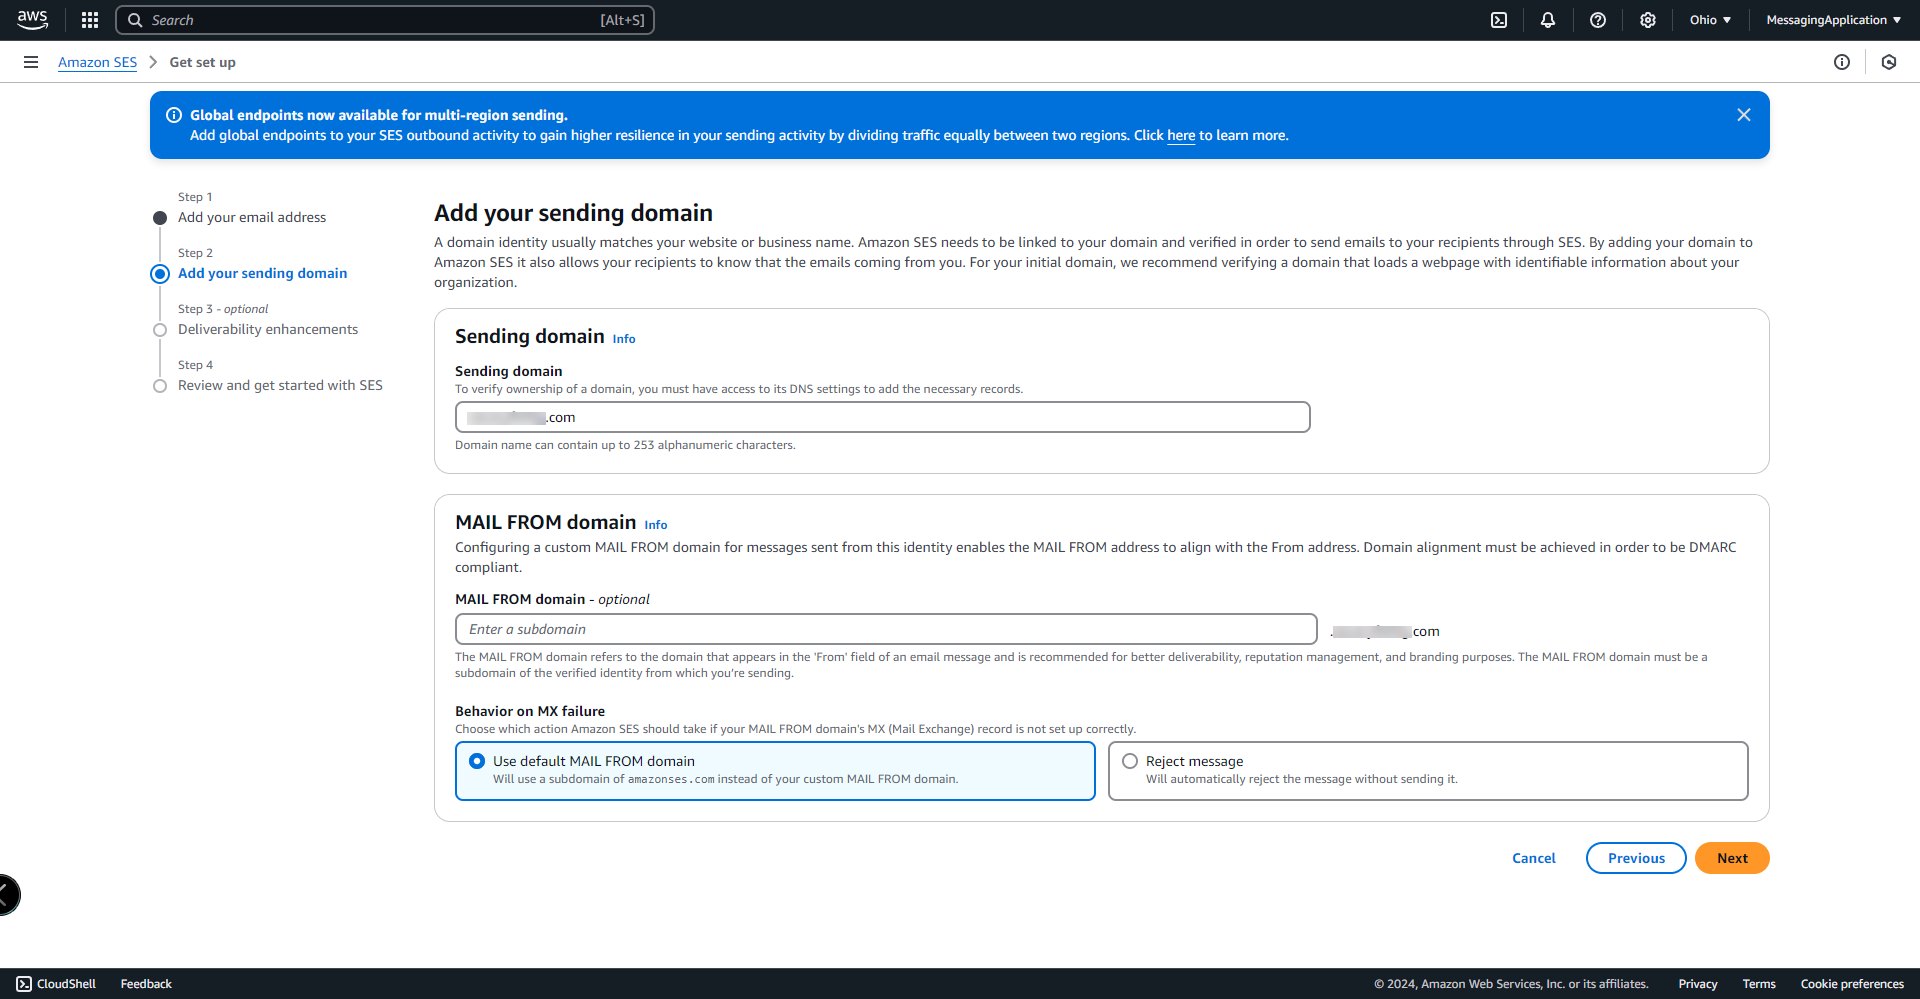
4. Select Turn on Virtual Deliverability Manager for more insight into sending statistics in production. Select next to continue.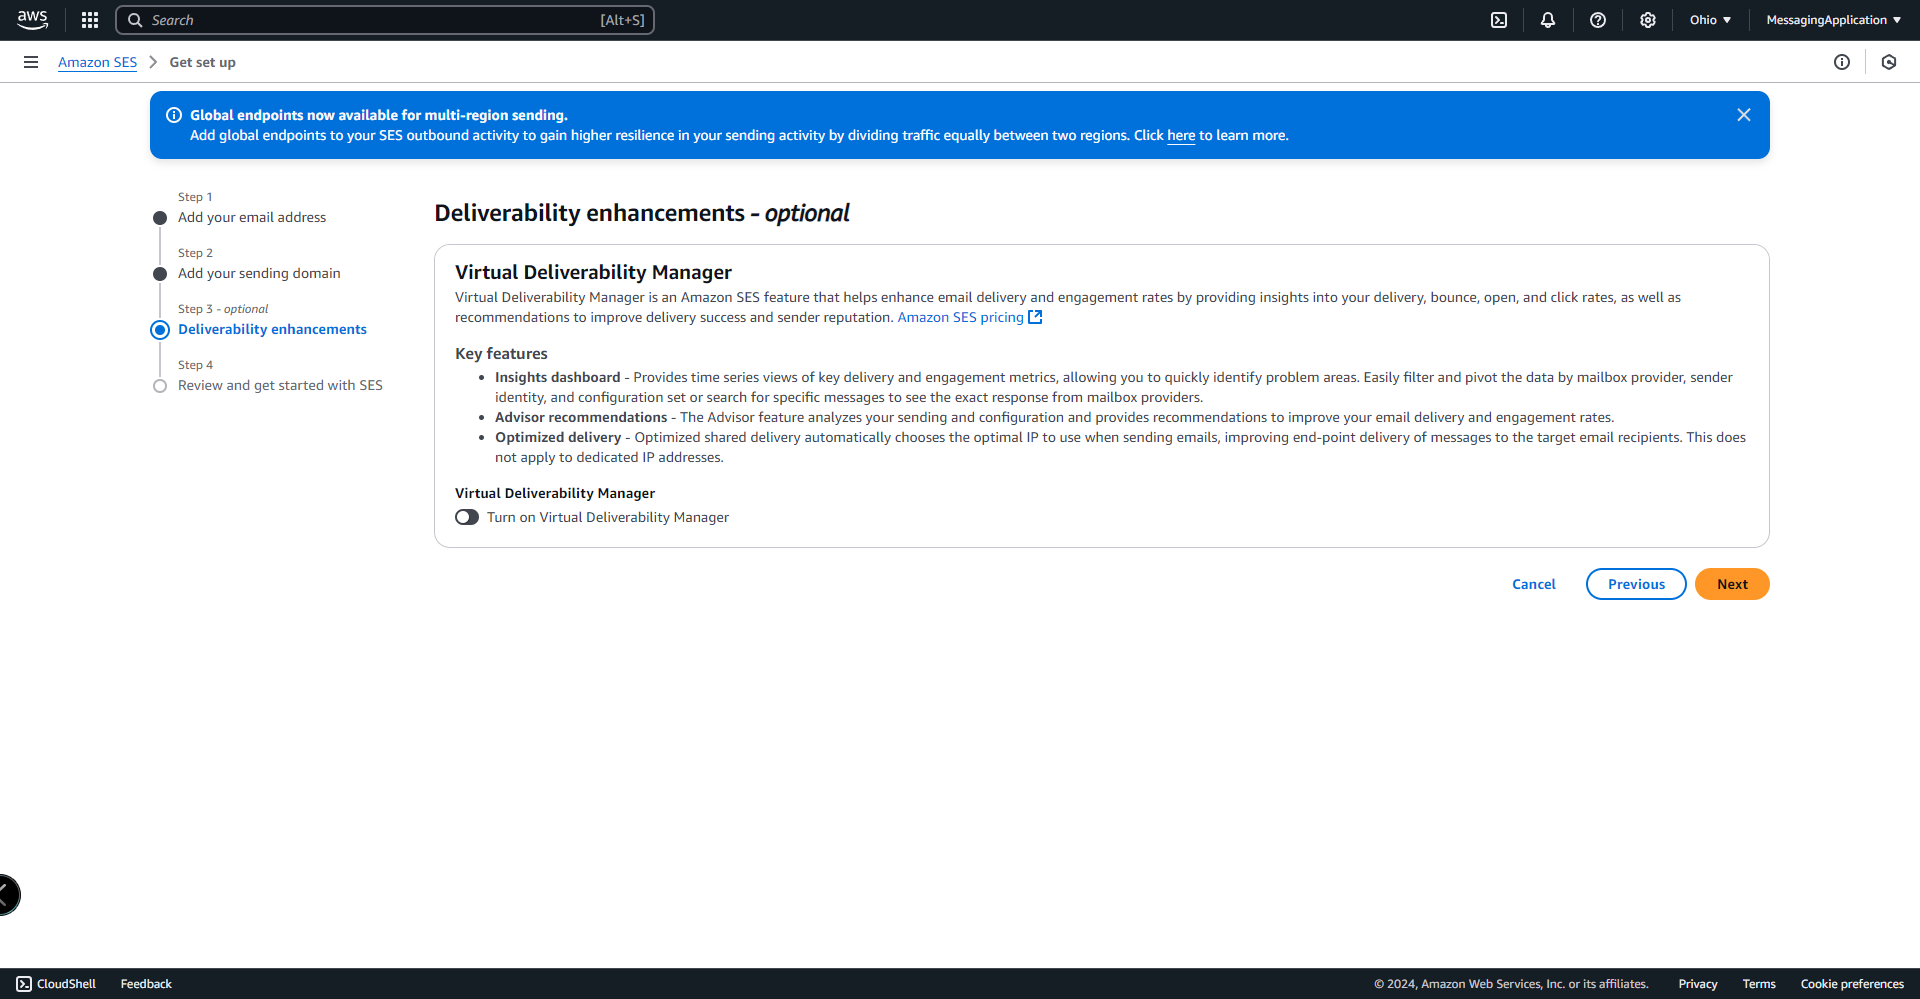
5. Select Get Started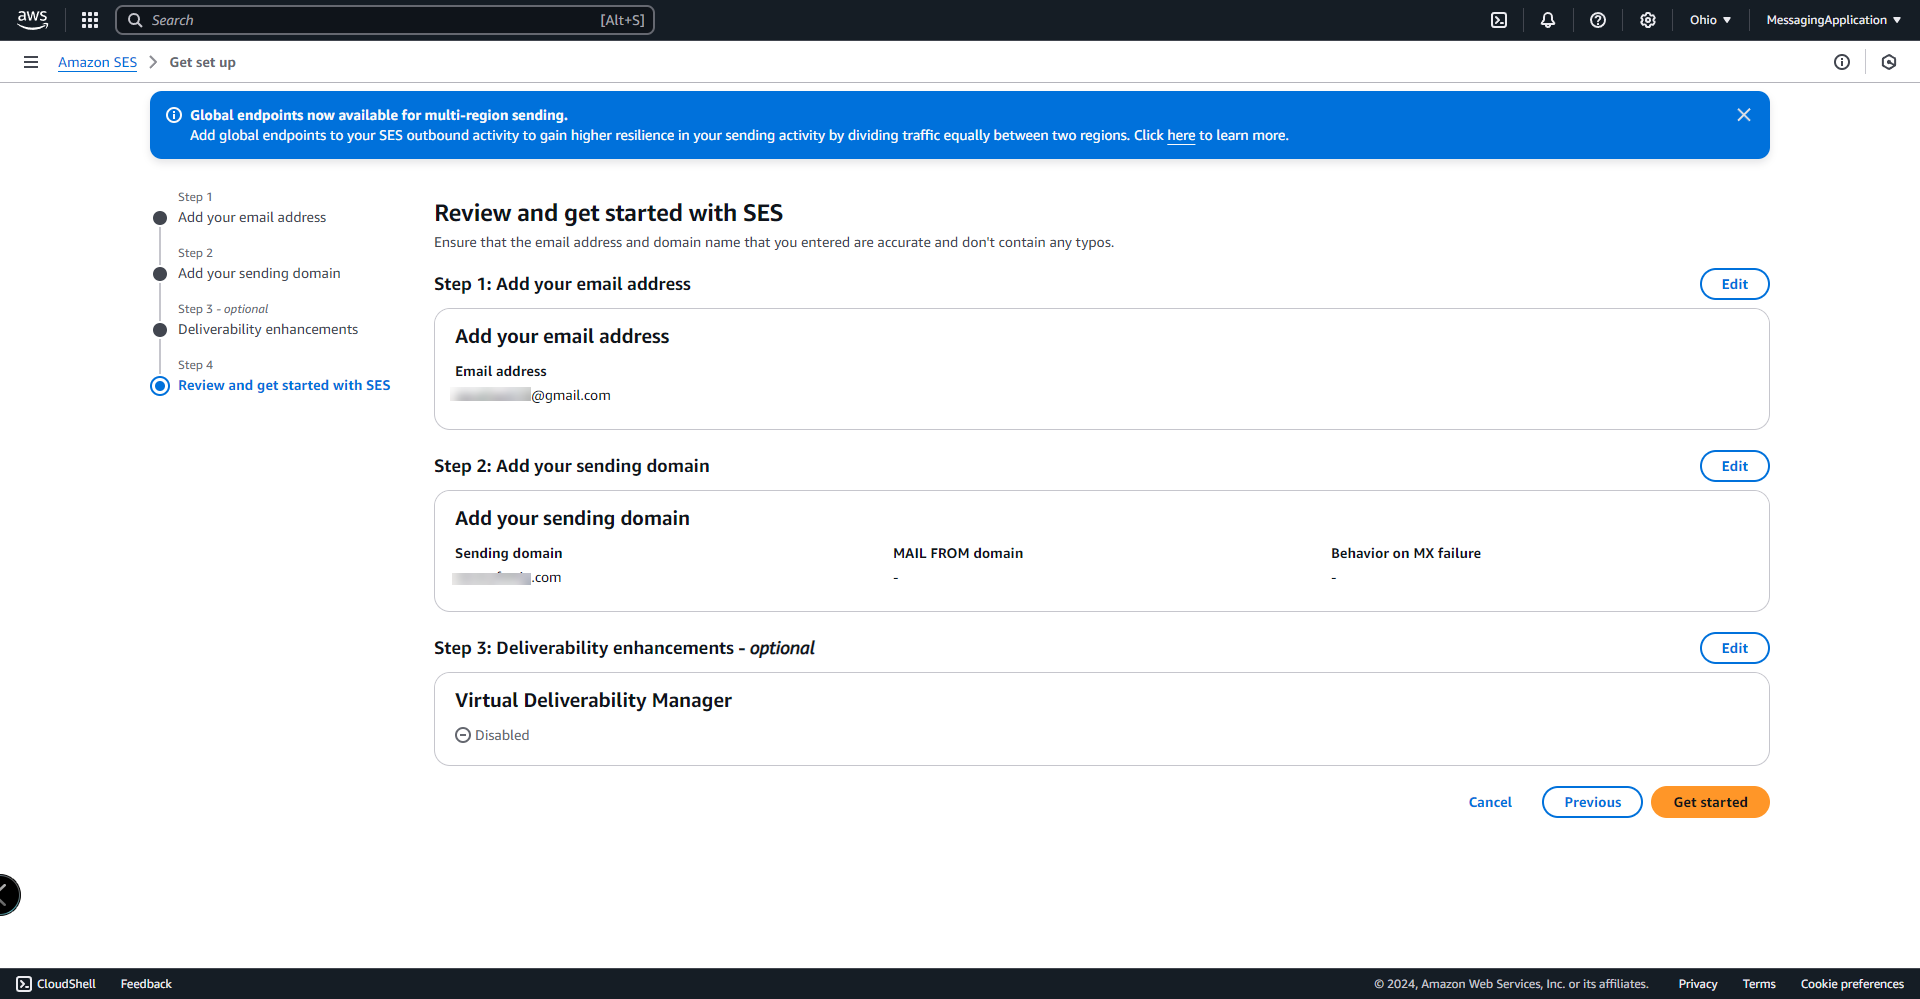
6. After completing the wizard, it will take you to the get set up page. A verification email has been sent to the verification email selected during setup. Go to our email and click the verification link to complete email verification.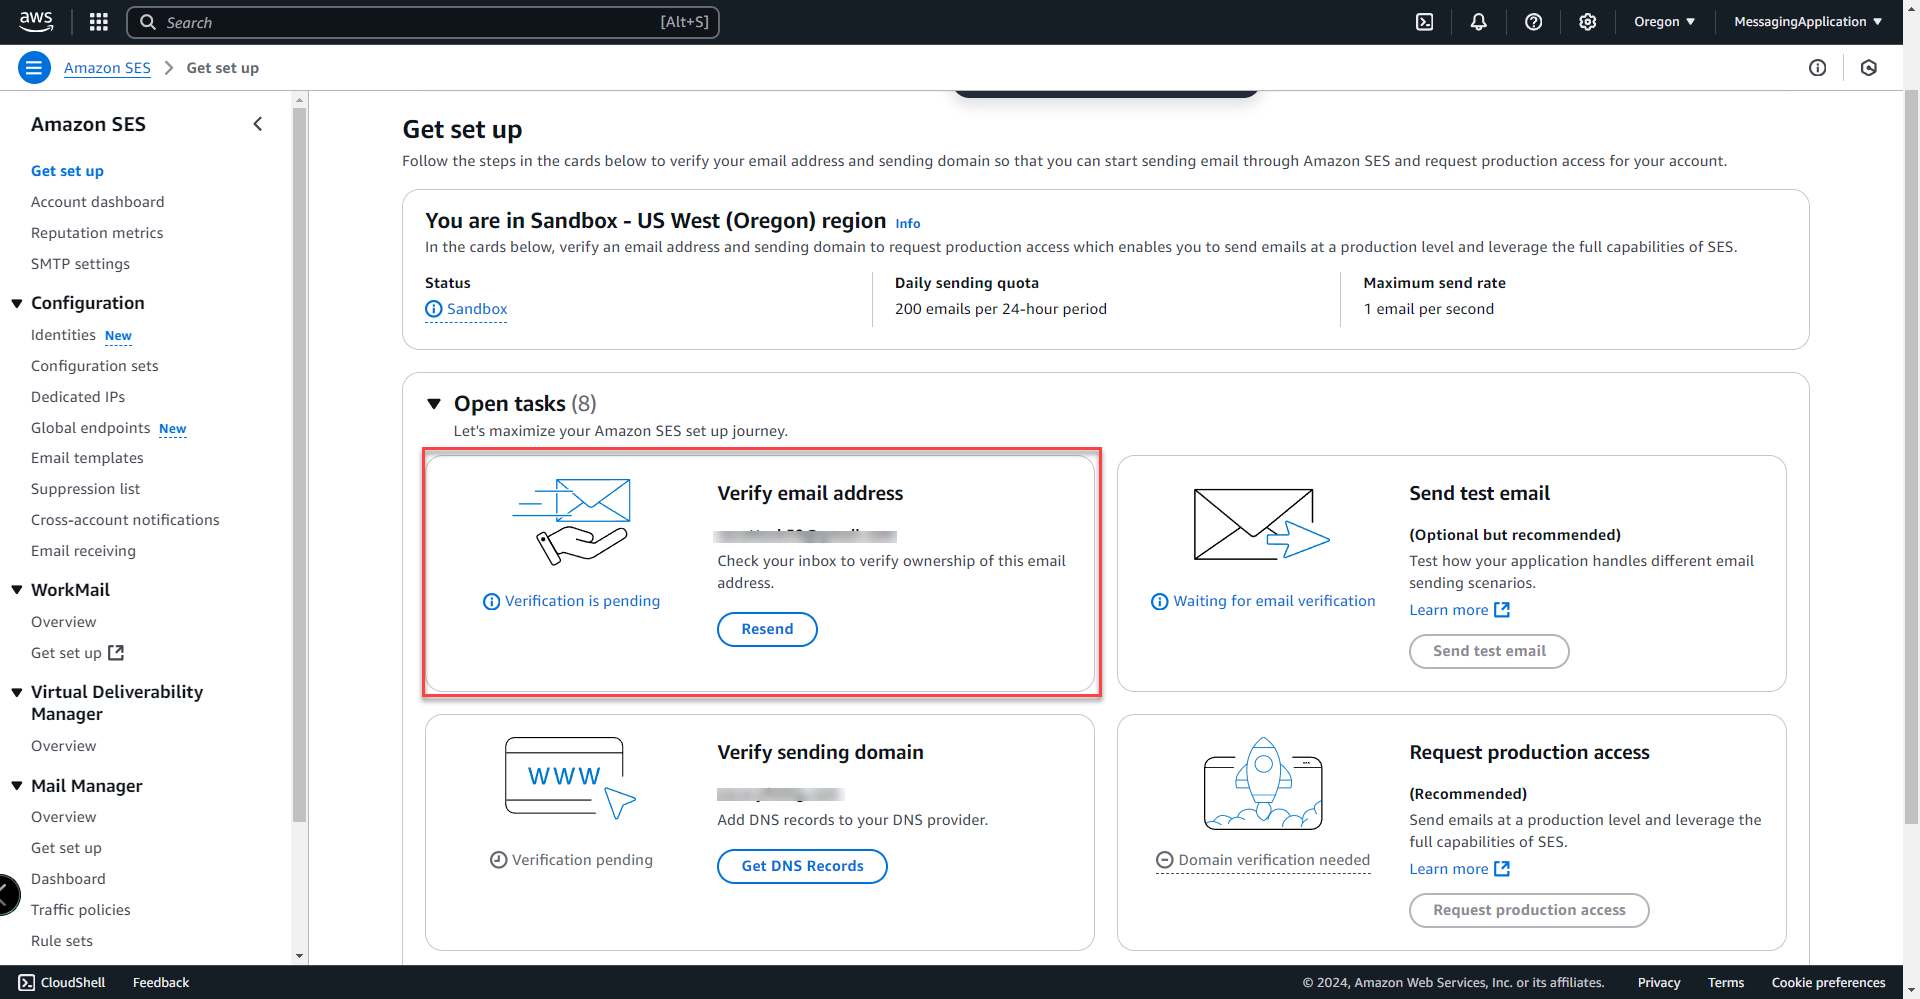
7. Select Get DNS Records to view the dns records that will be inputted into the domains registrar to verify the domain.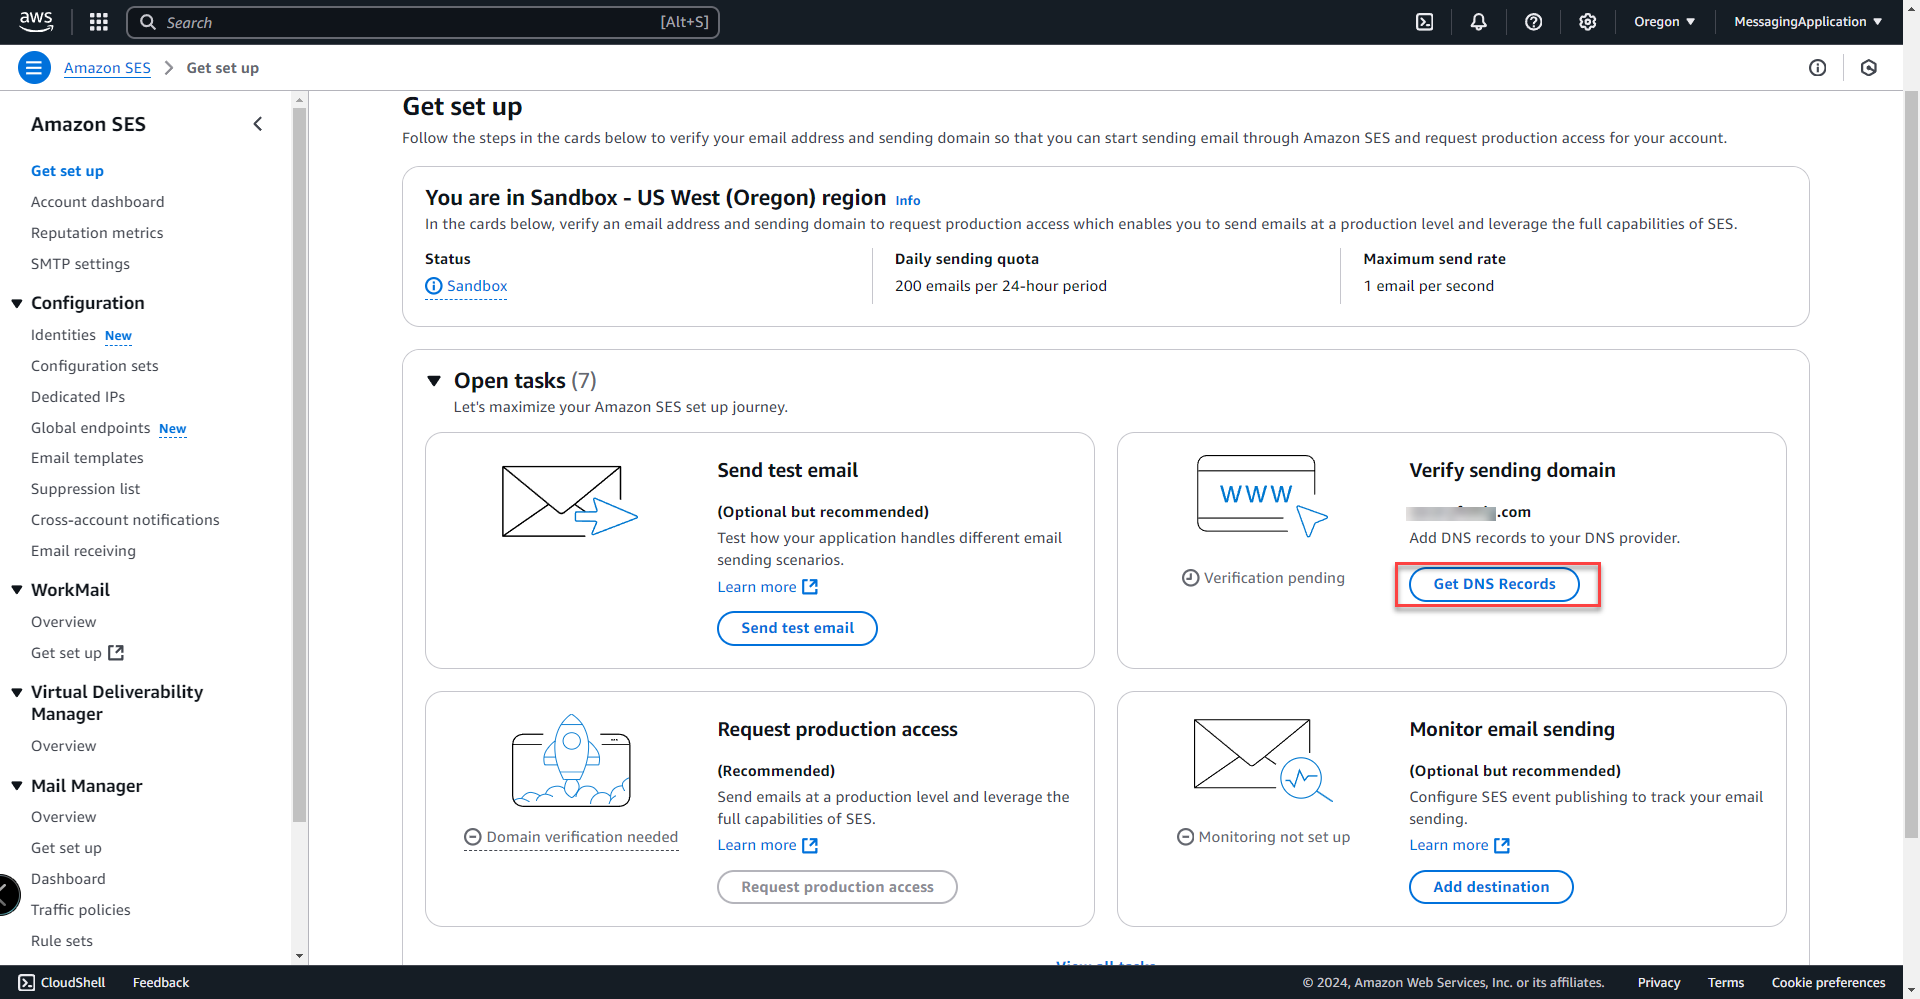
8. Add the records to your domain registrar. Note that depending on your registrar, it may already append the domain name to the end of the record name during creation and the copied name entry for the record may need modified as such.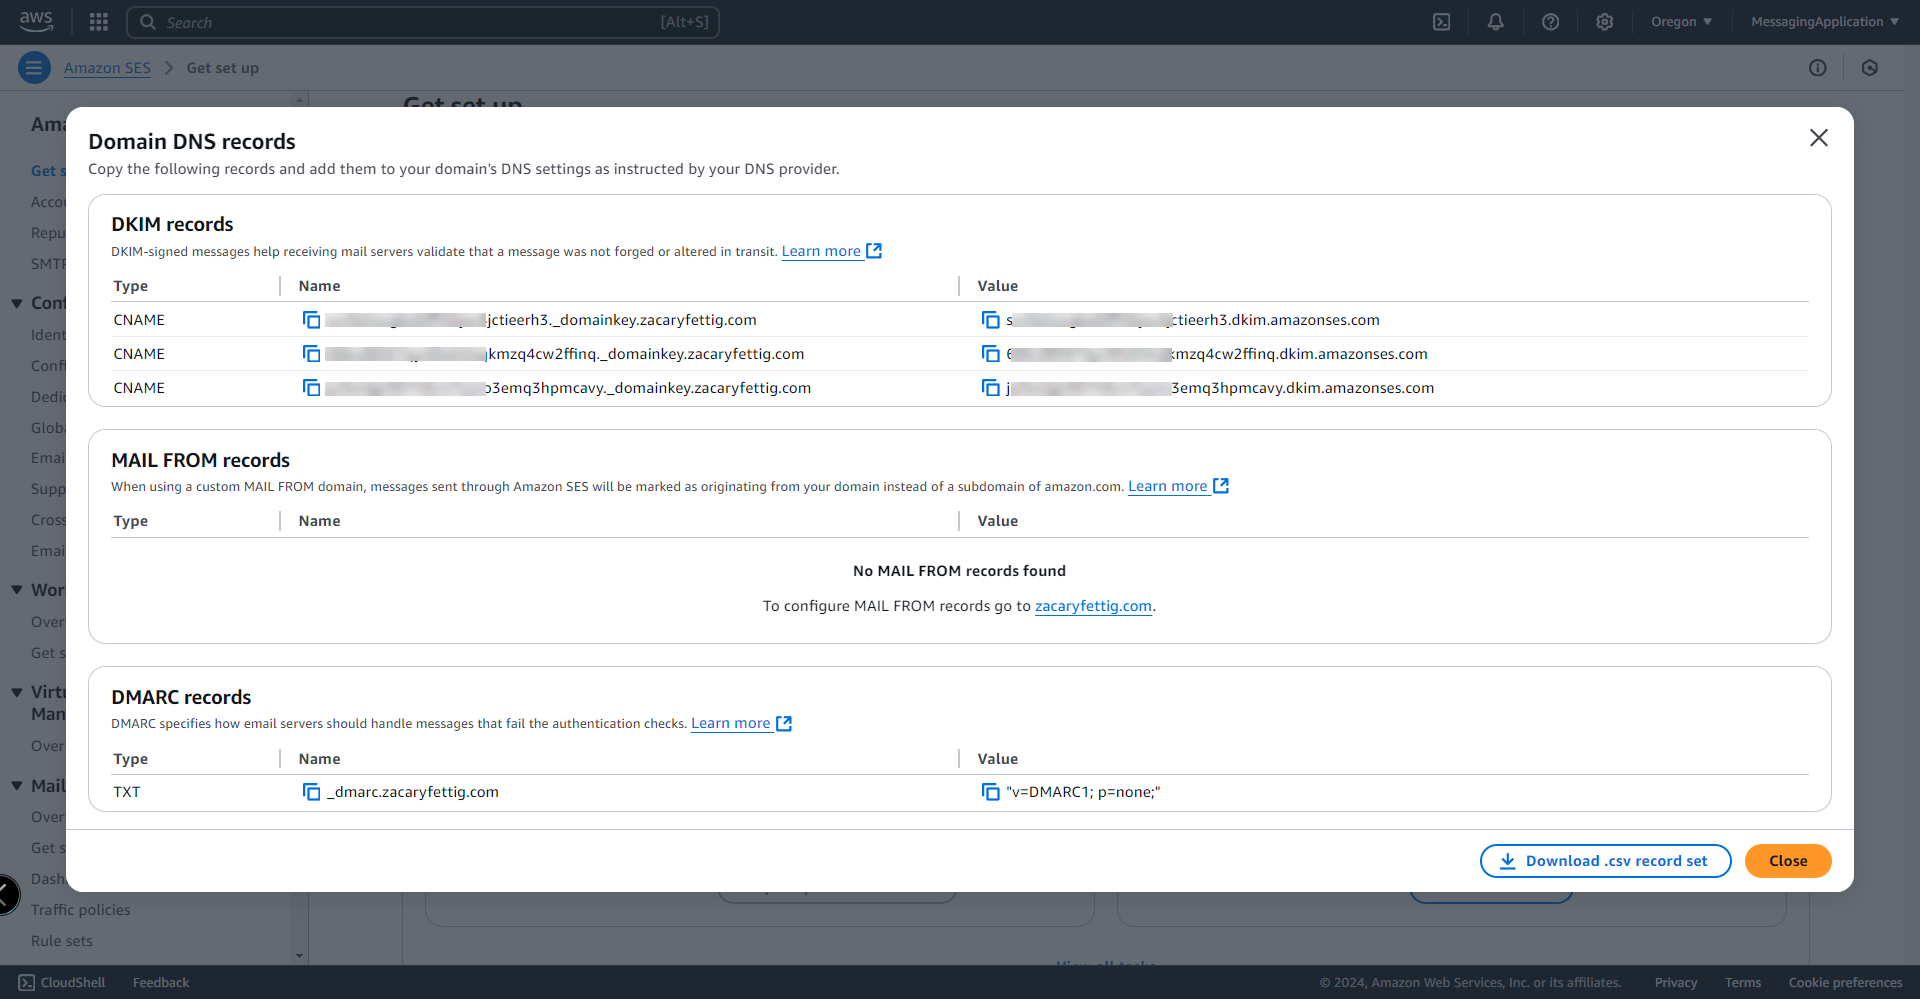
9. Once the records have been propagated and AWS recognizes those changes, the domain will show as verified in the completed tasks section.
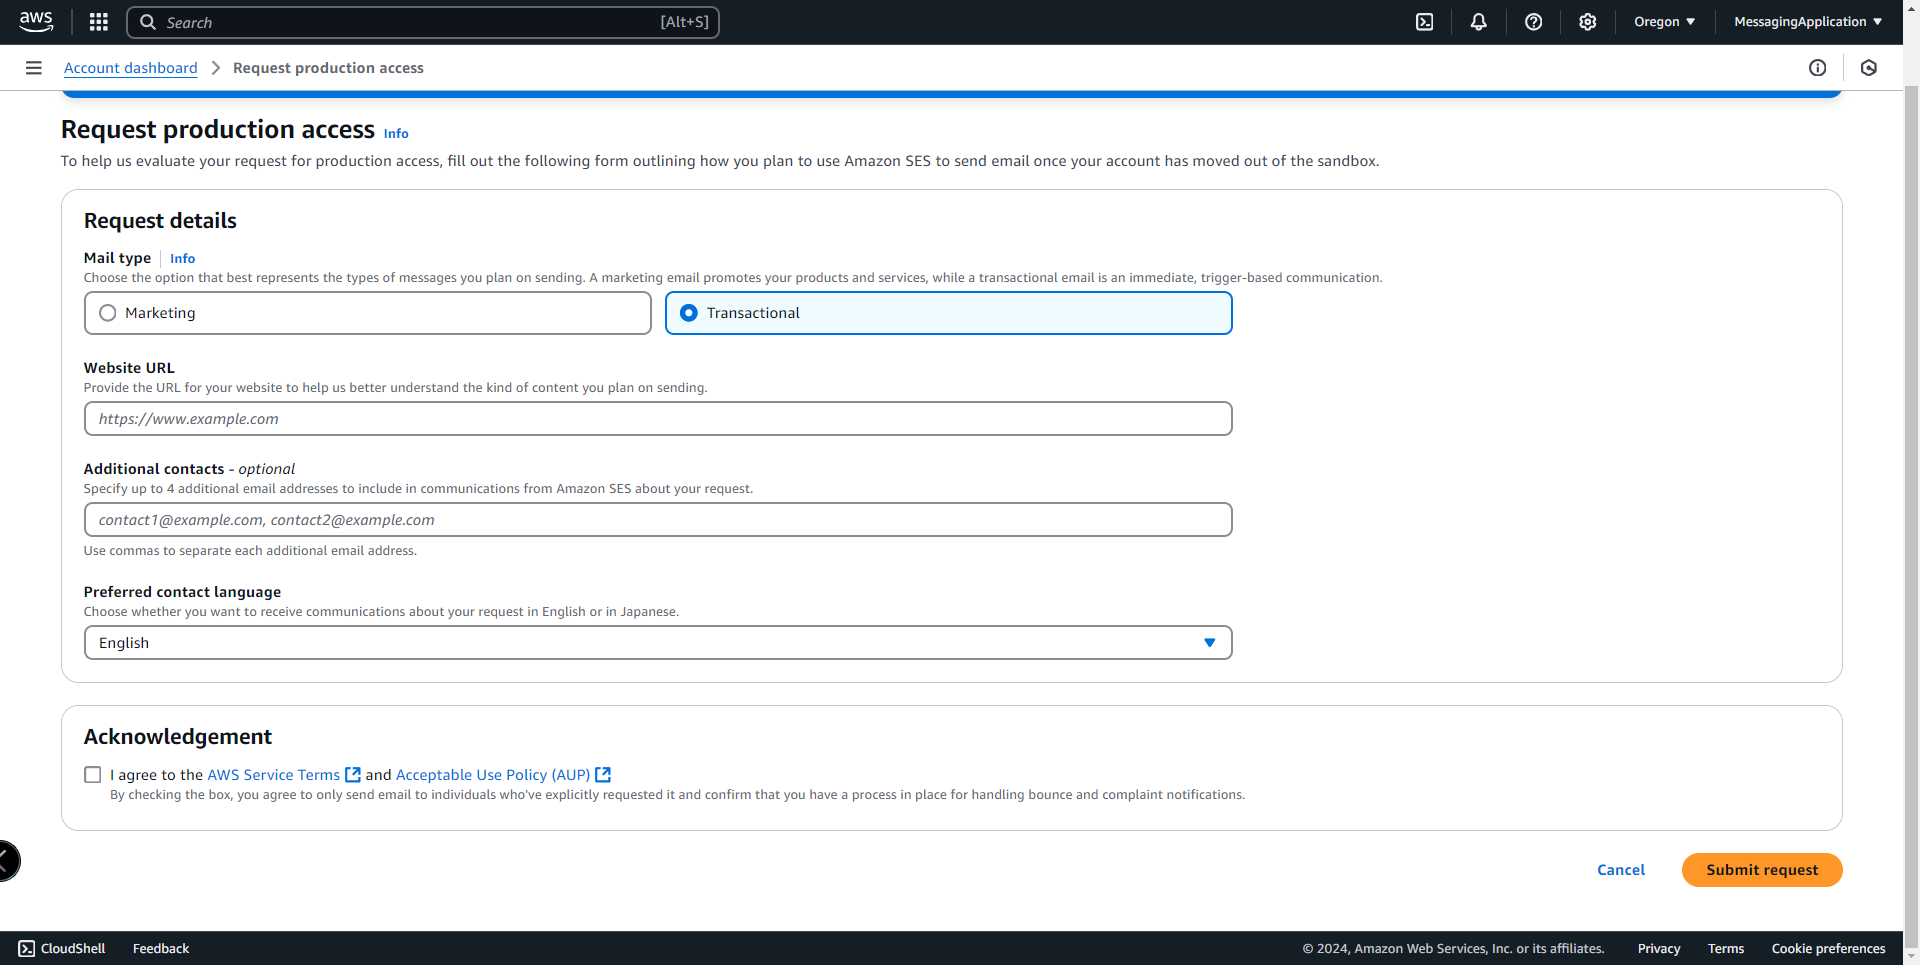
10. The last step is to request production access, so that the email recipients don't need to go through the verification process to receive the sign up conformation emails from the application.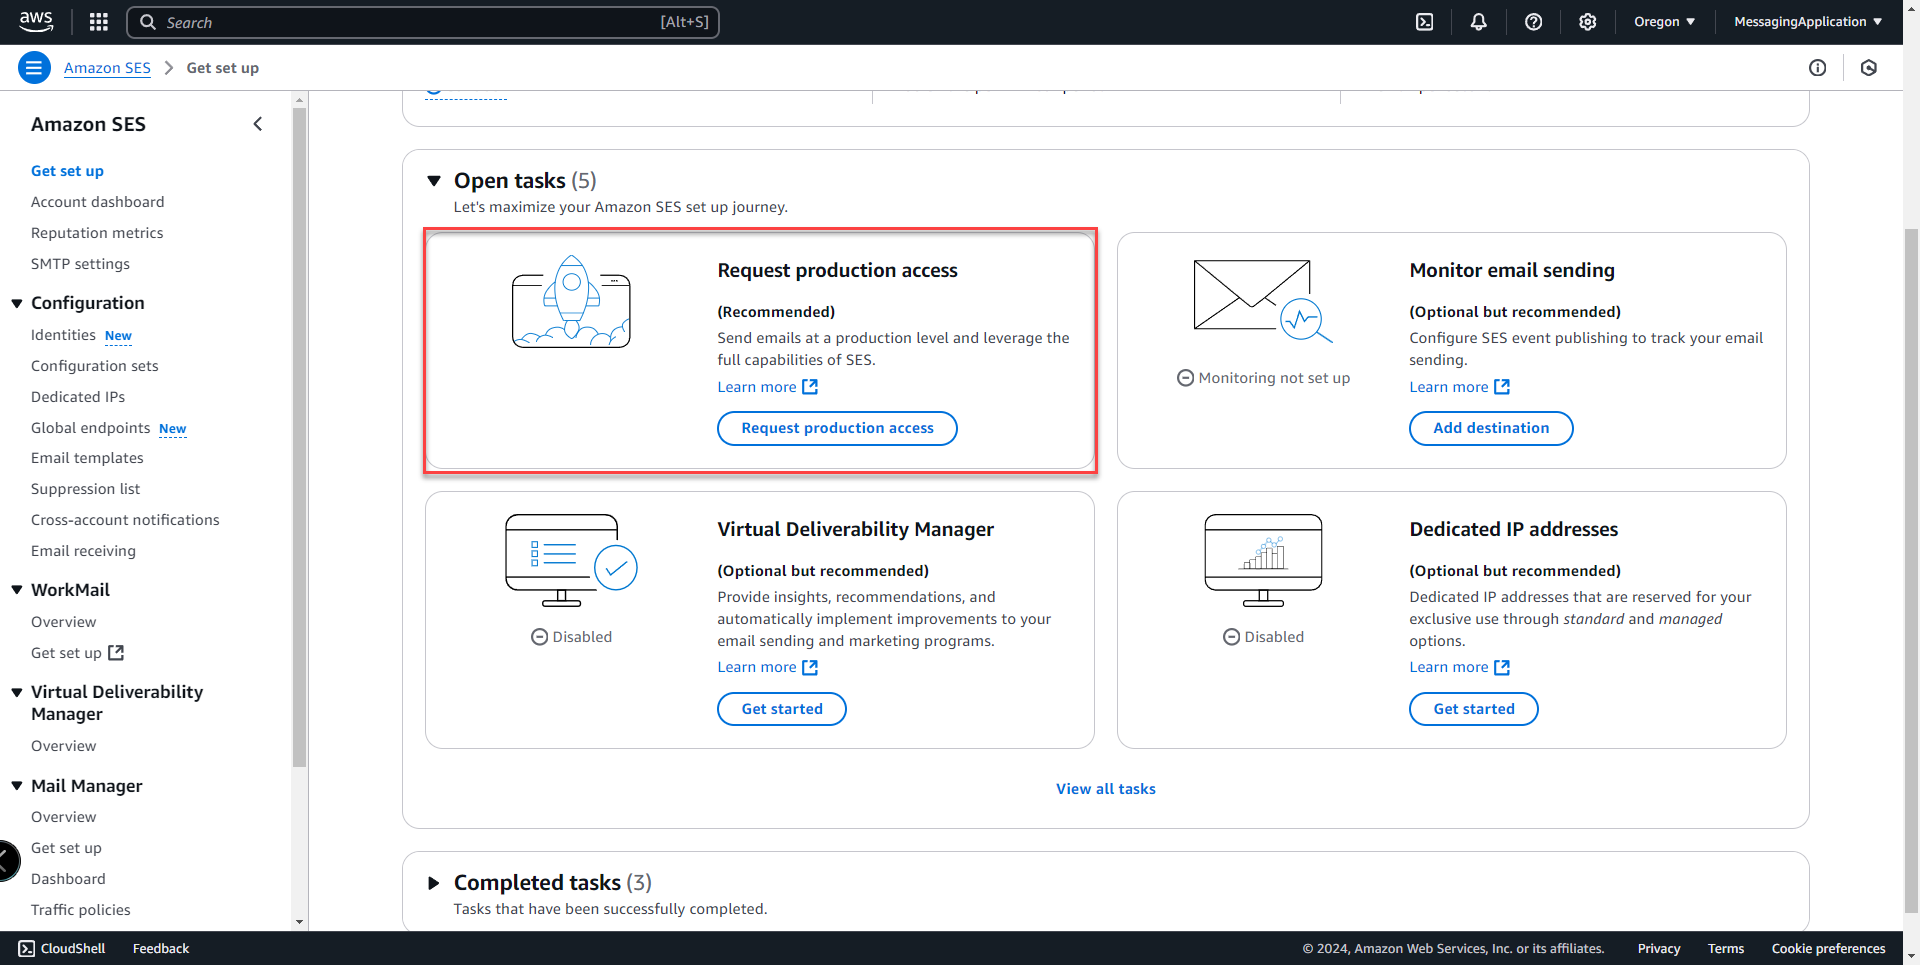
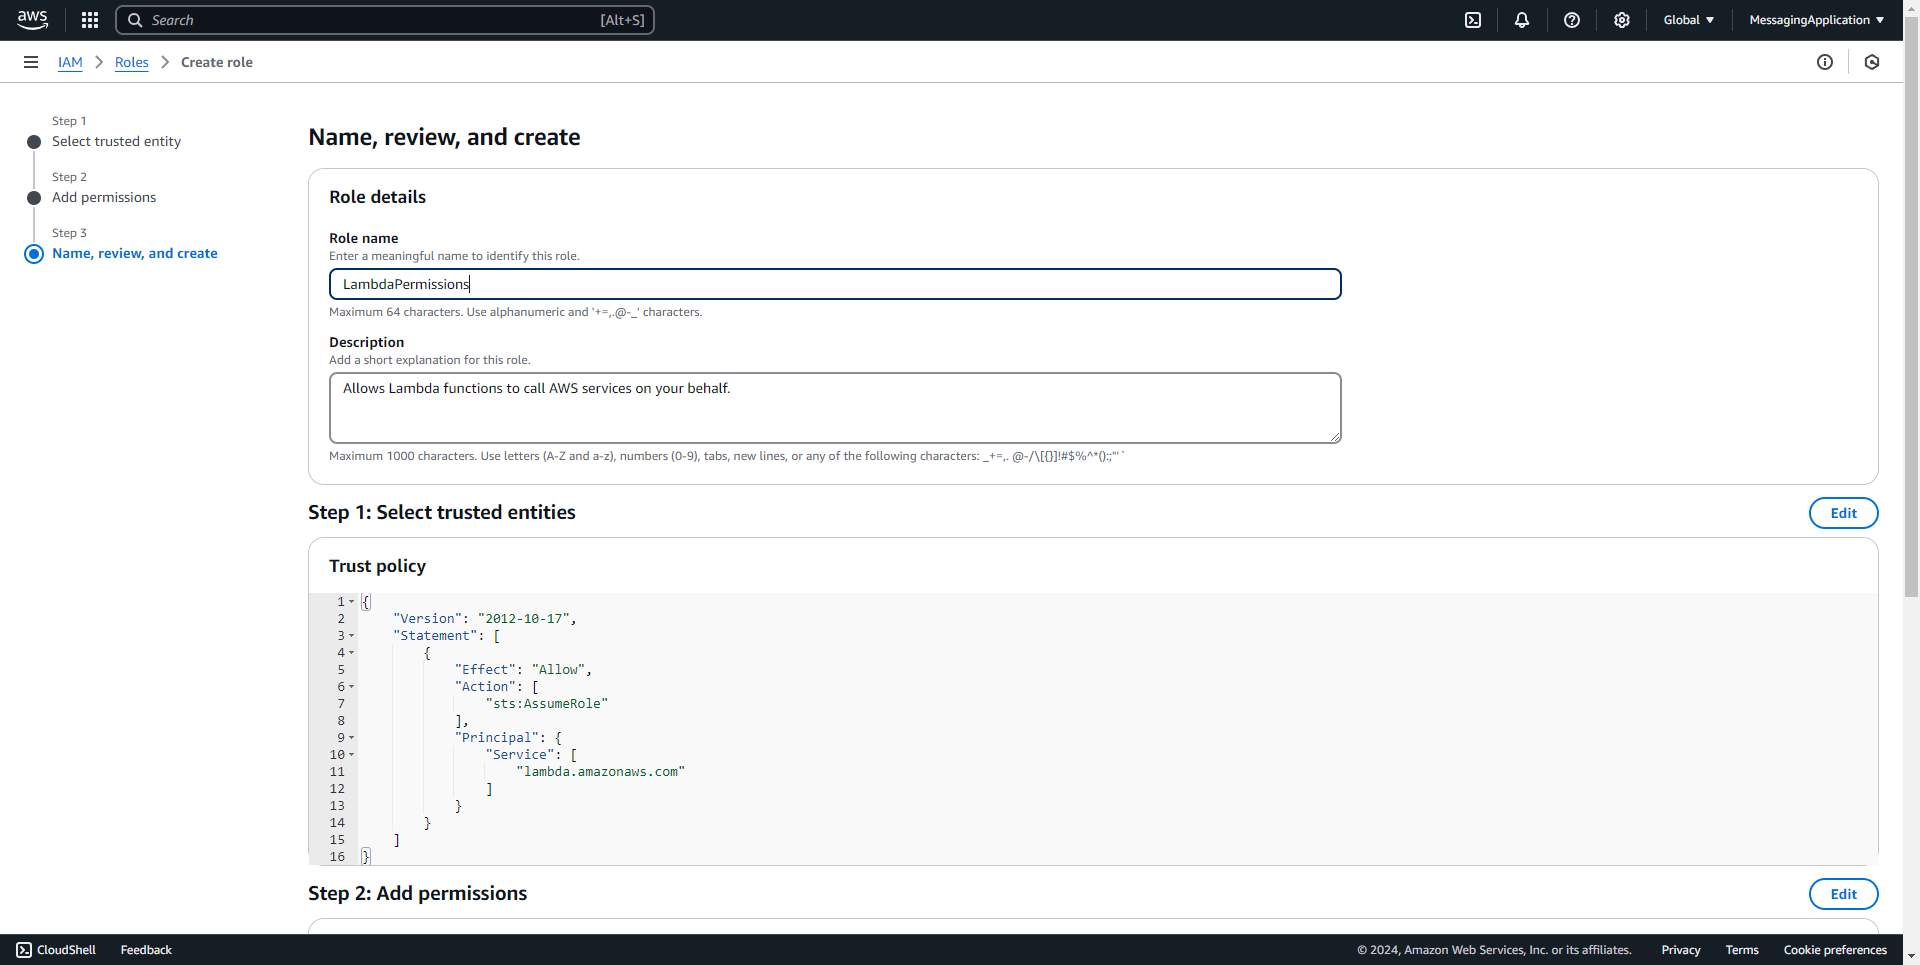
Create Lambda IAM Permissions
1. Add a new role
2. Select AWS Service. Under use case, select the Lambda Service. Select Next.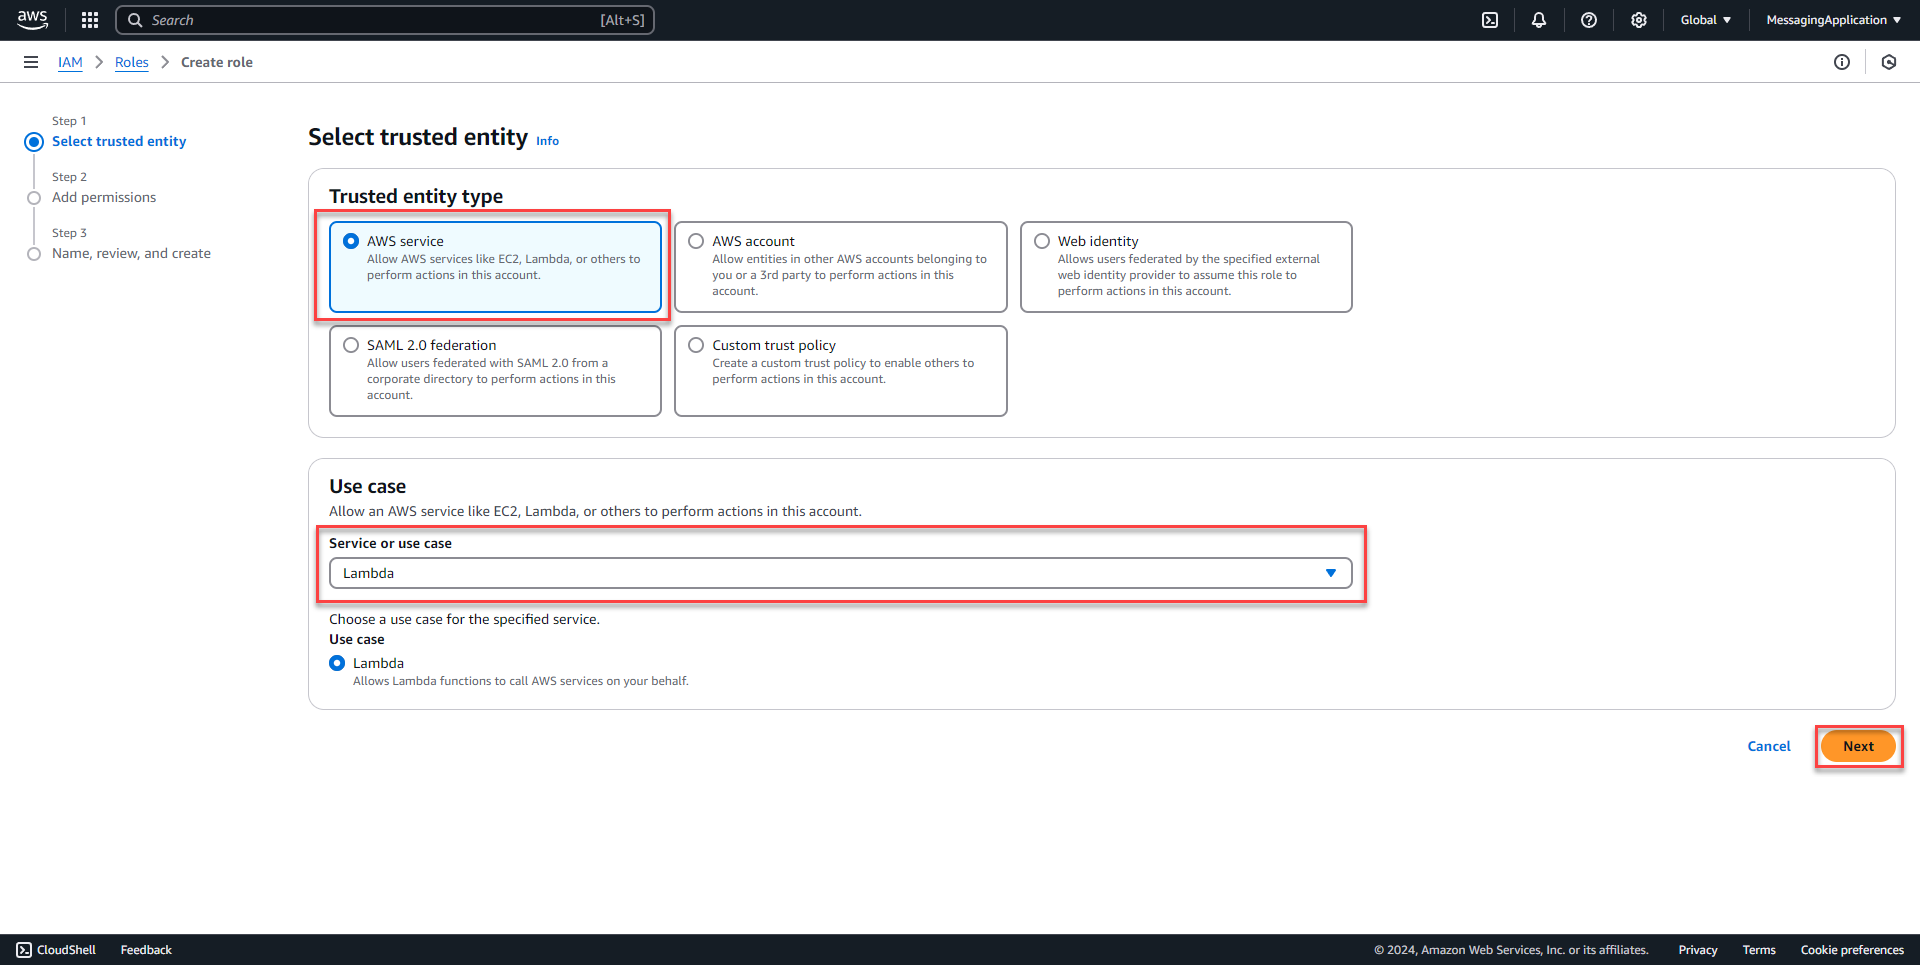
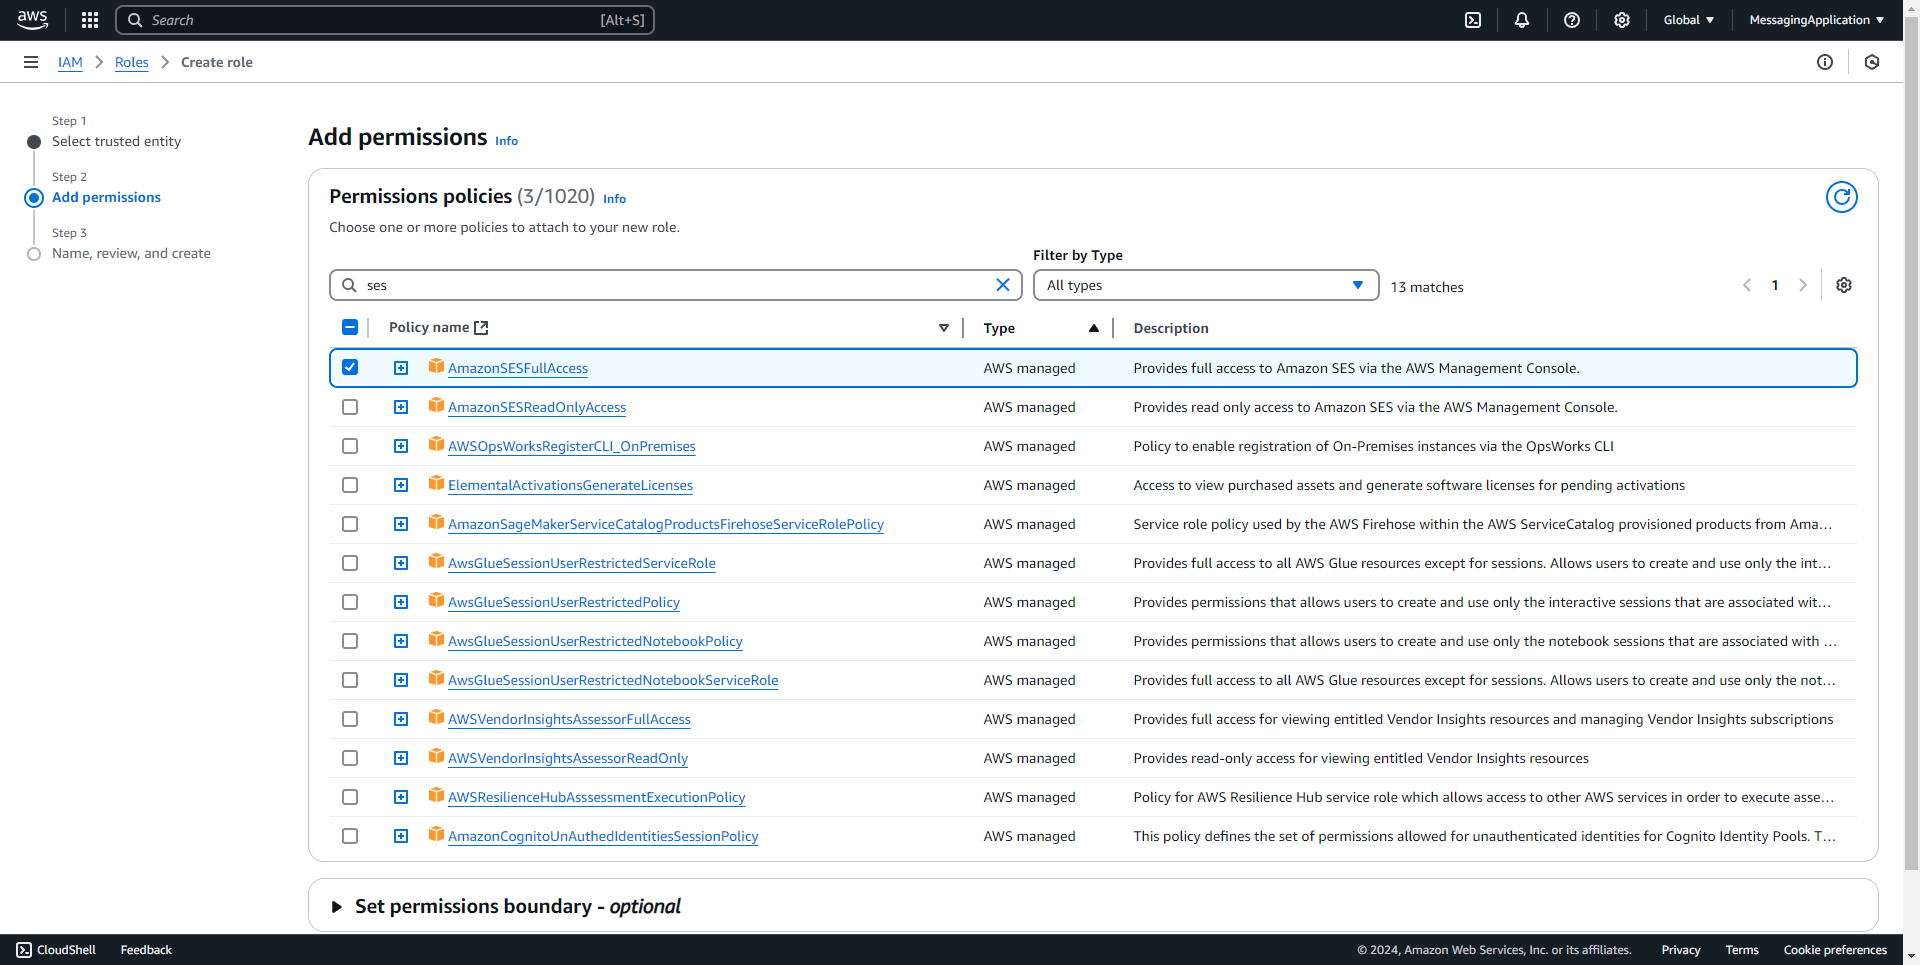
3. Add the policies AWSLambda_FullAccess, AWSLambdaSQSQueueExecutionRole, AmazonSESFullAccess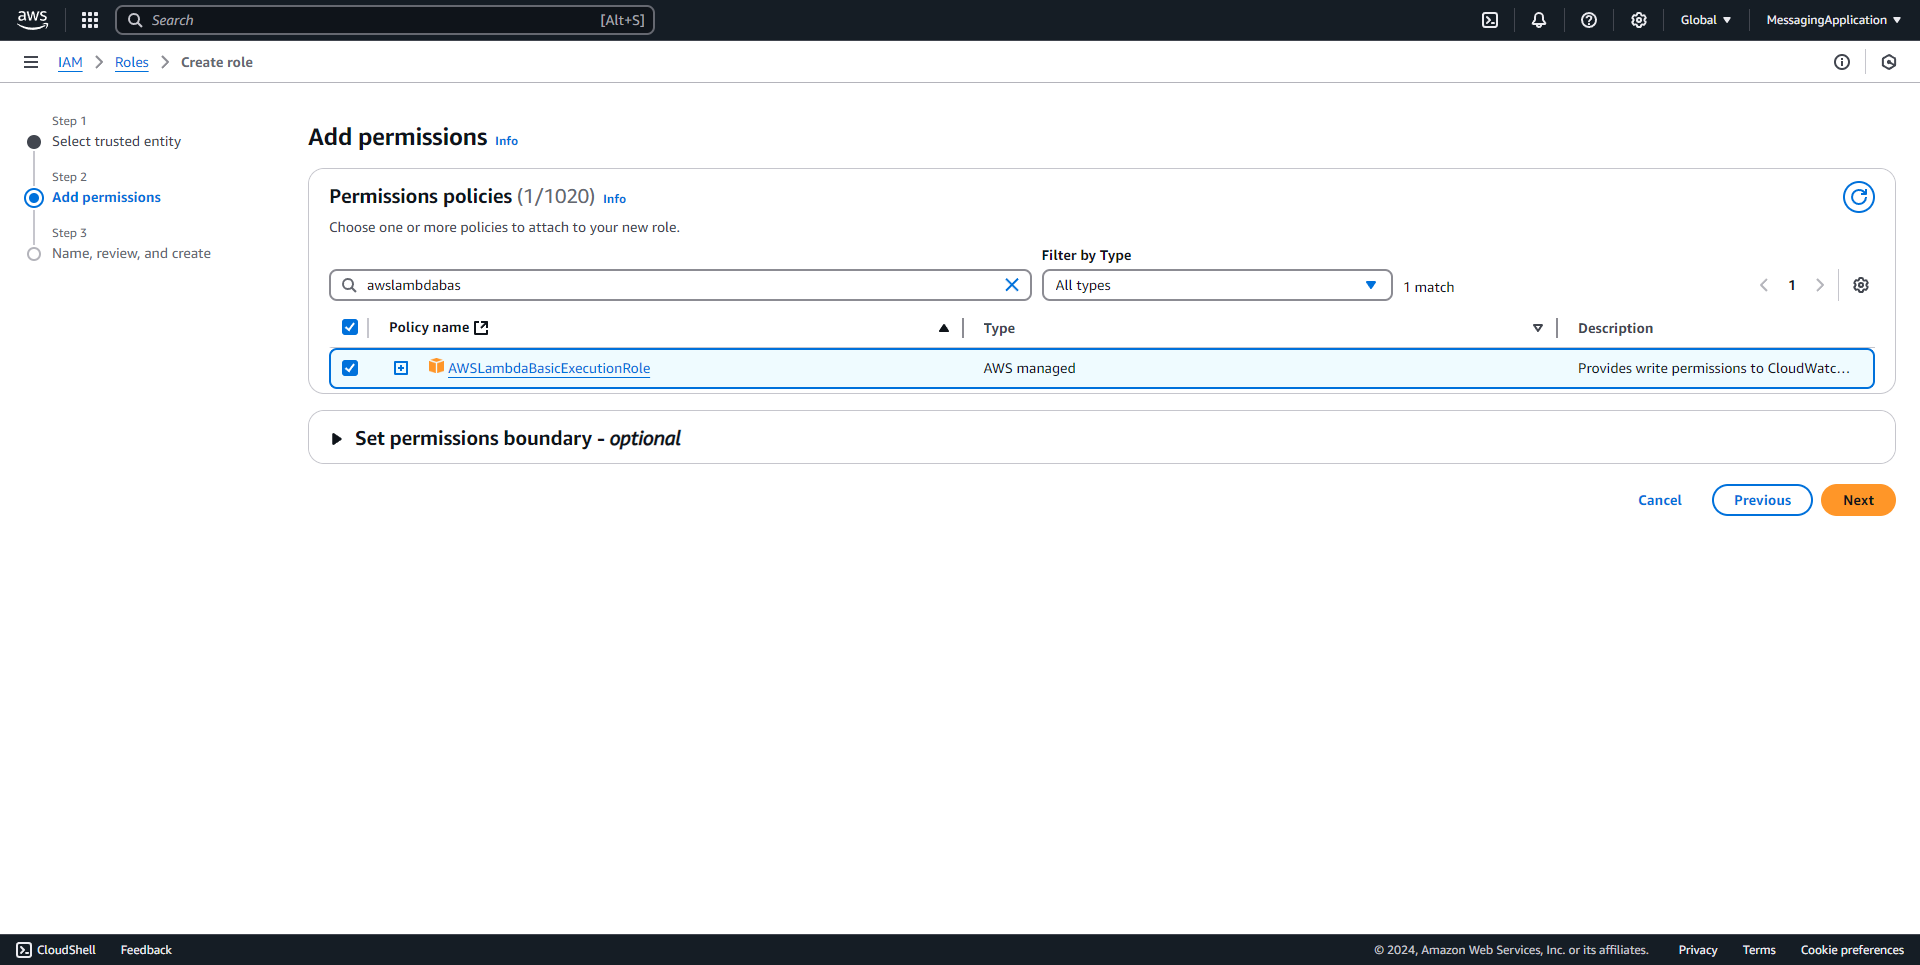

4. Name the Role that holds the policies for Lambda. Select create role at the bottom of the page.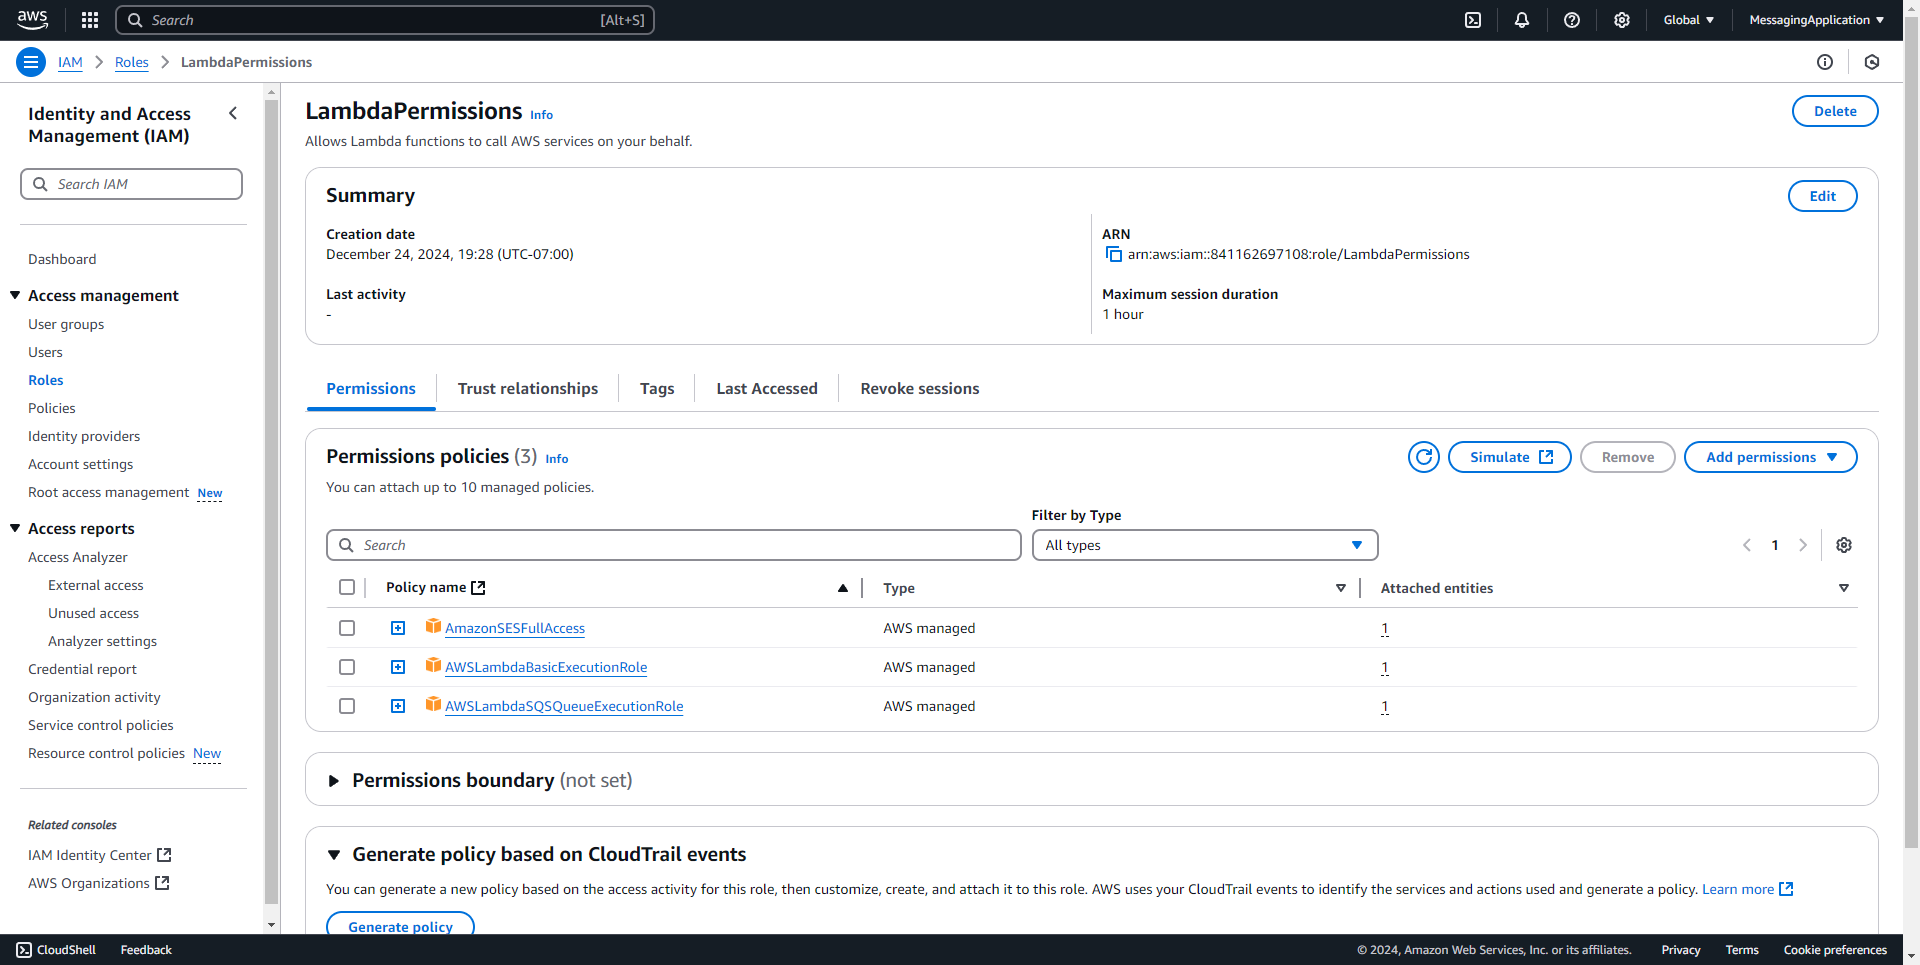
Create AWS Lambda Resource
1. Search for Lambda in AWS and select create a function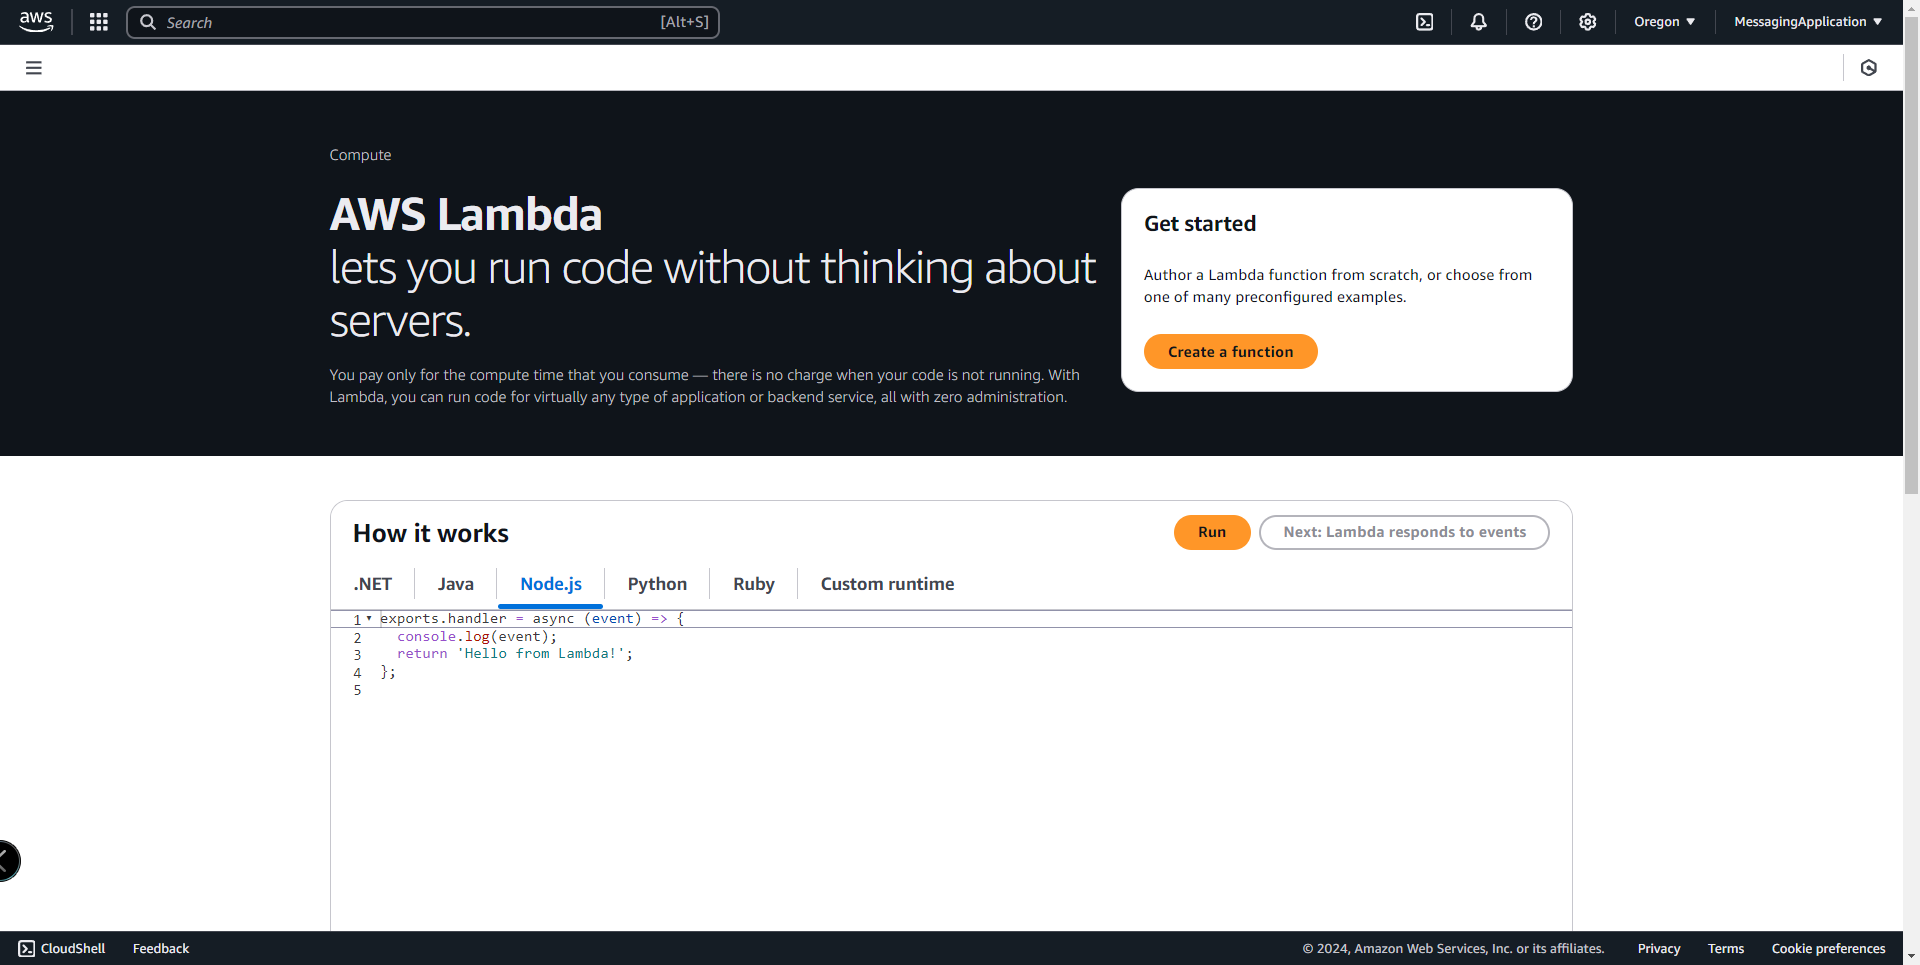
2. Name the Function and use existing role created in previous steps. Select create function.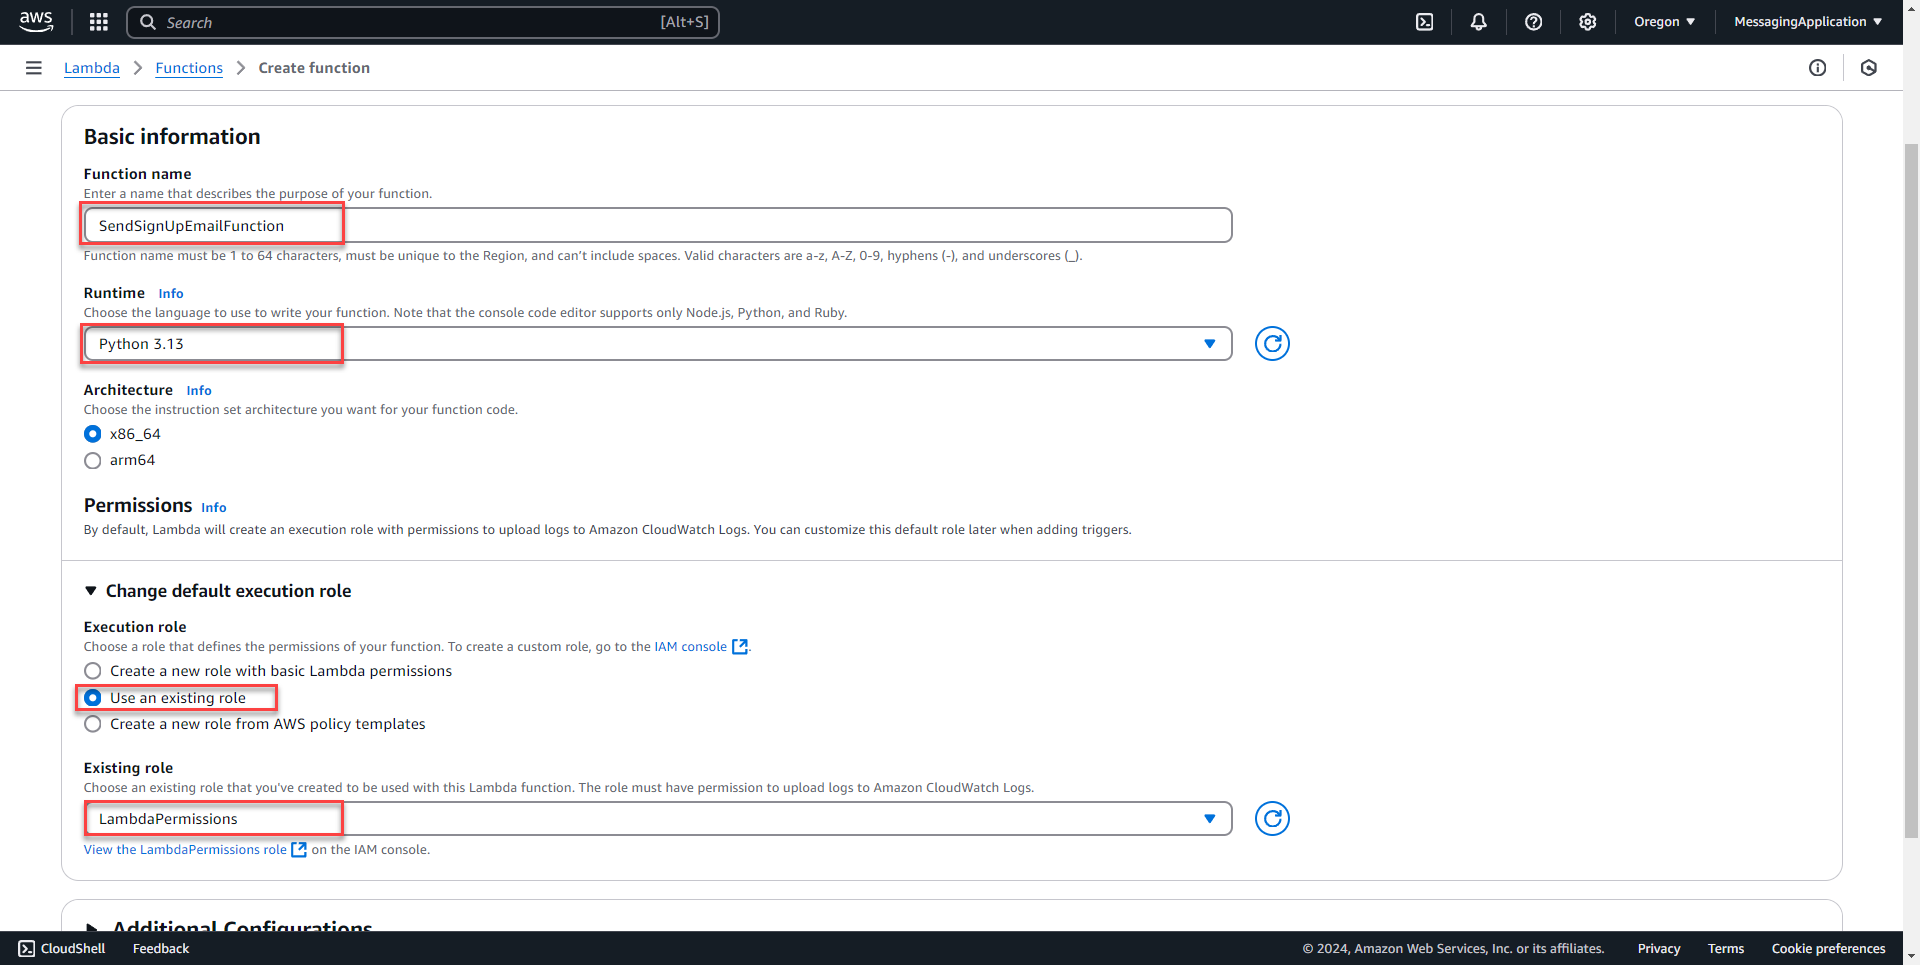
3. On the function editing page, scroll down to the code source section. Add the following code to the Lambda function.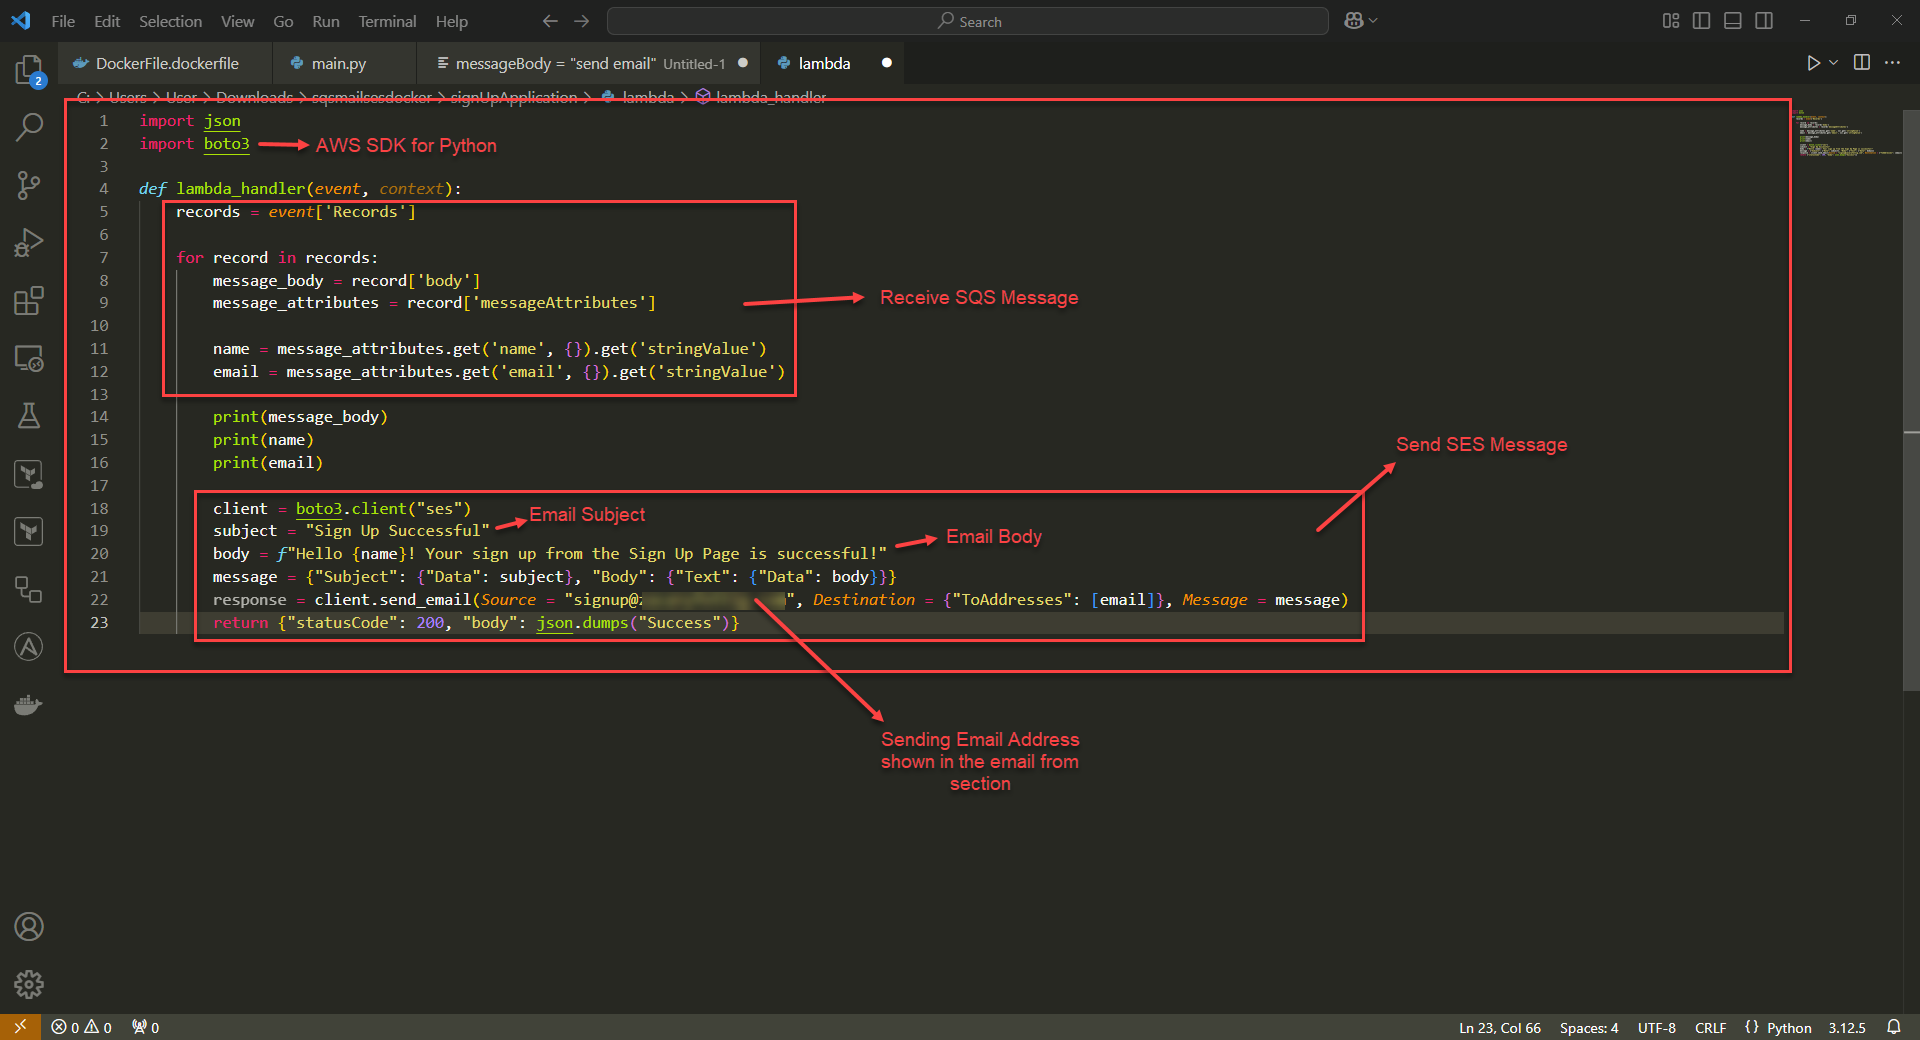
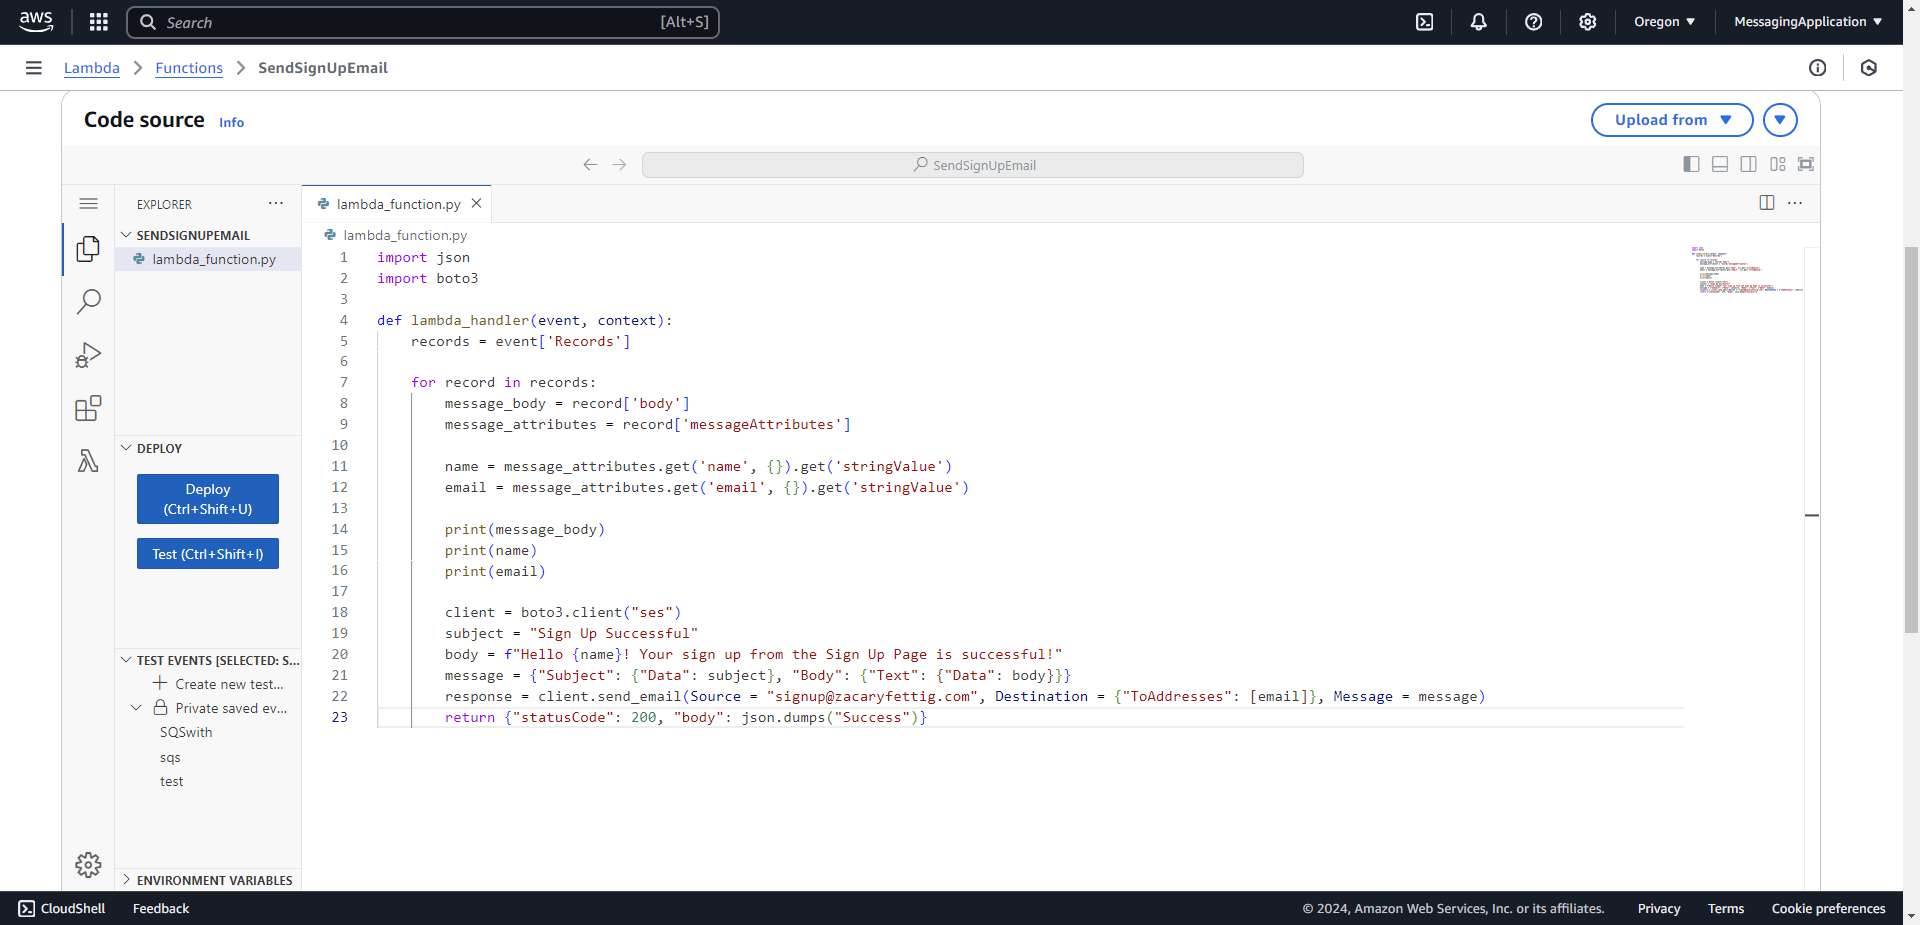
4. Select deploy which will save the code.
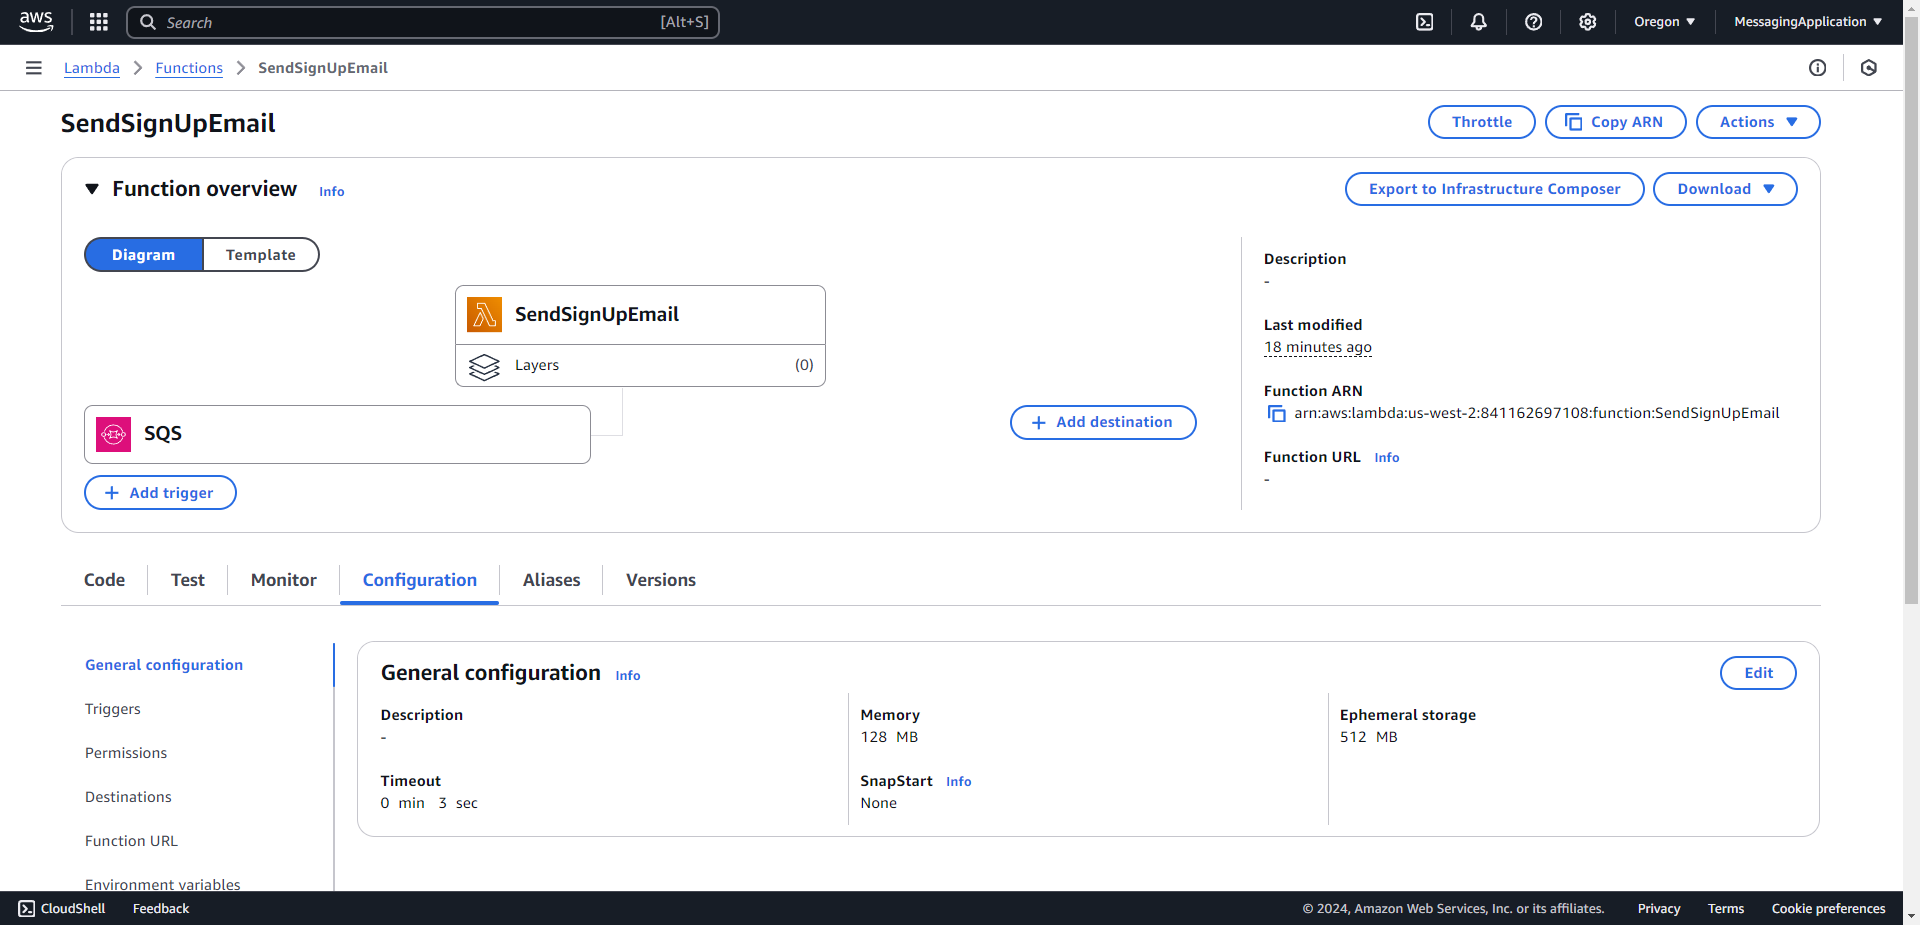
5. Set SQS Trigger in Lambda so that Lambda will execute the python script when a new SQS Message comes in. Select add trigger.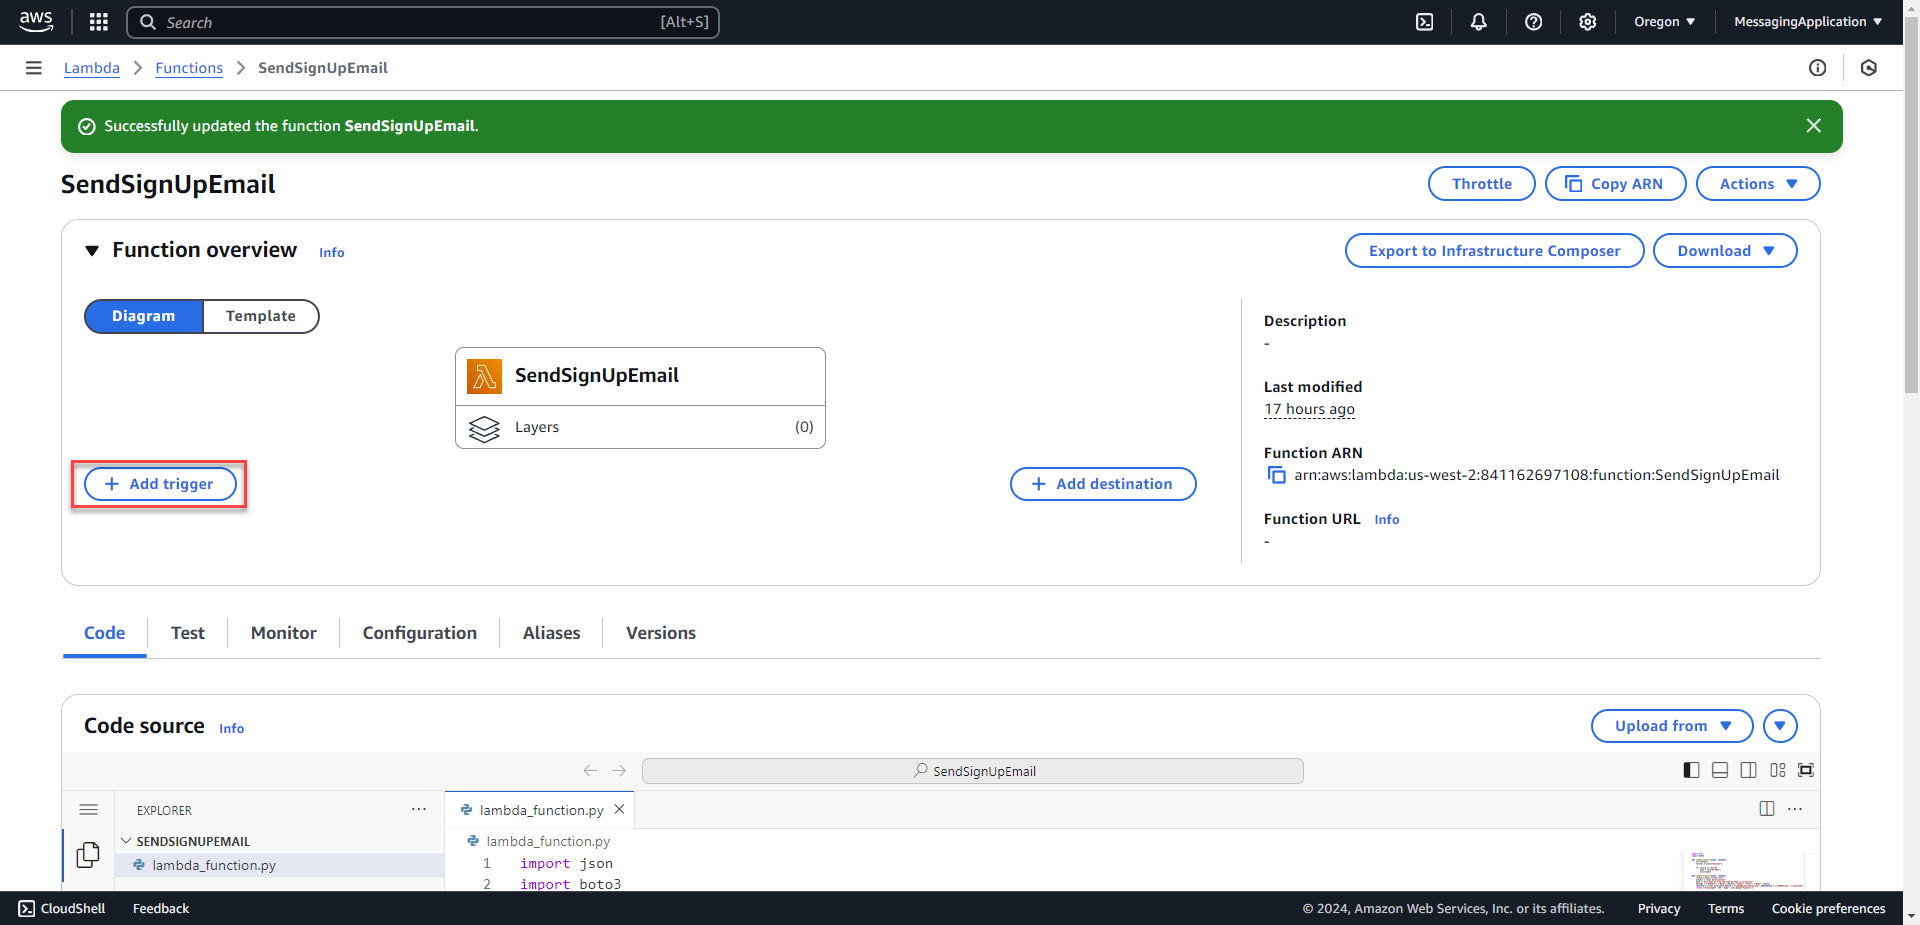
6. Search for and select SQS for the source.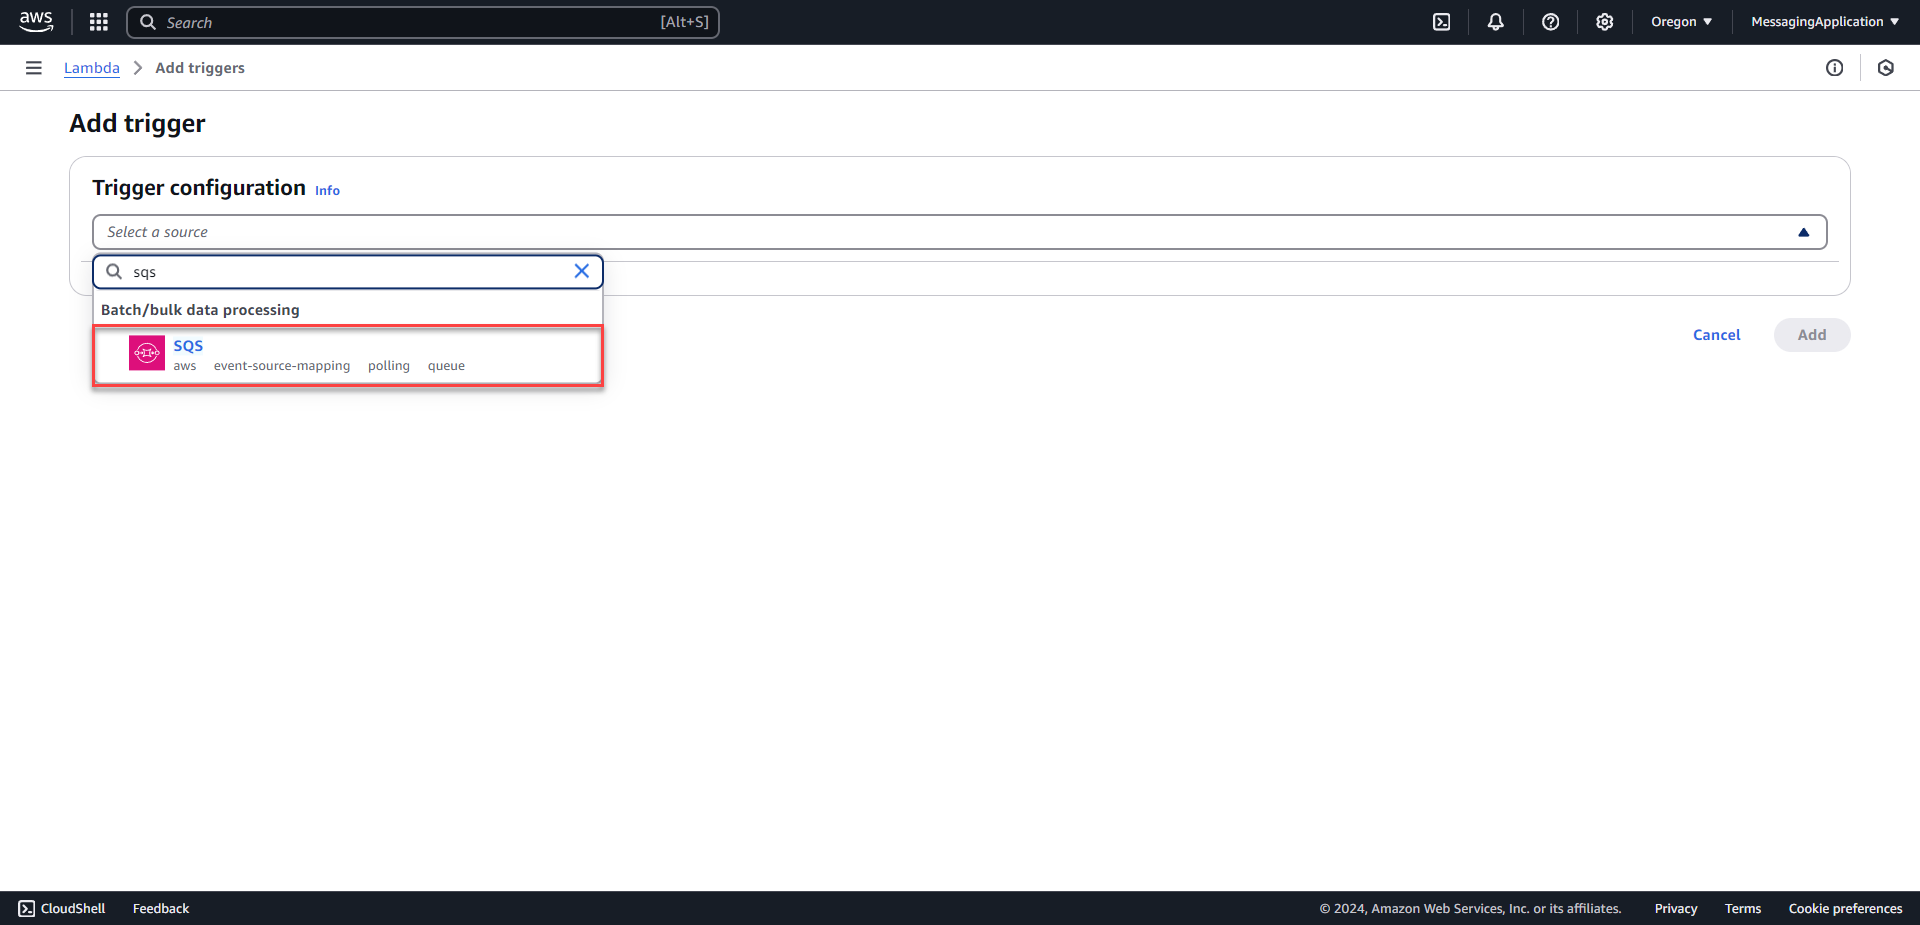
7. Select the SQS queue created from before and select activate trigger. Keep the rest as default and select the add button at the bottom of the page.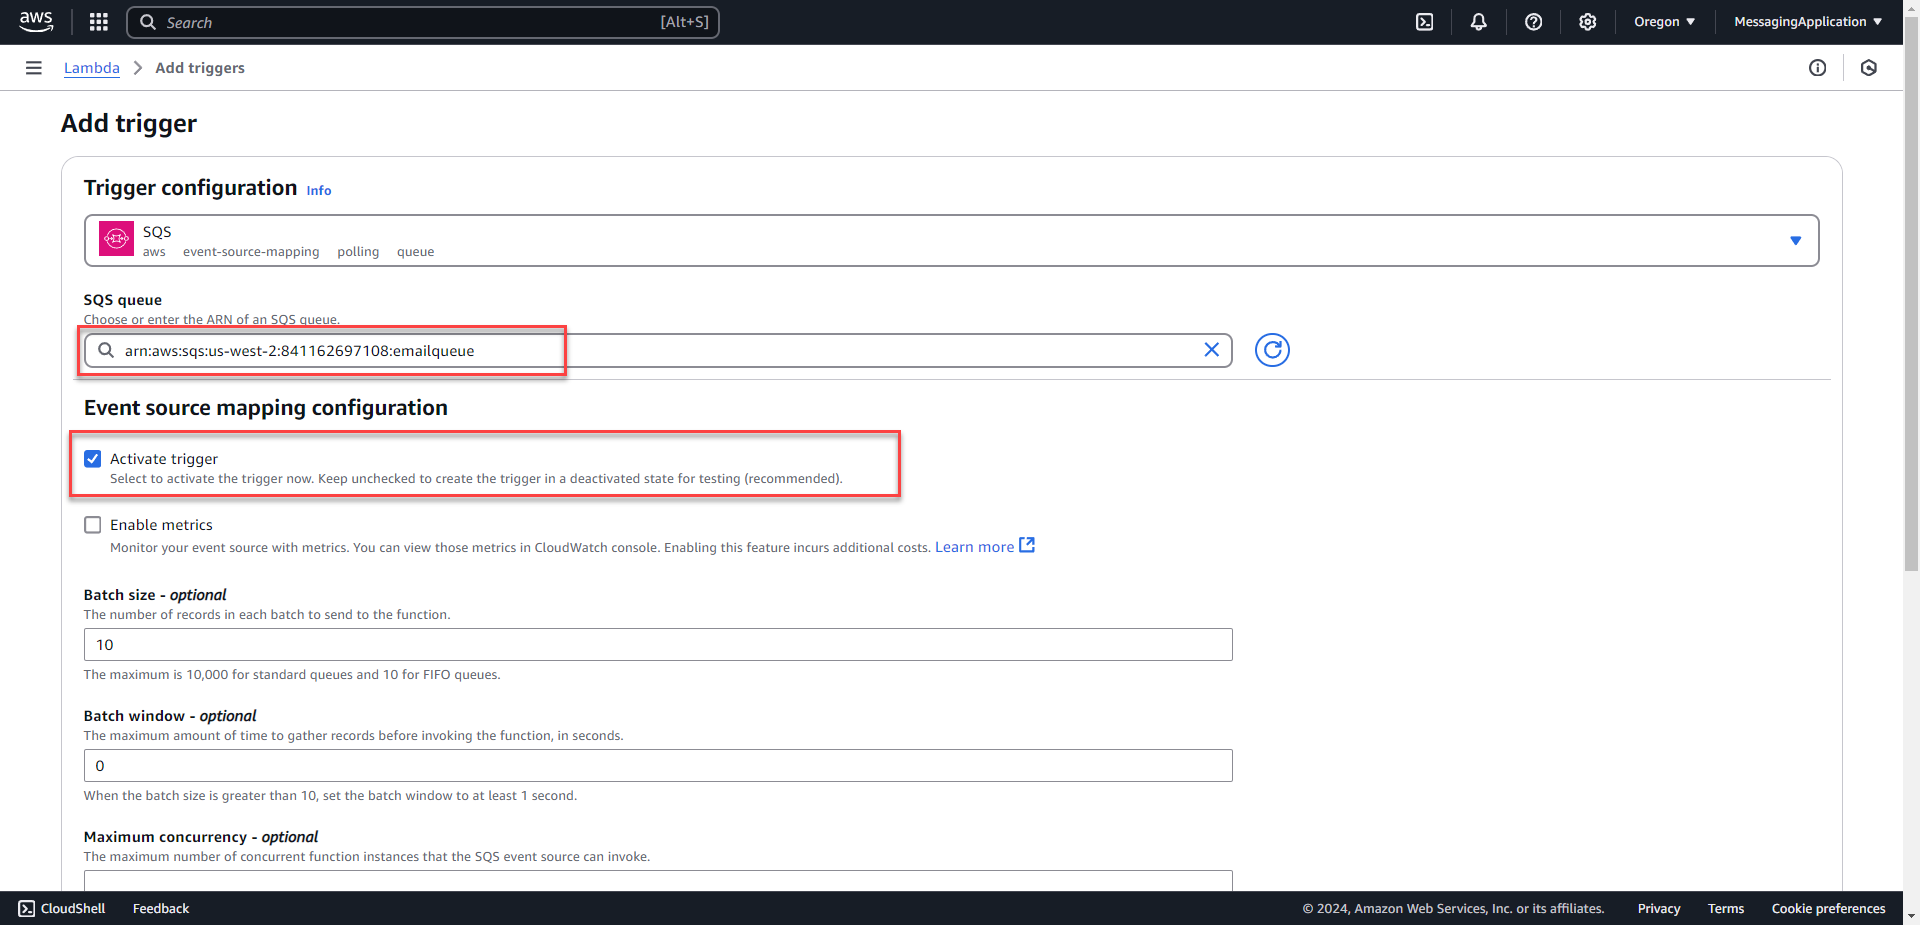
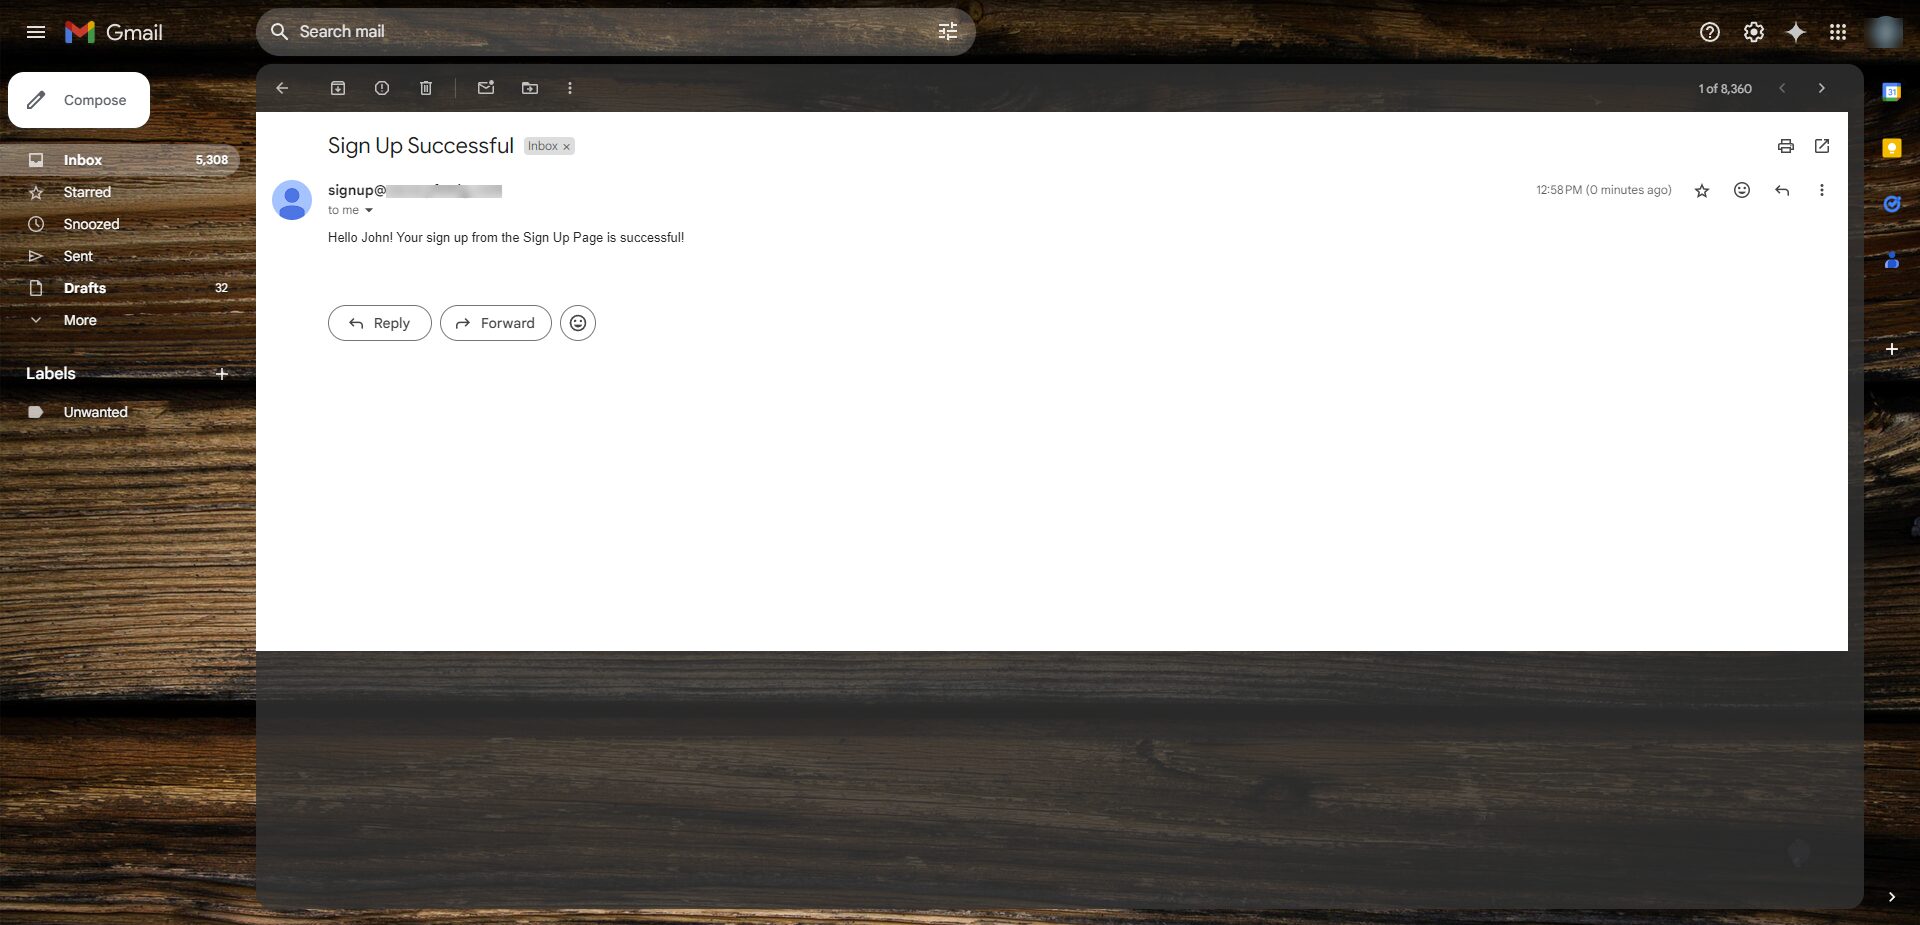
Testing the Sign Up Confirmation Application
1. Connect to the application. Copy the url or open the address from the ECS Cluster Task.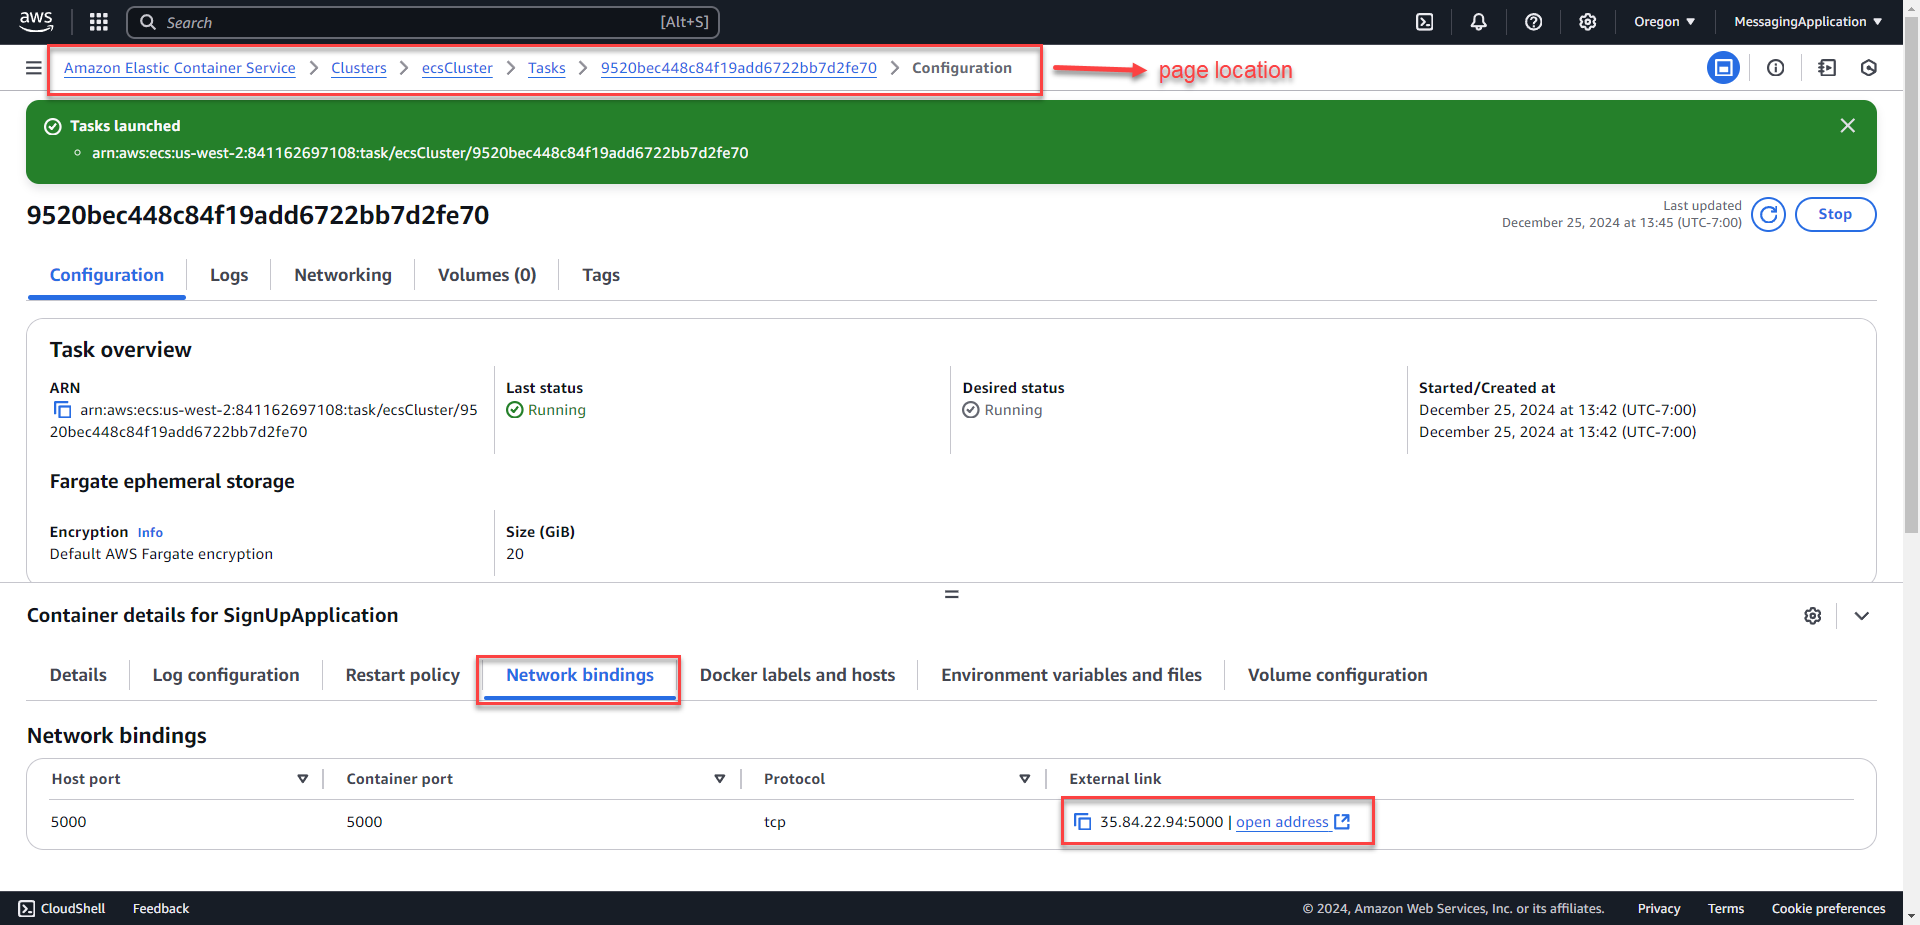
2. Register for an account at the sign in page.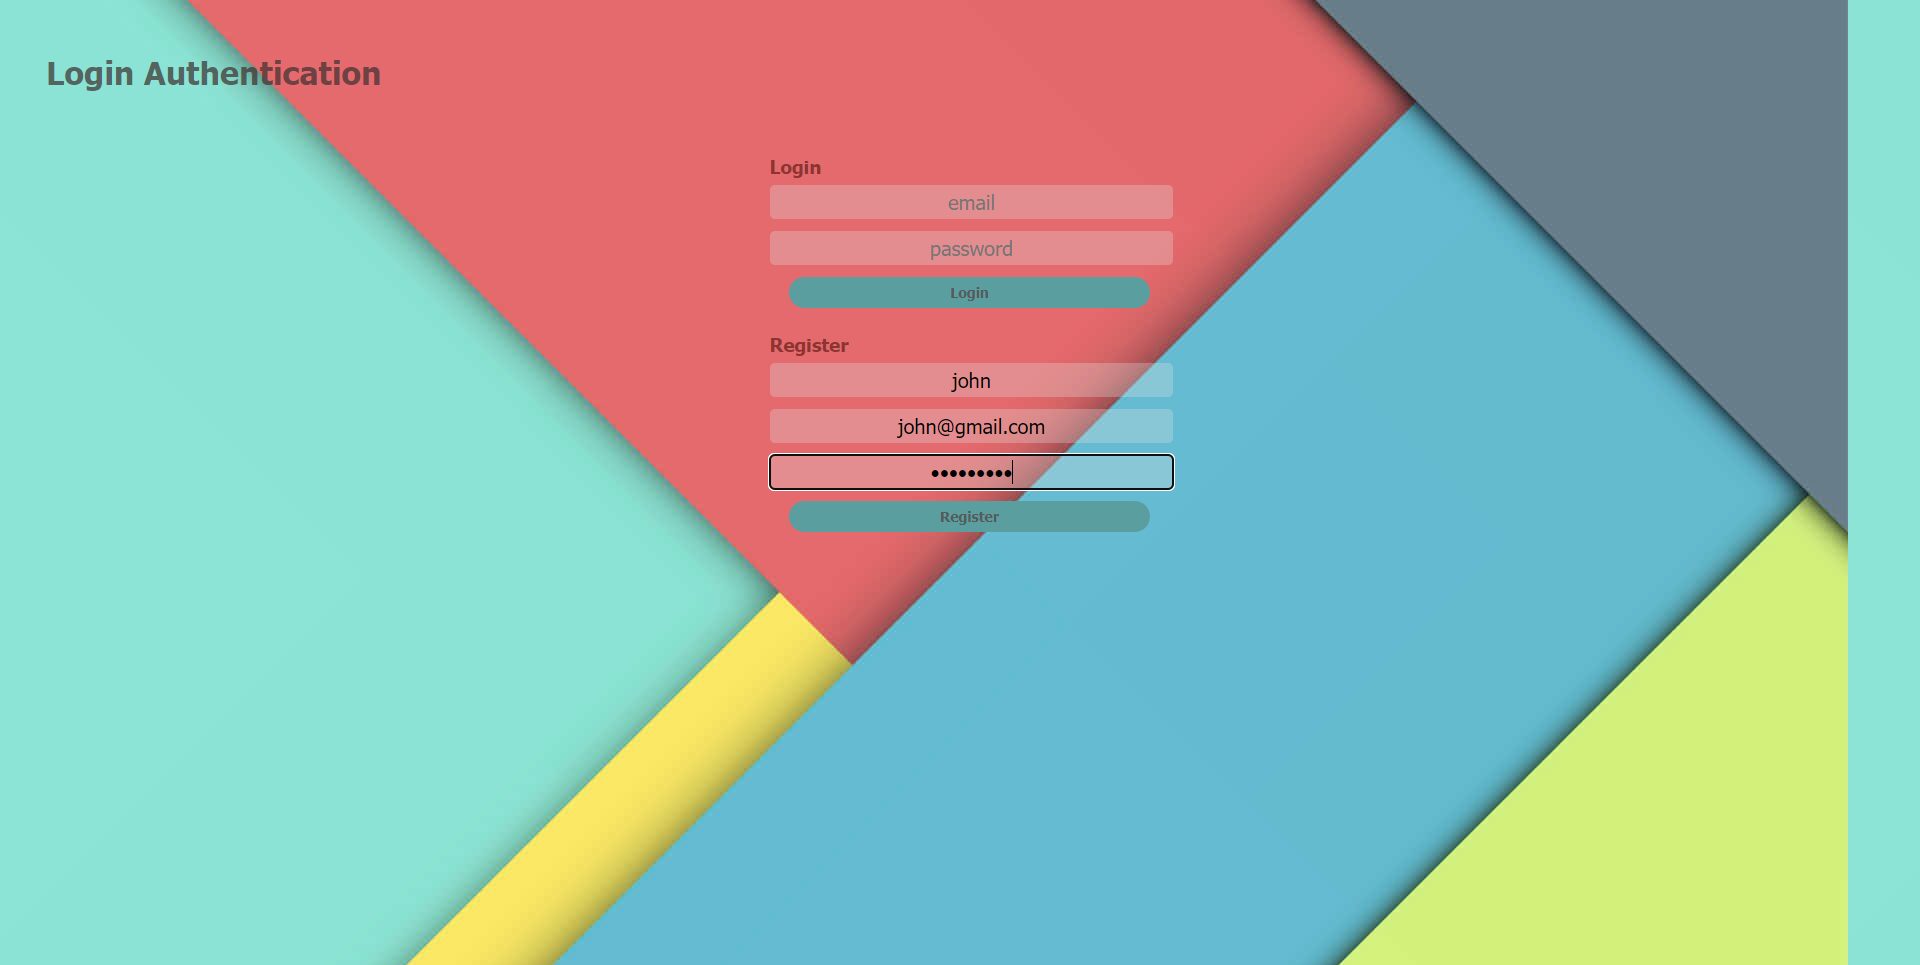
3. With successful login the successful login page and the email confirmation message process will have kicked off.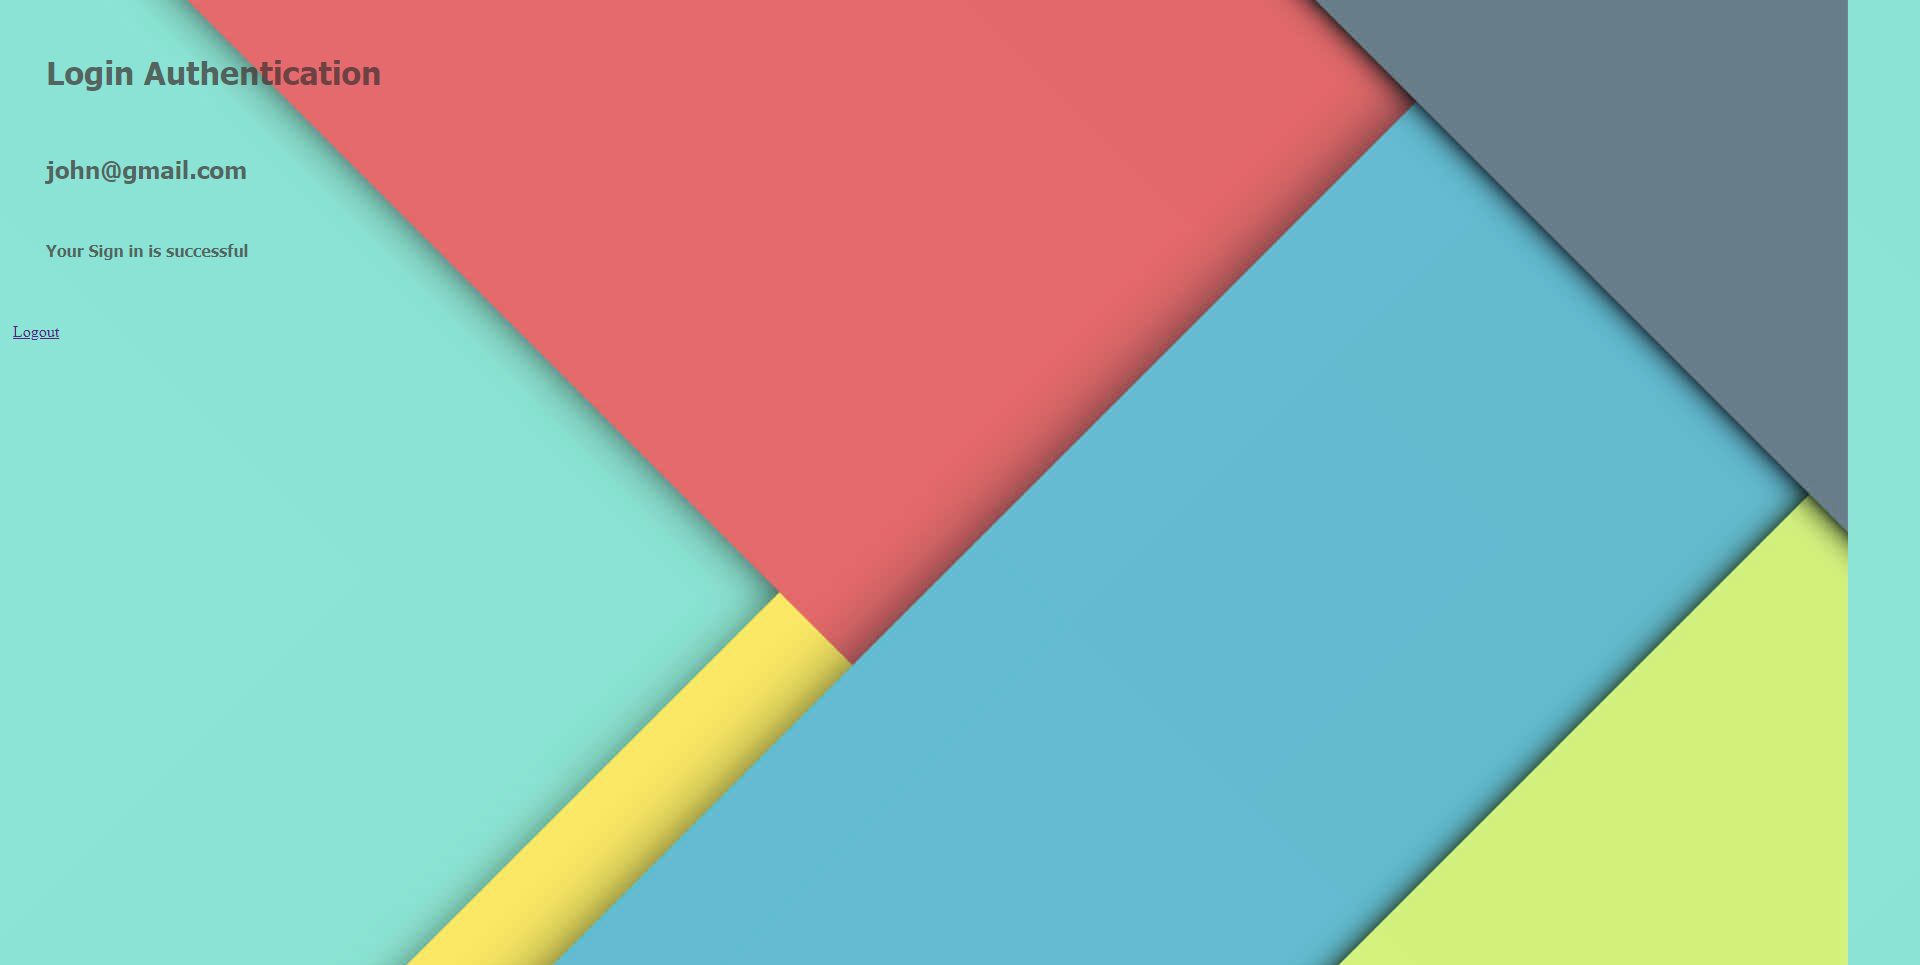
2. The python application will send off a message to SQS, the message will be passed off to Lambda, which will initiate SES to send an email with the SQS Message Details. The sign up confirmation message will show up in the registered users mailbox.